As usual, we came back from DefCon inspired, energized, and diseased. Yes, some of us came home with Covid this year. But we’re recovering, and it hasn’t stolen our Big STEM Energy.
We decided to take what we’ve learned over two years of designing and manufacturing badges, and offer a course. This takes us a step closer toward fulfilling our mission as a non-profit, and teaching strengthens everyone all around. Students learn something, and teachers become better teachers.
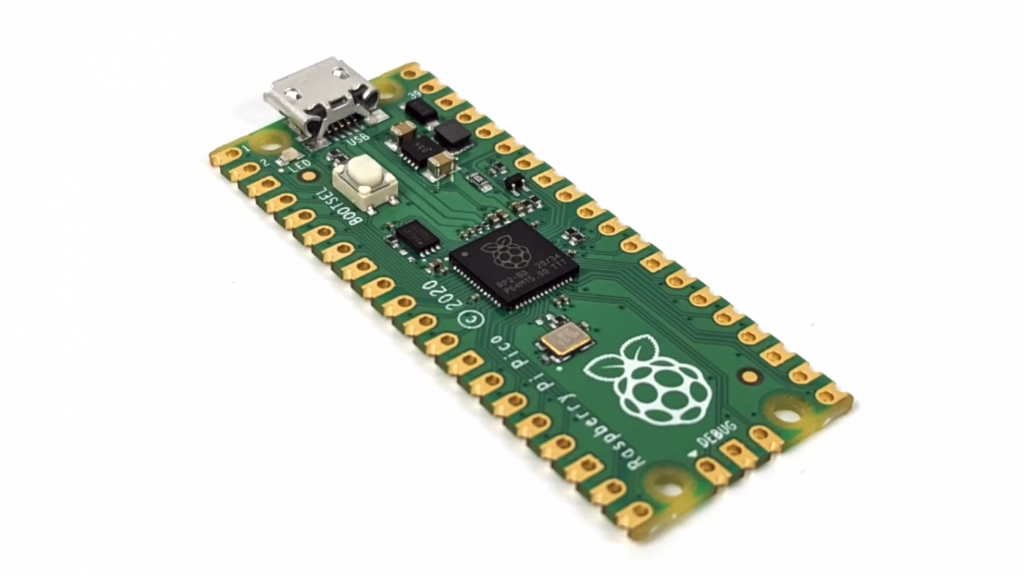
This class will be in two phases. The first half will be an intro to MicroPython using the Raspberry Pi Pico microcontroller with breadboards and some basic electronic circuit elements (LEDs, a display, buttons, etc). culminating in cobbling together your own MicroPython game!
The second half will be taking what you’ve learned from the first half and turning it into a standalone PCB (printed circuit board) project, using all the elements and code you’ve mastered in phase 1, culminating in sending it off to a fab house to be manufactured. You’ll end up with a permanent keepsake of what you’ve learned, and hey — it might even WORK!
We’re looking to start this in October. The class will be virtual, so don’t worry if you’re not local. We’re trying to avoid requiring soldering skills until the very end, so don’t worry if you’re not skilled. The class fee will be nominal, and supports a nonprofit doing good things. If you’re interested, make sure to follow us on twitter @dc540_nova and Join our Discord — an invite link should be in the right column of this website somewhere. We’re going to cap the class at around 25 or so. The class will likely be held in a moderated Discord voice channel. There will be a parts list published in the coming days — actually two parts lists — one for those who have soldering capabilities already, and one for those who don’t. Once you’re in the Discord, request in the main welcome channel to be added to the MicroPython PCB class list — that will get you into the discussion channel, where we’re planning and staging the class. Once the class begins, those who sign up for it will be added to another group and will be able to join us one evening a week for live classes. We may record the lessons as well for those who miss a lesson or can’t meet the consensus-decided class evening.
If you get lost in the code and can’t keep up, don’t worry, we’ll provide some basics at each stage to make sure you have something that works. One of the great things about microcontrollers is that once you prove all your circuit elements work, you can go ahead and build it, and worry about the software later. It’s easy to apply new code to a device that has working access to all of its components.
We created a dilemma for ourselves last year. If you saw our badge from last year, the Tree of Life badge, you’ll notice that we took a simplistic approach when mounting our OLED display. We used the version of the display with a backing PCB, and just mounted the PCB to the top board. It’s not innovative, it’s not beautiful, but it’s fully functional.
In #badgelife tradition, we wanted to do a little bit better this year. My goal was for the display to be flush with the top board, for a clean, flat appearance. At the very least, this would likely mean mounting the display on the bottom board. This creates a dilemma:
If mounted via header pins and therefore removable/replaceable, the backing PCB of the display ends up at the same height of the top board. This is undesirable, because the backing PCB is larger than the display and inelegant. The goal is to have just the display itself rise into a cutout in the top board.
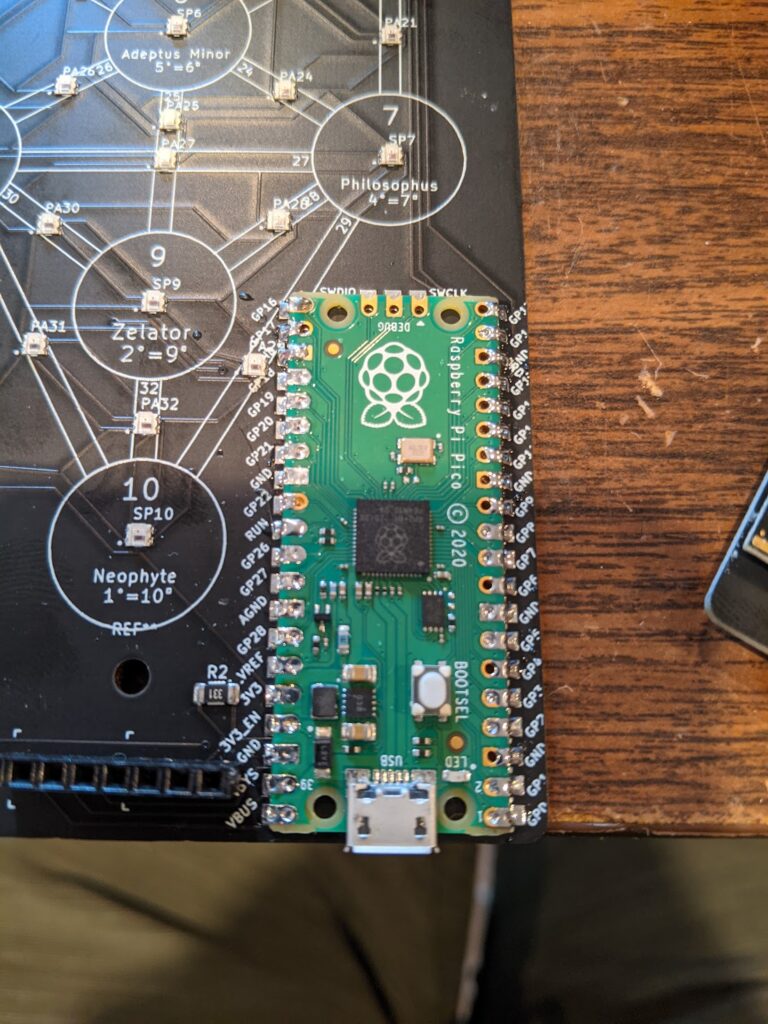
I could certainly have soldered the display directly to the bottom board, but since I made the design decision of mounting the display overtop and perpendicular to the Raspberry Pi Pico, , this would prevent access to the Pico in case a solder joint needed to be corrected. It would also prevent easy replacement of a broken or faulty screen.
So we looked at the problem and found several options available to us. I think the ideal solution would have been low profile female headers on the bottom board for the screens. In practice, however, we found these to be akin to Unobtainium. The only place sizes were properly defined was on Mouser and DigiKey, and no, I’m not paying a dollar each for freaking headers. I did find a writeup by someone who had done the research and found some reasonable low profile headers in China, but we were on a time crunch, so those remain on the to-be-explored list.
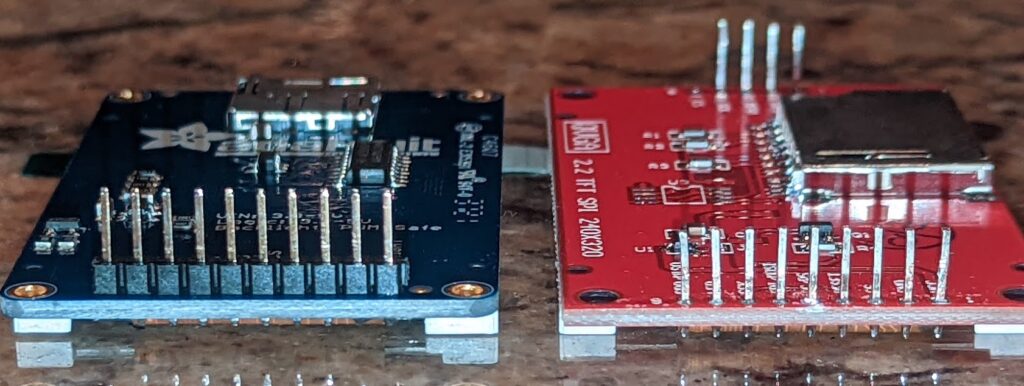
The solution that found us was to remove the “pin carrier” from the display after the pins had been soldered. The pin carrier is the extra bit of plastic that holds the row of pins together. This allows the pin to sink a bit lower into the receptacle header. Then we noticed it was bottoming out and not ending up completely flush at the top, so we ended up trimming about 1-1.5mm from the end of the pins on the display.
This solution allows the display’s backing PCB to sit just below the front board, and the display itself to sit flush, while still able to be removed for troubleshooting or inspection.
Here’s a before and after of the display modification, hopefully it helps to visualize. Note that the “before” model is actually a different model because I’m all out of unmodified stock.
So the group is home. Some of us are recovering from winning the C19 CTF this year, so obviously this coming Monday’s meeting will be virtual. Please join the discord.
We hashed out some changes before and during Con. The Executive Committee met in secret at the Jersey Eats food truck at 3AM and made the following decisions, which you all will just have to live with until someone creates consensus for better ones.
BadgeDev meetings for any potential badge to be released in conjunction with DC31 will be separate from the regular group meetings. Very limited in scope at this time, we will bring others in as needed.
We will be launching a class for members who wish to learn to do PCB design. If this is you, join the PCB class channel in the Discord. We’ll plan a schedule and dates. The syllabus will come soon, and the objective of the class is for each attendee to send something off to be fabbed and have something useful and/or blinky to cherish, lament or scoff at forever.
We will also hold separate meetings outside the normal group meetings to deal with the administrative tasks of keeping this group functional. Some things will trickle out of these meetings into the general membership meetings. There are soft, unspecified growth goals that will emerge and define themselves better as we move forward.
I have a funny little story to share. A few of us were hanging in the Forum outdoor area. Some were smoking, some were accompanying smokers. We were shooting the shit. Dude rolls up with one of those big badges with the speakers, we got to chatting about that, and Display recognizes him as the Strange Parts guy. He acknowledges, gives us cards & trinkets, and we’re still shooting the shit I guess. At some point DeadAddict rolls up and participates in the shit-shooting. Someone asks how the con is going, and I give my usual, “you get out of it what you put into it,” and DA responds, “oh no” and we all laugh. Some of the folks around are less attuned to DefCon history and don’t recognize DA. I think he’s got one of the most recognizable faces at the con. That’s fine, I didn’t recognize the Strange Parts guy. And nobody recognizes me unless they’ve interacted with us about badges and shit.
I wanted to provide some follow-up on that. My first instinct was that it was an unsalvageable error, which lead to adding the anti-metal NFC sticker to make it “work” while bypassing the onboard circuit. Not that it matters, nobody at Defcon in their right mind is going to scan your NFC badge. “Sure, I’ll take your malware!”
I’ll dive into an explanation with lots of pictures, to make it easier for folks maybe newer to Kicad to see the issue.
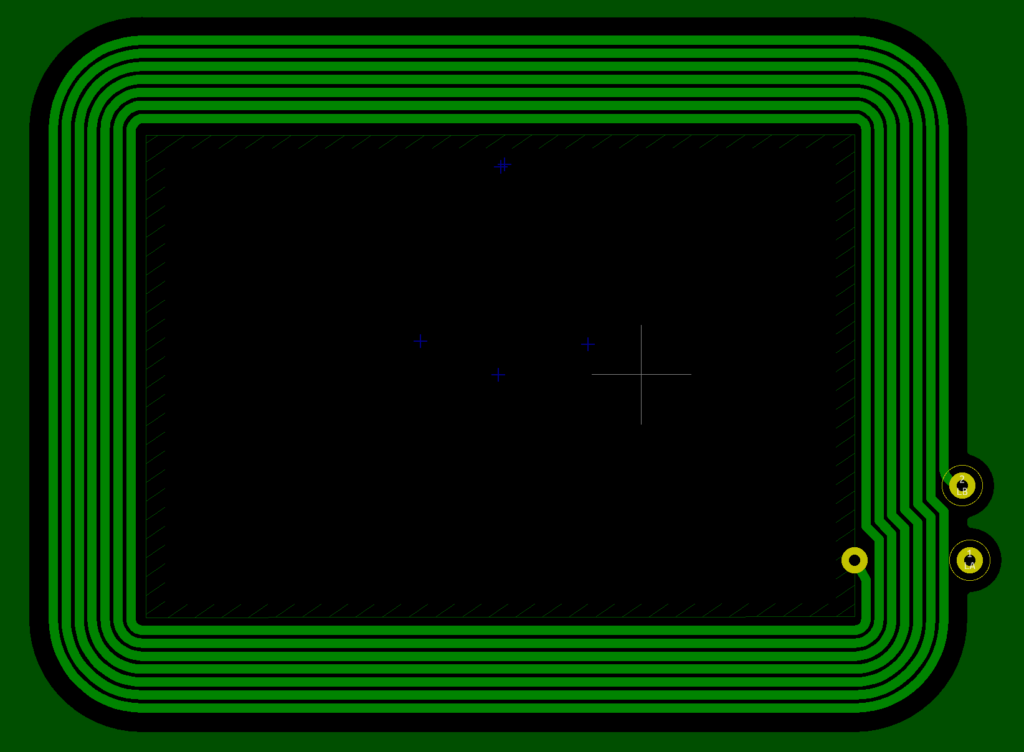
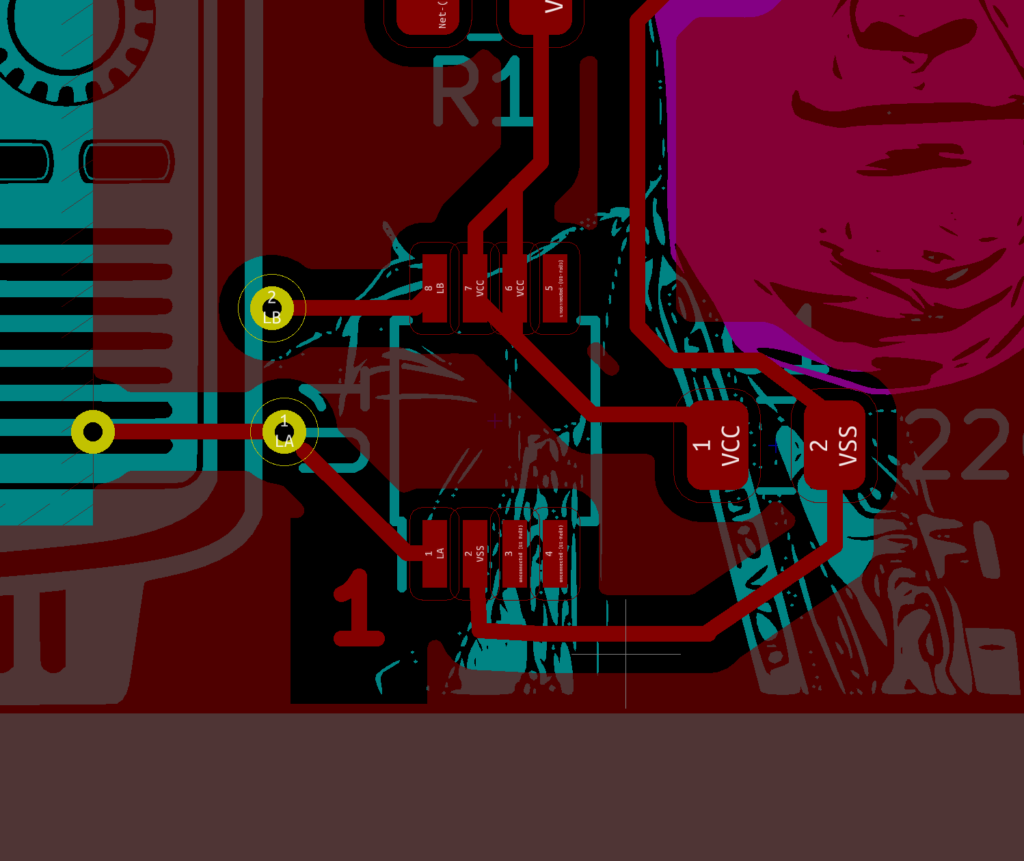
Here is the back copper layer. You can see that there is the antenna, which is the tight loops in a rounded rectangle, and that there is a copper keepout zone defined inside the antenna. This side, we believe to be correct.
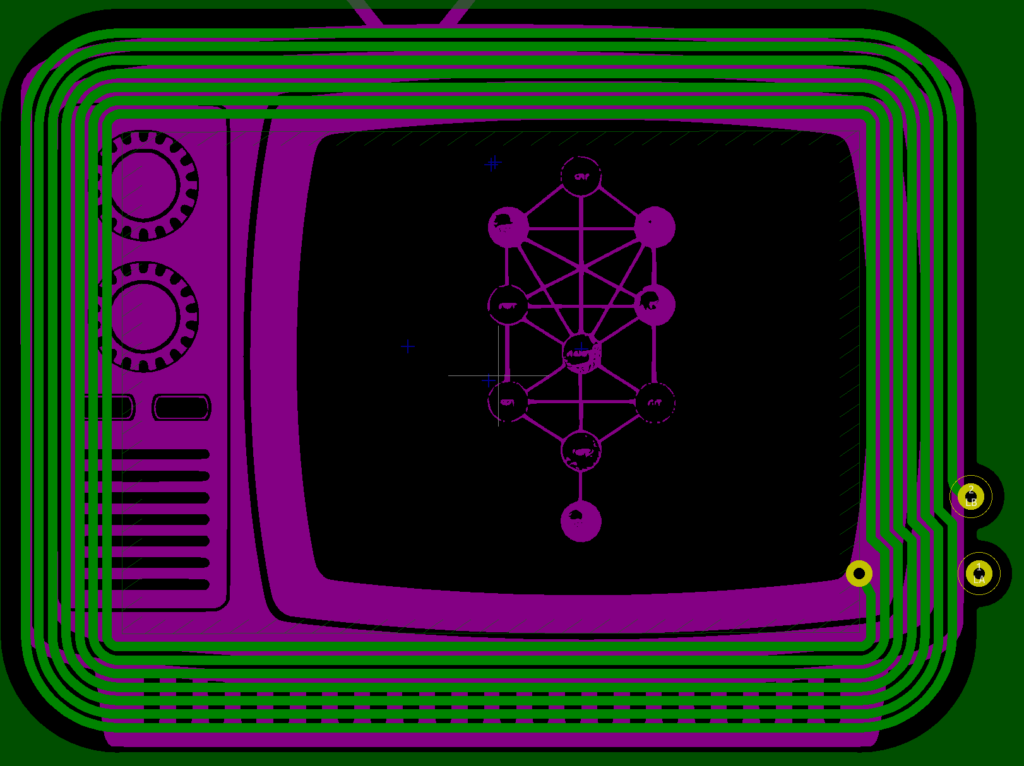
And for reference, here’s that same area with the silkscreen showing, so that you can see where the antenna lives on the backside.
With me so far?
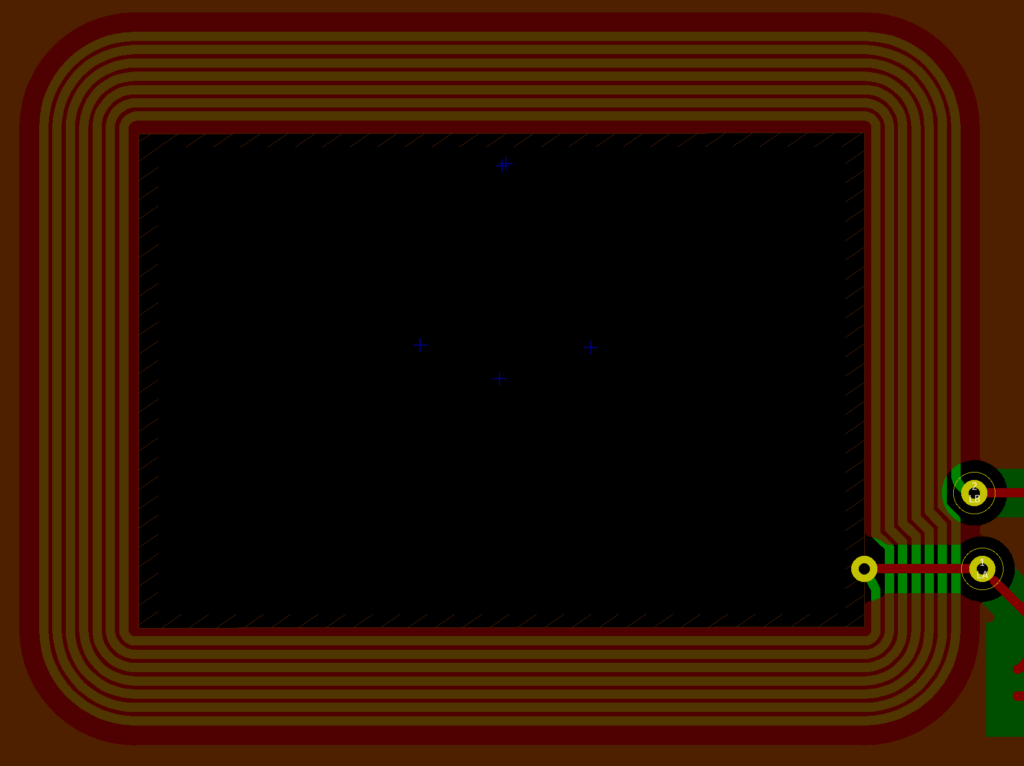
Ok, here’s where my attention to detail failed me. Here’s the front side copper layer in the same area. I’ve left the back copper layer visible but dimmed, so you can see how they interact/compare.
You see what I did there? I was in such a hurry to do this that I didn’t think it through. I just copied the keepout zone from the back to the front, thinking they needed to be the same. They absolutely don’t need to be the same. The purpose of the keepout zone is to allow radio waves to travel THROUGH the antenna, energizing it. The back is correct, because you don’t want a keepout zone where you actually want copper (the antenna). The front side, well, the keepout zone should have extended just outside the antenna on the back. I hope that’s clear. The front copper fill (which isn’t even tied to a net, not even ground — it only exists for the unmasked areas to be shiny!) actually overlaps the antenna itself, preventing the thing this circuit needs to the most — radio waves flowing through the antenna.
So here’s a shot with all of it showing, so you can see what part of the copper would need to be removed for the circuit to work (hint: All of the copper on the FRONT side that covers up the antenna).
So I assumed it was a lost cause. That copper is INSIDE the board, or at least under layers of mask and silk. Surely that can’t be repaired, or isn’t WORTH being repaired.
But this is DefCon, of course, and Syntax, who I met in either LineCon or MohawkCon or both at my first DefCon in 2017, speculated that perhaps if one wet-sanded the silk, mask and copper out of that area blocking the antenna (basically the red area highlighted above — while being careful not to destroy the trace between the inside and outside of the antenna across the two vias) it could still work. It would look a little janky, but I might try it when I get home just for the experience. And then BradanLane suggested removing it with a laser and acid etch, which might be a little cleaner.
Idunno. I’m going to try it, because dammit, I really want to see my eye light up when I scan it. If any of you lunatics goes home and tries it as well, I’ll mail you the TSSOP-8 NFC chip if you don’t already have one, and you can install it yourself. It goes here:
Sorry I didn’t bring the NFC chips with to Defcon, but you would have lost them in your sticker bags anyway. I naively thought it was a lost cause, and I mean, it’s not like hackers enjoy the recovery of a lost cause by any means necessary, LOL. It’s not like a point of pride or something to overcome by applying brute force, stimulants, ADHD and procrastination on actual money-making projects, simply for the glory of having WON.
Navigate to ‘Game Menu 1’ within the badge. You can choose to either practice or play. The practice option will allow you to refine your tarot card trivia information. When you are ready, select play and get 15 of 20 questions right in order to pass this challenge.
Game 2: Steganography
Steganography is a way to hide text in pictures. There are many ways to go about decoding steganography but I would suggest starting with a simple decoder found on Github https://stylesuxx.github.io/steganography/.
For this game, the steganography is hidden within our very own DC540 Shitty Deck (also featured in the badge but use the deck located at our GitHub Page. You’ll need to decode three pictures and then concatenate the answers to get a six-digit number. This six-digit number is what you will put into the badge.
Game 3: Tarot Card Reenactment
For this game, pick your favorite tarot card and reenact it. Take a picture and post it to our DC 540 Tarot Badge channel to receive your six-digit code. Be creative. Have fun.
Game 4: Scavenger Hunt
Find 10 of the items pictured on the Rider-Waite tarot deck to include: – a Fool – a Magician – a Hermit – a staff – a robe – Lovers – old school scales – a pair of knee-high peasant-looking boots – a throne – a white dog – an Angel – a chalice – six cups – eight stars – a chariot, – YOU MUST INCLUDE a picture with another person wearing the DC540 Tarot Badge
Post your photos to the DC540 Tarot Badge Discord channel. Once you post all 10 items and we’ll send you the six-digit answer to this game. Points for creativity (not like points really matter but you do get imaginary DC540 points).
Game 5: Tarot Flashcards
Navigate to ‘Game Menu 2’ within the badge. You can choose to either practice or play. The practice option will allow you to refine your tarot card flashcard knowledge. When you are ready, select play and get 15 of 20 questions right in order to pass this challenge.
Game 6: Personalized Tarot Card Deck
We at DC540 created our own terrible Tarot deck. To get credit for this quest, create your own deck. It must be original and posted to DC540.org/shittydecks to share with the world. Send us a message on our discord channel DC540 – Tarot Card Badge and make sure to include @DC540BAAB and @LYRATHEDAMMED in order to get credit for this game. We will send you a code and you can enter it on the badge.
Game 7: Morse Code
Have you ever wanted to learn morse code? This game will help. We have two modes – practice and play. The practice mode will display the letter, number, or word on the screen, and then the badge will “flash” in morse code. When you feel confident, you can select play. You will have three separate strings of words displayed on the screen. Use the left (dot) and right (dash) buttons to type out the morse code. If you get all three right. The badge will “flash” the morse code and let you pass the game.
Game 8: Decryption
There are three encrypted messages which can be found below or on the badge. Each of the three ciphers has a piece of the final answer. Your final answer should have six digits.
Malort is the alcohol beverage of choice among the DC540 members. Make your own drinkable recipe using Malort and share on the Discord page. Have fun and be create your own
Game 10: NFC
In a previous post, one of our members describes his NFC tag stickers. There are several of these distributed about DEFCON. We will drop hints on Twitter and our Discord website. This will provide a clue to the next sticker location. Find all the stickers and locate the code you need to enter into the badge.
Game 11: Tarot Badge Pair
Find another player wearing a DC540 Tarot Badge. Go to the Extras menu on the badge and select “pair”. Once paired, you’ll pass this game. While you are at it, say hello and get to know a fellow DC540 badge player.
Game 12: Boss Pair
There are at least two DC540 Boss Badges wandering around at DEFCON 30. They belong to several of our DC540 members. Introduce yourself and give us a unique sticker we can add to our collection to pass this challenge.
As a hint, we will be posting on Twitter occasionally or find us on the Discord site and ask us to meet up. Two of our handles are already included in this document but another Boss Badge holder was instrumental in programming this badge. His name is all over the documentation.
Important Tips and Hints
The DC540 Tarot Card channel can be found using the permalink located on the right side of the DC540 website’s home page. If you run into issues or questions, you can reach out to @DC540BAAB and @LYRATHEDAMMED on Discord.
Games do not need to be played consecutively.
If you reset the badge you lose the games you won.
Any answer that you have to input will be six digits long and consist of the numbers 1-4. For example, the answer for a game might look like 112114
Once a game is won, the badge will light up in a pattern and a red LED will stay lit in the corresponding number on the wheel.
Complete all twelve games to win. The first person who completes this game during August 11-14th and brings their badge to one of the DC540 founders wins a prize (To Be Announced).
So in the rush to get this done, apparently I mixed up power and ground between the top and bottom boards. So we’re going to disable them by removing those pins from the headers between the two boards. Power and ground on the front board ONLY provides power to the SAO header.
If you want to bodge it, you’re welcome to bodge it, just desolder the 4-pin header on the right and resolder a 6-pin header after cutting and rerouting the traces appropriately. If you want to add a SAO connector to mount an SAO without power, you’re welcome to do so. Just keep in mind it’s disabled for a reason. If you re-enable it without rerouting, it will burn out your SAOs and make your room smell funny.
This will be resolved in official batch #2 later this summer.
I could have retconned this as a “we deliberately disabled power on the SAO header for the Tarot badge so that it could connect to the Tree of Life Badge without concern for power in a future release of the firmware” but then we’d have to follow through on that promise.
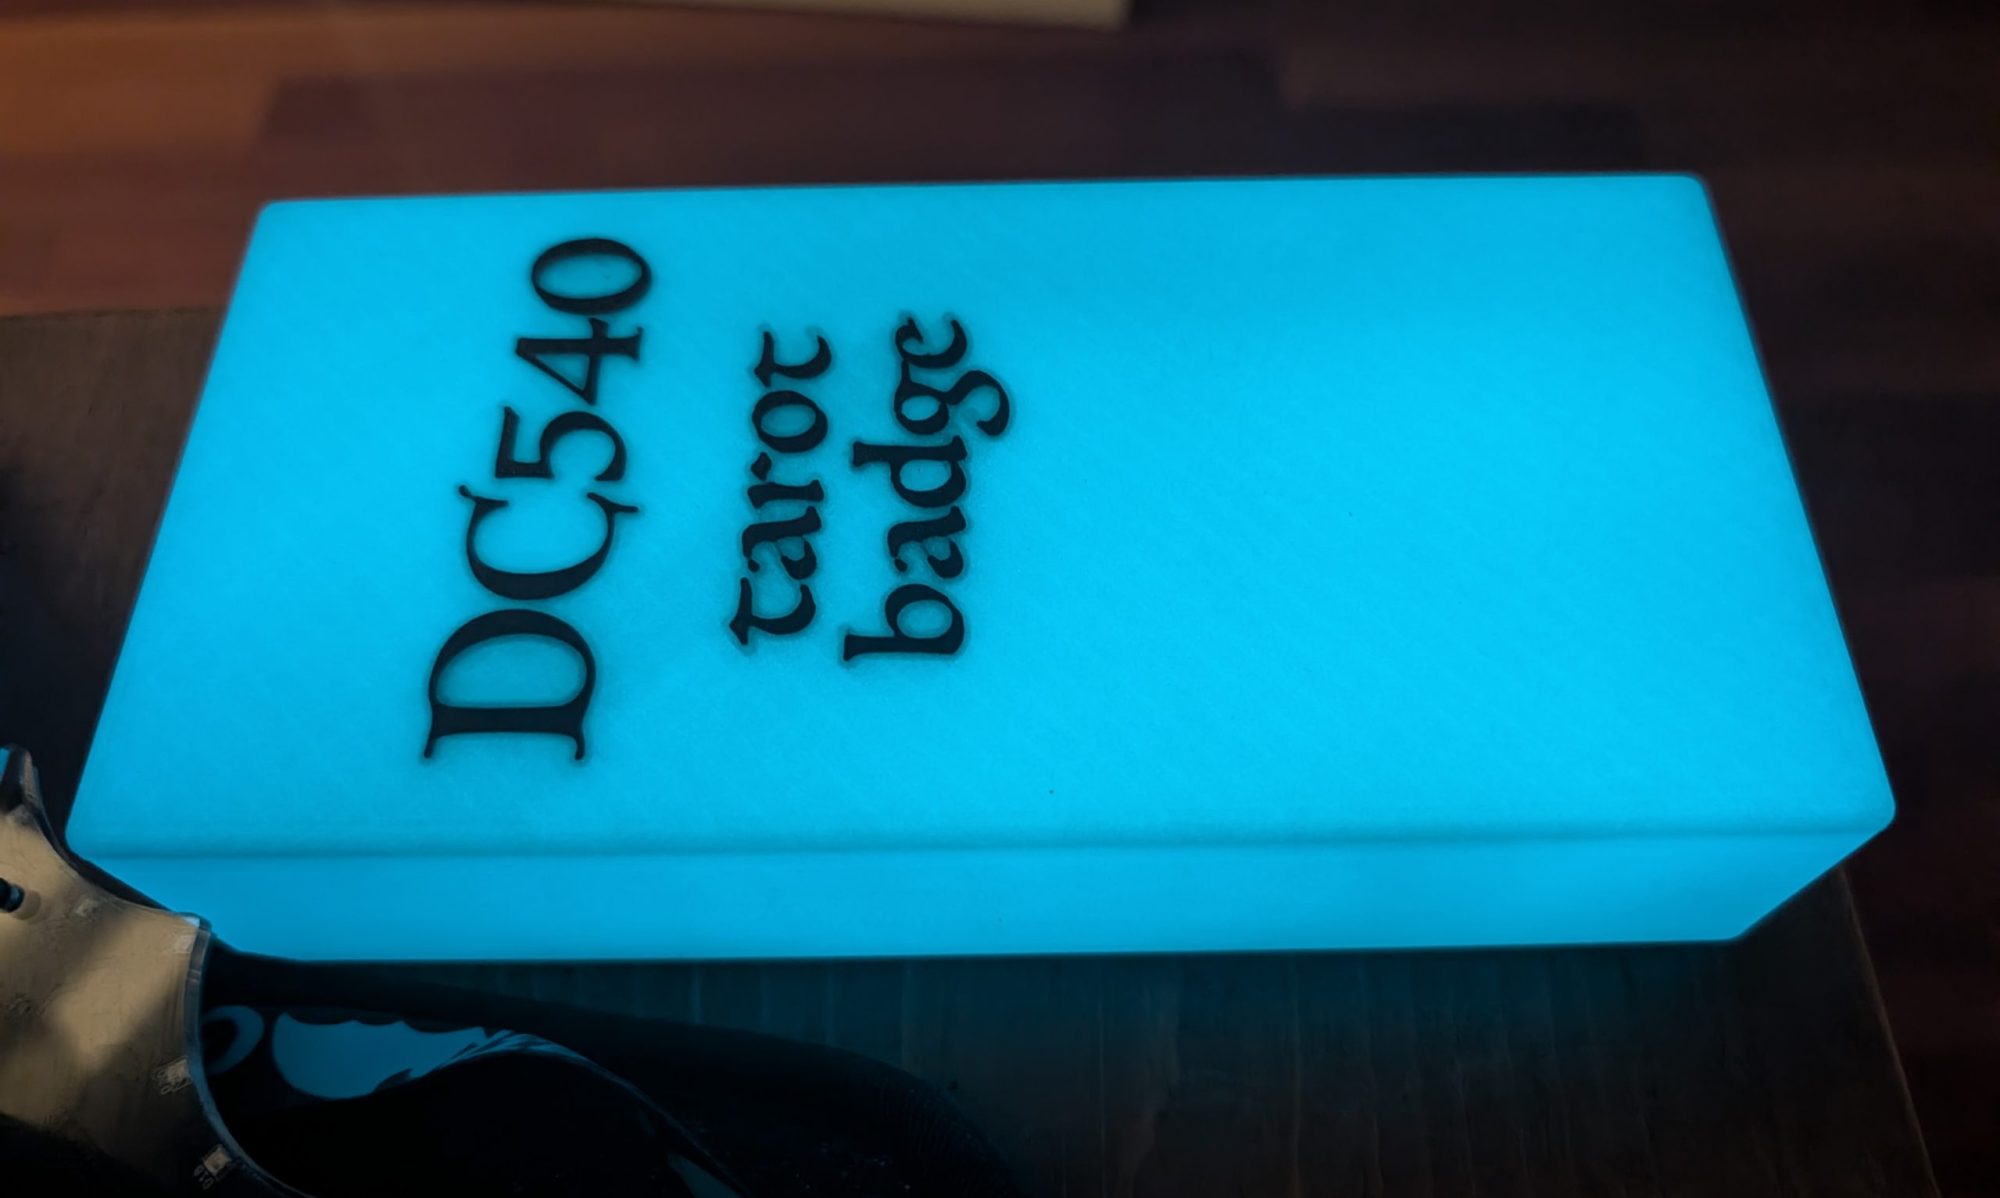
First, a little bit of background. We had the idea for a Tarot badge last year, while walking around DefCon and getting so much love for our Kabbalah (Tree of Life) badge. That badge started so many interesting conversations and opened so many doors that we just felt it made sense to keep going down that path. When we started digging in to complete last year’s badge, I decided to commit to learning more about Kabbalah for a year and then to evaluate. I sorta mostly kinda did that, off and on. Once you start going deep on Kabbalah, you start to see it’s complete interconnectedness with Tarot. What happened was we started wishing last year that we had built last year’s badge bigger to include more about the tarot correspondences. The natural answer to badge insufficiency regret is “maybe next year.” So here we are.
The Badge: Technical
We did not stray too far from the technical features of last year’s badge. At the core level, this is still an RP2040-based Pico, some LEDs, an NRF radio and a display. But here’s why we were struggling until just this week to get it out. We lost a lot of time to decision paralysis – there are a lot of screens available. Which ones work with the Pico? Which ones will work with MicroPython? Which ones will work at our power level. A lot of research goes into these decisions. A lot of parts bought that end up never being used. I’m going to quote a prominent member of the badge-making community who recently said “Why do I do this to myself?” The answer has to be a feeling that you’re putting something useful, interesting and/or beautiful into the world. And we kind of hope we did.
We settled on the 2.2″ ILI9341 with integrated SD card. It seems to be the smallest profile screen available with 240×320 resolution, which is critical for displaying tarot cards. Any less resolution would have looked shitty. And it’s sad, but that’s one of the more expensive screens out there, which reflects in the final price of our badge.
Kevin, our developer, like to scoff at those who consider MicroPython as some sort of lesser language. Some still linger in the world of perceptions where led animations are slow, there are blockers everywhere, and too many Python libraries haven’t made it over yet. We’re here to tell you, MicroPython is thriving. Our LED animations are proof that there’s nothing slow about either the RP2040 or MicroPython. We make generous use of the dual core architecture. And Kevin managed to squeeze three SPI devices onto a two SPI bus system. And nobody knows why, but apparently we’ve implemented AES encryption into the badge.
Next year we’re thinking of bypassing the fully-built Pico and working with the RP2040 directly.
Please remember that none of us do this professionally. We’re all learning. This is a labor of learning, and a labor of love. Last year’s badge was the first “big thing” I ever designed in KiCad. After Defcon, this year we plan to develop some PCBs as a group in a group class series, so that more people can be part of the development effort, and we’ll teach each other some group workflow lessons.
The Badge: Features
It wouldn’t have taken much to make a badge that does a Tarot reading. We didn’t want to stop there. What I envisioned last year, and I told at least a few of you this in Vegas, was this. I wanted a badge that could do Tarot readings, but I wanted it to be OPEN. Meaning I wanted to provide at least one deck. In my naive early imaginations, I thought we’d actually find an artist to do a deck specifically for the badge. But Crowley and Harris we are not. They had time and money to pursue their project. We all have day jobs. Then we realized there are public-domain and open-licensed decks available. So we included (at time of writing) three decks on the badge to choose from. The Rider-Waite-Smith deck, a version of the Tarot de Marseille (unfortunately not the Jodorowsky version — I really want to turn more people on to Jodorowsky and the story of that deck), and what we call the Shitty Deck, one that we hand drew over DC540 meetups. Trust me when I tell you that this deck is absolutely shitty.
We’re including instructions on how to add your own decks to the SD card to make them available for display. It’s slightly convoluted, they have to be resized and converted to raw format, and a naming convention is enforced. But think about it — once you do this process once, you have that deck for use on the badge. We could populate the SD card with the hundreds of copyrighted decks out there that can be found on various file-sharing platforms, but that would be violating copyrights, and that would be wrong. So maybe scan the decks you have. Maybe make your own deck.
So you can choose a deck, you can do a reading. What else? We have badge pairing, of course. We have a challenge game, like last year, but unlike last year when all we had to give as a prize was Defcoin, this year we’re offering a badge as the prize. Either an additional Tarot badge, or last year’s Tree of Life badge. Because of quantity issues, there won’t be many badges to go around at the con itself, so that complicates the game a bit. We’ll see how that works out. Maybe we’ll separate out part of the game so that non-badgeholders can play.
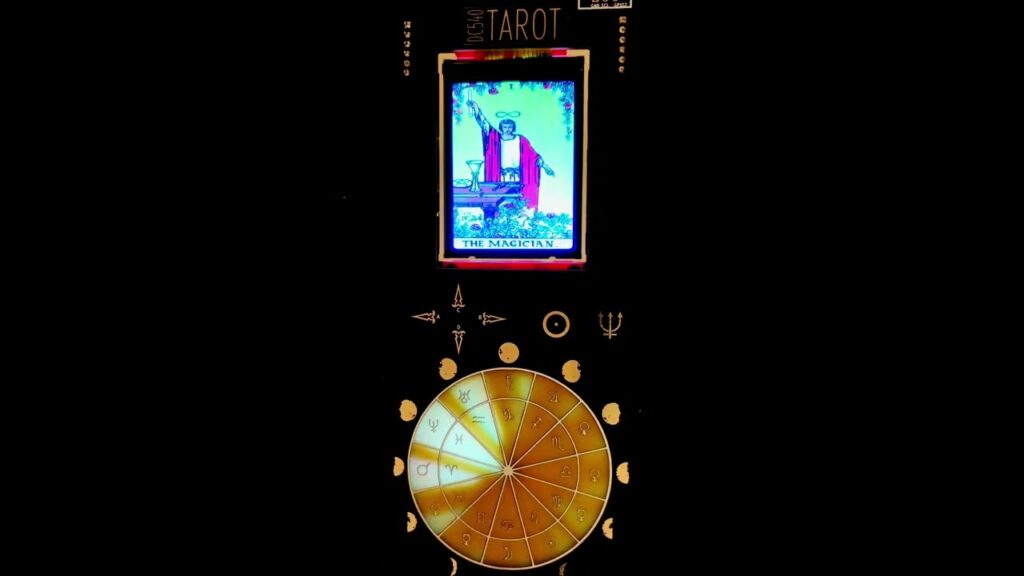
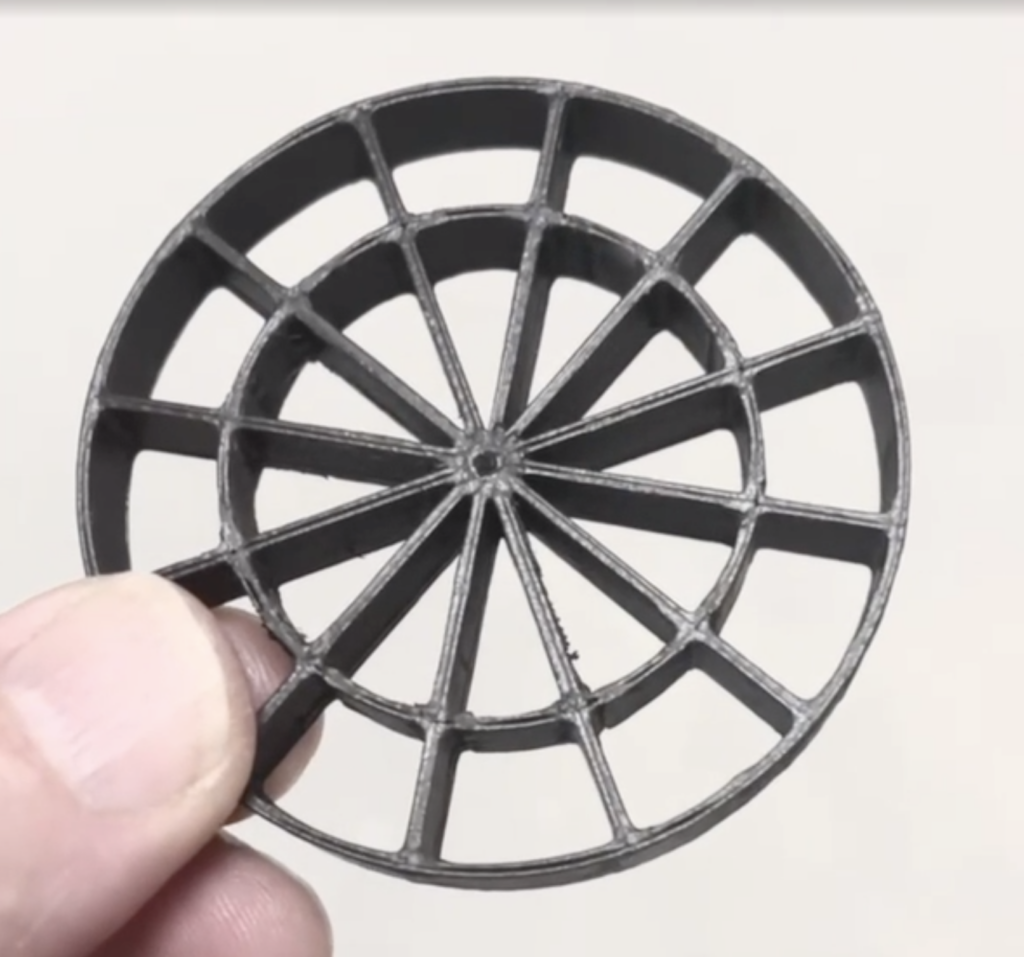
Everyone seemed to like the illumination scheme we went with last year. I’m not a fan of surface LEDs beaming photons into my faceholes, so I chose a more subdued look by strategically removing solder mask on both sides of the board and illuminating from a board below. I pushed to expand on that this year, but instead of just beaming through shapes and symbols, I put the shapes and symbols on the surface and opened up an entire wheel for shine-through. As you can see, the color of the FR4 itself tends to adulterate the LED colors a bit when illuminating large areas like that, but not excessively. I found it difficult to get a good blue to shine through, for example. As delivered, there is a lot of bleed between the different segments of the wheel, but in the demo Kevin posted last night, what you see is the result of gluing a light separation wheel to the underside of the top board. There are 24 LEDs on the bottom board this year, each illuminating half a wedge on the the top board. The separator wheel shown in the video only has 12 divisions, but still provides a nice sharp difference between the wedges. We will be providing an STL file for 3d-printing your own separator wheel, and the STL file has the inner ring defined as well, for full separation of all 24 segments. To be fair, I think beauty is in the eye of the beholder. The spinny animation in the first public demo, when run without a separator wheel, tends to lead to some interesting effects that evoke searchlight patterns at times, which is its own meaningful thing.
Searchlight casting for faults in the clouds of delusion
Anyhow, here’s what the beta version of the wheel separator looks like. It’s about 60mm in diameter. Thanks to BradánLaneStudio for creating the STL.
Not Many Copies at Defcon
We are so sorry, but because we got finished so late, we were too timid to drop coin on large quantities of the badge before knowing if it would work, so we won’t have many at Defcon at all. We should have enough to show everyone, and a VERY limited few to sell or trade, but literally don’t get your hopes up. We made 25 in the first batch. There are 10 of us going. We lost a few to testing. So we might have maybe 10 extras if we’re lucky. The good news is, boards and parts have been ordered, so we’ll be able to make more when we get back home.
We haven’t had the deep communications required to figure out how we’re going to distribute such a limited number of badges. We had such a good time distributing badges last year, we wish we could have done the same thing this year. We’ll try to have those discussions by the time the con starts. But seriously, temper your expectations of getting one onsite.
Some Thought About Tarot in General
A lot of people have a lot of thoughts about Tarot. On the ends of the spectrum, there are some pretty heavy expectations people lay on Tarot. As a lifelong rationalist, I see it, much like Kabbalah, as a framework in which to view the world and life events. A structure to be superimposed, for examination and rumination. Sometimes the results can be profound, but I like to believe the results are directly correlated to how much the reader and/or readee are able to open and stretch their minds. I will quote Lon Milo Duquette:
It's all in your head. You just have no idea how big your head is.
DC540’s Status and Mission
Last year, DC540 Nova cemented our status as a 501(c)(3) nonprofit. We have banking, we’re on AmazonSmile, and we have plans to to support people both in and out of the infosec community with our skills, talents, passions and green energy. So when you’re forking over your hard-earned pay to covet one or more of our badges, please keep in mind that it’s going to a good cause. If you’d like to contribute some of that green energy directly to DC540 to support our efforts, you can do so by sending money via Paypal to [email protected]. This will help recoup dev and prototype expenses, and support our mission. Now we’re not saying that making a healthy donation might lead you to receive a badge at Defcon, but we can absolutely be bought. And donations are tax-deductible.
Future Thoughts on this badge
We don’t know if it’s possible yet, but what if a new firmware could be developed for this year’s and last year’s badge that expanded the functionality a little bit, so that when a card is displayed on this year’s badge, the corresponding sphere(s) or path could be illuminated on last year’s badge? We exposed two GPIO pins on both badges via the SAO header, so maybe… Food for thought…
Engage with us. Join our Discord. Talk with us on Twitter.
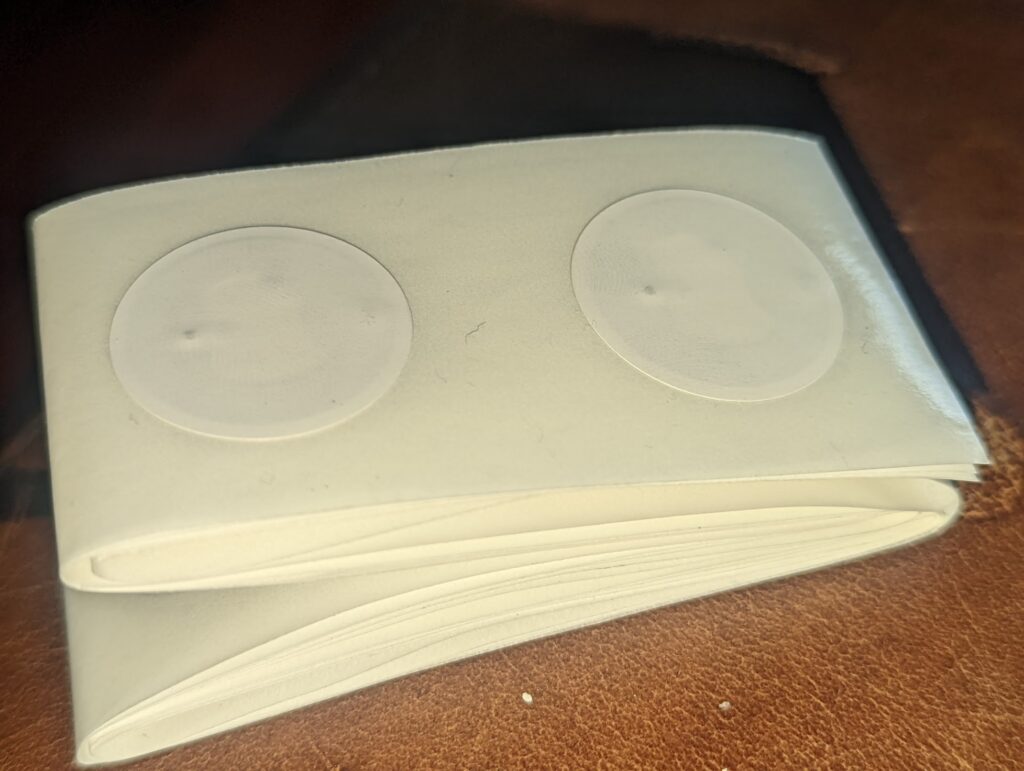
I picked up a batch of NFC tag stickers from you know where.
I started thinking they would be a fun way to host a hunt-type game during a conference, gathering, or other event where the playing field could be large enough and diverse enough, yet still somewhat controlled.
They look innocuous enough, just a plain white circle about 1″ in diameter.
You could direct someone to a landmark — a sign on a building or street, a shelf in a bookstore, a corner of a bar, etc., where you have pre-planted a preprogrammed tag, have them locate and scan the tag, on which they’ll find clues — a URL, a phone#, an email address, or just a block of text. The options are endless.
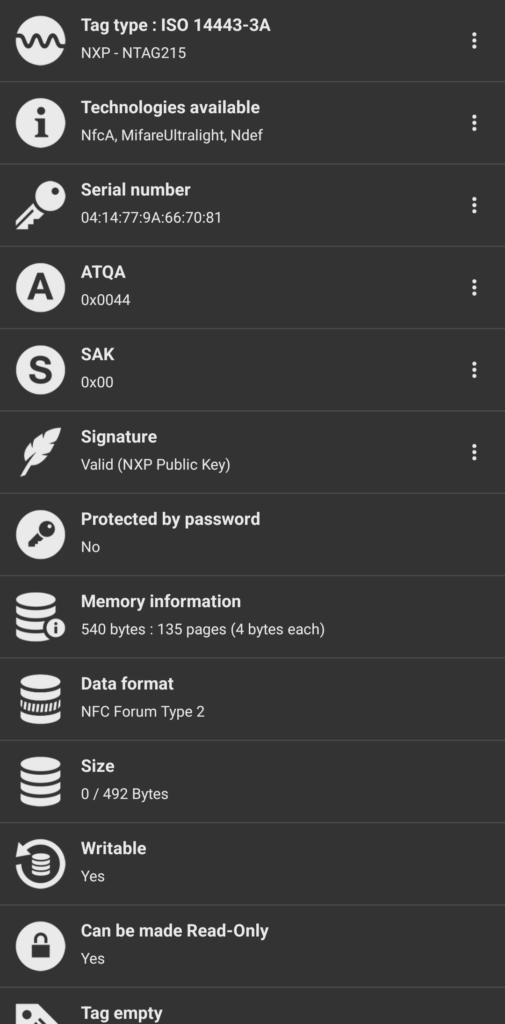
I think most modern phones support the NFC apps. On my Pixel 6, I’m using NFC Tools by WakDev. Here’s what it looks like on an empty tag:
You can see from this screenshot that it’s writable, can hold 540 bytes of data, and can be made read-only. This is useful to have this choice. In a hunt game, you may want to make the tag read-only so that players can’t corrupt your clue data. If you’re using these tags to exchange data with someone, however, you may want to leave it writable. Imaging using it as a stealth message delivery tool.
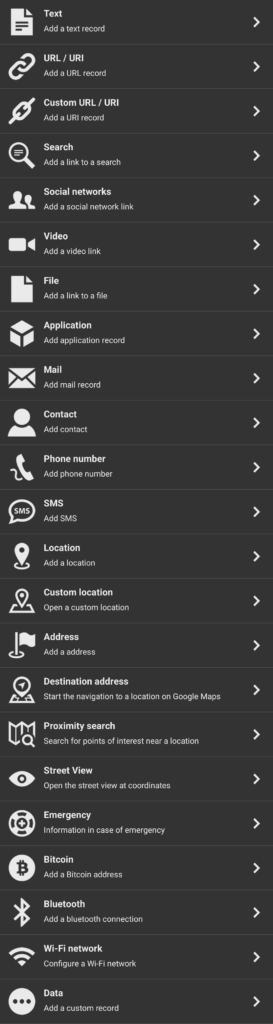
Here is the large list of types of data it supports. You’re limited by its 540-byte memory, but anything too large to fit on here can be put somewhere semi-privately on the web and just shared as a URL.
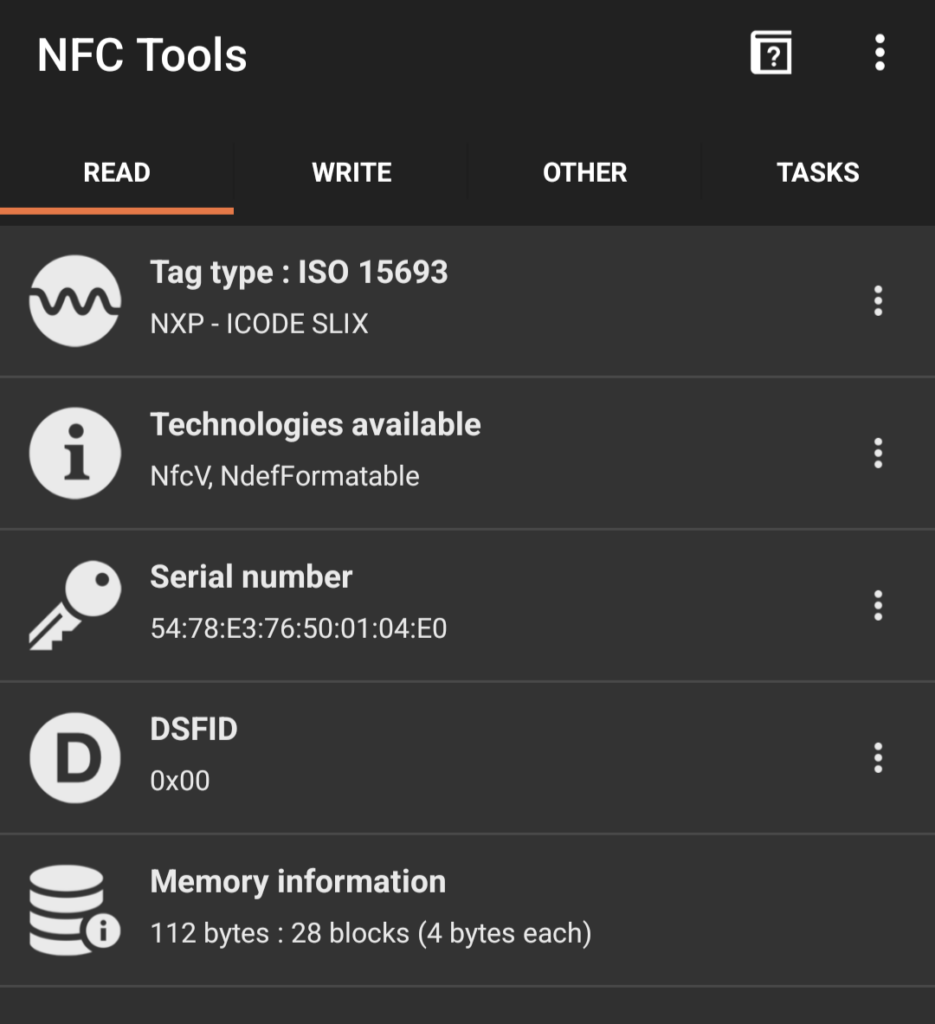
Yesterday I wrote about the mystery Waldorf Astoria Park City room keys that didn’t respond to either 13.56MHz or 125KHz probes. Mystery solved. They use NFC. On a whim, I hit them with NFC-tools on my phone, and the world makes sense again.
I decided to audit my large collection of RFID hotel keys I’ve collected over the years. Just to get an idea what’s out there, and look for patterns and anomalies.
One strange set I found is from the Waldorf Astoria in Park City. Didn’t respond to HF or LF search, but it clearly says right on the card, “hold key within 1/2 inch of locking device.” I wonder what they’re using if it doesn’t register at all on the Proxmark? I have four of them, maybe I’ll see if I can crack one open to see what’s inside.
The Hilton cards, for the most part, revert to hardnested attacks, but fall rather quickly, as opposed to the Sheraton card I was battling earlier in the week.
I guess I have about 75 card dumps in total now, about 40 of which are Hilton.
I’ve been playing with reading/cracking hotel room keys using the Proxmark3 RDV4 lately.
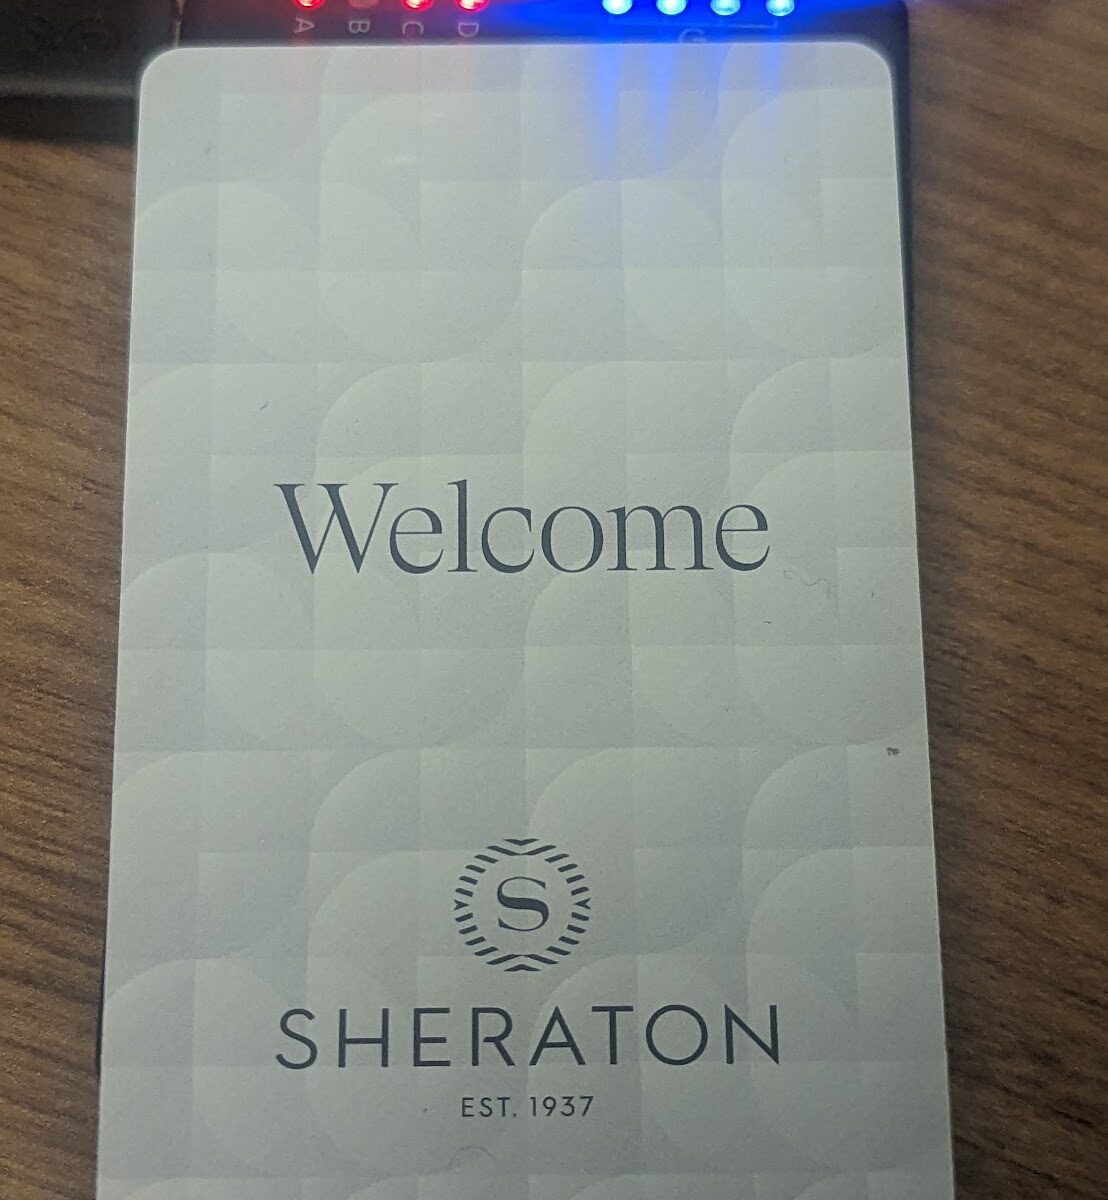
Most hotel room keys I have collected are MiFare Classic 1K. MOST of them are susceptible to autopwn within a minute or so. Coincidentally, most of my collection are from Hilton properties. Recently I came across a Sheraton room key that didn’t fall within the expected timeframe.
The “Weak PRNG” method did not work on this particular card, and so pm3 (RRG/Iceman fork) reverted to a hardnested attack. On my macbook M1 air, that was slated to take 2 days. I moved the task to a more powerful Kali desktop, and it’s now slated to take 9 hours to complete.
I will update this post when experience either success or failure. I do like a challenge.
Hours later: The first run stopped in midstream with “Could not connect to Proxmark.” Running it again for good measure.
Hours later again: Collapsed again after a couple of hours. Might have to try a different approach.
I learned some stuff in my reading, though. Apparently it’s all a game of spy vs spy. There are RFID systems that will detect cloned cards by attempting to write to block 0. If successful, it’s a writable clone card and the system can deny and alert. There are also more advanced CARDS that can be written and then locked, to defeat those features.
For those who choose to join us, Social House in South Riding/Chantilly. We’ll try to get our usual outdoor table. Tonight’s topics are badge artwork and stickers. 1830, first one there grab the big table.
Some of you might have been subject to my old-man ranting about how difficult it has become to install software that “just works.” My raging against the cloud, against everything-as-a-subscription, and against software that requires the capability of phoning home, either during install or on a continual basis.
My task was to install MS Office in a closed lab network, so that the users doing the work in the lab could write reports, etc., without having a separate machine just for that purpose. This network does not connect to the internet. It is a self-contained lab network with only what is needed for the lab installed on it.
It’s been a while since I fucked around with Microsoft products, and I naively assumed it would be a piece of cake. Just install it, give it a key, and be good to go. I was warned by those who had gone before me that it’s no longer that simple. Everything in Microsoft-land requires internet, they told me. “Surely they understand that a use case exists for no internet/no cloud,” I started to respond, before reliving the trauma of having to kill Atlassian when they made their on-prem product completely out of reach for small groups/businesses.
So I started down the road. I bought 12 licenses for “standalone” office 2016, went through the process of installing it on one of the lab machines, and yep, it requires internet to activate. OK, I’ll play along. We use FOG to image these lab workstations, so I set up a fresh install on a golden image candidate, activated it over the internet (very ugly process, by the way, if you buy multiple licenses), confirmed it was functional, and then captured an image of it. Rolled it out to other workstations, only to find that each new clone required its own activation. Well, this will never work.
I managed to get MS to refund the product after a lengthy discussion with a support rep. I decided I wanted to go the way of a volume license, only to learn that the KMS server too needs to touch the internet. I kept reading and reading and learning, and finally came across vlmscd, which is a linux-based open-source KMS server. Its only job is to say yes. When configured as the KMS server for a workstation (using DNS or manually via slmgr), any activation requests received by that KMS server are simply approved.
So I built one, making sure our licensing is properly paid for and accounted for,I of course. I added the SRV record for announcing the KMS service to the closed-network DNS, and installed the VL version of Office. Initially, running OSPP.VBS from the Office16 directory reported that the software was under a grace period with <30 days remaining, but after a reboot it reported it was fully licensed.
I wish vendors would provide a bit more flexibility in their product offerings, and understand that there are use cases that are outside the norm. I understand their need to protect their software from piracy, but this kind of heavy-handed control really makes it difficult for some of us who, for various reasons, don’t want to connect every network in our enterprise to the internet. We still exist.
Tune in to the Discord voice channel at 1830. Good chance to get to know some of us if you haven’t been to an in-person, or to participate in summer camp decisionmaking if you’re a regular.
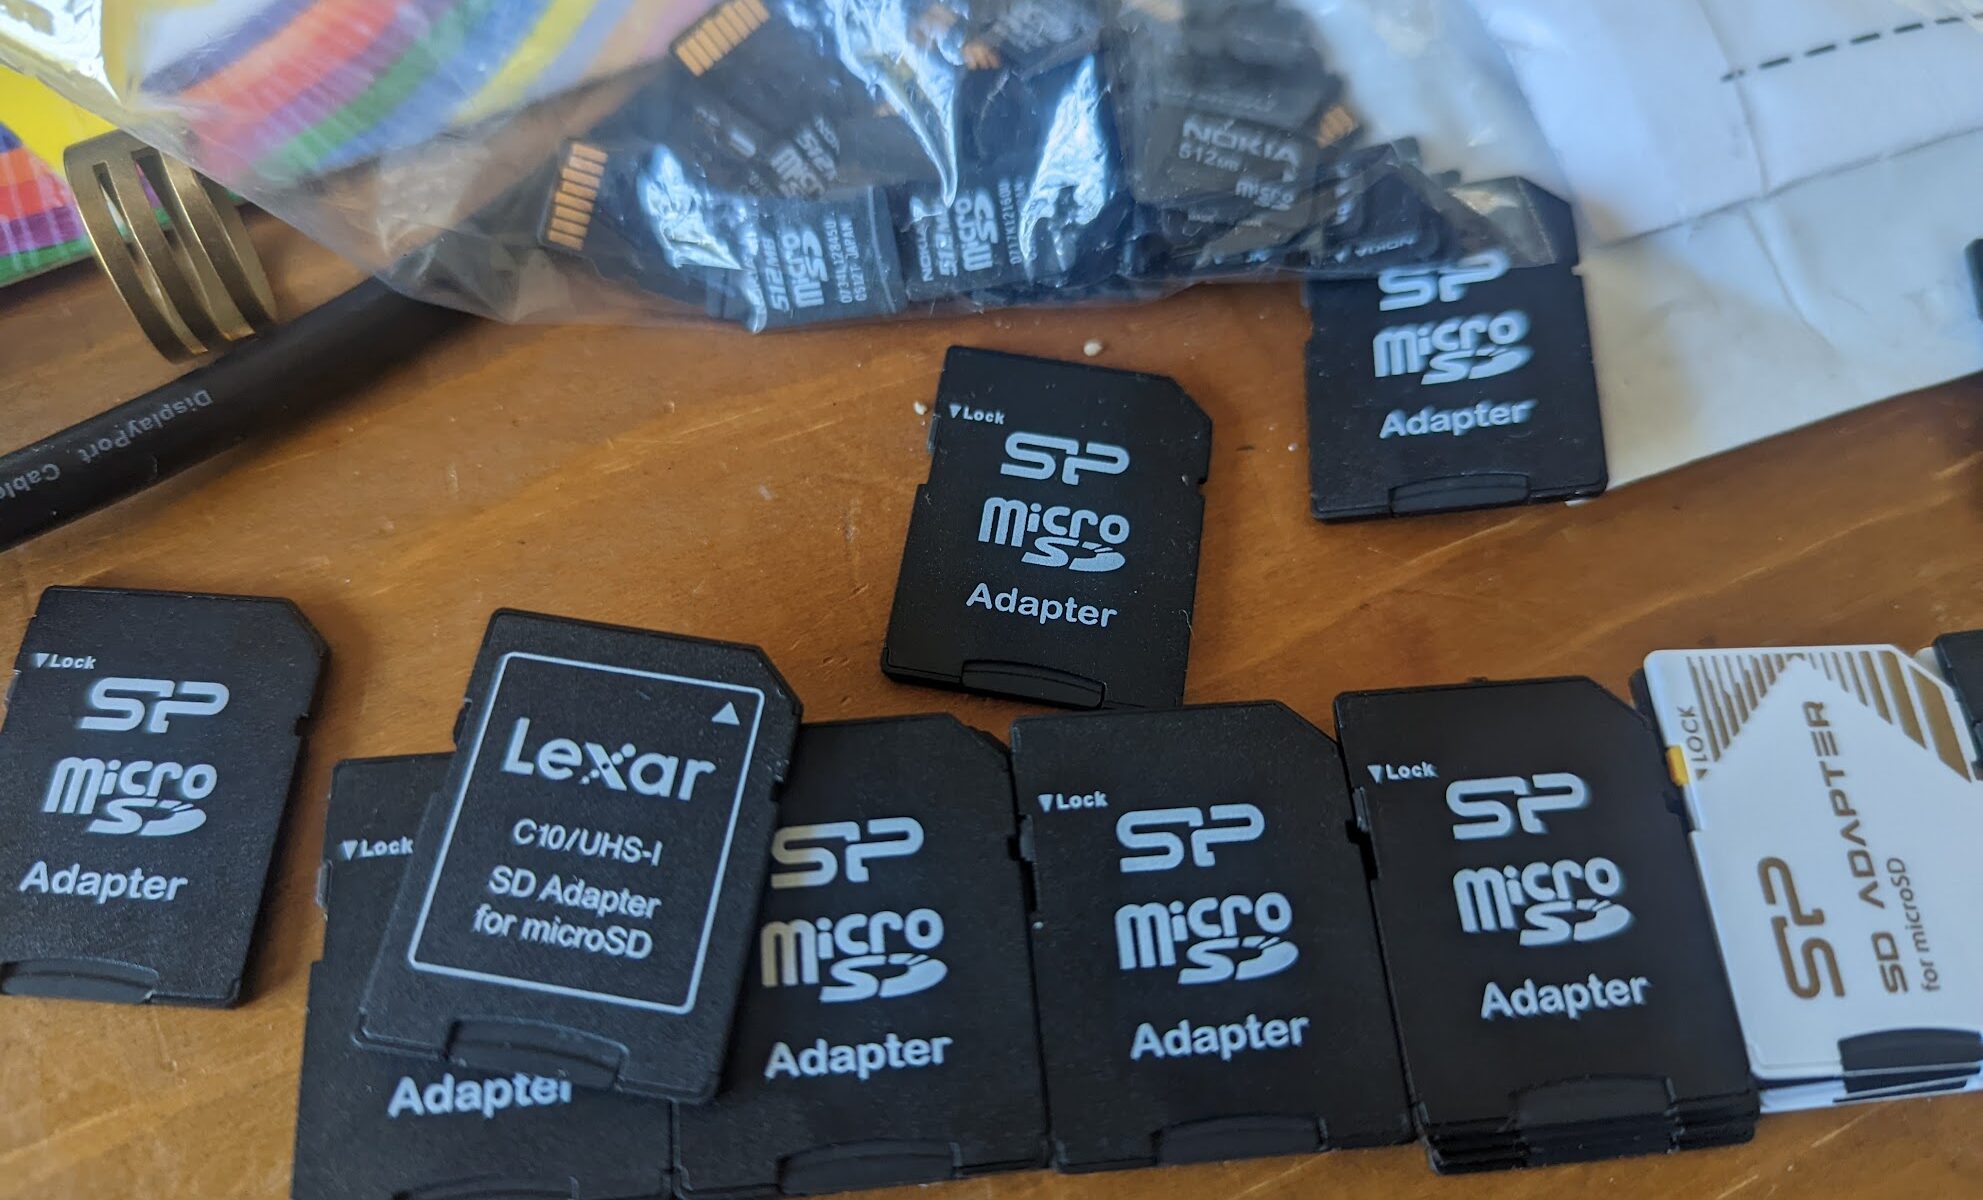
I picked up a large batch of MicroSD cards and adapters for an upcoming project. I’m cheap, and the data reliability isn’t critical, so I picked up used cards on ebay. After I made the purchase, it occurred to me that this was a potential teaching moment, both to freshen my own skills and to raise awareness for others who may not pay as much attention as those of us in the field.
TLDR: If you don’t know how deleted your data really is, don’t give, sell or return writable media. Either learn how to securely erase your data and confirm that it has been erased, or toss it in a fire.
So before they showed up, I installed the latest version of Autopsy on a fresh Windows box. Fresh because, well, just like I’m assuming that others might have been careless in data deletion, I have to guard against being careless about sticking random cards in my machines.
So they arrived. The moment of truth was here. I pulled out the first MicroSD, stuck it in the first adapter, and inserted it into a USB slot on the PC.
Predictably, it pops up as a blank, formatted card. Let’s see what Autopsy sees…
Let’s see, it’s been a while since I played with Autopsy. Let’s go with: * Add Data Source
Let’s call it * Card001 * Local Disk * Select Disk. On my machine it showed up as H: <Next>
I’m leaving everything checked here. If this was true forensics I might be more choosy, but I’m not.
Looks like the first test is examining the file system. “Adding $OrphanFiles,” it says.
After that, it tells me file analysis has started. I can hit finish, but I can tell by the progress bar in the lower right that it’s still analyzing stuff. This process goes on for a few minutes.
After the file analysis phase, it moves on to the data integrity phase.
Finally it’s done. I browse the card in the data source tree. Ooh, look, there are recovered files in the $CarvedFiles folder! Baby pics, family pics, and yes… porn. Folks, I recycled porn from the very first used SD card I tested.
So I’m up to card 28 now, and a few patterns emerged.
The metadata shows a strong preponderance of Nokia 5300 as the image source. This tells me these cards were likely sold by a shop servicing Nokia phones. The mp3 and video content I’ve extracted so far shows a strong trend toward Spanish-speaking content, and a few of the images with recognizable stuff on them actually mentioned Mexico.
I need to dig deeper into metadata, but visually it appears that at least some of the porn is homemade. Some of the cards had porn images which had likely been downloaded from the internet, as I discovered by running through through TinEye.
I’ve really got to refresh my Autopsy skills. I don’t do forensics for a living, but it helps to know the workflow of someone who does, in case you might one day find yourself protecting yourself from an enthusiastic forensic investigator.
Further learning: There are hash sets you can obtain that can validate files you find against known file hashes. Which might be the prudent thing to do if you don’t know what your found media might contain. Might be good to know if you’re handling CSAM before you actually view CSAM.
We’ll be meeting up in the Discord voice channels on Monday evening @ 1830. We will likely break off into at least one non-public channel for badgedev discussion, but please feel free to join us in the main meeting channel anyway.
We’ll be in person at the Social House tonight. Social House is a restaurant — not my house, FYI. Will have the Malort if anyone’s feeling stupid. Will have last year’s badge to compare and discuss w/r/t planning and measuring for this year’s badge.
We’re linking up at Social House in South Riding this evening, 1830. Please let us know (preferably on the Discord) if you’re attending so we know how big a table we’ll need.
I wanted to take a moment to digress a bit and go into what makes modular synthesis so rewarding to folks with a hacker mindset.
I’m not a musician. I have dabbled in bass, guitar, keys and drums, but as for formal training, I’ve had guitar and djembe lessons, and not a whole lot of them. But the thing about music is, if you LOVE music, it will find a way to move you in one direction or another.
I’ve had many thousands of dollars worth of equipment over the years from Korg, Kawai, Yamaha, Casio, Nord, Alesis, Peavey, PRS, Epiphone, Tascam, Moog, Ableton and many more. And they’ve all been very rewarding in their own way. But none of them has given me the sustained high that exploring modular synthesis has given me. My first exploration was a Moog Subharmonicon, which quickly grew into the entire Moog semi-modular trio of Subharmonicon, DFAM and Mother32. I realized that being able to tweak and modulate sounds and sequences on the fly on an intuitive basis would more than make up for the fact, for me anyway, that I have limited musical playing ability.
And when I expanded that setup to include specialized Eurorack modules like Clank Chaos, Castor & Pollux, and utility modules like mults and LFOs, I realized this was the space I needed to be in. The limiting factor for making music, for me, was always that without musical skill, there was only so much variety I was able to create in realtime. Sure, I could layer multiple track and create sonically rewarding pieces, but look — I work in tech all day long, and I pursue tech hobbies on the side as well. The last damn thing I want to do when I make music is drill down into menus and learn advanced software tools. I wanted something far more tactile, and something closer to magic. Rather than directly crafting a particular sound, I find value in combining functionalities and making the different components “influence” each other in unique and interesting ways. I find that when I start a session with modular equipment, it never ends up in the same place twice. Sometimes I’ll start with a keyboard CV value to start, and route it into one or five places. Sometimes I’ll take the audio from one component and throw it into another for further manipulation. I’m particularly drawn to the modules with an element of randomness or surprise, like the Clank Chaos or the QuBit Bloom.
I credit another DC540 member for triggering me to make some changes and fall even deeper down the modular rabbit hole. Now the semi-modulars are on their way out, and I got a new case to replace the non-portable homemade Ikea rack I was using before. I find myself imagining how this configuration could be taken completely portable, and actually considering replacing the brand new 24-channel mixer I just bought a few months back with something similar that fits in the box.
For a while I had a friend’s Minimoog Voyager. I loved how it combined the best of both worlds. You could easily choose presets, but you could make vast modifications to those presets by twiddling knobs, and then save those changes to your presets. A bit out of my league pricewise, though, unless I sacrificed much of my other gear.