Moving from a K40 to an 80W Omtech laser cutter/engraver

I’ve had my K40 for over a year now. I’ve burned leather, engraved and cut wood and acrylic. I’ve made hundreds of things for gifts, decorations and even made custom commissioned items for friends. It’s been great.

But it’s been a struggle. Don’t get me wrong, the K40 is a great starter machine for this kind of work, but it seems to be pushing its limits for cutting acrylic. It takes a bit of effort to calibrate, align and focus the laser correctly for maximum efficiency, which is needed for acrylic work.

Because I’m running up a deadline for mass-producing an item (wings for the DC540 Chakra badge) and production wasn’t meeting requirements, I decided to invest in a larger machine. Being budget conscious, I chose the manual focus version of the Omtech 80W machine.

It arrived last week, and I’m going to try and encapsulate my experience/lessons learned over the past week in this post.

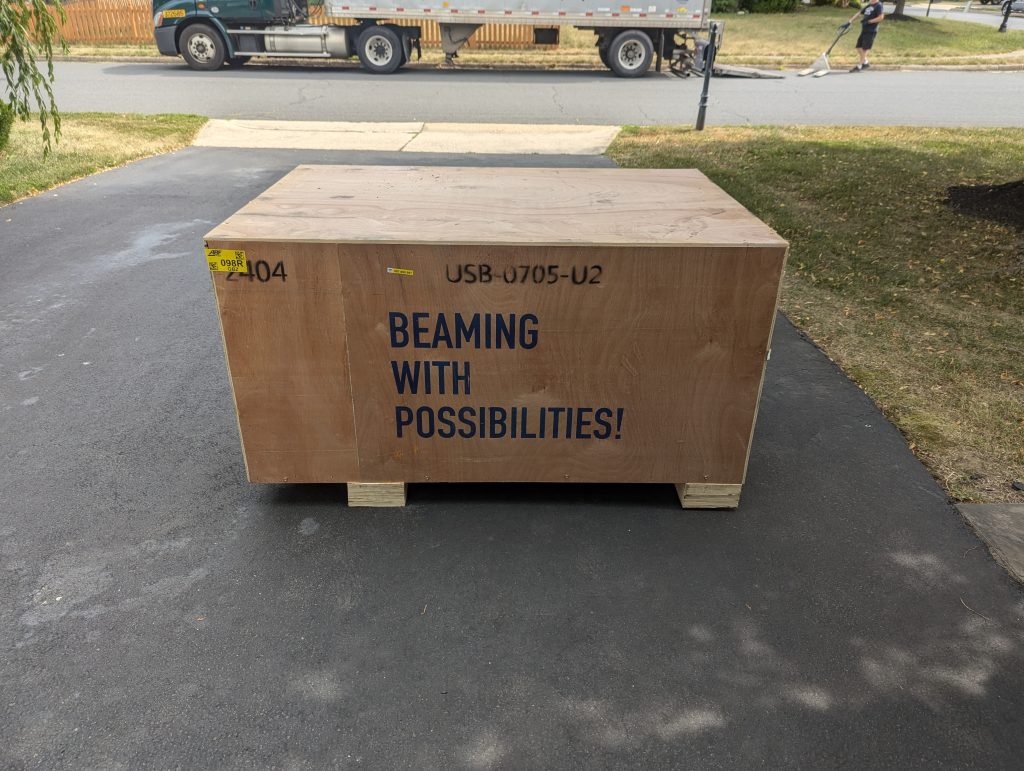
I was relieved that the crate arrived unharmed. As my wife suggested, I’ll probably cut out that lovely tagline for wall art at some point. 🙂

After a bit of work uncrating and positioning the 200+ lb unit in the garage, I went through the installation and testing process.

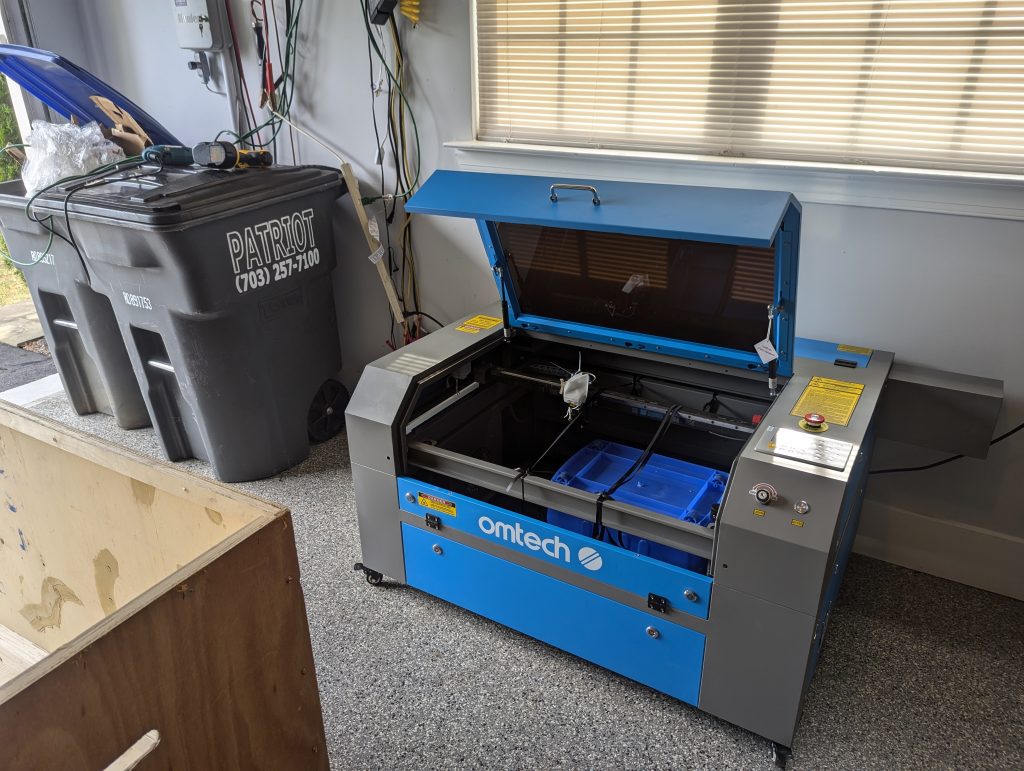
The first test cut demonstrated two things. First, I had the focus wrong. Second, this thing has way more power than a K40. When the K40 is out of focus, it barely penetrates acrylic. When this thing is out of focus, it just makes thicker lines and doesn’t make it all the way through.

The first major difference between the two units is the size. The K40 can be lifted and moved from room to room by one person of average strength. It’s a tabletop unit. Not so with the 80W. I waffled between the garage and the basement for this unit, for various reasons. Garage = easier installation, easier venting of exhaust. Basement, better climate control, better integration with the rest of the lab. I opted for the garage. Sometime before winter, I will enlist three strong friends to help bring it into the basement and reconfigure exhaust.

Next obvious difference is the bed. The K40 ships with a fixed bed. It’s actually bolted on extension poles from the bottom of the cabinet. No provision exists in the unit to adjust the bed height. This is problematic. I ended up buying a lab jack and removing the extension poles. And cheap lab jacks are inherently not level. Oh well. I worked around it, but it was troubleshom. The 80W unit comes with linked greased screw adjusters for the entire bed, controllable by a single knob.

The K40 has no focus assistance at all. Trial and error (weighted heavily on the side of error) is used to find the correct focal point for your material. The 80W includes a red-dot focus tool. I simply turned the bed level adjustment knob until the red dot was at its smallest, and bam, I had good focus. The red dot is a little bit off in the X/Y coordinates from where the beam hits, but that’s easily adjustable as well (critical if you’re using the red dot to validate framing before cutting/engraving).

The mirror mounts on the K40 are not great. On mine, they look kind of like this, but the mirror is much closer to the surrounding ring than this photo. The result is that when you use tape as recommended to calibrate and center the beam on each mirror, invariable there ends up a bit of tape or burn residue on the mirror.

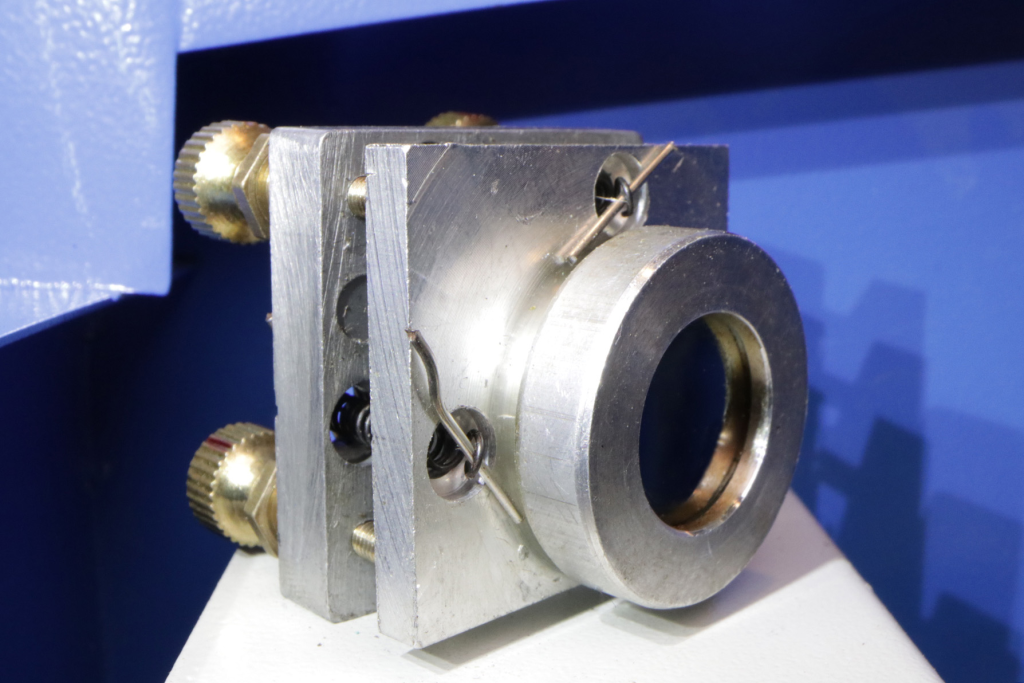
The new unit includes an offset frame for exactly that purpose. It’s not close to the mirror, so there’s no risk of tarnishing the mirror, yet it’s still aligned with the mount, so you can trust the alignment by putting tape on that frame and pulsing the laser.

The K40 has very little in the way of controls. A simple power level display, up/down buttons, an emergency stop button, and a pulse button. This unit has a full display which shows a representation of the pattern being cut/engraved, including a real-time cursor of what’s being cut.

My K40 would have required a controller upgrade to work with Lightburn — therefore I would have to set the power level on the panel, and use K40 Whisperer to send the operation code to the unit.

It was trivial to attach this unit to my PC using Lightburn, and since I already had a Lightburn license for my diode laser, I just had to add a DSP license to control the OMTech unit. Lightburn is miles beyond K40 Whisperer in functionality, including dragging, rotating, duplicating and removing design elements to suit your material before starting the job. Plus it’s easy to control design elements by color, assigning each color to line, fill or offset fill as desired.

Something I learned during this process, relating to my specific use case, is about vector vs raster. Most of what I do is engraving acrylic to foster illumination of patterns in acrylic. With the K40, vector engraving was fine for main design lines. With the new unit, the focal point is much smaller. Maybe that is an indication that the K40 was never completely dialed in on a good focal point, or maybe the beam and lens combination is just that much better on the 80W unit, but the end result is that I can no longer use vector lines for main lines of illumination. They’re fine for fine details and accents, but the big lines are going to need raster from now on. Raster takes a bit longer to cut, but that’s fine.

By the way, if you’re considering this unit or one like it, consider laser cooling solutions. It comes with a water pump, but from experience, I’ll tell you that the stock water pumps on these things are perilously unreliable, and if the pump fails you will lose your tube. Consider an industrial chiller. I ended up buying a CW3000 for the K40. It’s not a true chiller, more of an enhanced water pump, but the enhancements include alarms and alarm outputs for sensing flow failure or high temperatures. Since the new unit is in the garage, and the garage gets hot in the sweltering Virginia summer, I opted for a true chiller with compressor (CW5200) for this unit. Same safety features, but it actually cools the water. The last thing I want to do is replace a blown tube on this unit.

I wish I had upgraded to this unit earlier, but the K40 was a great training ground for CO2 laser work.

Chakra Badge Update, 2024-06-11

So the entire early sales allotment sold, and shipped. Sixty badges went out to you lovely people around the planet, and we are so grateful for your support!

For our next feat, we’ll be doing another smaller early sale batch shortly. We’re still having internal conversations about how many to put out there early and how many to hold for DEF CON.

One of the complications of DEF CON delivery is that now that the con is pretty much all in one space, and no longer directly connected to hotels, selling them at con just got much more complicated. Since we’re not allowed to sell in con space, and no connected hotels, we’ll have to be creative to find places to meet within folks’ already chaotic DEF CON schedules.

So all of that is factoring into our decisions.

Also, we’re trying out a new plugin for a birdseye view of all shipped badges, so if you get a NEW shipping notification AFTER you’ve already received your badge, don’t get too excited, it just means we populated a field. 🙂

-baab

Shipping updates

Most of the orders from early sales are on their way to buyers! International orders and multi-badge orders take a little longer because they’re outside of the flow zone, but EVERYTHING should be on the way by tomorrow. It’s exciting seeing and hearing reports from the field. Feel free to come into our Discord with any questions or comments.

P.S. we found out that our domain is having SPF/DKIM issues mailing to some domains, and we’re working through that.

Minor shipping difficulty… Patience is appreciated…

So our first time selling stuff in over a year, and there are minor bugs in our ecommerce system that showed up since then.

  1. Because of bugs in generating shipping labels, some recipients might have received two shipping notifications. Most likely the first one is the one you should be tracking, we’ve tried to void the second.
  2. We’ve generated labels for more than half of the current orders, but they haven’t been dropped off yet. They’ll probably be dropped off this weekend.
  3. Two international orders came in, and due to issues with the ecommerce, no shipping was charged. Clearly this is a problem, since it costs us around 3x to ship overseas than to ship in the US. We ask for extra patience while we sort this out.

Early Chakra Badge sales

Because someone took the time to ask, this is not a “presale” for later delivery. These badges are shipping NOW.

The advantages to you, my worthy #badgelife devotees, are many. Mainly that you can fool yourself into thinking this badge is no longer included in your “badge budget” for Defcon. 🙂

Final firmware will be released on day 1 of Defcon, at which point the competition will begin. The firmware that we’re shipping now, which we lovingly refer to as “MVP” (Minimum viable product, I think someone called it?) has demos and other entertaining features. The final firmware will include the competition games. It’s easy to apply firmware later.

You can also use the time between now and DC32 to maybe write your own code and throw it on the badge. The instruction booklet includes pinouts, and help is available in our Discord server if you’re interested in pursuing that.

Badge Announcement

Sure, it was haphazard. We shat out a badge announcement tonight. You wanna know why? Because Kevin and Txnner put together such a beautiful intro/promo demo that it just begged for public consumption.

Yes. DC540 has a badge this year. This is the badge that was supposed to happen last year, but us ADHD misfits with demanding day jobs couldn’t get our shit together to complete it in time to release last year. And when we realized that, we relaxed. We were like, “Fuck it, we’ve got time to do it right. Let’s do it right.”

And I, for one, think we did.

So the badge is once again based on the RP2040. But this time, we didn’t use a prefab Pico devboard as a base. We went all out and did all the things we needed to rawdog the RP2040. We have EEPROM. We have flash. We have USB-C. We have Li-Po. We 3D-printed battery covers to protect the Li-Po. We painted and laser engraved and cut acrylic wings, and used sidelights to light them up. It’s fucking glorious. It’s eloquent. I think it’s the most beautiful badge we’ve done yet.

But it’s not just me. Kevin is ejaculating in his pants as well. This is a beautiful fucking badge.

But we didn’t stop there…

We have seven badge challenges this year. And NONE of them will be released before DefCon 32 Day 1. The winners of the challenges will receive beautiful laser-crafted physical trophy awards to commemorate their diligence and commitment to NoVa’s #2 death cult. Something so glorious and displayworthy that we’re not even going to preview it here. The first THREE winners to complete all seven challenges at DC32 in-person will receive a trophy. The first VIRTUAL winner who can’t make it to DC32 will also receive a trophy.

We’ll do presales. We have assembled badges in-hand. We have lanyards. We have packaging. The only thing we don’t have yet is the documentation booklet. And we’re working on that. We’re going to do a limited presale, maybe 25 badges, maybe more, way before DefCon. Those presale badges will not have the final firmware, they’ll have some lovely demos and things you can play with, but they won’t have the badge challenge. Those who pick up our badge at DefCon will have a fully functional badge with the badge challenge loaded.

Those who preorder will have to make do with demos, features and maybe customizing it with your own software while you wait for DefCon Day 1. We’ll publish the pinouts and starter hints in the documentation booklet. On DefCon Day 1, we’ll release the final badge challenge firmware, it’ll be easy to reflash your badge with it.

Let’s be clear. We don’t WANT to do a presale. But we’re pretty heavily out of pocket for creating this year’s badge, and we need to recoup costs, hopefully before we get out to vegas. Not all of us make the big tech bro dollars. But we’re doing it. And we’re almost 100% ready.

You ready for the preview now? Here goes. Make sure you’re in a private place, because regardless of gender or personal junk, this badge might just give you some sort of boner. I present, the DC540 DC32 2024 Chakra Badge.

K40 Laser Calibration: Center That Beam!

We’ve been fighting with the K40 for what feels like months. Finally got it “working” reliably a few weeks ago, but at a higher power level than I expected, and it was still not cutting all the way through acrylic. Good enough for production — we could break off the pieces — but I knew from anecdotal evidence that it could be better, so I was disappointed.

Fortunately, it clearly went out of alignment this weekend. I was seeing double lines on the cuts. So I knew it needed aligning. Mirror alignment was something I had been mostly avoiding since unboxing this thing, since like a lot of K40 units, they put some sort of glue or caulk or other kind of sealer on the knobs/screws of the mirror alignments to kind of lock in factory alignment. Unfortunately, this was no longer cutting it (no pun intended) for me.

So I followed the alignment checklist, checking for alignment with the laser head at top left, top right, bottom left and bottom right, to see how far down the alignment rabbit hole I’d have to travel.

Background: K40 lasers use a series of three mirrors and a lens to focus the beam on the material in the bed. Mirror #1, right where the tube emits, takes the beam from the tube and brings it out into the play area. Mirror #2 is on the near end of the traveling arm, and mirrors the beam from #1 to mirror #3. Mirror #3 is inside the laser head itself, and is basically a stationary mirror which reflects the beam from #2 down to the material.

By putting tape over the hole in the laser head and then giving a short low-power burst, you can see exactly where in the hole the beam from Mirror #2 is entering the laser head. Ideally, you’re bringing that beam into the center of the hole in the laser head, so that it will hit mirror #3 dead center and thus hit the focusing lens dead center, for optimal energy transfer to the material.

Mine had been hitting fairly close to the edge of the hole, but since it was engraving and cutting somewhat satisfactorily and reliably, I had been ignoring it. The double lines showed me that it had gone further out of alignment. Sure enough, a piece of tape and a short burst indicated that the beam was striking even closer to the edge than before. So likely whatever beam was making it to the lens was weakened and skewed by the angle at which it was hitting.

So I removed the sealer from the knobs on mirror #2 and started twiddling the knobs, using additional short bursts to check my progress, until I had the beam good and centered. I checked it at the four positions to ensure it was at the same position in all four. If not, I might have had to start working with mirror #1, which I was hoping to avoid due to added complexity. I was lucky. It was dead center.

I ran another test, and it came out perfect. No double lines, and none of the items on the 8×10 panel I was cutting required breaking off. This indicated to me that more energy was reaching the material surface, and thus I could potentially reduce power and passes and still have good results.

With the next two panels, I reduced by 5% power each and one cutting pass. So effectively I migrated from 65% power and 4 cutting passes to 55% power and 2 cutting passes, and my objects are still cutting and engraving perfectly. This afternoon I might try even more reduction. It’s hard for me to imagine a single-pass cut, but I’ll try it and see.

Center that beam, folks!