We’re meeting this evening in the usual space. You know, that place where we put that thing that time. Costumes are encouraged. Someone will probably live-stream it on Discord for those who can’t make it, but come on out.
Here’s the current CDC guidance on gatherings:
https://www.cdc.gov/coronavirus/2019-ncov/your-health/gatherings.html
Monday In Person: 10/4 Good Buddy
We’re in person tomorrow. Likely someone will make it hybrid but I’ve proven useless at dividing my attention between virtual and IRL, so I tend to focus on the IRL. After all, that’s where the booze is.
Anyone who has come to previous meetings is welcome. If you’ve only met us virtually hit one of us up if you’re interested in attending. We prefer to vet strangers because it’s a private space.
Optionally, bring a snack or festive bevs to share. This seems to be shaping up to be one of the larger in-persons we’ve had in a while, this could be interesting.
Indoors vs outdoors is currently unknown. WX report indicates rain possibility around meeting time of around 50%. We can handle either, but if you can’t, that’s on you. Please be vaxxed and/or masked if indoors. None of us want the delta variant.
Activities: laser engraving, staring at psychedelic lighting, and badge thoughts for DC30.
Don’t be a dick.
DC540 pizza night this evening
In the backyard. 6:30.
If anyone wants to try laser engraving, bring an image on a flash drive. 1.5″ round, or 2.5 x 3.5″ rectangle. Take home a souvenir of your obnoxious insensitive nerdy friends and their messy habits.
I’ll try to have the pizza show up around 7.
Closed the Meetup account for good today
Obviously DC540 lives on, but I really don’t feel like Meetup is worth the cost. They make it surprisingly obscure to shut down. The default is to “step down as organizer” allowing any rando who’s joined your group to take over. Anyhow, y’all can still find us here, wherever it is that you see this message.
DC540 8/30 Meetup is VIRTUAL
This week’s meeting will be on Discord. The basement needs some TLC after the last couple of frantic weeks since Defcon. And I need a break from solder fumes and new-PCB smell. Short reprieve while the next batch is on the way. A Discord meetup is a great time for new folks to join in and meet the group, and we welcome you. The Discord link is on the website, and we meet in the Monday meetup voice channel. Please show your beautiful faces, even if they’re ugly.
Tree of Life Badge documentation released
Following up with conversations we had with a few acquirors at Defcon, we have opened a public repo for the Tree of Life badge.
It contains hardware pinout documentation, and the stock .UF2 firmware.
This is so that people can feel a comfort level throwing MicroPython on it, or their own home-rolled firmware, and access all of the components, and have a place to come back to if something goes poopy.
We’d love to see what you come up with! I hope we got all the pinouts correct. Feel free to open an issue if you have any questions.
DC540 ‘Tree of Life’ Games
How to Enter the Answers:
– Once you get the Answer, go to the http://dc540.org/question.html website and enter in the Question number, the answer, and our badge ID. Take the eight-digit number (unique to your badge) and enter that into your badge.
– A couple of notes: even if you put in the wrong badge id or answer, an 8-digit code will be returned, so be careful.
– When entering the numbers into the badge, make sure to lock in each number with the right button and then submit. If the answer is wrong or you didn’t submit correctly, you will be dropped out of the game answer area.
– There is a Discord invite on our main DC540 page but look for the dc540-tree-of-life-badge room.
Game 1: Crossword Puzzle
– There is a Hitchhiker’s themed crossword puzzle on our website or the one included in your bags. Complete the crossword puzzle, snap a picture of the completed puzzle with answers written legibly and send it to us on Twitter or Discord IN A PRIVATE MESSAGE with your badge ID (that 16-digit sequence starting with an ‘e’). You can also deliver it to us in person. Once we verify you completed the puzzle, we will send you the answer code to enter on the badge. Our Twitter Handles and Discord Usernames are at the bottom of this instructions.
– https://crosswordlabs.com/view/dc540-2021-badge
Game 2: Lockpicking Challenge
– Go to the lock picking village and learn how to pick locks. Videotape yourself picking the lock and send us the video to our DC540 Twitter with all the hashtags or feel free to also send it to us privately. Once we verify you completed the challenge, we will send you the answer code to enter the badge.
Game 3: DC540 Website
– Check out the ‘History of the DC540 badge’ and enjoy the pictures on our website.
Game 4: Twitter Challenge
– We have hidden some information on our DC540 Twitter Page. Nothing too complicated but check out our feeds, find the information and decrypt.
Game 5: Scavenger Hunt
– Make sure to be courteous and ask for permission before taking pictures of anyone.
– To ensure the following photos are yours and yours alone, make sure you are in the picture. Extra points for creativity.
– Take pictures of ten of the following items, add a hashtag, and post on our twitter page. Make sure to send us a message (to our twitter) with your username when you found ten of the below items and posted on our Twitter:
– A Sheep
– A Carrot
– The “Welcome to the Fabulous Las Vegas” Sign
– A brochure from a wedding chapel in Las Vegas
– A photo of you next to a man/women who has a mullet
– Take a picture of an impersonator.
– A photo of you with a Roman Guard at Caesars
– Poker chips from 3 different casinos
– Green Craps dice
– Post card with the Eiffel tower on it
– A picture with Elvis
– A picture with one of the M&Ms
– A tiger
– A picture of a person wearing socks with sandals.
– A bike “cop”
– Photo of a man with a handlebar mustache
– Ceiling in Bellagio
– Pink Flamingos
– Floppy Disk
– Picture with a DC540 Boss
Game 6: Morse Code Challenge
– Go through the Morse code menu and you’ll find several Morse code challenges. One is the answer, but the rest may prove helpful. For a bit of fun, when you pair with a boss, Morse code will flash. Hurry up and write it down and make sure to let us know what you’ve found. The answer (when input into the generator) will not have spaces, capital letters, special characters, or numbers.
Game 7: What do you know about the Ham Radio?
– The theme of DC29 is “Don’t Stop the Signal” if we do end up in a world where communication becomes more difficult, could you grab a ham radio and know what you are doing? The questions and answers are only displayed once and your answers will not save if you leave the game early. You will get a random set of questions from a larger question bank, Answer 15 of the following questions correctly and pass this challenge. You won’t know what questions you get wrong. Then maybe go take your entry level Ham Radio license (there is a Ham Radio village at DEFCON).
Game 8: Badge Pairing with another Player
Pair badges with other players and check out some of the default messages or send your own. Be careful, you’ll have several good or bad hints you can send to the other person. You know if the message you sent is helpful or not, but not what the message is. Hopefully, they treat you the same. Make sure to write down the message you receive immediately. It’s not saved anywhere.
Game 9: Hide and Seek Part 1
There will be three DC540 founders at DEFCON. You can put your badge in “Boss Check” under the Phonebooth menu and it will search for our three Boss Badges wandering DEFCON. Your badge will light up when you are nearby a “Boss Badge”. We will occasionally post on Twitter our locations or hints. We maybe wearing DC540 paraphernalia. Find us and to get the code you need by completing one of the following: sing a lullaby/song out loud, show us a talent (idk, impress us), bring us a SAO for our collection or a cool DEFCON sticker or anything else you think would be worthy of winning this challenge (or just bribe us with a beer).
Game 10: Hide and Seek Part 2
Now find the another boss badge.
Bonus: For those coders/badge enthusiasts and all-around tinkers, feel free to explore our badge and make suggestions for code improvements or
Twitter Handles: @skullsinblack and @dc540baab
Discord: ‘Lyra the Damned#5380’ and dc540#3865
History of the Tree of Life Badge
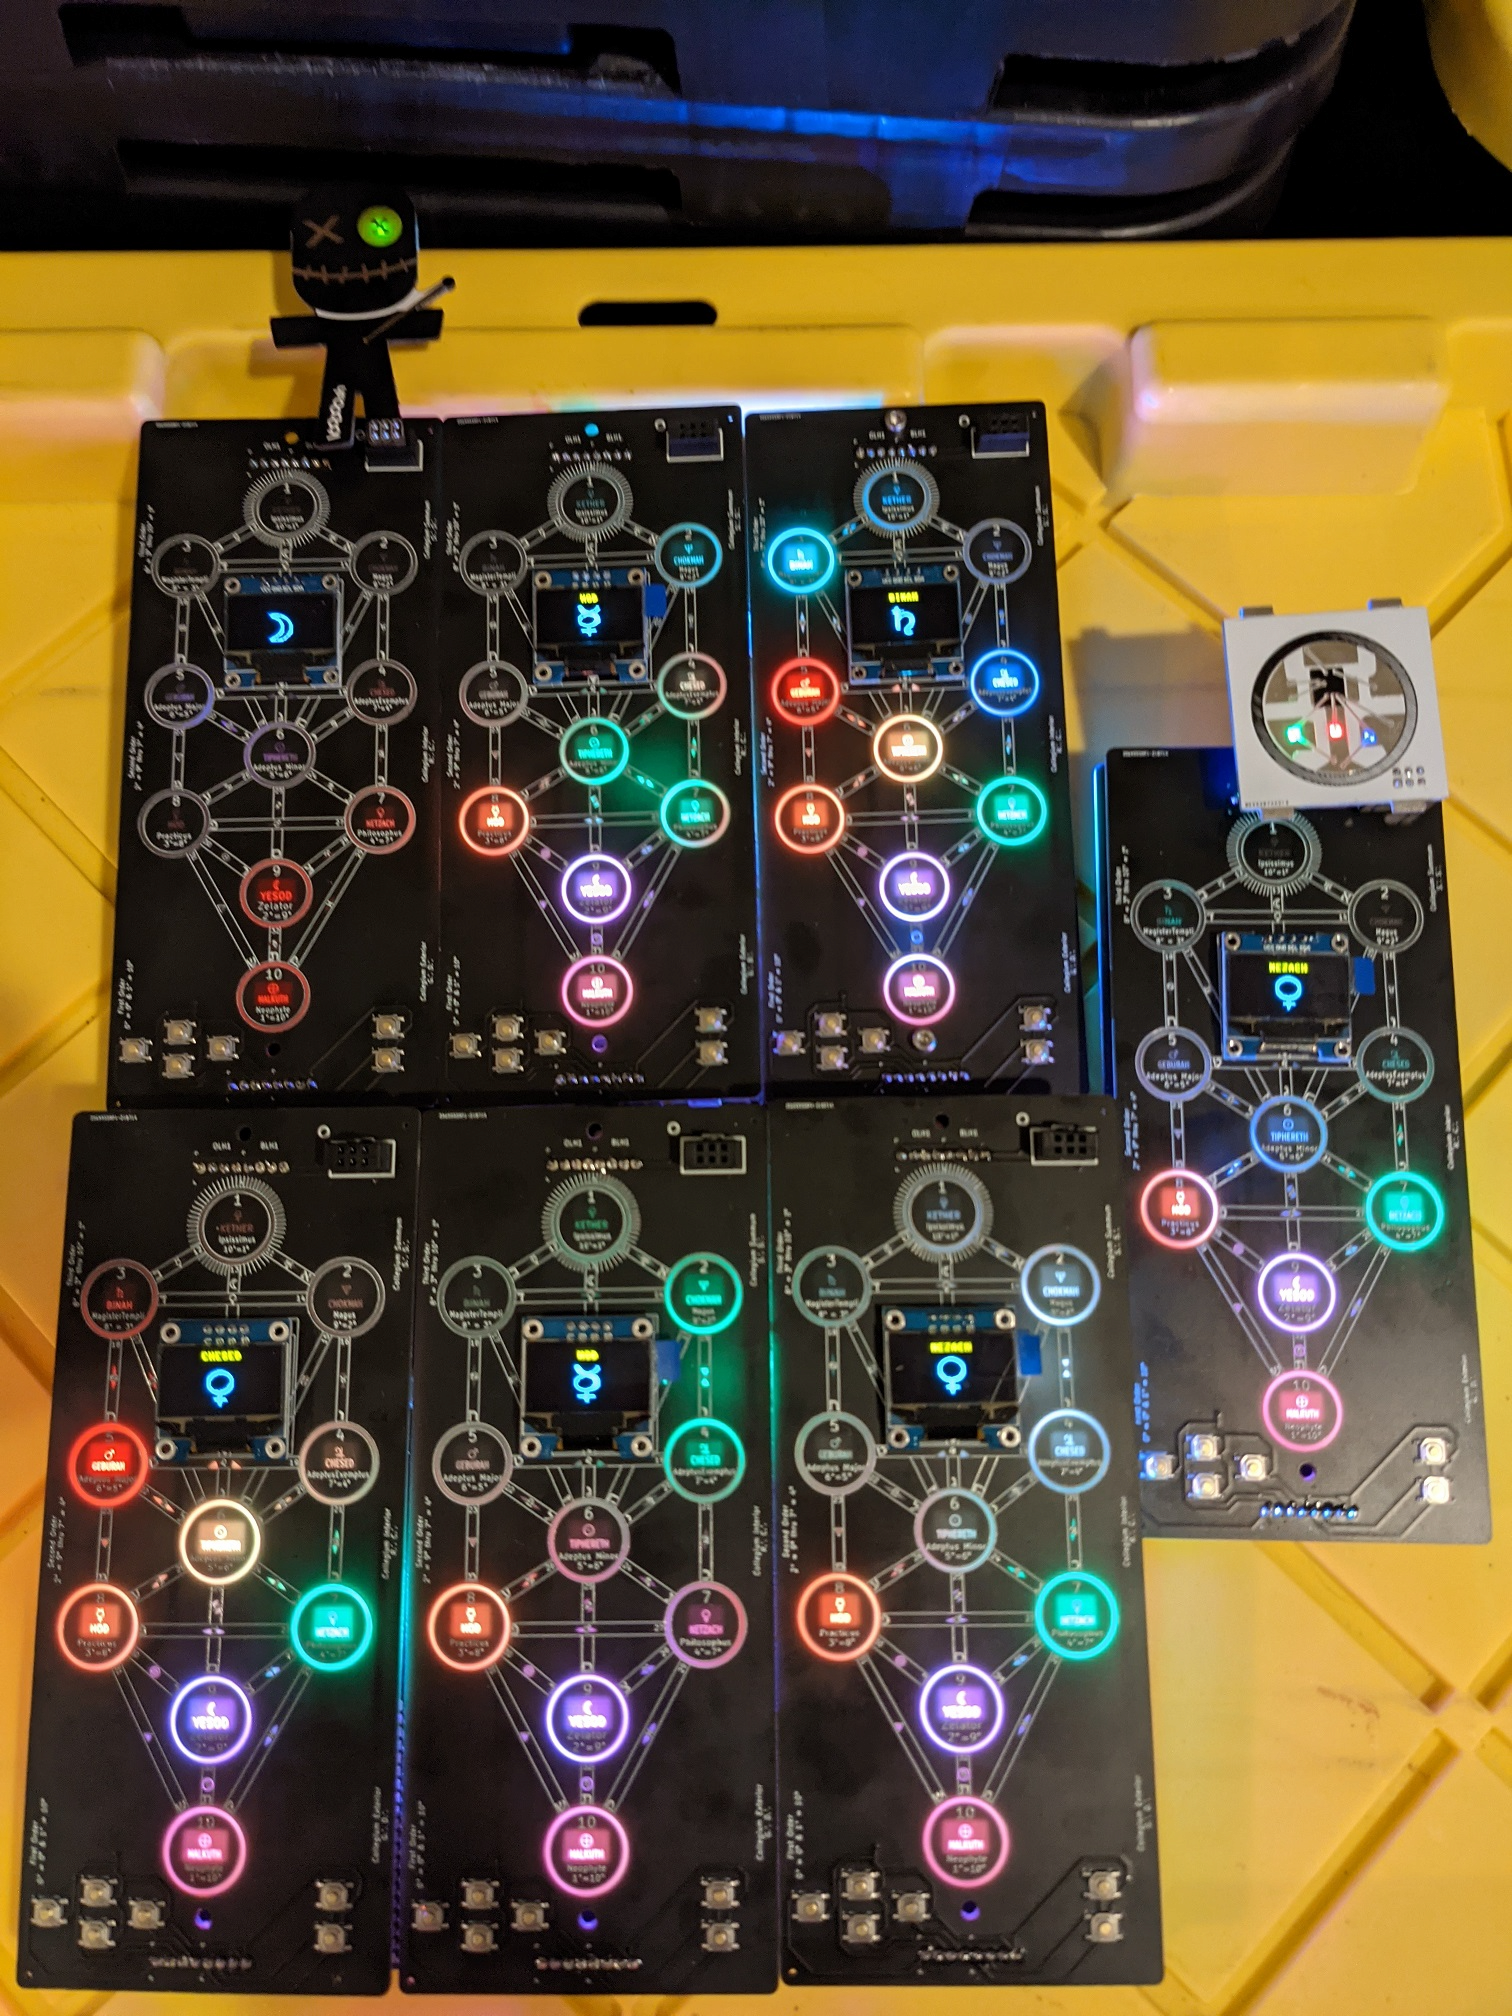
It’s time to tell the tale of how the DC540 “Tree of Life” badge came to be and memorialize its compiled history into one grand telling.
The badge had humbled beginnings as all great ideas do. Our crew had long wanted to conceive our own glorious badge. A badge that was both aesthetically beautiful but also offered more. We played around with several different themes that stretched from The Hitchhiker’s Guide to the Galaxy, Lovecraft, an Escape Room to Ham Radio.
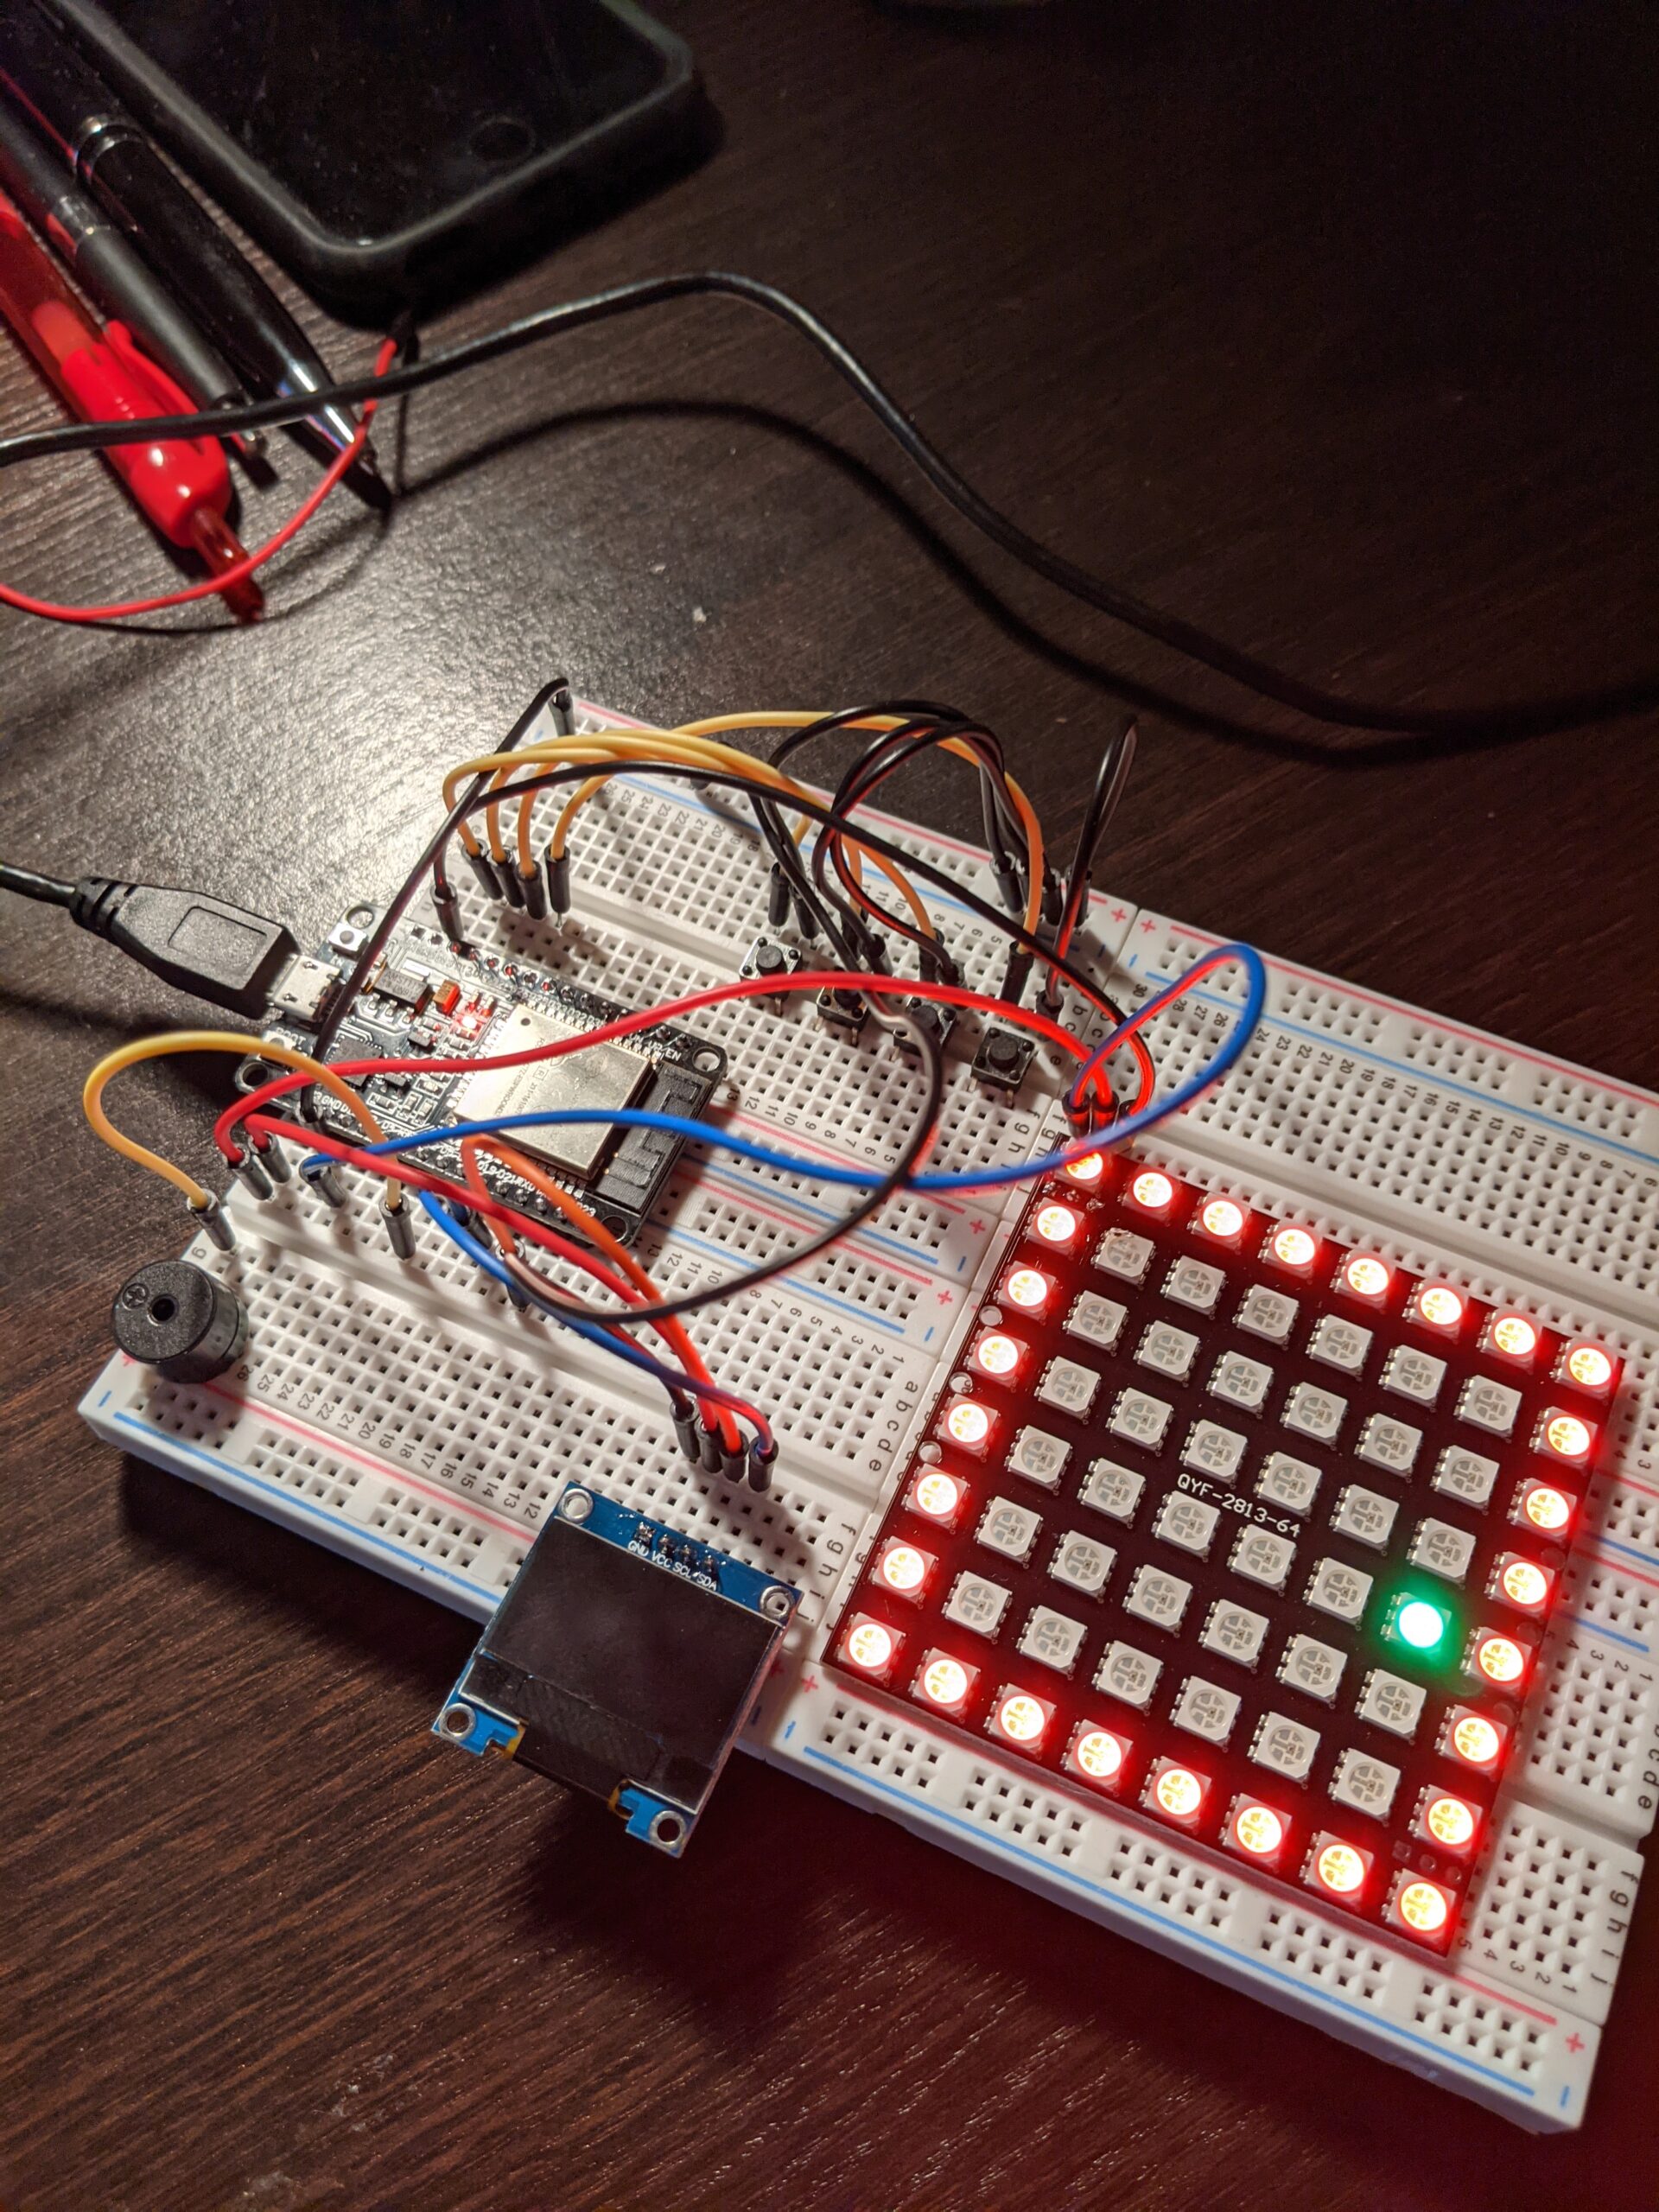
We quickly learned the importance of identifying which hardware we wanted to use early on. Initially we played around with the ESP8266, found that it wasn’t robust enough for our grandiose plans, moved to the ESP32, and then abandoned all for the pico. Our OLED screen changed quite a bit as well, with us at one point using a 1.8 inch SPI TFT LCD Display module. While lovely, cost and other practical implications kept us from pursuing a larger OLED. We were loath to have the badge burdened down with batteries and needed to keep it light.
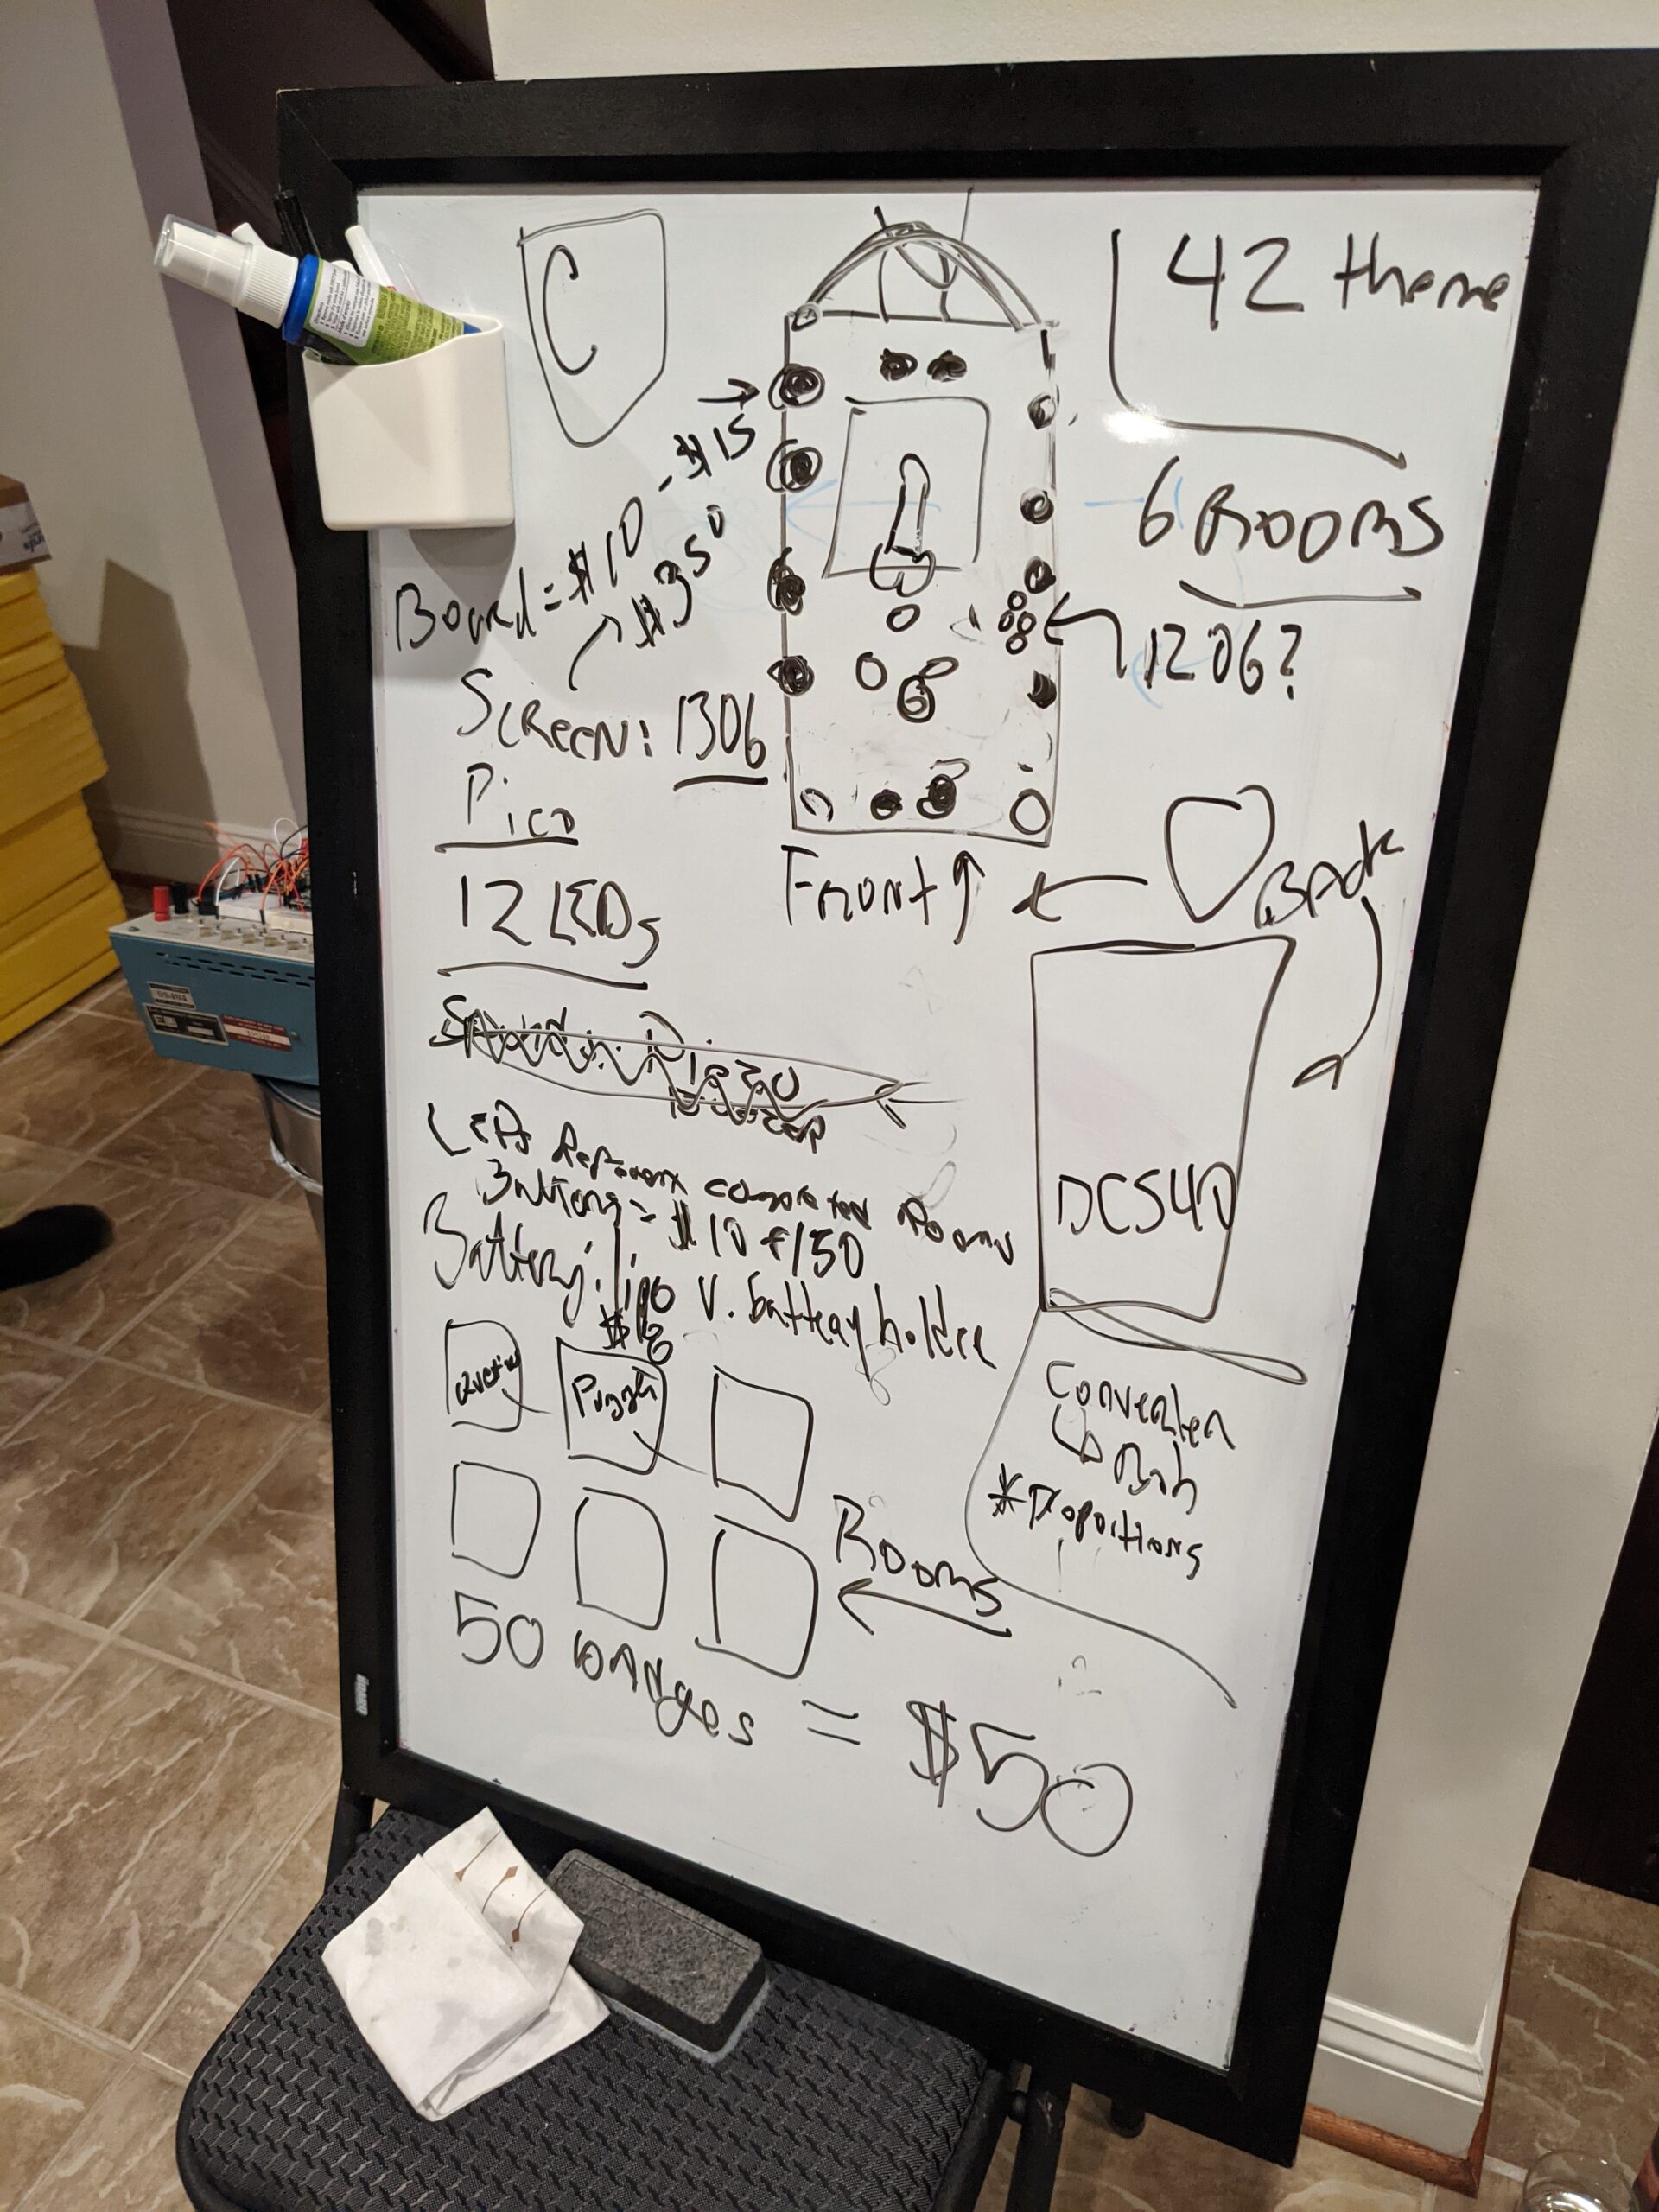
It was the end of May where we finally got serious. At one of our in-person meetings, the whiteboard came out and we started scribbling. In the next two hours, we had more forward progress than the last 6 months. We made some guesses on how much parts would cost, our general “theme” and some potential games. Shockingly, we were pretty on point with our cost estimations and were able to keep our final product at the $50 mark per badge.
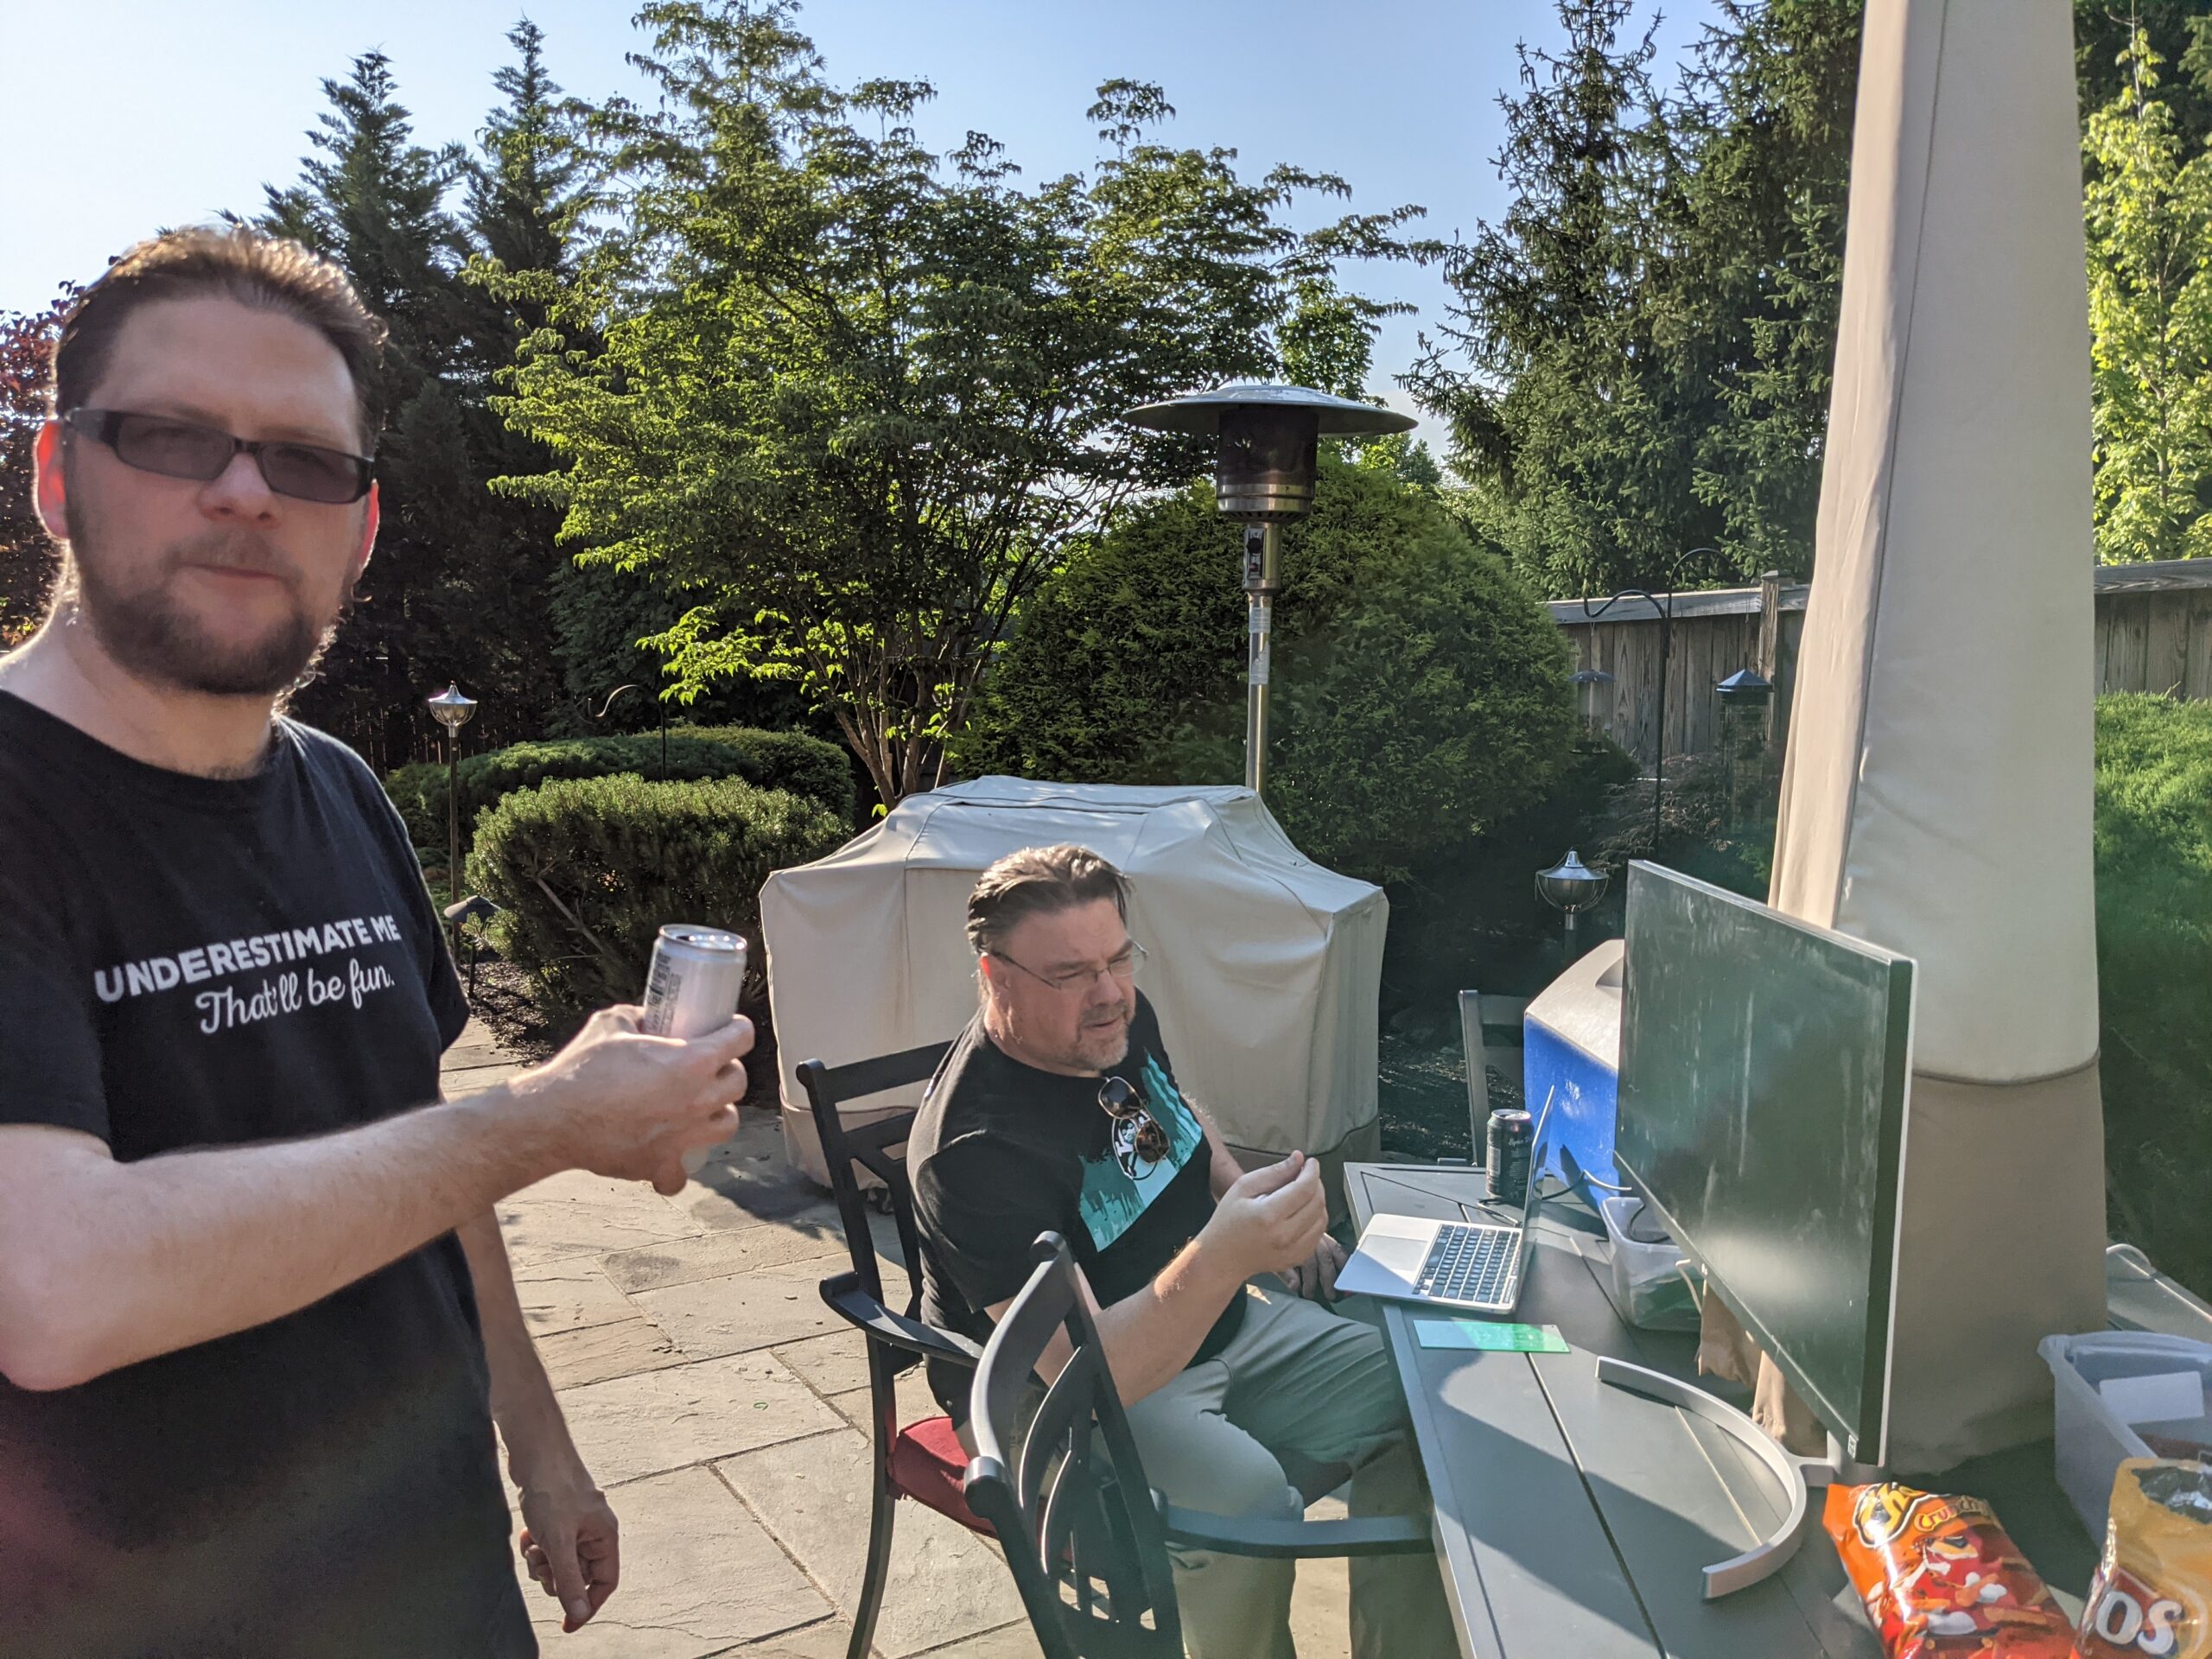
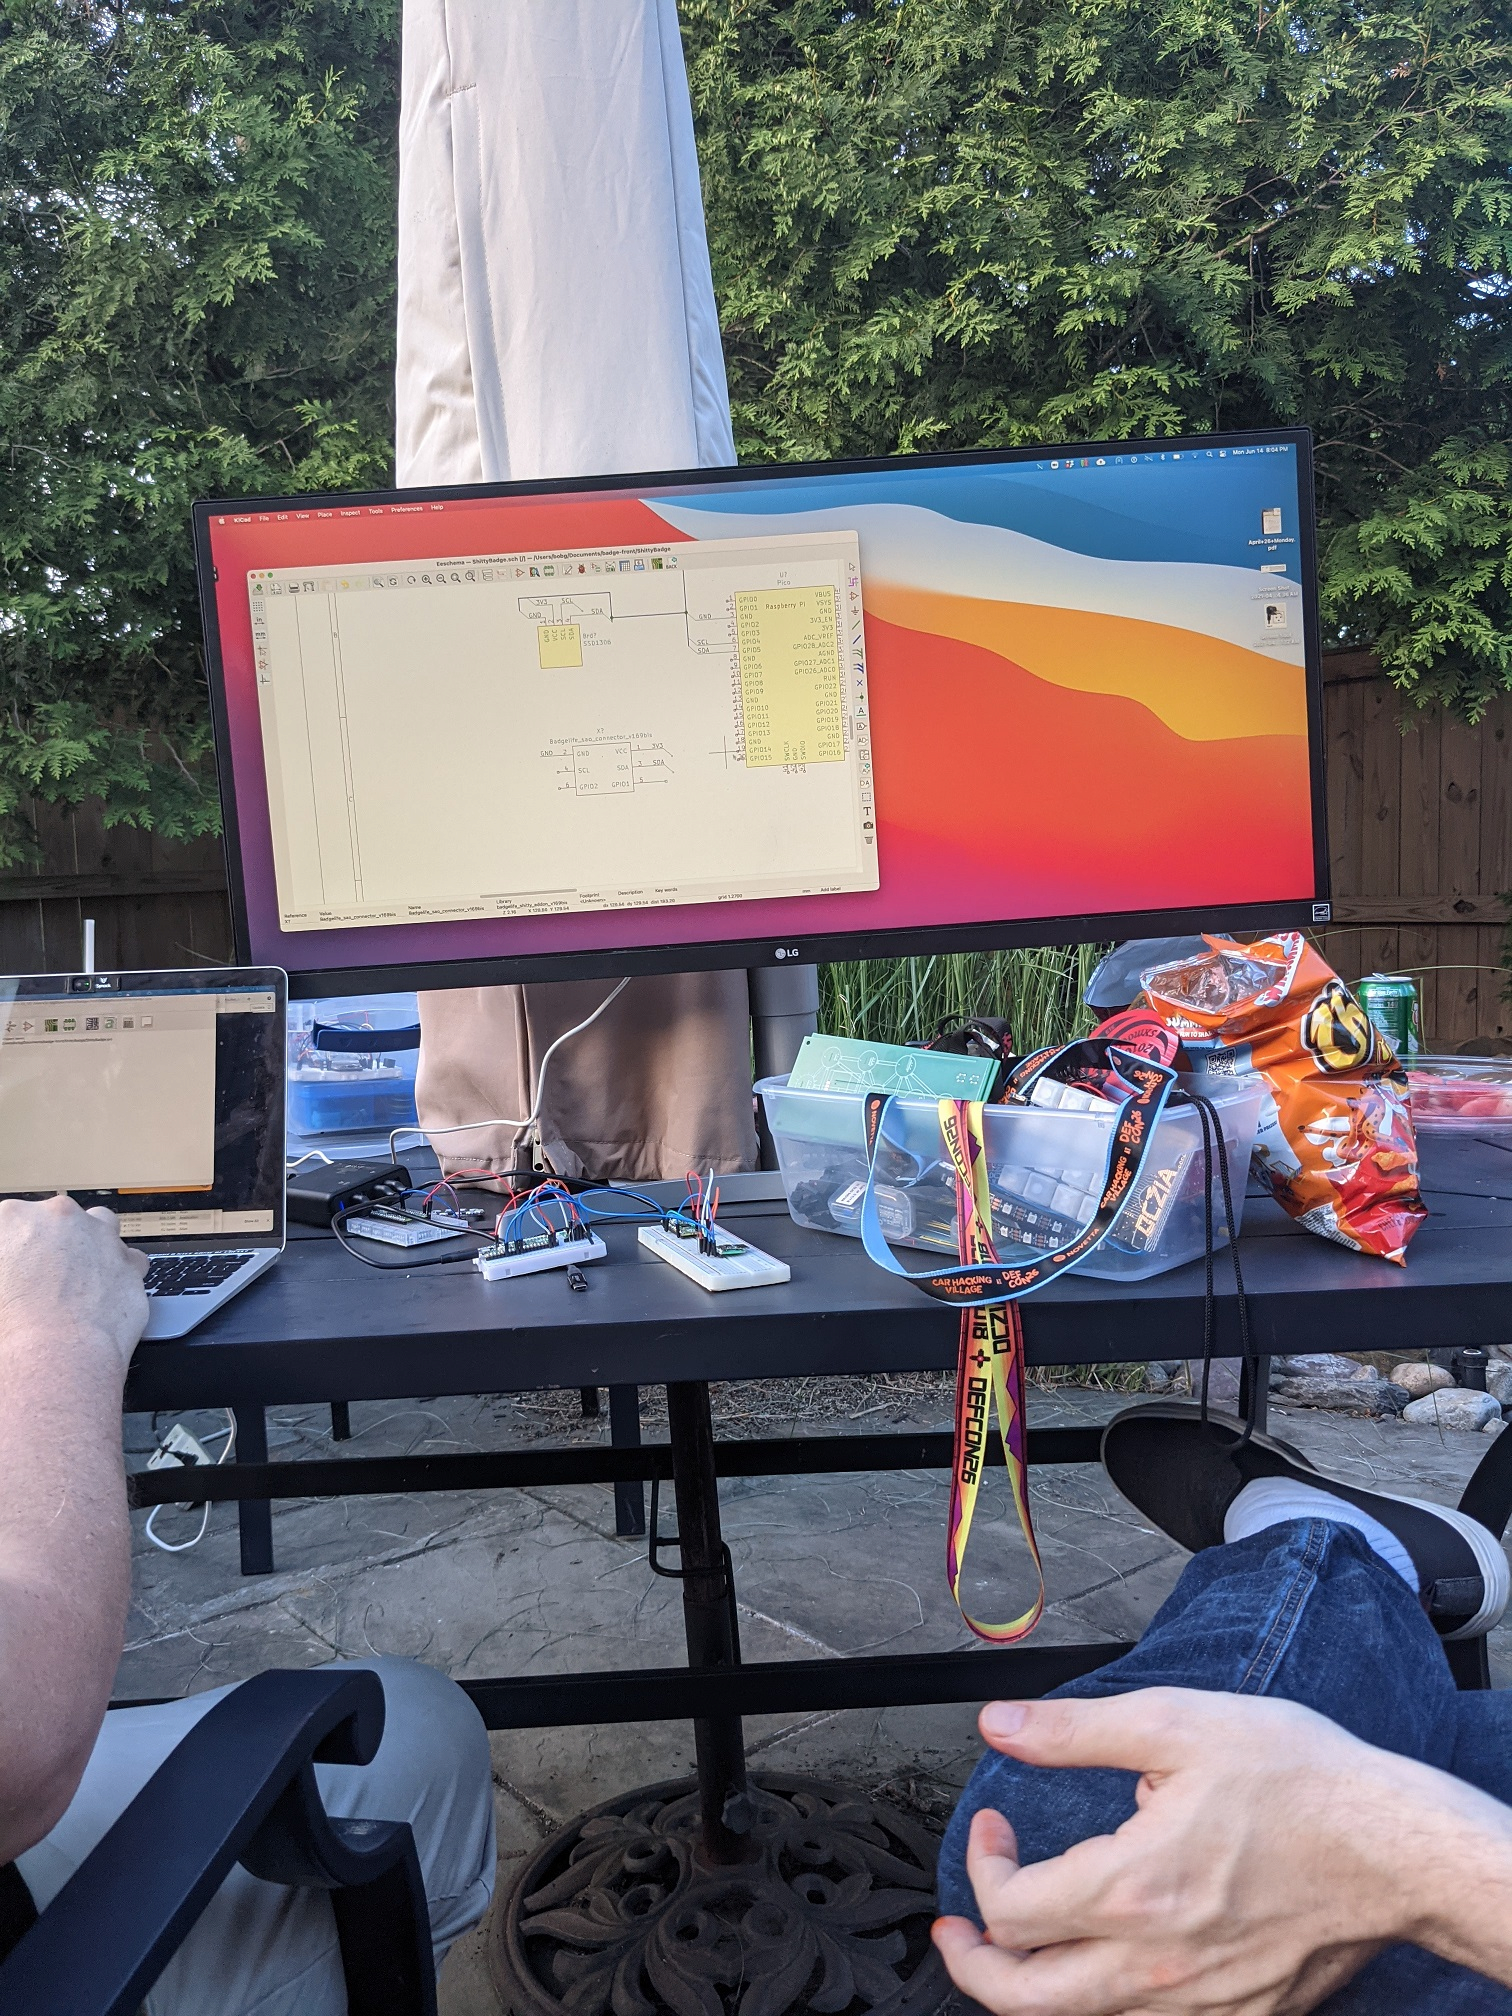
Bob played around with many ideas for the badge design and finally had inspiration with the “Tree of Life” theme, in a fit of creativity, he quickly produced one prototype after another, making each one a bit better. He used KiCad for the board designs and then gave us all a lesson on how he did it. Our imaginations went into high gear as we started planning our future badges and Shitty Add On (SAO) we could make.
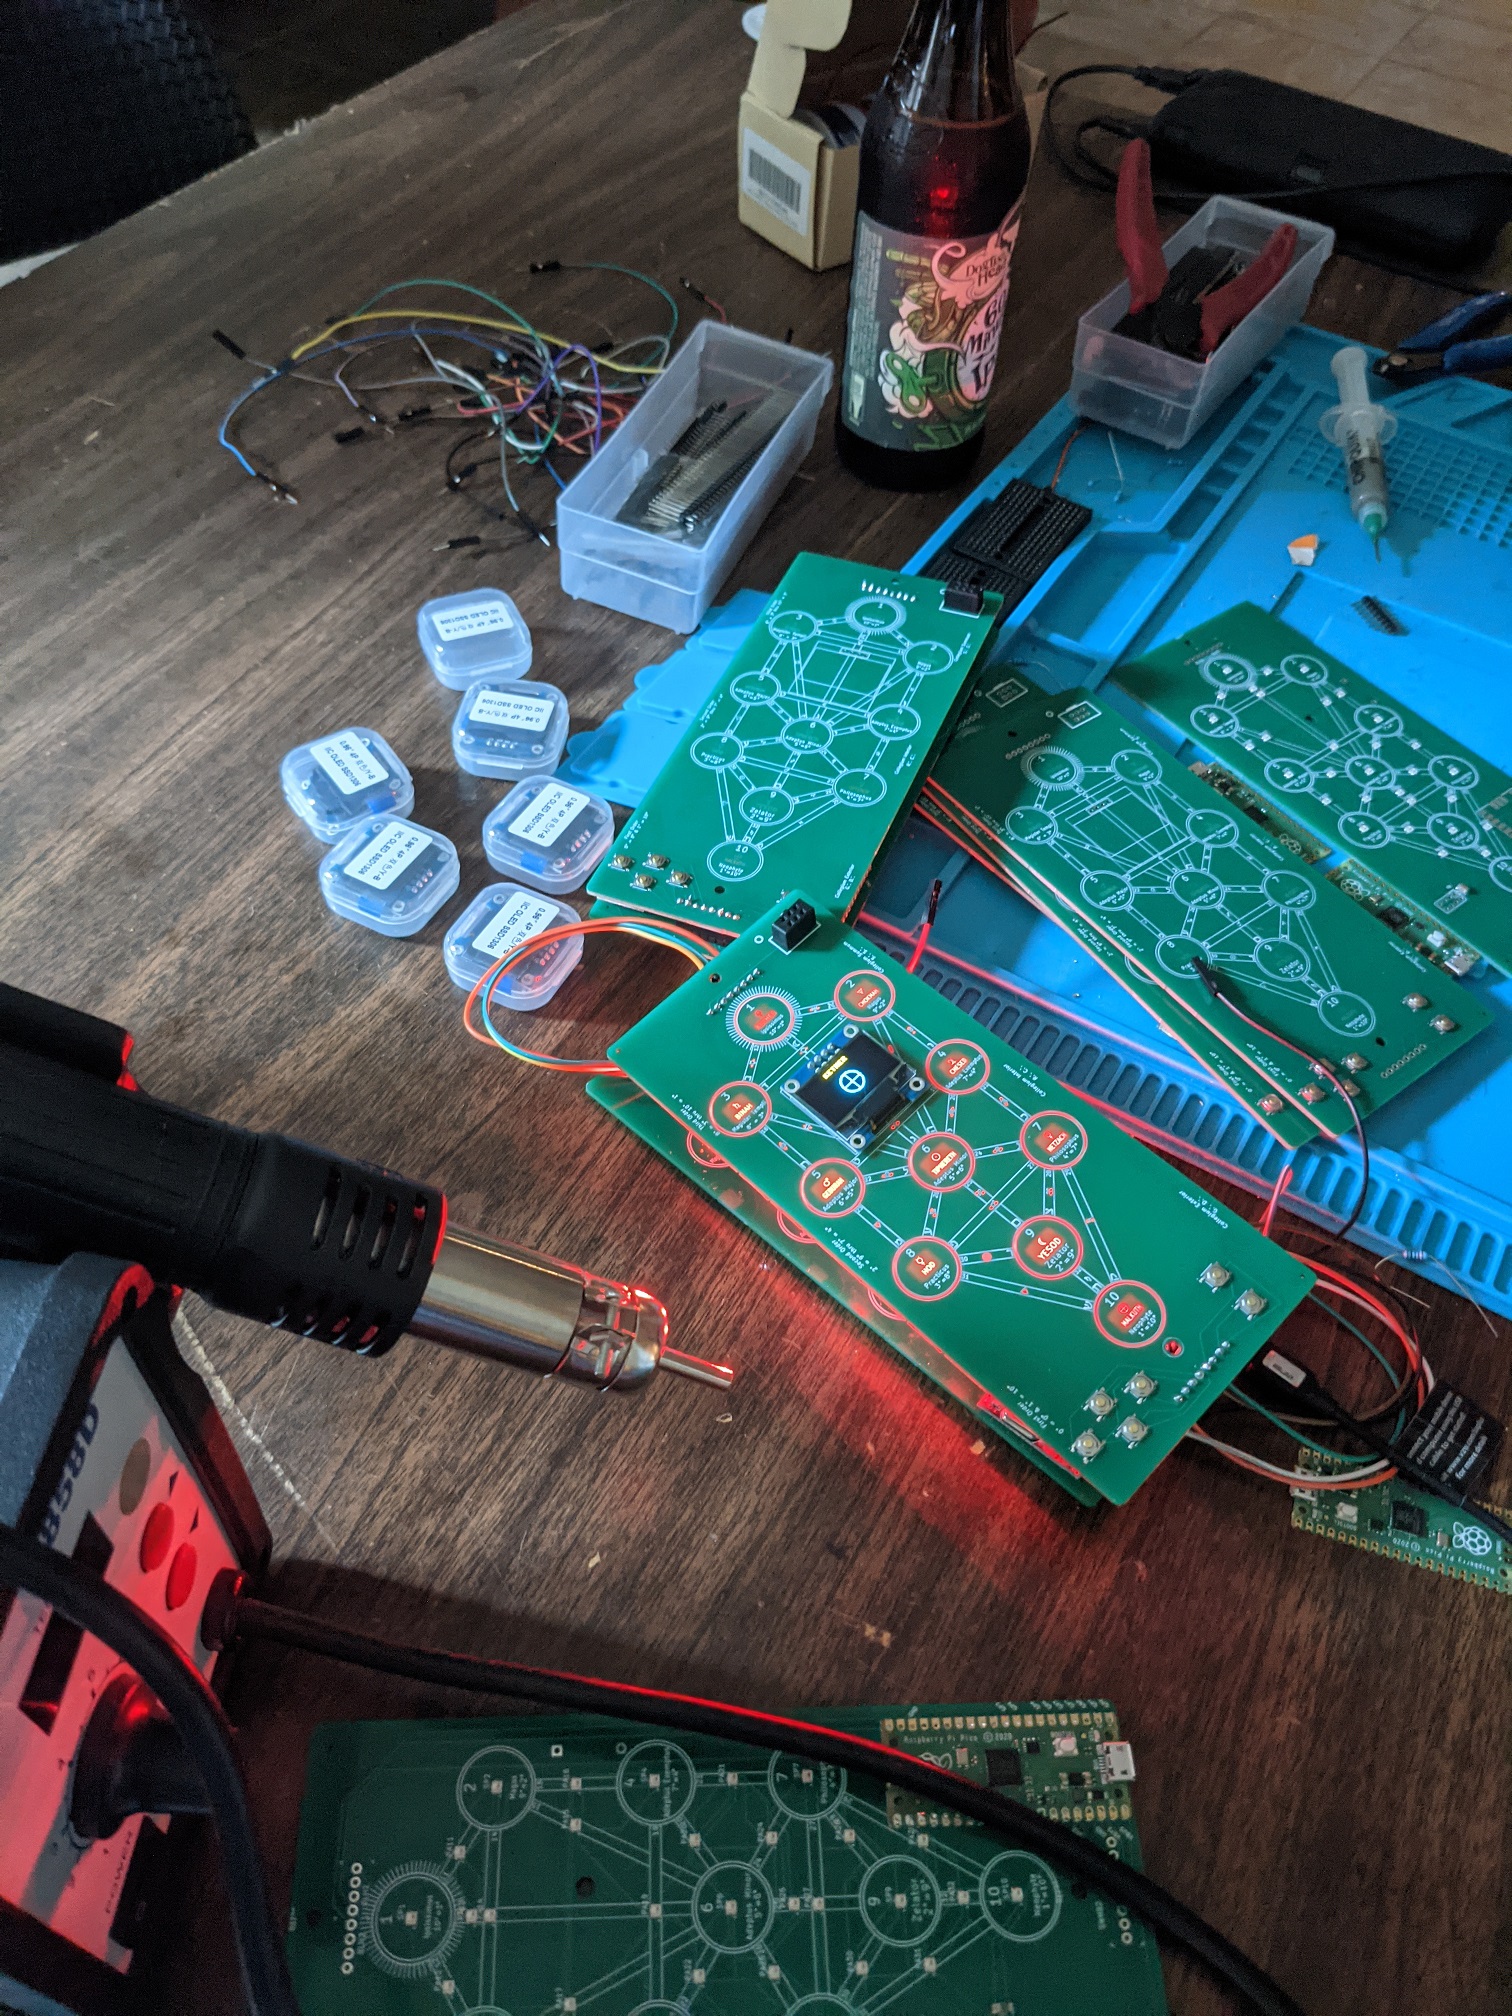
Our first prototypes came in unexpectedly quick which was a relief, we were a month in and had little more than a month to finish up the project. Kevin worked hard, rewriting the libraries and code, each time one of us fortuitously had another good idea that resulted in more work for him. Critiques included morse code had too much fade when flashing, the badges didn’t just need to send messages to each other but also have default messages hidden inside, badges had to flash in a spectacular manner when paired with a Boss, and I needed more menus! Oh, let’s not talk about the great hash wars where we debated the merits of each encryption and nearly stopped talking to each other. At one point, I swore Kevin hadn’t slept for a week and had developed an uncontrollable twitch and would yell “no more” every time I spoke up, even when it was just to say hello.
The development of the games was especially frustrating as the goal was for the games to be very achievable by new DEFCON attendees, offer a way for people to interact with each other but still be challenging. I learned a lot about steganography, stegdetect, githubs Steganography online, using WordPress, a member helped by created a Hitchhiker’s themed crossword puzzle, the intricacies associated with morse code (using ‘dah’ and ‘dit’ over ‘dash’ and ‘dot’ and so much more.
One particularly important lesson was learning to speak “developer”. What made sense in my mind didn’t necessarily make sense to our developer and how he envisioned code. There was many nights of butting heads, exasperated sighs and outright frustration over the lack of communication.
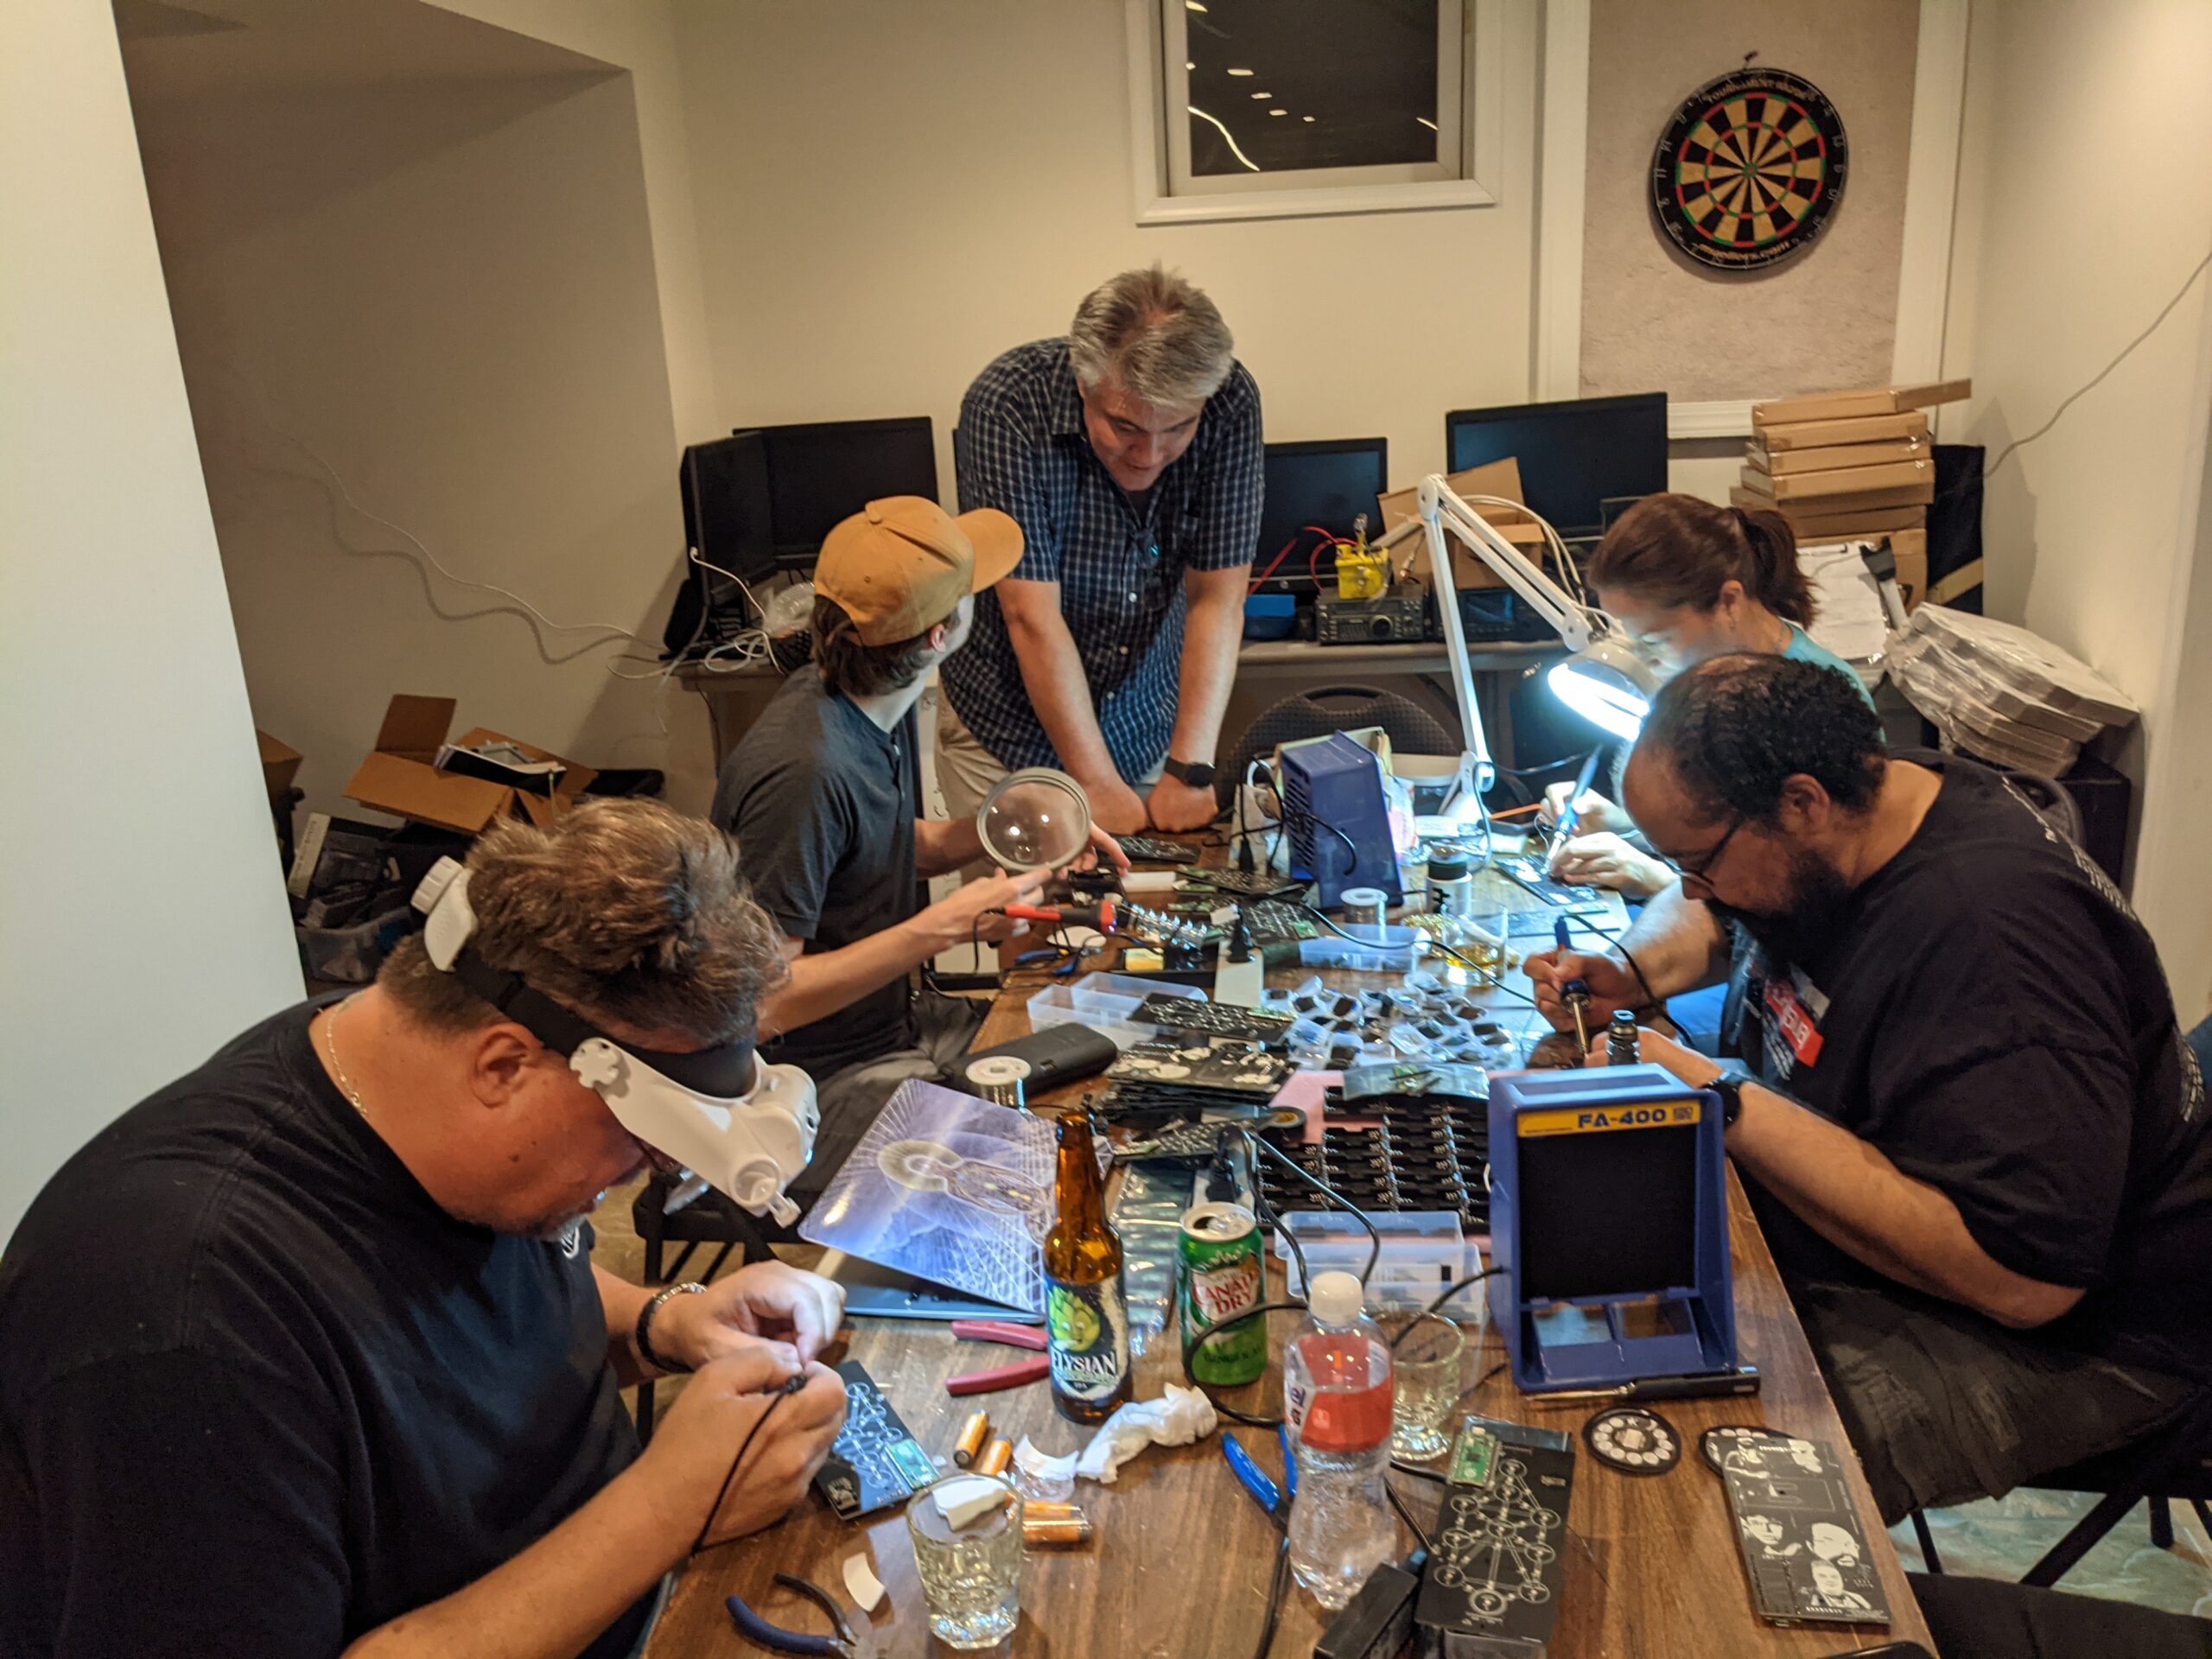
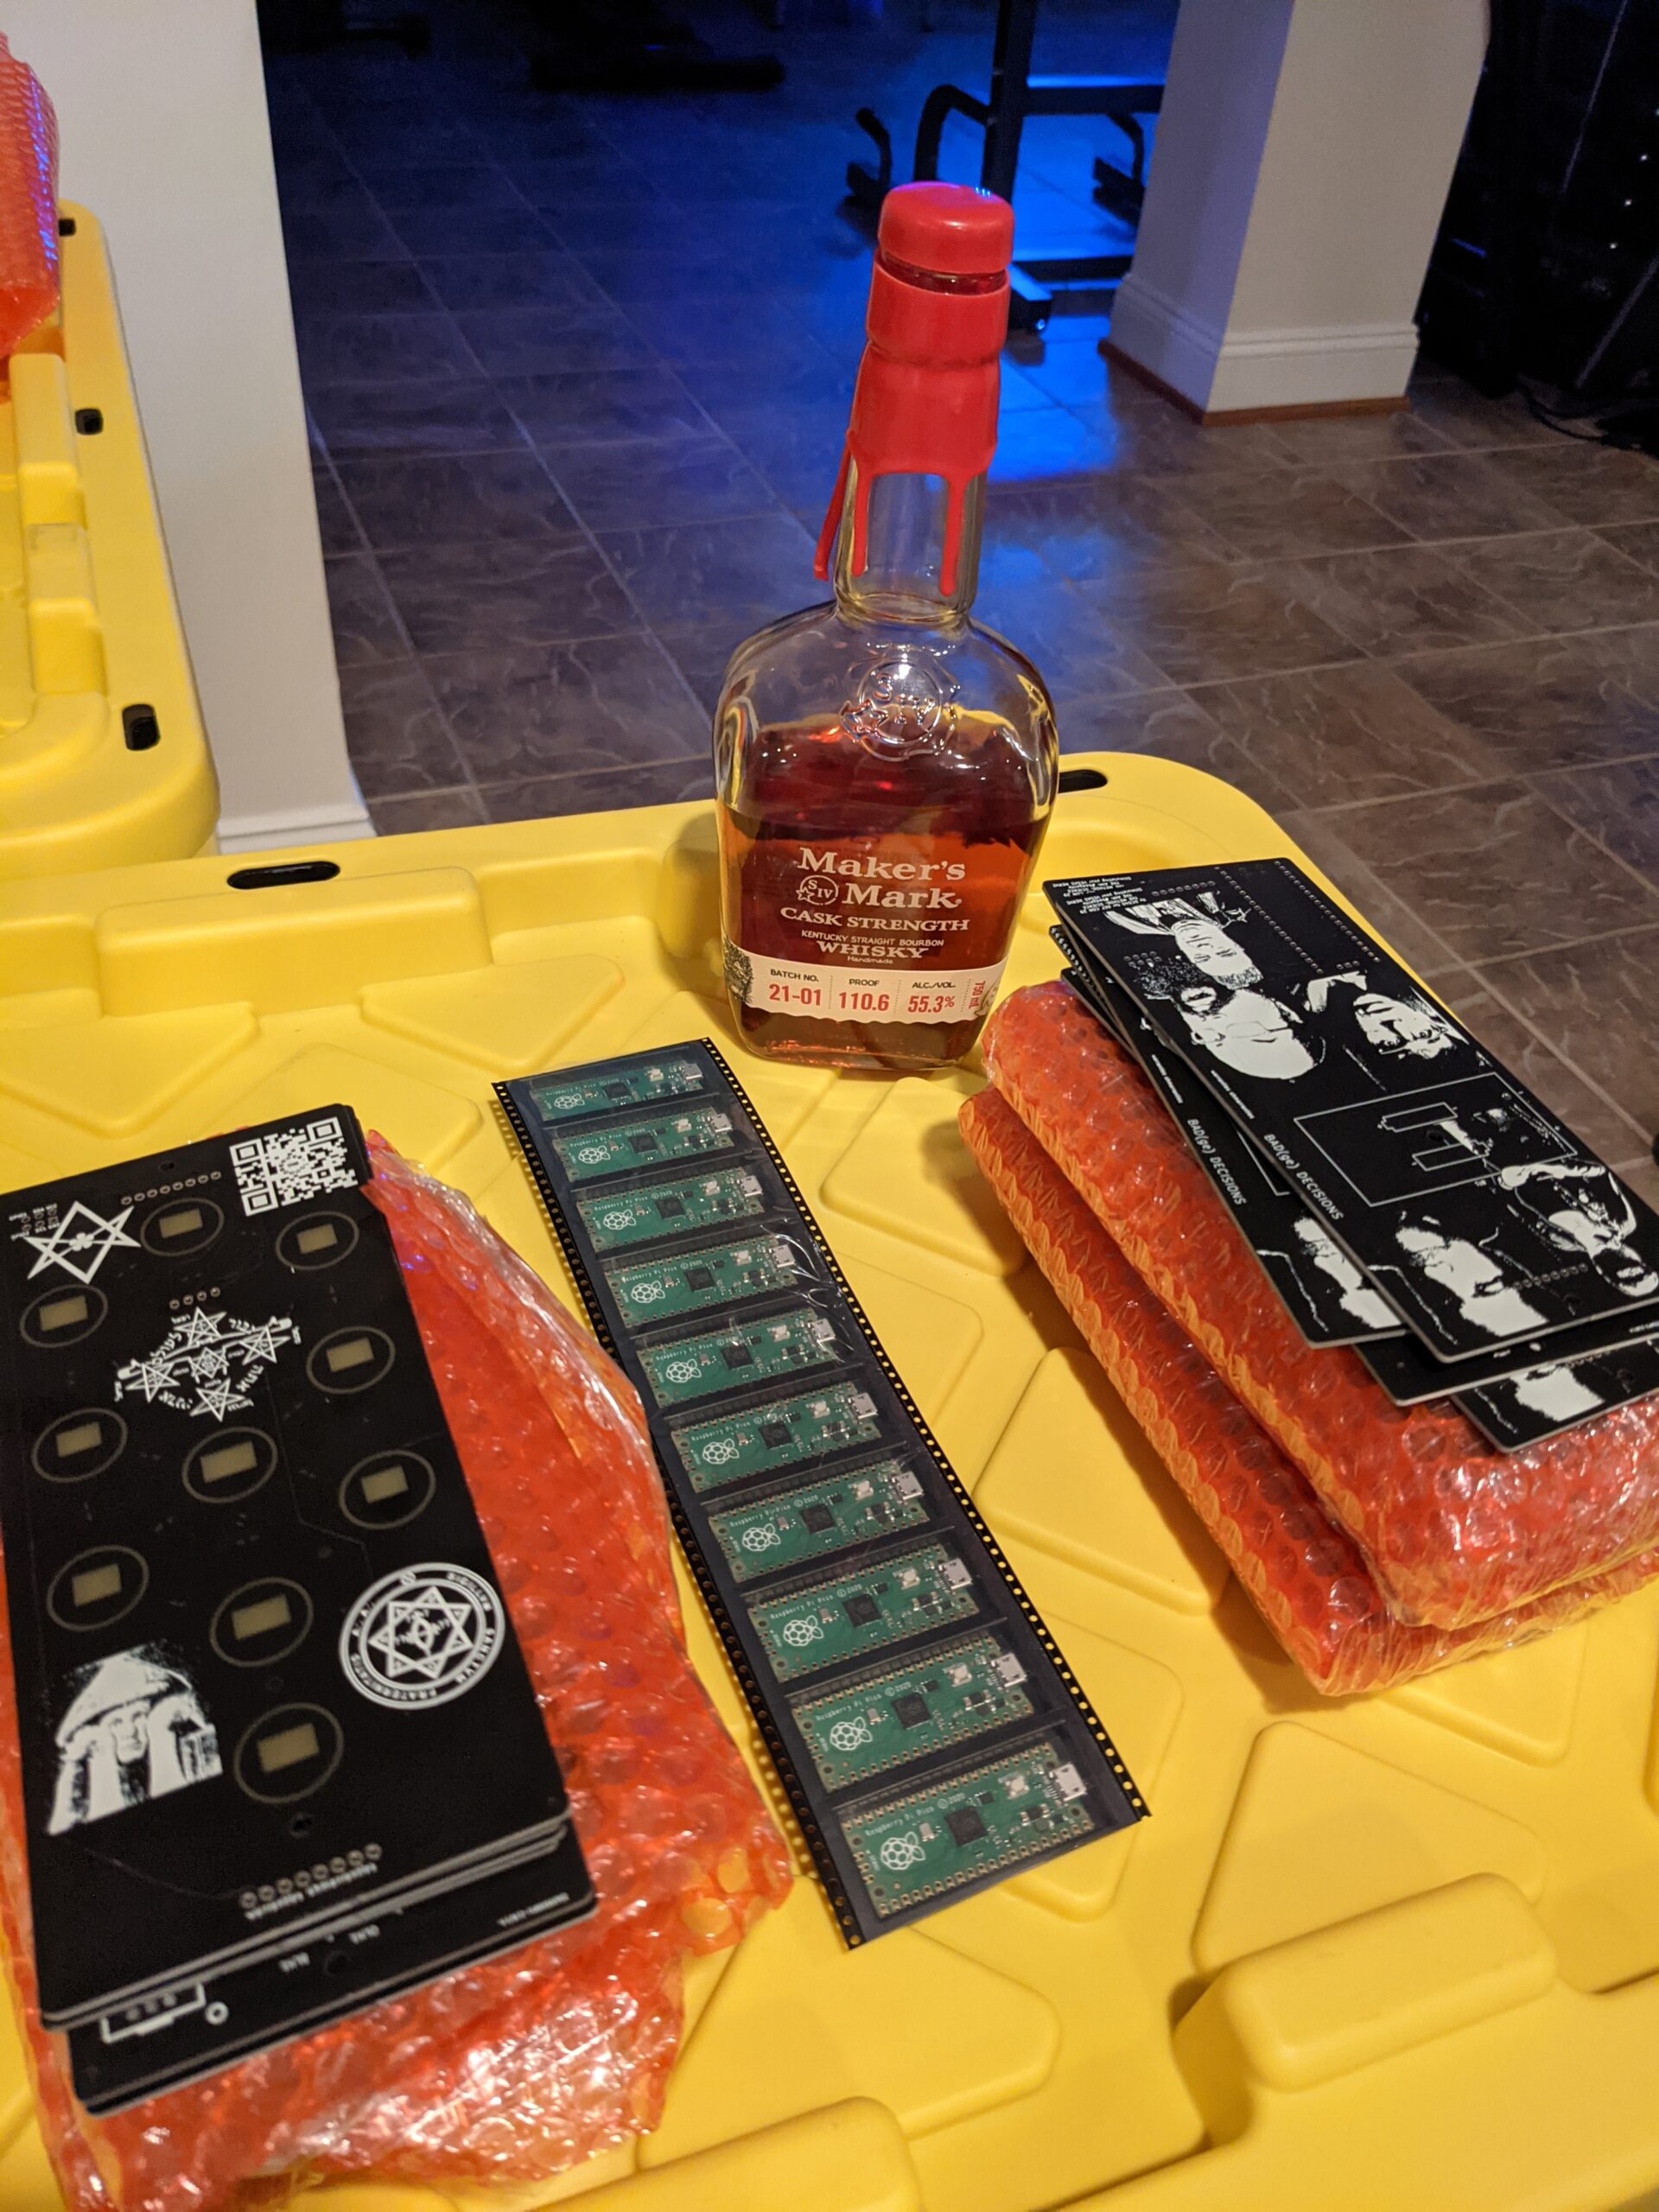
Finally we had the boards, now it was just time to solder and assemble them. In these desperate times, we called everyone together and had one large soldering party, troubleshooting any connections that just weren’t right, cursing, and drinking more whisky to sooth our burnt fingers.
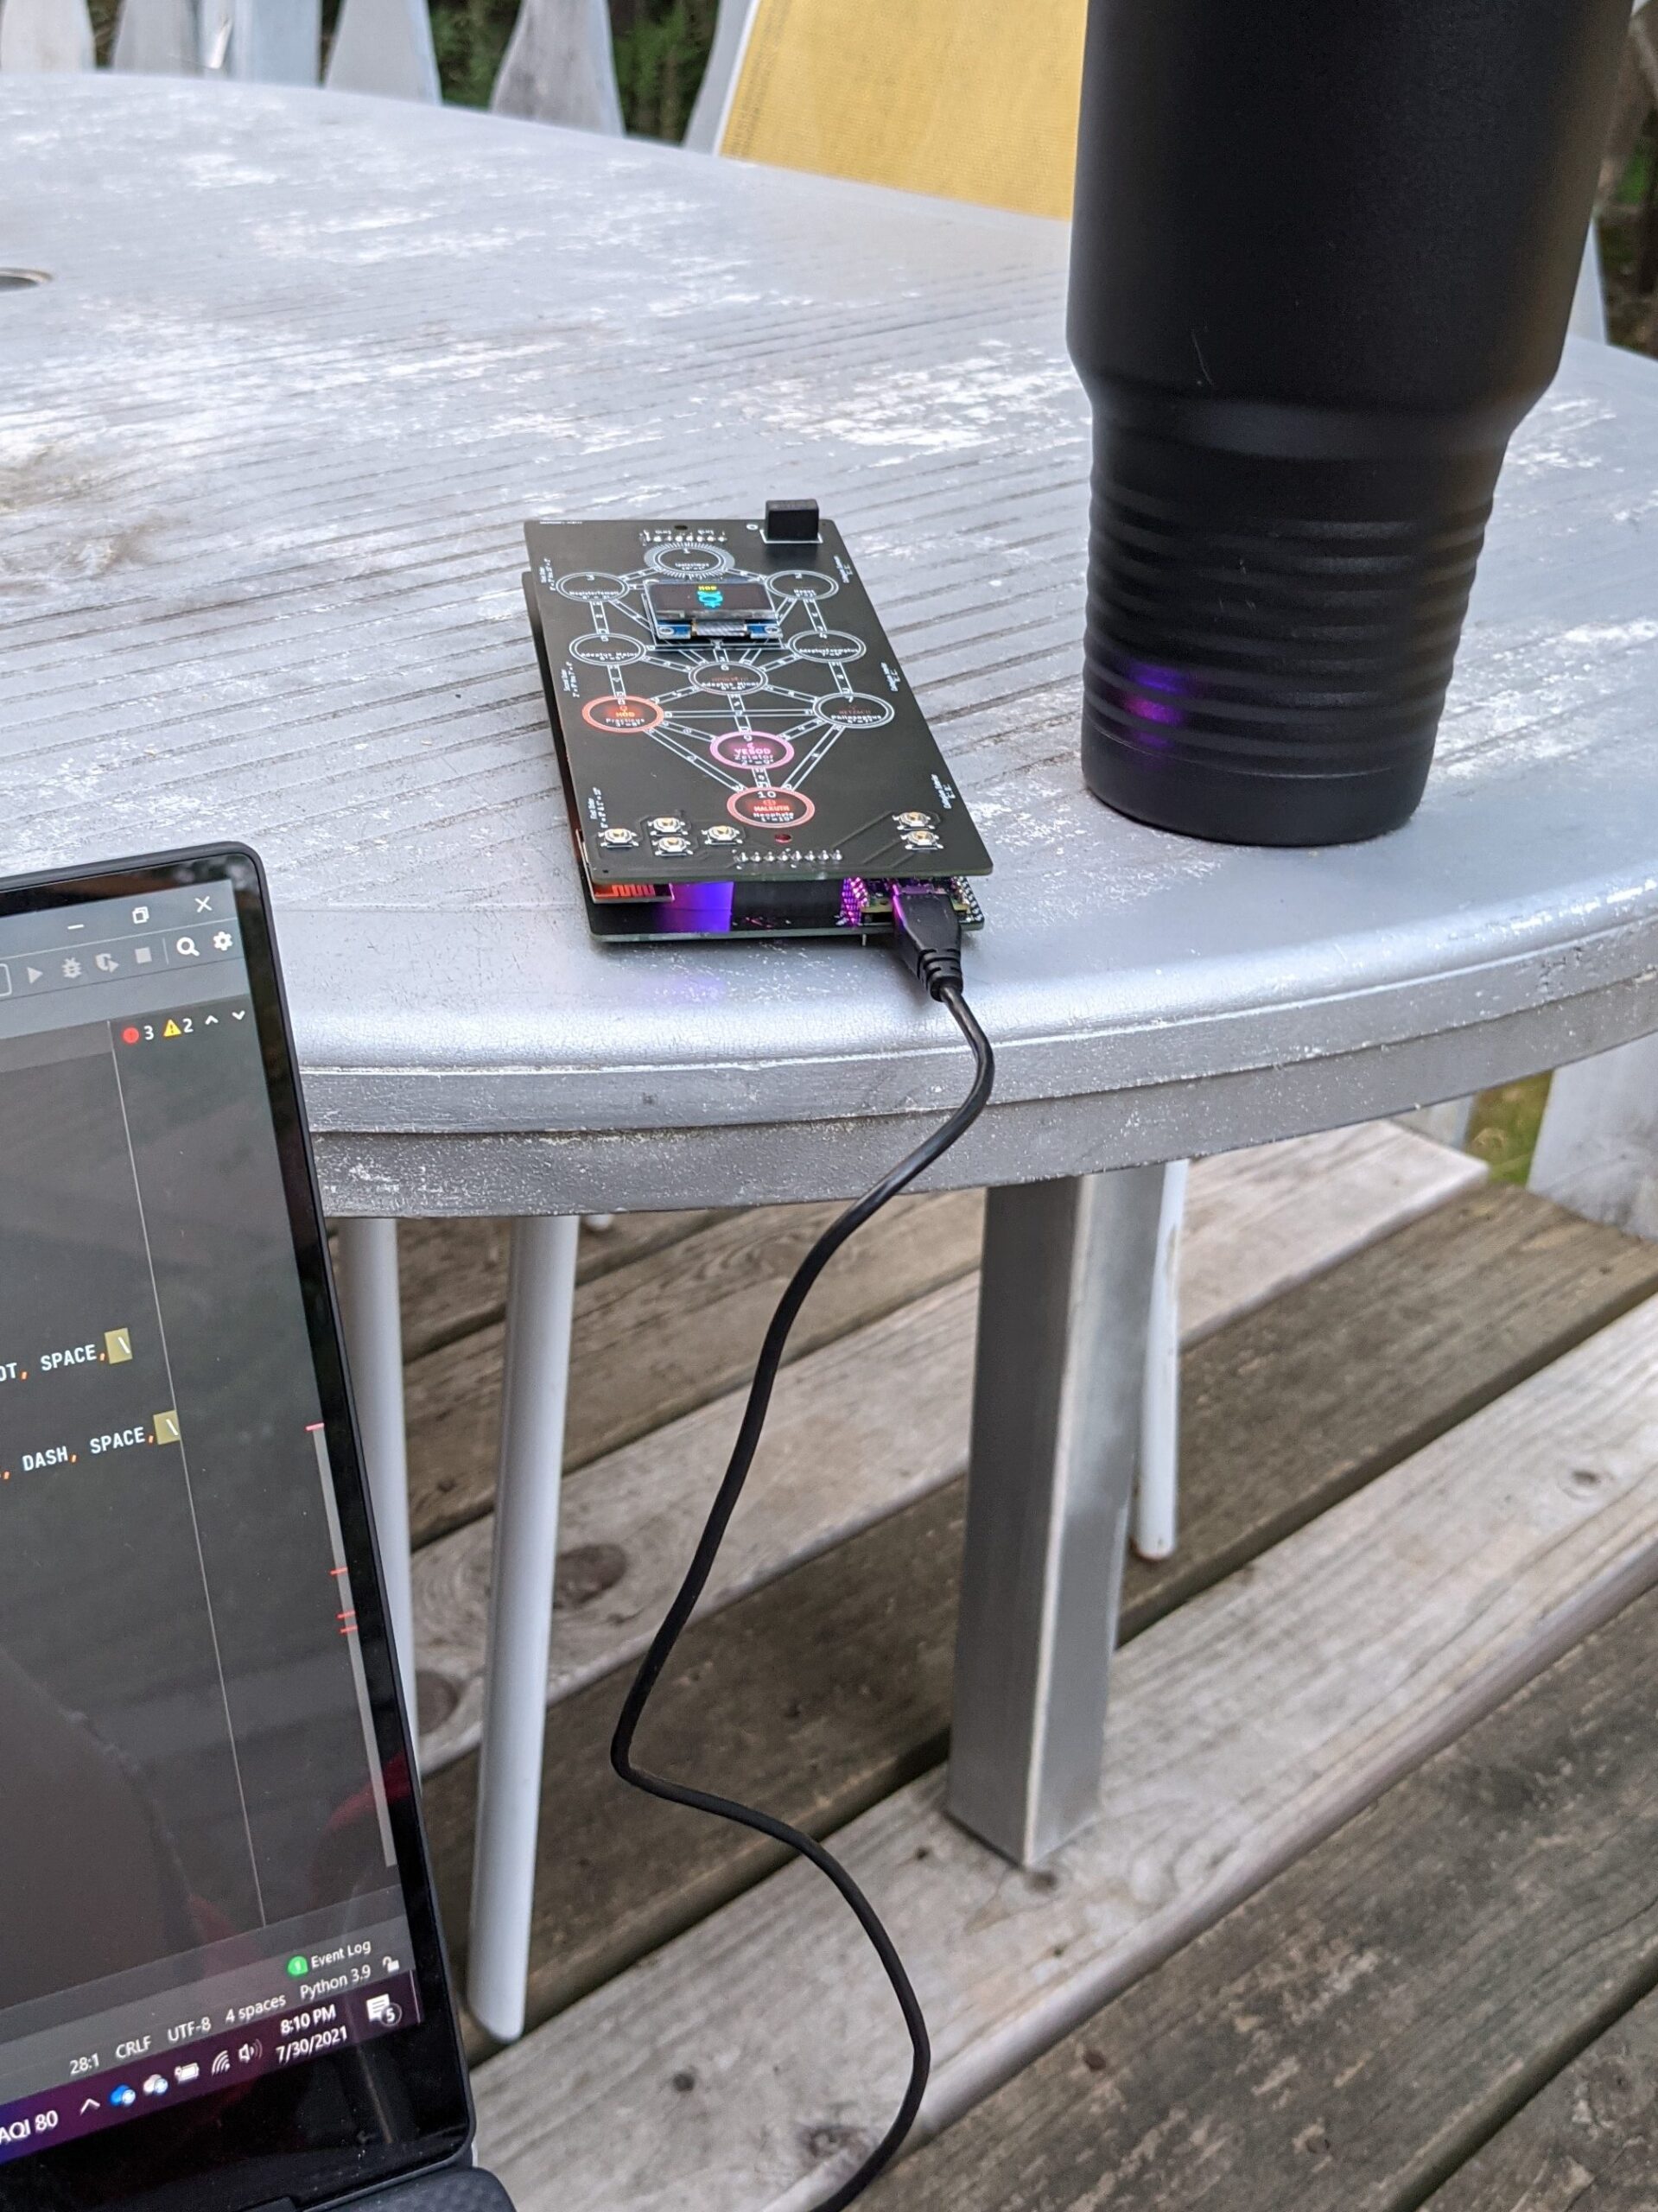
Now the last step, playing the games, traversing the rooms in the badge and seeing what would break. I hid away in a the Shenandoah Mountains for a weekend and did nothing but drink more coffee, try and break the badge and code, and debug away. With only five days before we would leave for DEFCON, we had a product we all agreed was magnificent. Our last Monday before we left, we double checked each bag, wrapped them in bubble wrap and carefully placed them in a baggie with batteries, stickers and a lanyard.
Our last task would be to hand them out at DEFCON and enjoy.
Well, except we ordered 50 more badges just a week ago, so it seems we will be packing those up and shipping them out once we get back.
Oh, and our war-torn developer just happened to ask about our next big product…..he’s already got a suggestion and we’ve begun to brainstorm away.
#game3
Post 2: Game Rules for the DC540 “Tree of Life” Badge
****** DO NOT PLUG IN THE BADGE TO A USB IF THE BATTERIES ARE INSERTED ******
If the power switch is off, it is probably fine, but use your judgement.
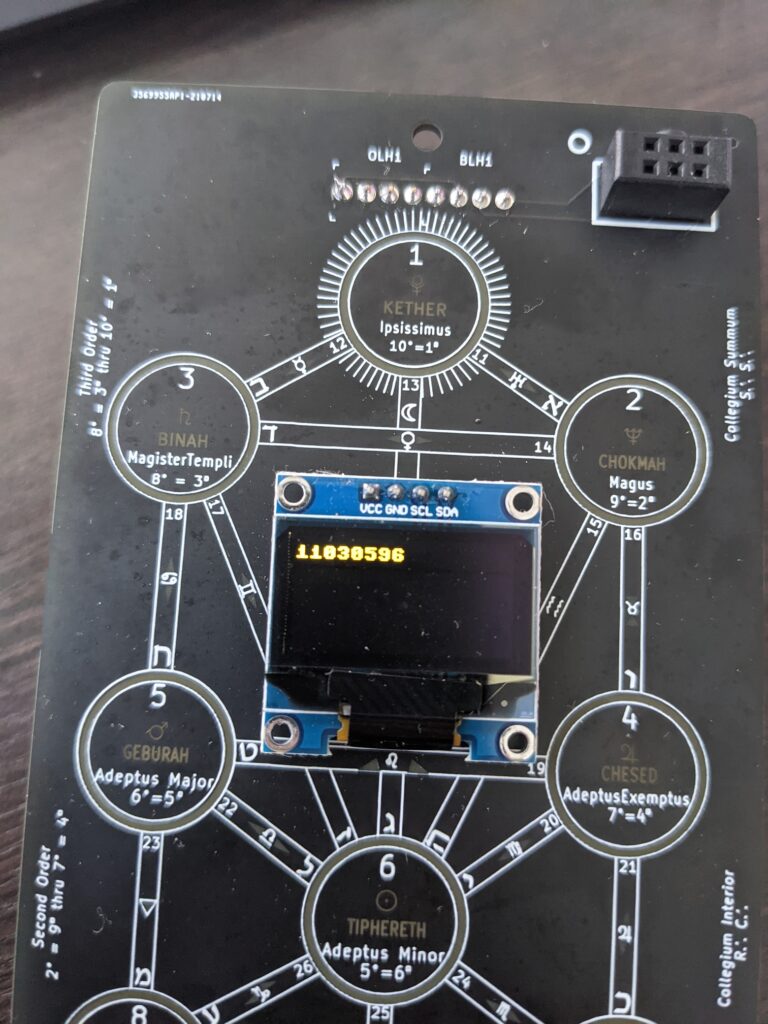
The DC540 Tree of Life badge has ten interactive games that can be played during DEFCON. The games vary and some can be played on the badge (morse code, ham radio questions) while others are interactive (conducting a scavenger hunt, lock picking, decoding ciphers). An explanation of games and more detailed instructions will be posted on the DC540 website Friday morning August 6th at 00:01.
Overview
The games do not need to be completed in a specific order.
Five of the games will require you to send us proof of completion. These games are:
– Game 1 (Crossword Puzzle)
– Game 2 (Lock Picking)
– Game 5 (Scavenger Hunt)
– Game 9/10 (Boss Pair)
For Games 1, 2, 5, 9, and 10, the game instructions will provide direction on how to obtain the answer but make sure to always include your badge number in your correspondence.
The other five games do not require interaction with a DC540 member to complete. Completing the game will either automatically unlock the badge or provide you with the answer.
Include the following hashtags on anything you post on Twitter when you solve a challenge.
#dc540 #badgelife #dc540scavengerhunt
Alternatively, you can post on our DC540 Discord Channel “dc540-tree-of-life-badge” or message us on Twitter or Discord (preferably both).
Twitter Handles: @skullsinblack and @dc540baab
Discord: ‘Lyra the Damned#5380’ and dc540#3865
As the game progresses, hints and other updates will be dropped on the dc540 Twitter page (and that of the two main characters) if certain challenges are proving too difficult.
When all ten spheres are completed, the badge will FLASH RAPIDLY FOR 5 minutes. Be advised, that it is intense, and be cautious if you are nearby other people as this has the potential to trigger seizures or epilepsy. Send us a picture of all ten rooms lit up from completing the challenges. We will announce winners on our Twitter DC540 Page.
Understanding the Badge:
There are six buttons on the badge.
– The four buttons on the left function are: Up, Down, Left and Right
– The Left Button allows you to erase a previously input character.
– The Right Button will allow you to “lock” in each character.
– Up and Down scroll through the characters and numbers.
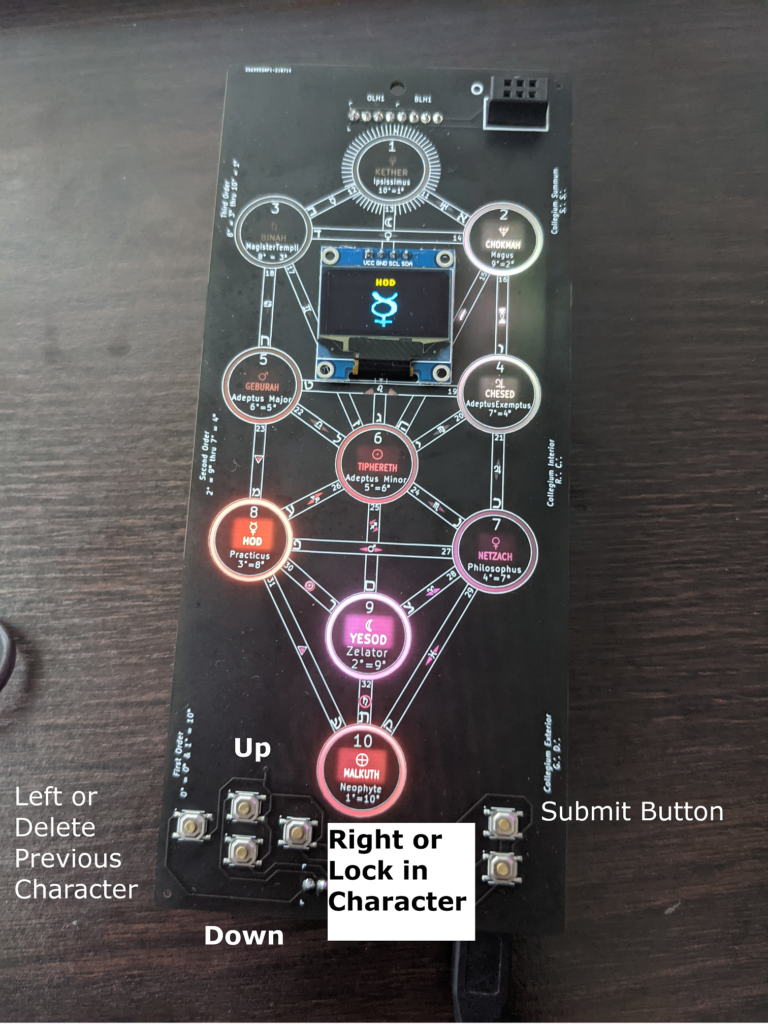
There are two buttons on the right. The top button allows you to submit, and the button has a surprise but IT is also there for you to get creative.
Entering Answers:
When you complete each game, you will get a case-sensitive answer.
– Go to http://dc540.org/question.html, select the question number, the answer, and your badge number.
– You will get back an eight-digit number that is unique to your badge.
– Write down or save that number.
– From your badge, go into that corresponding game, and enter that eight-digit number. You will need to “lock” in each digit and then submit. If you for the answer correct, the badge will correctly flash and blink for that challenge.
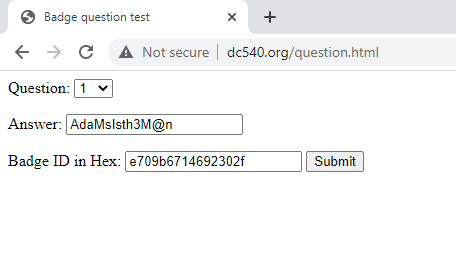

The answers are case-sensitive. Once you complete a challenge and put the answer into the badge correctly the “room” lights up.
Prizes:
We do have prizes for 1st, 2nd, and 3rd place. More information to come.
First Place: 100K DEFCOIN
Second Place: 10K DEFCOIN
Third Place: 5K DEFCOIN
Thonny, MicroPython and Pico Inside Out
We’ve been playing with the Pico over here. Some of us have been going more in-depth than others. And since everyone starts with a different set of experiences, a historical perspective, you might say, we all sort of hit it from another angle.
A common angle to come at this unique and delicious combination is from a general familiarity with Python. That’s where I came from. I had written Python scripts to do various things. I had taken it to the next level and written tkinter visual apps for the Raspberry Pi 3 and for desktop OSes.
But I quickly got the understanding that MicroPython is not full Python. Is it safe to say it’s a highly-specific subset of Python?
So obviously my first question is, “what can I DO with it?”
So, you could go out and find things that have been done, and adapt them, and we’ve all done that.
Or…
You could ask your Pico directly.
Go install Thonny, if you haven’t already, and get it talking to your Pico. I’ll wait. And I won’t walk you through that. That’s beyond the scope of this little post.
[jeopardy theme song plays while I wait patiently…]
OK. You back? Let’s do this.
So hopefully you’ve connected up your Pico and been prompted to flash the MicroPython firmware to it. That’s all kind of automatic, right?
Now, create a new file in Thonny. Let’s call it fafo.py (fuck around, find out).
Put the following very simple script in it.
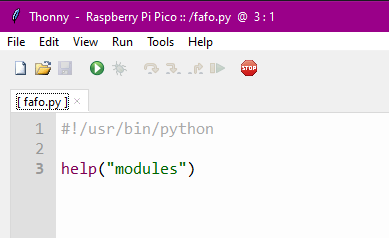
Save it (you should be prompted to choose whether you’re saving it to your PC or to your Pico — choose the Pico).
Now run it. You should have a shell in the bottom half of your Thonny window and should see the following output:
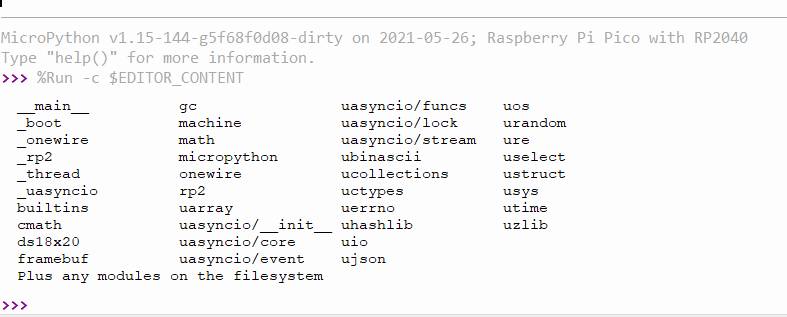
Congratulations. You’ve just asked your Pico politely for a list of modules, and it has responded with a list of all built-in modules (modules that are built in to the MicroPython firmware you flashed onto your Pico). Note the last line: “Plus any modules on the filesystem.” It’s not aware of any custom modules you may have written, borrowed, used within its governing license, or stolen, and dropped into the MicroPython filesystem.
Let’s take this a step further. What if you wanted to know what functions and classes are available within a module? Let’s try this:
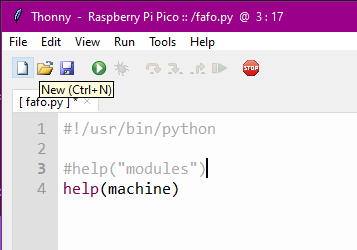
Now you’ve asked your friendly little Pico to give you help on the module named “machine.” Note that you do not quote the module you are requesting help with. If you do, it thinks you’re asking help with strings, because “machine” is a string. Yeah, I don’t know why “modules” is quoted and machine is not. Let’s keep going anyway. Hit run. (In my setups on Mac and Win, you don’t need to save anymore once you’ve saved to Pico, it will automatically save before running, so unless you’re saving a new file, you can just hit run.
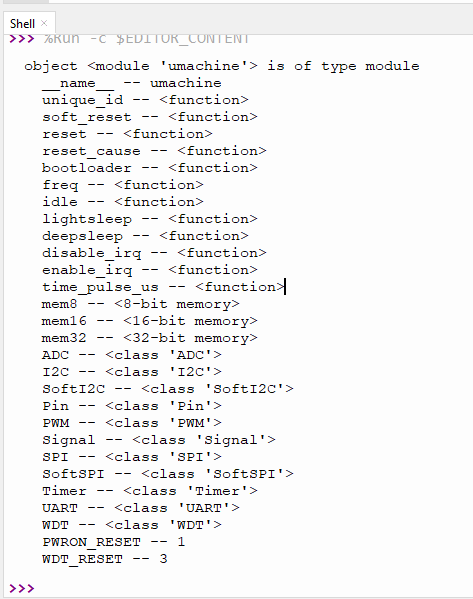
That’s pretty cool. And now you know you can ask it for help on any module. But what if you want to know more about a class within a module? Let’s take a look:
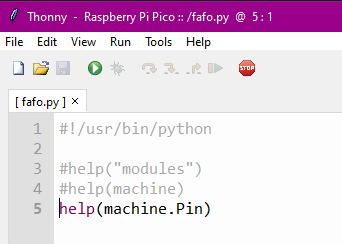
Hello, my little Pico friend, would you be kind enough to tell me more about the Pin class within the machine module?
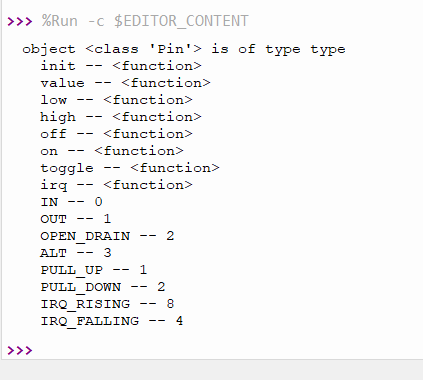
Now you have a super helpful list of functions (methods) and constants associated with the Pin.class of the machine module. Now go forth and play with all the other modules. Find something that takes you to your happy place. I did:
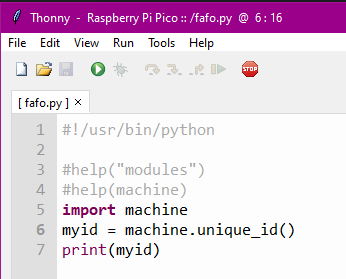
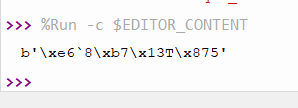
This is actually what I came here looking for, a unique ID function.
So I plugged in another Pico, flashed the MP firmware on it, then hit run again. As predicted, it automatically saved it to the Pico, not even realizing I had swapped Picos, then ran it.

Mission accomplished!
