Creepy Devices vs Creepy Behavior

There’s a lot of debate about creepy devices these days.

Part One: Meta Glasses
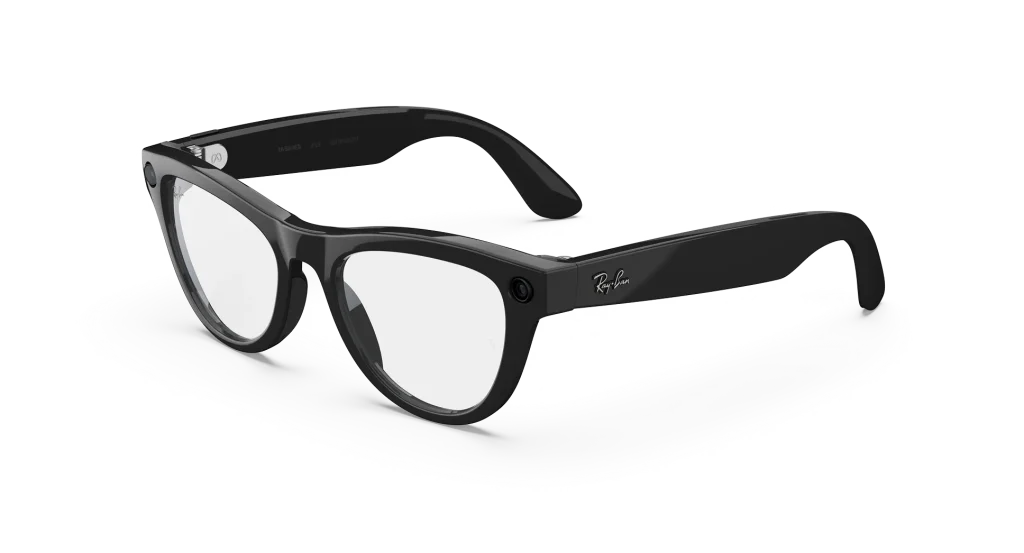
There is a sort of kneejerk reaction to Meta Glasses that anyone wearing them is automatically creepy, sketchy or at the very least suspect.

Maybe it depends. I went to Italy last year. Spent a lot of time in galleries, museums and historic buildings. Took a fuckton of photos. Didn’t have to distract myself or others by taking my phone out of my pocket every time. Just looked at it, leaned in, and clicked the button on the arm of my glasses. It was an experiment. Would I feel comfortable? Self-conscious? Would the photos turn out ok?

I ended up not feeling self-conscious or uncomfortable, and the photos turned out fine for my personal collection.

I was wearing them inside the Sistine Chapel. None of the guards or attendants noticed. I could have taken photos inside the Sistine Chapel, despite the disappointing photography prohibition in that particular location, a result of a deal made years back to fund restoration in exchange for exclusive photography rights.

I didn’t violate anyone’s privacy with them. Just took photos of what I was seeing. But I wasn’t in private places. Didn’t take any photos where I wasn’t supposed to. Didn’t use any technology to obscure the indicator light, which is where one of the debate points resides — a valid question, I suppose — If you’re not intending to do something illegal, prohibited, sketchy or sus, or (gasp) perverted, why would you need to obscure the indicator light, and hide the fact that you’re taking photos? Ask any photographer who takes candid photos among friends and family. A lot of people react when they know they’re being photographed, even when they approve of it. It takes the candid out of candid, and turns something that might have been candid into something posed and unnatural. So there’s one valid reason.

I’ve seen discussions around someone who intends to wear Meta glasses inside Def Con, where photography is strictly prohibited. To me that’s risky and confrontational, and maybe it’s time to get the popcorn out and wait and see how that works out for him.

I bring my Meta glasses to Vegas, but I don’t wear them inside the Con space, for two reasons: (1) Con policy, and (2) They are sunglasses. Sunglasses in the con, which is frequently dark in many places, would stand out.

There are other debatable aspects of Meta glasses, such as the data Meta collects from you when you use them, the fact that their app may be able to do facial identification and more. I’m not going to get into those aspects here, other than my threat model is not your threat model, and there is certainly a lot to discuss.

Part Two: Audio Recording Devices
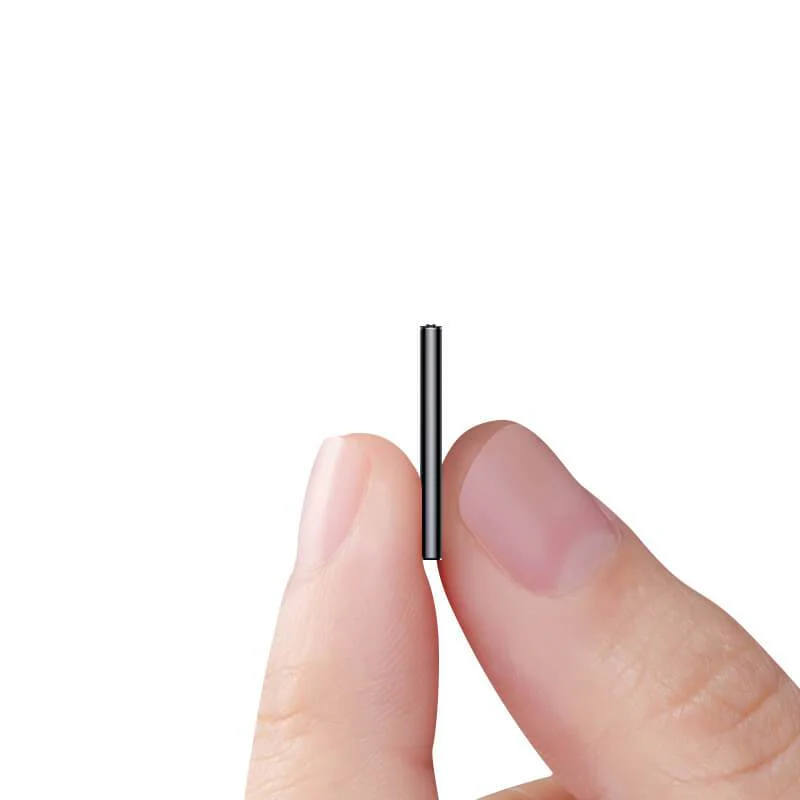
Less talked about is the low-cost proliferation of discreet, long battery-life audio recording devices. Some of them in a credit card-sized format, some of them more like a quarter. Easy to leave somewhere discreetly and return later to retrieve, transfer, transcribe, etc.

What if, as a provocative experiment, someone planted a number of these strategically during a security conference, and collected whichever units weren’t discovered later for research purposes? You can argue one-party vs two-party recording laws, but from cursory research, generally, public locations where no expectation of privacy exists are exempt. I’d love to hear other people’s takes on how this would butt heads with state and federal audio recording laws.

At the very least, an experiment like this, aside from getting someone banned from Def Con, might get people thinking on how the average researcher with a far lower threat model than nation-states or public figures might mitigate the threat posed by such devices. I wonder how much corporate and social espionage is going on as we speak, now that these devices are so freely available and affordable….

…food for thought.
PowerChute Network Shutdown and multiple UPSes

I gotta tell you, APC’s PowerChute Network Shutdown (PCNS) has a shitty interface.

And shitty documentation.

I was using it to control a UPS in a rack, and I thought, well, I have other racks with other UPSes, do I need a PCNS instance for each one? And I started down the rabbit hole.

The answer is no, I don’t. A single PCNS instance can handle multiple UPSes (or groups of UPSes, even).

The secret sauce is in two places:

  1. The first is finding the place to add additional UPSes: Go to PowerChute Setup, choose advanced, and continue forward through the menu pages until you reach the UPS Details page. There you can add additional UPSes (or UPS “groups”). That took a bit of looking to find.
  2. The second, and important part, I couldn’t find documented anywhere. Rather than using Shutdown Settings, go to Configure Events. Configure each event you want to action with a command file (command files must be in your user_files directory on the PowerChute server, in my case that was in /opt/APC/PowerChute/user_files) and the script must exist before it can be associated with an event. So write your script, make it executable (I used bash files, but I’m sure Python would work).
    • The hidden part is the abstraction for multiple UPSes. I decided to use one for “PowerChute cannot communicate with NMC” as the test event and script. I
    • made a test bash script that uses the system logger. I cycled through $@ with a for loop and logged each arg received by PowerChute, and discovered that two of the args passed contain the UPS name. I discovered this by shutting off the switchport connecting the UPS to the network. This is a nondestructive way to test this functionality, as in, you don’t want to test UPS events by yoinking power, at least not unless you’re ready for the consequences. I found no documentation for script variables anywhere, I just assumed since the system supports multiple UPSes that it would include them, and tested for them, and found they were indeed there.
    • Once I have that, I can use PowerCLI for VMware (powershell plus some addons) to correlate events with the ESXi servers powered by the UPS. Example, query each ESXi server for running VMs and issue each a SUSPEND command, then shut down the ESXi server itself. This avoids VMs ungracefully losing power.

Hope this helps someone who might be looking for script variables for PowerChute.

ID Badge Printing fun

So some years ago I picked up a Fargo DTC400e id badge printer at auction. It was cheap, and something I wanted to fool around with. I had already been recreationally fooling around with magstripe and RFID cards, it just seems like a natural progression of interests.

A recent meeting revitalized my interest. There’s a thing the group wants to do and it might come in handy. I was all set to buy a dye sublimation printer and go down that route, either printing direct to cards or to vinyl transfer which would then be applied to the cards, when one of the members mentioned “id card printer” and them I remembered that I had this thing buried in a bin somewhere. I had futzed with it in the past, but did not get good results. Might have been the wrong kind of card to print on, might have been an aged ribbon, I abandoned it back then because “overcome by events” and lack of interest, but here I am looking into it again.

Here’s what I’ve found so far:

  • The DTC400e was a decent card printer in its day. It was likely expensive in its day. Its day has passed. The ribbon cartridges appear to be discontinued, it’s likely that anything I’d be able to find in stock would be old stock. Someone is selling some on ebay that was manufactured in 2011/2012. I don’t think it was meant to last that long.
  • Modern dedicated id badge printers are expensive. The cheapest I’ve managed to find is a very low-end $400 model that only prints on one side. The DTC400e can print on both sides. Most comparable models are over $1,000. For far less than that I could get a decent dedicated dye sublimation printer and do much more than ID cards with it.
  • The DTC400e is used via the Fargo Workbench software. It’s so old that there are no Windows 10 drivers for it available. I even had quite a bit of difficulty finding the Windows 7 drivers for it. Eventually I did, and end up performing a staggering series of sysadmin feats of strength just to get to test mode:
    • Installing Windows 7 via ISO didn’t recognize NICs in my HP ProOne600 G2 All-In-One PCs that I use for group stuff.
    • Installing the NIC drivers after that resulted in an inability to install the workbench software due to dead Windows Update functionality on that obsolete Windows.
    • I had avoided deploying Win7 from my FOG installation because I had broken my FOG installation in 2023 for some reason and didn’t want the extra steps of making that work again.
    • But that’s what I ended up doing. Fixed FOG and deployed a Win7 image I had saved a few years ago. Fargo Workbench installed just fine on that, the DTC400e drivers I found installed fine, and now I have a valid test platform.
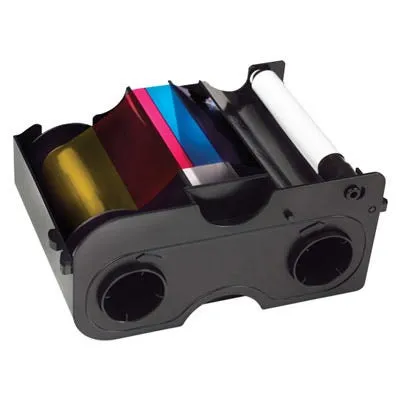
    • Is it worth buying a new ribbon for somewhere between $60 and $150? Maybe. If nothing else, just for the experience. I found a YMCFOK ribbon slated to work with this unit for $82. Mostly I had been finding YMCOK ribbons, which would be fine. But the F is exciting:
      • Y=Yellow
      • M=Magenta
      • C=Cyan
      • F=Fluorescing! (security layer only visible with UV light)
      • O=Clear protective overlay
      • K=Black Resin

So that’s where I am now. The printer is reachable by the software on a reincarnated Win7 build from quite some time ago. I’m about to pull the trigger on a new ribbon. And a couple of us are taking a dye sublimation class this evening in case it goes that direction.

Badge Shipping Disabled! DEFCON BABY!

Badge shipping was just disabled from the ecommerce shop. You can still order a Chakra Badge, but only for pickup at Defcon. Around 60 badges are on their way to Las Vegas right now, and when they’re gone, they’re gone. We have not yet had deep discussions on whether there’ll be another run of these. It’ll be based on demand and other factors.

If you want to pick up at Defcon, we can accommodate you. We’ve got agents stationed at Sahara, Fontainebleu, the Marriotts, and even Paris. We’ll make it work for you.

We love the reaction we’re getting from recipients of this badge, and we’re super proud of it. In fact, we’re proud of ALL the amazing badges that are coming out of the woodwork this year!

Even if you don’t buy one of our badges this year, come hang out with us. We’ll be at the DCGroups room at least some of the time, and we’ll announce on our main Discord page when we’re planning to be somewhere.

Production firmware for the badge should be released at 8AM on Thursday, at which point the competition begins. Do your research, don’t get left behind!

Chakra Badge Status Update

We assembled, tested and packaged the last of the Chakra badges at last night’s meeting, the last in-person group meeting before the big event.

I’m going to disable shipping for badges tonight. So if you want one shipped, and it’ll make it to you in time, order it today.

I have added “in person pickup at Def Con” as a shipping option. So if you’d like to reserve one for pickup in Vegas, use that option. Then make sure we find each other during the con.

If you plan on getting one, you can either reserve one by ordering it that way, or you can take your chances that we’ll have some left at con. We’ve sold over half of our supply, and we’ll probably bring about 50 to Vegas with us.

We’re very happy with the community’s response to this badge, and the feedback we’ve gotten so far. We finished the prize trophies this week, and decided not to post them in advance, so they’ll be a surprise. Again, the first three in-person finishers and the first remote finisher of our badge challenge will get a trophy!

Turns out EVERYONE will have fo flash the final firmware. Never fear, it’s easy. Just make sure you have a USB-C cable and a computer. Or find one of us, we’ll probably be able to do it for you at con. The final firmware is done, we just didn’t have time to flash all the badges before packing them up, so they all have demo firmware on (which is beautiful, but not competitive).

Moving from a K40 to an 80W Omtech laser cutter/engraver

I’ve had my K40 for over a year now. I’ve burned leather, engraved and cut wood and acrylic. I’ve made hundreds of things for gifts, decorations and even made custom commissioned items for friends. It’s been great.

But it’s been a struggle. Don’t get me wrong, the K40 is a great starter machine for this kind of work, but it seems to be pushing its limits for cutting acrylic. It takes a bit of effort to calibrate, align and focus the laser correctly for maximum efficiency, which is needed for acrylic work.

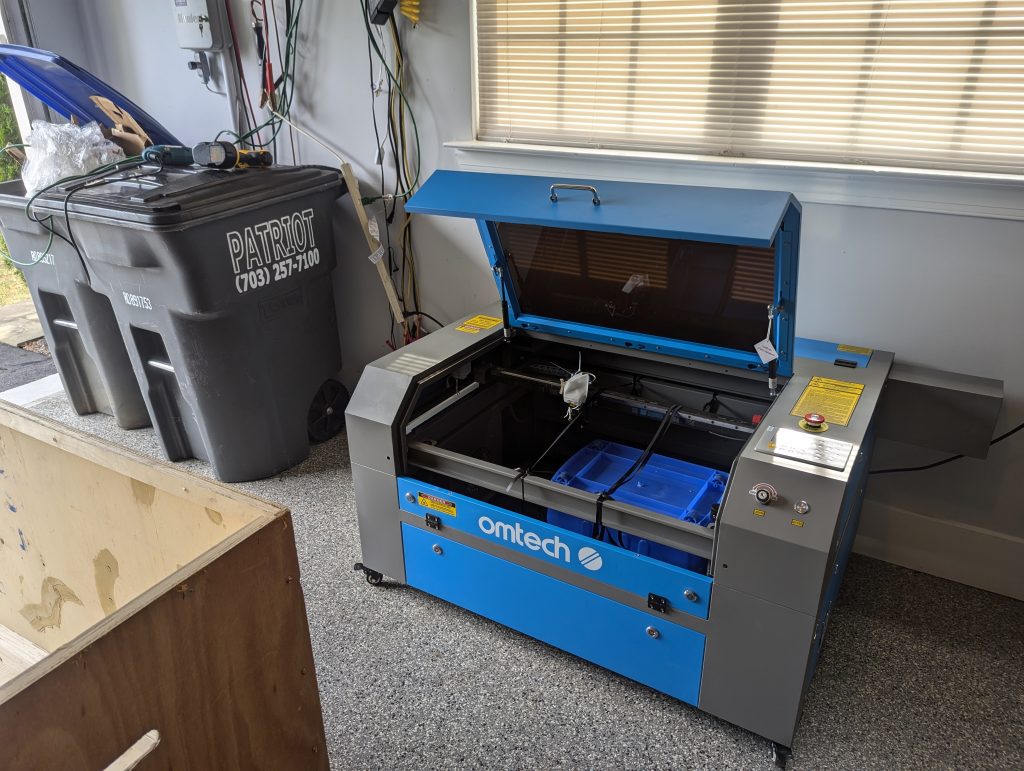
Because I’m running up a deadline for mass-producing an item (wings for the DC540 Chakra badge) and production wasn’t meeting requirements, I decided to invest in a larger machine. Being budget conscious, I chose the manual focus version of the Omtech 80W machine.

It arrived last week, and I’m going to try and encapsulate my experience/lessons learned over the past week in this post.

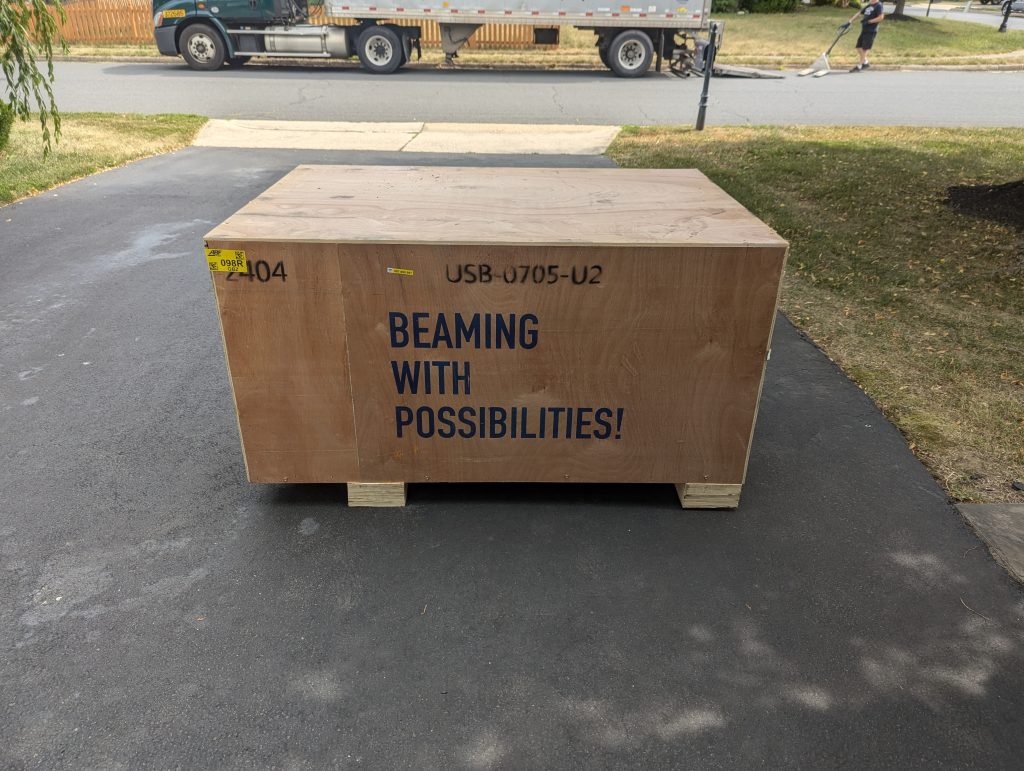
I was relieved that the crate arrived unharmed. As my wife suggested, I’ll probably cut out that lovely tagline for wall art at some point. 🙂

After a bit of work uncrating and positioning the 200+ lb unit in the garage, I went through the installation and testing process.

The first test cut demonstrated two things. First, I had the focus wrong. Second, this thing has way more power than a K40. When the K40 is out of focus, it barely penetrates acrylic. When this thing is out of focus, it just makes thicker lines and doesn’t make it all the way through.

The first major difference between the two units is the size. The K40 can be lifted and moved from room to room by one person of average strength. It’s a tabletop unit. Not so with the 80W. I waffled between the garage and the basement for this unit, for various reasons. Garage = easier installation, easier venting of exhaust. Basement, better climate control, better integration with the rest of the lab. I opted for the garage. Sometime before winter, I will enlist three strong friends to help bring it into the basement and reconfigure exhaust.

Next obvious difference is the bed. The K40 ships with a fixed bed. It’s actually bolted on extension poles from the bottom of the cabinet. No provision exists in the unit to adjust the bed height. This is problematic. I ended up buying a lab jack and removing the extension poles. And cheap lab jacks are inherently not level. Oh well. I worked around it, but it was troubleshom. The 80W unit comes with linked greased screw adjusters for the entire bed, controllable by a single knob.

The K40 has no focus assistance at all. Trial and error (weighted heavily on the side of error) is used to find the correct focal point for your material. The 80W includes a red-dot focus tool. I simply turned the bed level adjustment knob until the red dot was at its smallest, and bam, I had good focus. The red dot is a little bit off in the X/Y coordinates from where the beam hits, but that’s easily adjustable as well (critical if you’re using the red dot to validate framing before cutting/engraving).

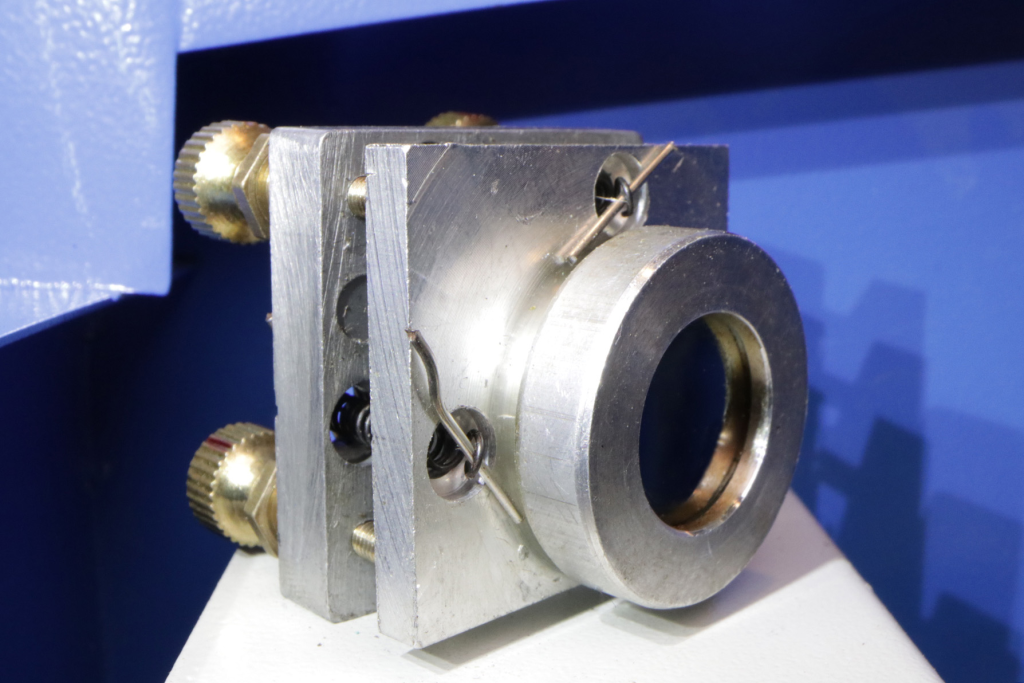
The mirror mounts on the K40 are not great. On mine, they look kind of like this, but the mirror is much closer to the surrounding ring than this photo. The result is that when you use tape as recommended to calibrate and center the beam on each mirror, invariable there ends up a bit of tape or burn residue on the mirror.

The new unit includes an offset frame for exactly that purpose. It’s not close to the mirror, so there’s no risk of tarnishing the mirror, yet it’s still aligned with the mount, so you can trust the alignment by putting tape on that frame and pulsing the laser.

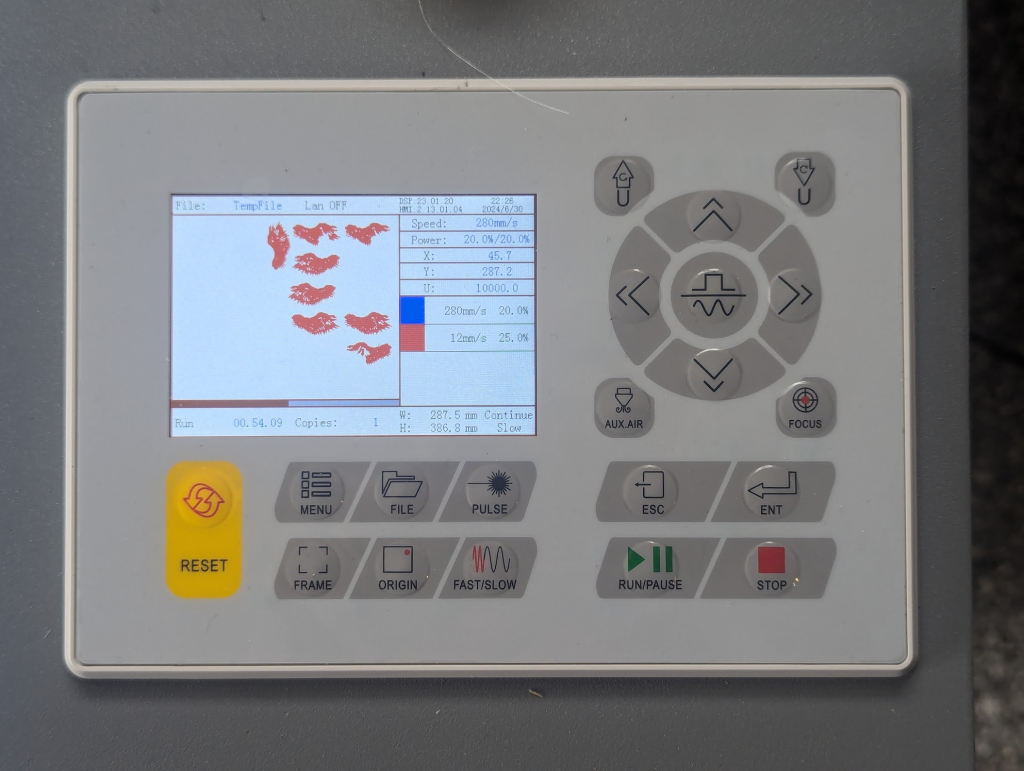
The K40 has very little in the way of controls. A simple power level display, up/down buttons, an emergency stop button, and a pulse button. This unit has a full display which shows a representation of the pattern being cut/engraved, including a real-time cursor of what’s being cut.

My K40 would have required a controller upgrade to work with Lightburn — therefore I would have to set the power level on the panel, and use K40 Whisperer to send the operation code to the unit.

It was trivial to attach this unit to my PC using Lightburn, and since I already had a Lightburn license for my diode laser, I just had to add a DSP license to control the OMTech unit. Lightburn is miles beyond K40 Whisperer in functionality, including dragging, rotating, duplicating and removing design elements to suit your material before starting the job. Plus it’s easy to control design elements by color, assigning each color to line, fill or offset fill as desired.

Something I learned during this process, relating to my specific use case, is about vector vs raster. Most of what I do is engraving acrylic to foster illumination of patterns in acrylic. With the K40, vector engraving was fine for main design lines. With the new unit, the focal point is much smaller. Maybe that is an indication that the K40 was never completely dialed in on a good focal point, or maybe the beam and lens combination is just that much better on the 80W unit, but the end result is that I can no longer use vector lines for main lines of illumination. They’re fine for fine details and accents, but the big lines are going to need raster from now on. Raster takes a bit longer to cut, but that’s fine.

By the way, if you’re considering this unit or one like it, consider laser cooling solutions. It comes with a water pump, but from experience, I’ll tell you that the stock water pumps on these things are perilously unreliable, and if the pump fails you will lose your tube. Consider an industrial chiller. I ended up buying a CW3000 for the K40. It’s not a true chiller, more of an enhanced water pump, but the enhancements include alarms and alarm outputs for sensing flow failure or high temperatures. Since the new unit is in the garage, and the garage gets hot in the sweltering Virginia summer, I opted for a true chiller with compressor (CW5200) for this unit. Same safety features, but it actually cools the water. The last thing I want to do is replace a blown tube on this unit.

I wish I had upgraded to this unit earlier, but the K40 was a great training ground for CO2 laser work.

Minor shipping difficulty… Patience is appreciated…

So our first time selling stuff in over a year, and there are minor bugs in our ecommerce system that showed up since then.

  1. Because of bugs in generating shipping labels, some recipients might have received two shipping notifications. Most likely the first one is the one you should be tracking, we’ve tried to void the second.
  2. We’ve generated labels for more than half of the current orders, but they haven’t been dropped off yet. They’ll probably be dropped off this weekend.
  3. Two international orders came in, and due to issues with the ecommerce, no shipping was charged. Clearly this is a problem, since it costs us around 3x to ship overseas than to ship in the US. We ask for extra patience while we sort this out.

IN-PERSON Monday 3/20!

We’ll be in person on Monday, for the first time in a while. 1830 eastern time, at Social House in Chantilly.

Come visit, even if it’s your first time. We don’t bite, and we’re tolerant of most flavors of weirdos.

Fitness data pt 3

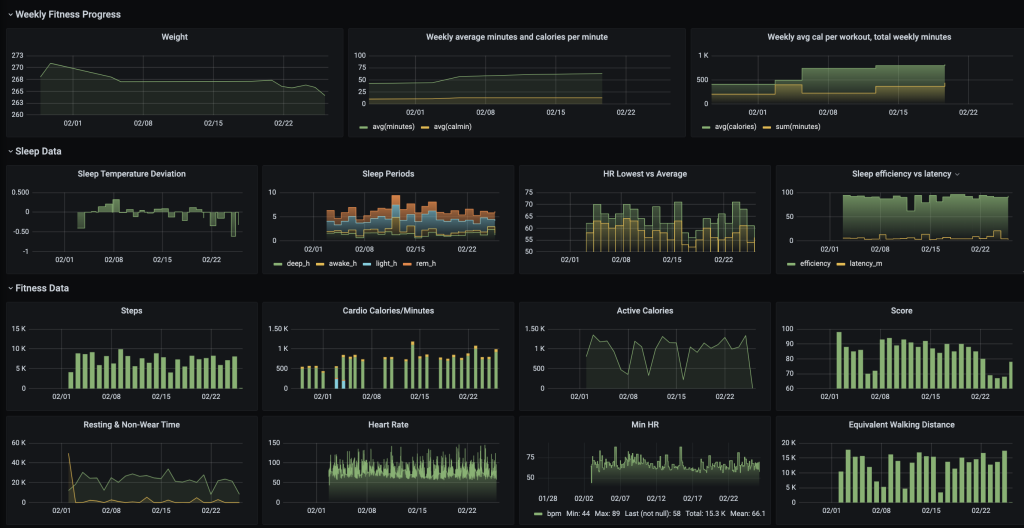
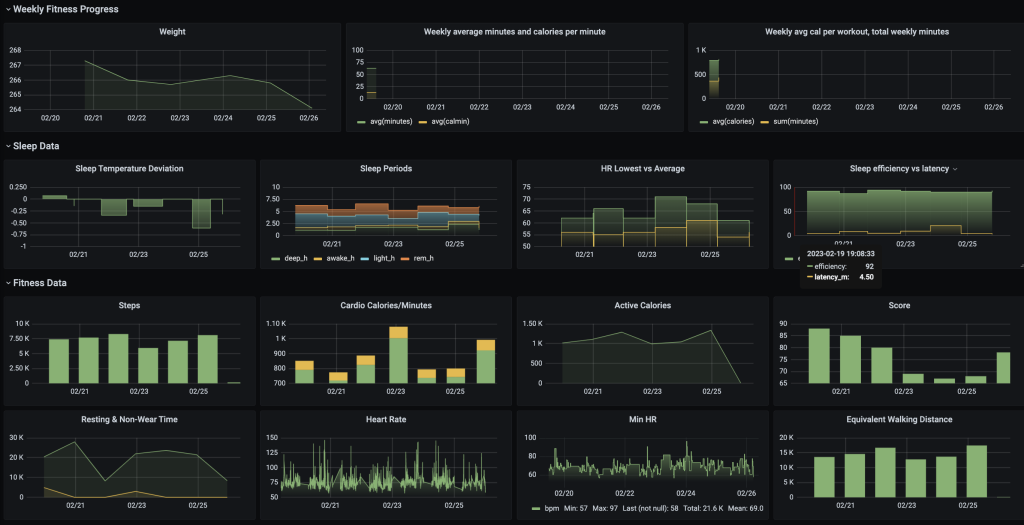
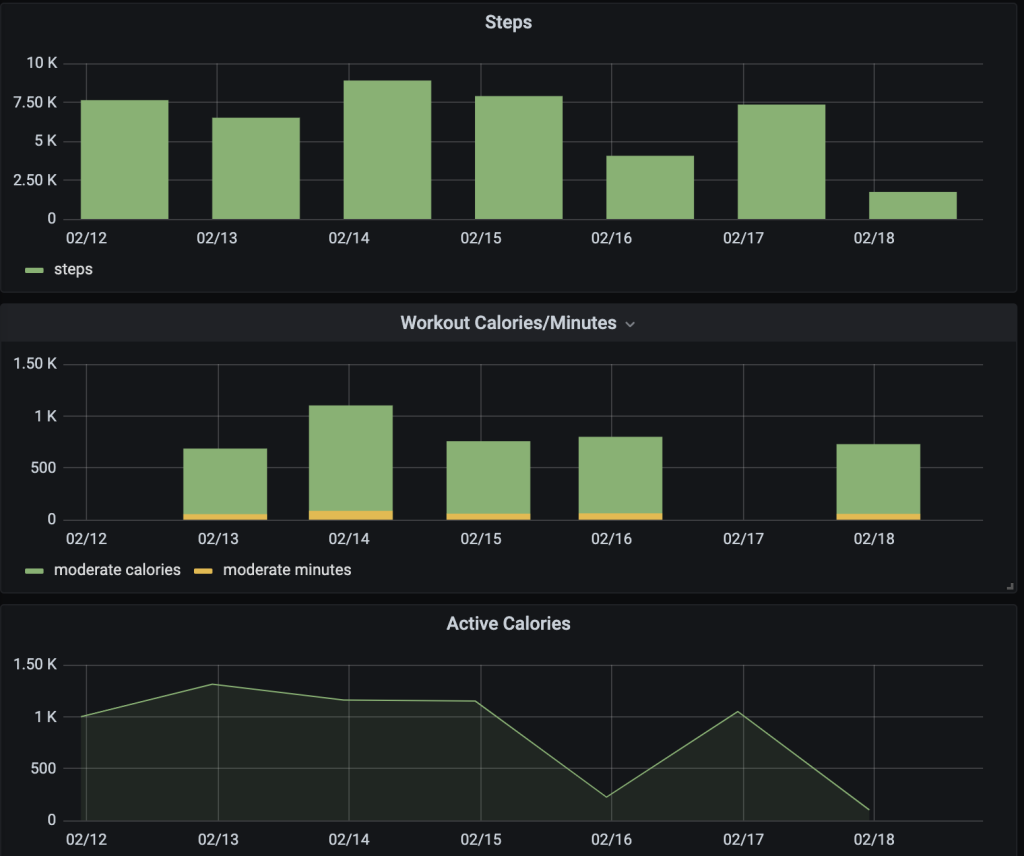
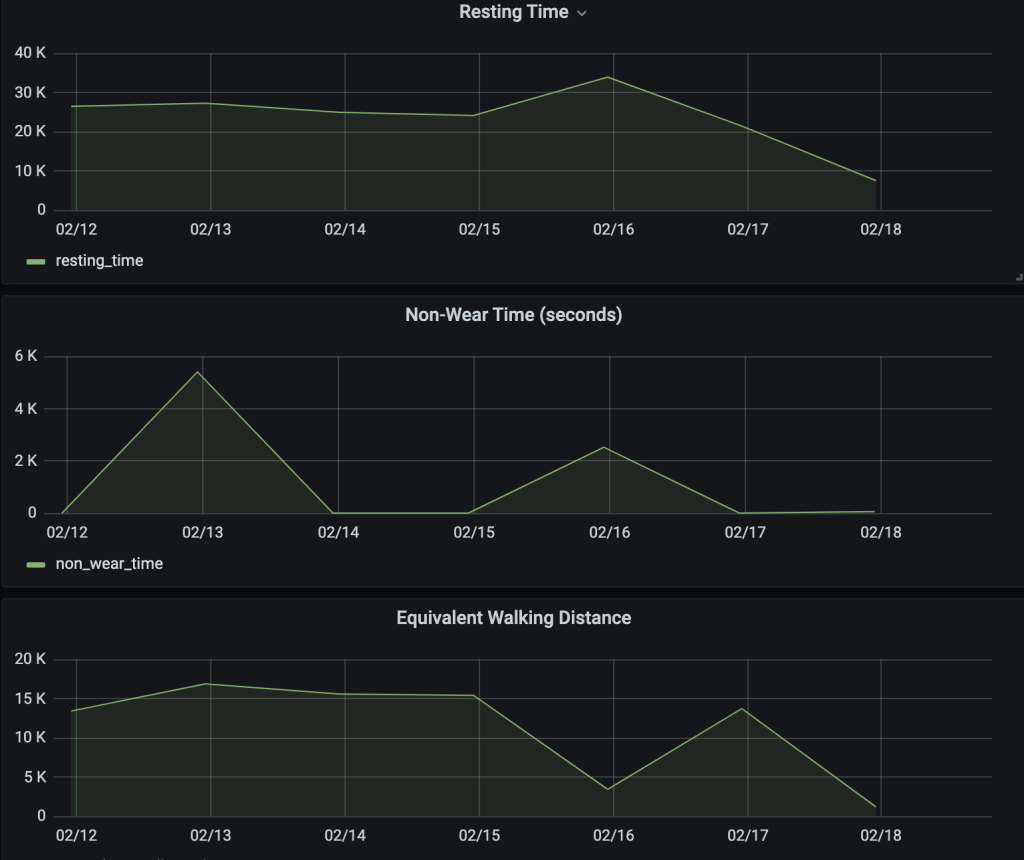
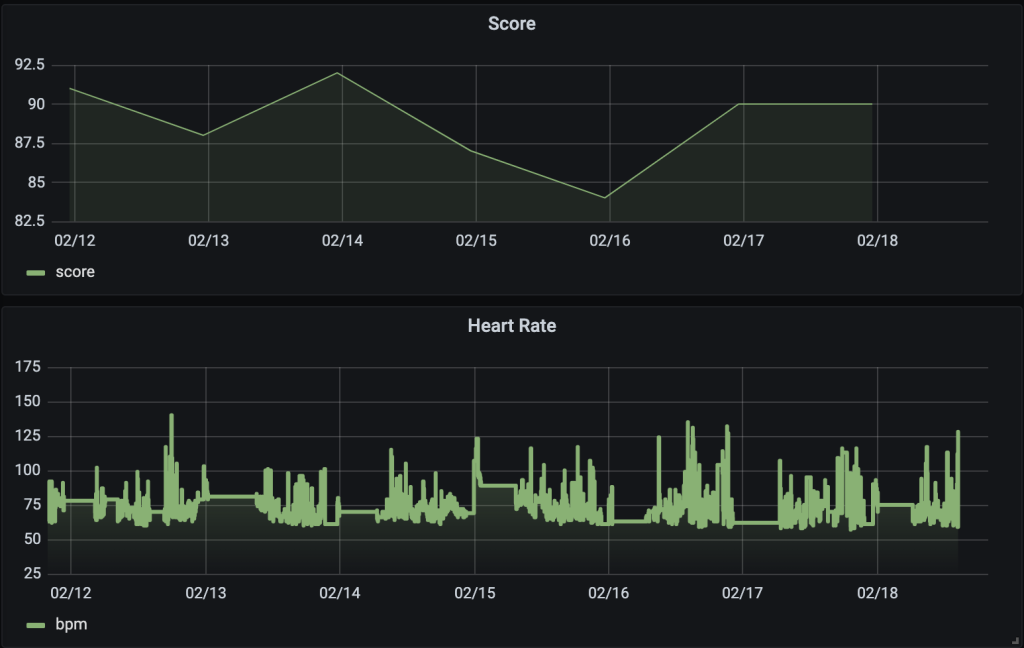
I managed to shrink a whole bunch of data into a single-page, semi-coherent dashboard. The only thing not automated on this whole thing is weight. I have my Withings scale communicating with Health Mate which is tied to Google Fit, and Oura is supposed to swing with Google Fit, but that intermittent weight data isn’t it making it into Oura. So I’m using the “Tags” feature fo the Oura app to enter my weight every morning, and my script recognizes the data type and inserts a MySQL row for it. I have less than 30 days of data at this point. I can’t wait to see what 90 days or even a year looks like. I’ll probably be making these graphs even more pretty and useful as my time and experience with Grafana increases. A week ago was the first time I touched it.

AVR Coding Class reminder

Tonight we venture into the world of Charlieplexing. Don’t be late.

Some of us may slide over into the main Monday channel after class, if we see anyone there. So if you wish to interact, hang out in the Monday voice channel around 7:30ish.

Fitness for Data Junkies

I swore off of fitness data acquisition a while back. I hated the way big tech invasively mines your data, and I hated the Black Mirror-level machinations they seem to have for it.

But when I caught Covid at Def Con last year, a friend mentioned in passing that NIH was doing a Covid study and needed volunteers. I looked into it, and it seemed interesting, so I signed up. The study provided a BioStrap Evo wristband and an underarm temperature sensor. The study was gathering metrics to explore the relationships between bio data and long covid, I guess to try to create better predictions of who is at risk for long covid, etc.

It was a six-month study. The BioStrap collects interesting data, especially on sleep cycles, and I grew rather accustomed to looking at that data. I found it helpful, and started looking into the best options for collecting fitness and workout data without necessarily providing it to big tech.

Also, most of the services are subscription services, and it doesn’t make sense to me to subscribe to multiple services that essentially provide the same thing, with maybe small variations on how the data is presented.

I’m a data junkie at heart, I love having access to raw data to create my own presentations, interpretations, and correlations. I’m also a lazy engineer, so I prefer automating things up front and avoiding manual or repetitive work. So I looked forward to my options.

I wasn’t particularly fond of the BioStrap form factor, to be honest. It’s a wristband without a display, so you’re relying on the app. The bluetooth comms between the wristband and the app can be sketchy at times, requiring bluetooth resets, phone reboots, and sometimes deleting and re-adding the device profile to re-establish comms. Data is lost when that happens.

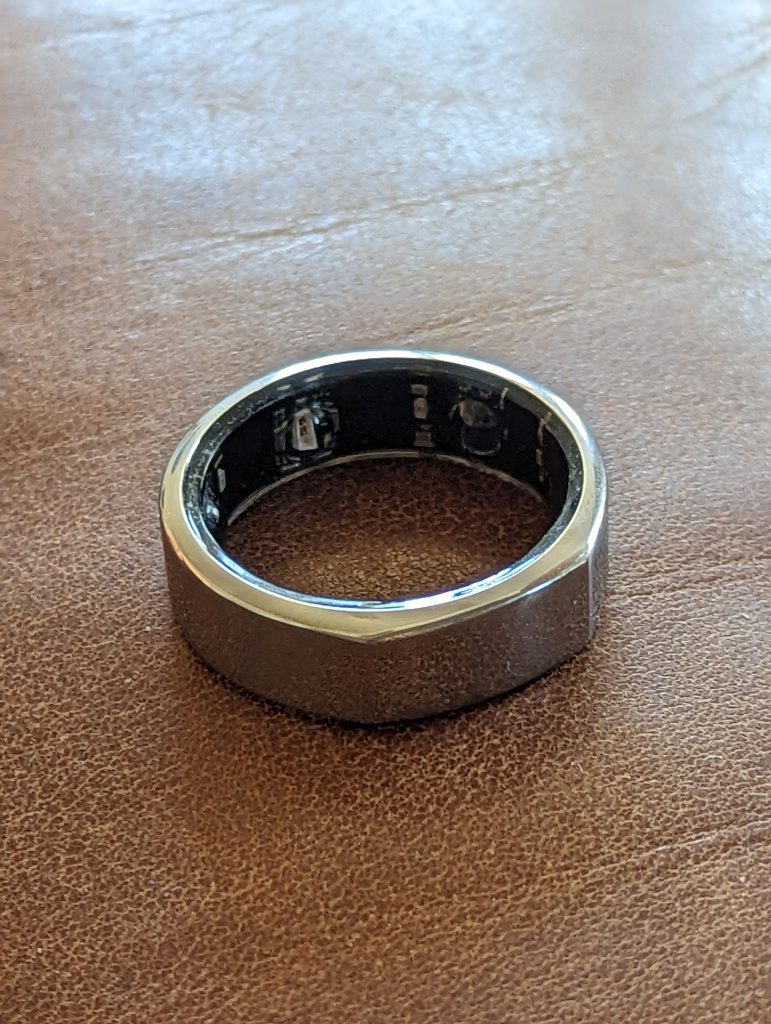
I started looking at competing products. I read a lot of good things about the Oura Ring, which I had looked at a year or so earlier, but rejected because I was still in the anti-tech-data mode. I discovered they have an API, so you have access to the data collected. So I bought one, and have been mucking with it for a couple of weeks now. The stats seem to be pretty close to what the BioStrap provided, but I like the ring form factor much better than the wristband (which makes me look like I’m wearing two watches), and the charge lasts for several days, where the BioStrap pretty much needs a charge daily.

This morning, I woke up with the intent of exploring that API a bit.

So far I’ve been able to pull in workouts for the past couple of weeks, including date, type of workout, intensity, length of workout, and calories burned (based on Oura’s calculations, of course). I’m also able to pull in the “tags,” which is sort of a custom comment field where you can add a mood, or an activity, for correlation. Some examples include noting when you drink alcohol, or getting a massage, and looking at how those activities affect your heart rate, sleep, and “recovery” level.

I’m also able to log workouts into my self-hosted Gitlab instance, which is not the best way to track workouts, but at least it accumulates time and comments. I’ve also installed a local instance of WGER, which is some odd combination of workout scheduling and “gym management.” It seems like WGER has a bit of an identity crisis going on. I tell you what, if WGER decided to go all in on allowing users to import fitness data from other apps with APIs, such as Oura, Google Fit, Strava, Apple, etc., I feel like the user base would explode.

It’ll take more time to pull in heart rate data, which seems to take averages every five minutes. That really seems to lend itself to something like MRTG, RRDTool, Grafana, etc. And the other data is in there as well. Looking at heart rate variation over time could be interesting, correlating it to workouts, sleep data, and other activities. I guarantee there are some DIY folks whose imaginations are bigger than BFT (Big Fitness Tech) when it comes to chewing on and presenting data.

But the really cool part is the automation. I’ve got it pulling the data in daily via cron job. I simply “record workout” when I start a workout, and end it when I’m done (via the phone app) and the rest of the collection and distribution of my data happens behind the scenes.

Adventures in maintenance vs obsolesence

Look, I realize my lifestyle is a bit of an anachronism. I prefer keeping things working vs buying replacements when possible. I don’t mind getting my hands dirty and doing a deep-dive if it means my tech will last longer.

Here are two examples from recent weeks.

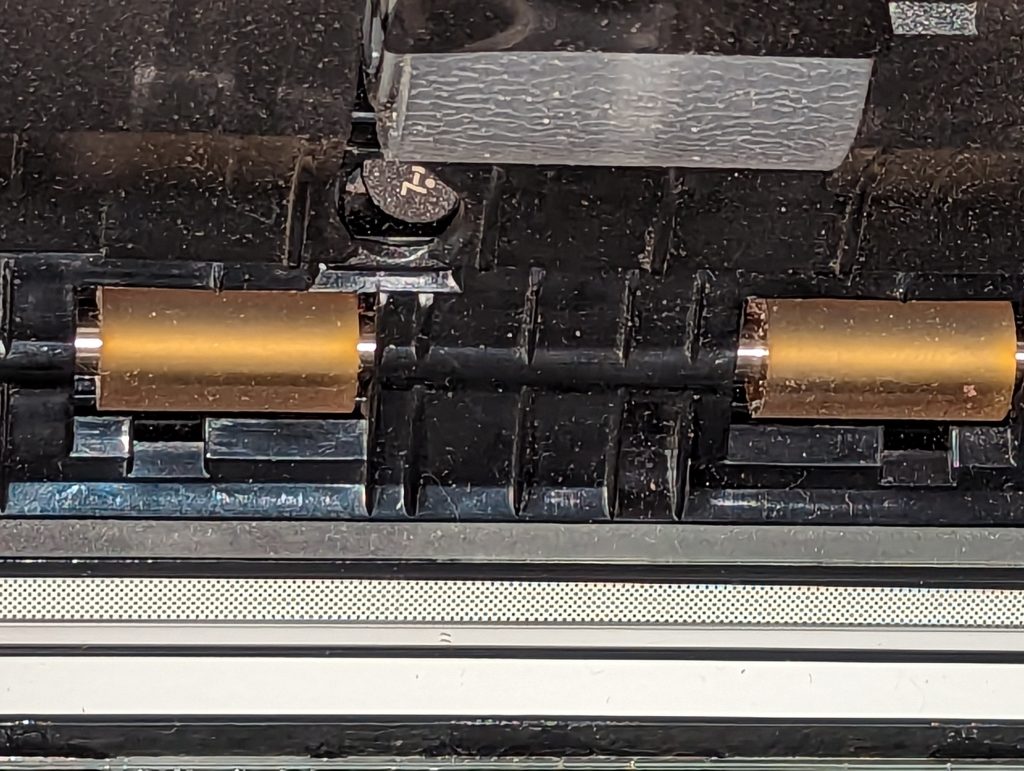
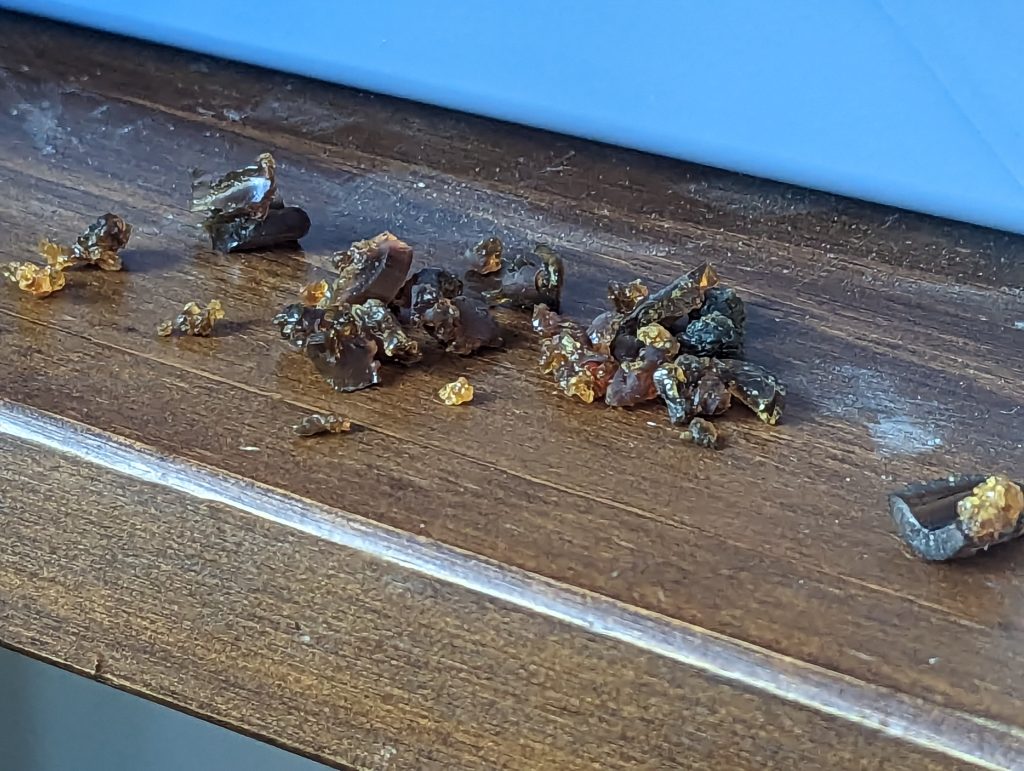
I scan all of my documents into a Mayan EDMS installation in my home network. Incoming mail, contracts, documentation, you name it. In the early days, I used an all-in-one scanner, but the feeder was less than optimal. I shopped for network scanners, but so, so pricy. So I picked up a USB scanner with a decent feeder, the Fujitsu ScanSnap S1500. I posted about this project. It scans in color, and scans both sides. It’s a relatively simple device, and until last week, I considered it super reliable. Last week I rearranged my office and moved it to a different table. Suddenly it would no longer feed. It emitted a horrific grinding sound. Research revealed that the rubber feed rollers had turned to goo, and would no longer spin. I was at a loss on how this happened, until I read the manual. You know, that pesky thing a lot of us tech folks don’t bother to read? Apparently the expectation is that we clean the rollers FREQUENTLY with F1 cleaner. I don’t know what freaking ink I’ve been scanning that eats rollers, but for reference, here is what rollers in good condition look like:

Feed rollers in good condition

And here is what my rollers looked like after I used a razor and tweezers to peel them off of the shaft:

Roller goo

I have found feed roller shaft replacements on the ubiquitous web shopping site, but I have yet to find any document explaining how to disassemble and replace that particular part. It’s not obvious, anyway. The main parts Fujitsu consider consumable are the pick roller and pad assembly. I’ll dig down and figure it out at some point. For now, I just bought another scanner (super cheap) with rollers in good condition. There’s also mention somewhere of buying just the rollers, slicing one side of them and slipping them onto the existing shafts.

Considering the cost of network scanners, even buying two of them I got a deal (made them networked via Raspberry Pi, see prior post).

PART 2: THE QNAP

I have a QNAP with 8TB of disk space on it. This equates to 5.4TB of usable space in the RAID. I want to upgrade but I’m terrified of disrupting the gobs and gobs of media I’ve got stored on it. So I went shopping for a new one. They’re ridiculously expensive, some of them. But I found one “for parts or repair” for just $67. I did some research, and was convinced I could restore it to service. It’s a TS-453 Pro, which suffers from the famous J1900 LPC bug, which causes it to degrade and become unbootable. I got the sense from the listing that the “fix” (which may be temporary) was never attempted on this unit, and I was correct. The fix involves soldering a 100 ohm resistor from the clock pin to ground. The headers appeared unmolested on the board, so I grabbed a resistor from the basement and quickly soldered it into place. Sure enough, it booted right up. I slapped four 1TB hard drives from my surplus rack into it, and got the unit fully upgraded and functional. Then I ordered four 12TB drives to truly populate it. When they come, I’ll go through the recommended exercise of replacing each drive in the array one by one, and waiting for RAID to complete rebuilding itself, until all of the drives are replaced, and then expanding the storage pool and volume. I looked into a current equivalent of what I’m assembling — the Synology with 48TB of space is $1359 at B&H. I put this together for under $600. If it fails (nobody seems to know if the “fix” is permanent or just prolonging the inevitable — it’s a real scandal) I still have the other QNAP and should be able to just import the drives into that unit. Or maybe I’ll buy a brand-new 6-bay or 8-bay when that time comes. Who knows?

Monday January 9 Meetup: Social House in Chantilly

So maybe you’re in Nova and have been craving one of these meetups, but maybe you’ve been busy, or maybe you’ve been battling your social anxiety, or maybe you’ve been having pressing issues at home, or maybe you’re wearing an ankle monitor.

Whoever you are, and whatever brings you to our meetup, you are invited, and welcome. We’ll be at Social House in Chantilly. Look for the group of tired, jaded tech folks, probably mostly dressed in black, and probably mostly drinking. Maybe I’ll bring some swag to reward anyone brave enough to join us.

There’s a Dairy Queen across the parking lot if that sways you. Official meetup time is 1830 eastern, but some show up earlier, and some show up later. Come out. You deserve this. We deserve each other.