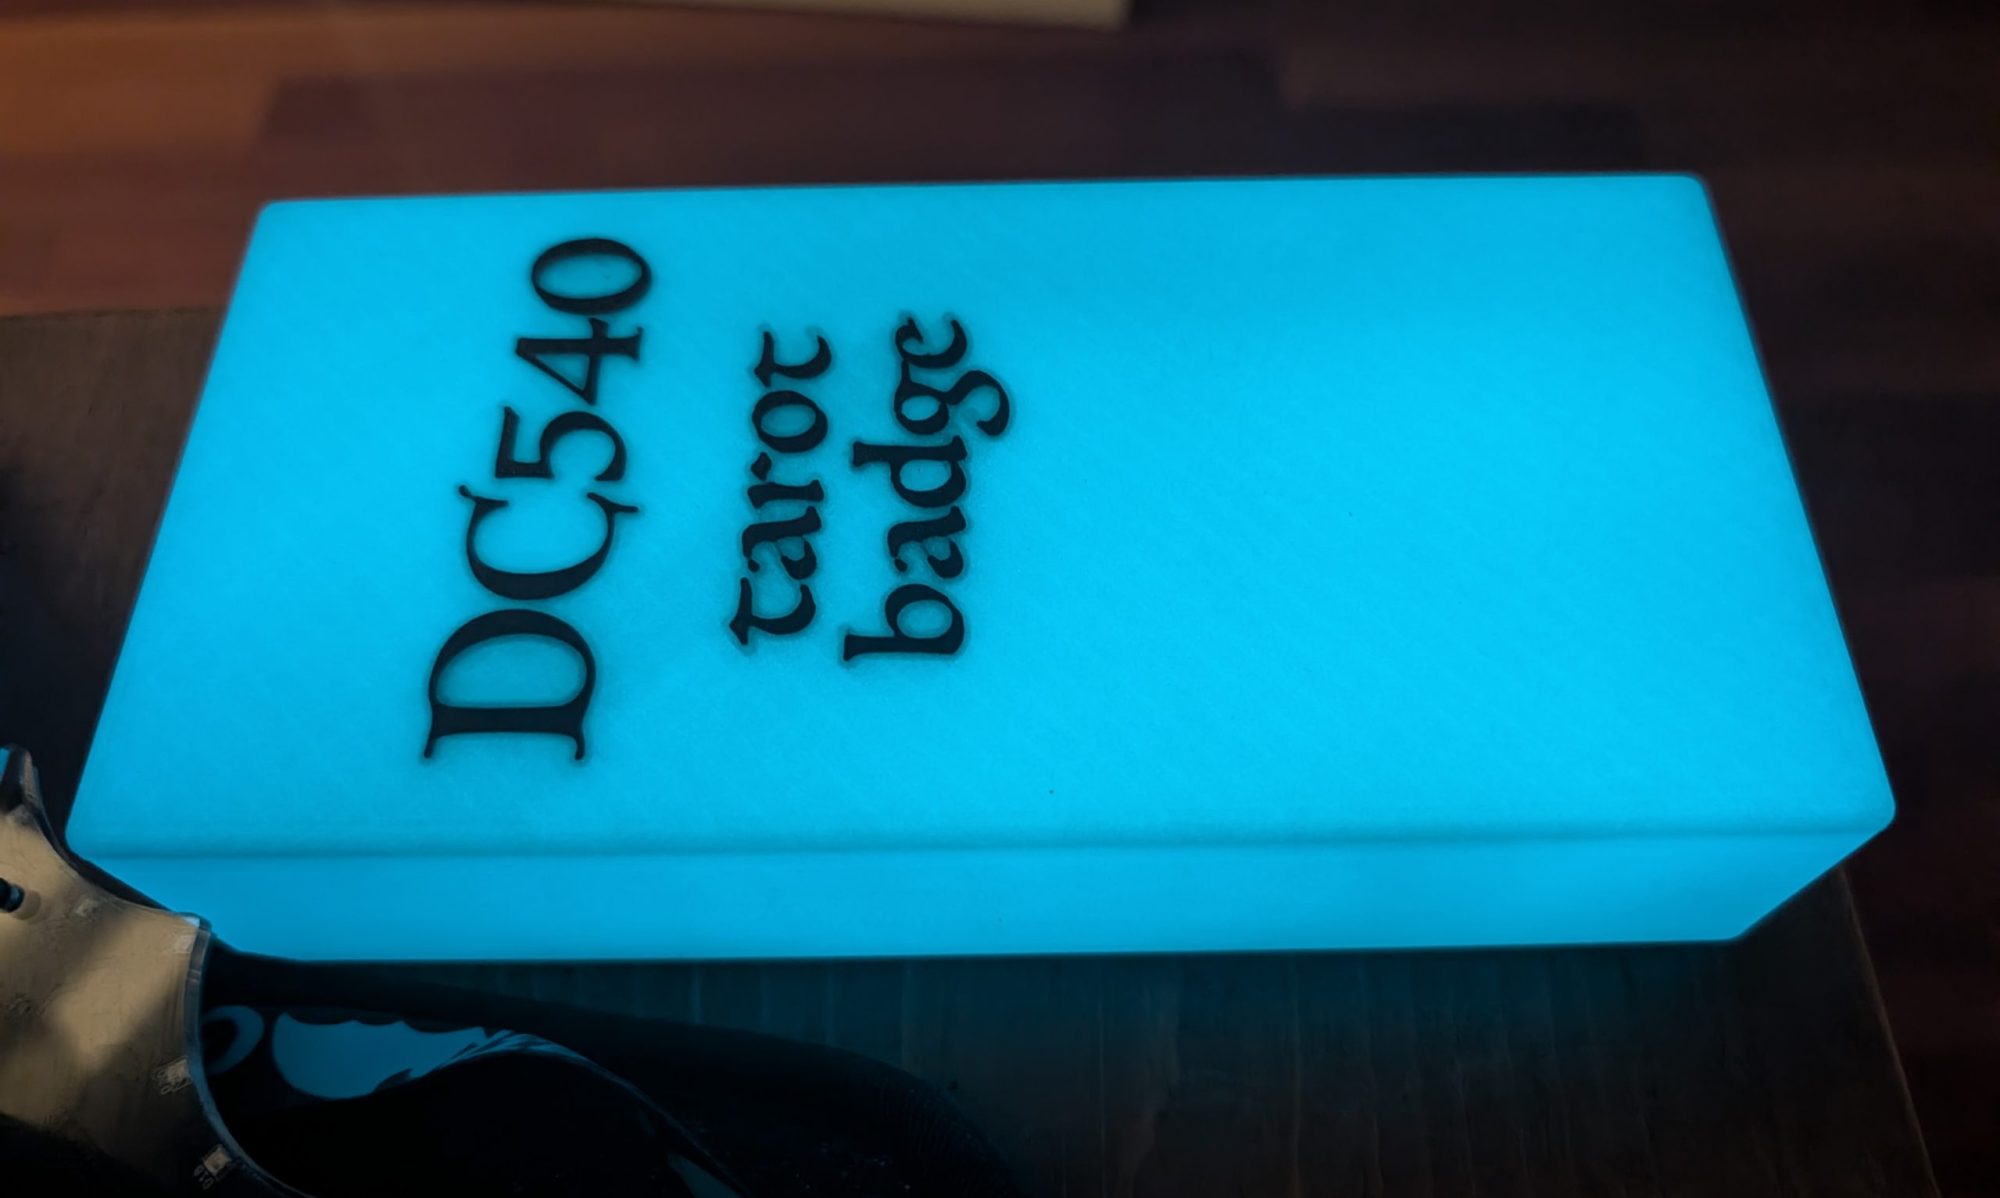
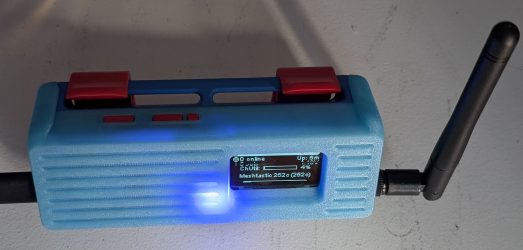
We’re giving away a couple of badges and a few other soldery trinkets for new year’s.
Enter by following our YouTube. We’ll choose at random on New Year’s Eve (hell, maybe even live!) from the email connected to your youtube follower account and notify you there.
Content is becoming more frequent. PCB design classes, modular synth explorations, and who knows what we’ll get into in 2023? Follow and stay tuned!
The basement will be open to regulars & trusted friends on Monday 12/26 for our regular Monday meeting. I’ll open up the Discord channel for those who can’t make it. I’m feeling a bit like celebrating.
So I managed to find a satisfactory and effective resolution to my problem with serial number 0123456789ABCDEF. If you recall, the problem is that certain consumer-grade USB devices ship with non-unique serial numbers, making it difficult to use them with USB pass-through under VirtualBox.
Serial number on multiple devices = 0123456789ABCDEF
VirtualBox USB filtering (permanently mapping a device to a specific VM) relies a unique field. With diverse devices, this can be the vendor/product ID. With normal devices with unique serial numbers, the serial number can be used in the filters.
With identical product, vendor and serial numbers, you’re stuck with “Port,” which at least in CentOS/Rocky’s USB subsystem, is dynamically assigned when the device is plugged in to the host. Example: Plug in a device, it shows up on Bus 001, Device 005. Unplug it, plug it back in, and it’s now on Bus 001, Device 006.
Allegedly, udev rules can be set to assign a specific port (or a port “nickname”) using some other unique identifier, like the actual physical port the device is connected to. Still less than ideal, since that would require adherence to a strict protocol of unplugging and plugging into the same port. Anyway, I couldn’t get that to work.
So I dug around a bit, and found that the devices DO have a unique component — the device’s MAC address. It’s visible when using lsusb in verbose mode. But VirtualBox can’t see it, and it’s not an option in the VirtualBox filtering.
So what I ended up doing was abandoning VirtualBox’s USB filtering entirely.
I created a text file mapping those MAC addresses to VMs. Then I created a script which iterates through LSUSB, and checks the MAC addresses of every USB device it finds through that mapping file. When it finds one, it needs two things to make the usb attachment happen via command line. It needs either the UUID or machine name of the VM, and it needs the UUID or “address” of the USB device. My mapping file stores the MAC address of the device (discovered via lsusb) and the UUID of the VM, which is available via vboxmanage list vms.
The UUID of the USB device can be found by comparing the Bus and Port values found in lsusb to the output of vboxmanage list usbhost. With creative use of bash and awk, I was able to iterate through the devices, determine which ones are assigned to VMs, check to see if they’re currently attached, and if not, issue the vboxmanage controlvm vm-uuid usbattach usb-uuid command to attach the device to its home VM. So in case of a host reboot or someone rejiggering ports, a single command is enough to get things back where they belong.
I realize that there are probably only three people on the planet who have run into this particular problem, but I thought the solution was an interesting exercise in information-gathering on a VirtualBox host on a Rocky Linux platform, so I felt i was worth sharing.
I generally prefer to blog when I’ve solved an obscure problem, or even a not-so-obscure problem, because I’m proud of myself for doing it, and because for everyone out there who already knows the answer, there are 20 people out there who don’t, and I like to be helpful.
Not this time. I’m blogging about it this time in the hopes that explaining it in sufficient detail might trigger an a-ha moment for me, or maybe that someone out there in the ether will find it and know, and feel that same urgent need to be helpful that I frequently feel.
So I’ll be as concise as possible here:
CentOS-based server running VirtualBox.
Multiple USB devices connected to the server, intended to be passed through to individual VMs.
These particular devices caused us to settle on VirtualBox, because it was on the only virtualization platform we found that could pass them through reliably in a usable way.
So we found one that we like as far as function set and usability. We’re happily plugging along and making our VM work happily with it. OK, let’s make another one. Spin up another VM, plug in another (identical) device.
Oh noes. The vendor, product, manufacturer name, and everything are all identical! What do we do? Those of you who’ve done this before, I know what you’re about to say. “Use the serial number in the VBox USB Filter, dumbass!” To that I say, “did you read the title of this post?”
Yeah. This particular vendor rolled out this product commercially with generic, identical serial numbers. Whatever fucktard made that decision, I curse their existence.
After a bit of futzing, we found that we could filter on “Port”, which is the port number assigned to the device, visible in lsusb and in the device in. /dev/bus/usb/001/###.
So yeah, we got on with our day and forgot about it. Oh yeah — then we got another one.
“No problem,” I said, “we know how to handle that.” So we’re working through setup, and I have the filter in place, and we pull it out and put it back in for whatever reason, and the filter’s not kicking in. I look again, and the port number has incremented!
Yeah. USB port numbers in linux, at least in this distro, are dynamic. So you can’t expect them to continue to work after a server reboot, or maybe even after a device reset. Bad news.
So a colleague sends me an article on using udev rules to find the uniqueness buried in udevadm attributes to generate a named symlink to the device. That sounds awesome.
Well, less than awesome. The only uniqueness I was able to find in the attributes was “bus” and “devpath”, which are the physical USB bus and port the device is connected to. The lovely non-unique serial number is in there glaring at me triumphantly with its useless stupid face.
So I futzed around with udev rules, trying to get that symlink to come up, and haven’t figured out quite the magic words yet. Maybe because the article is based on a ttyACM device that’s directly in /dev, and my particular situation involves a device that shows up way under /dev/bus/usb/001/### instead. In any case, I see no evidence of a symlink being created anywhere in the /dev tree, and I have no way of knowing whether it would be usable in VBox USB filtering even if it did show up. So I’m calling it a night, and I’ll put fresh eyes on it tomorrow maybe.
I’m thinking we should meet in the backyard/basement this evening. Might be the last time in the season to enjoy a little bit of outdoor weather. I’ve refreshed the beer supply and improved the side path lighting. What say you? A little badd pizza & beer on the patio while discussing badgelife, job searches, and other relevant topics? Who’s in?
There are many, many password manager apps out there, but none of them tick every box for me in my particular situation.
I don’t think I’m asking for much:
I want a self-hosted password manager app.
Not in the cloud. Obvs.
LDAP capability (for an IT Team to be able to share passwords, for example)
The closest I’ve found is BitWarden. Or more specifically, VaultWarden. I was so excited about BitWarden for so many reasons — Organizational capabilities, delegation, data structures for more than just passwords (credit cards, identity info, etc.), etc. And one of their enterprise features is… wait for it… a directory connector which includes AD, LDAP and others.
But it’s expensive. Their enterprise product runs between $3 and $6 per user per month. Doesn’t sound like much, but it adds up. I was a bit let down by the pricing, but then I found out about VaultWarden, which is I guess a “fork” of sorts of BitWarden which includes the enterprise features. I’m not sure of the mechanics of why it exists, but I decided to give it a try.
It was only then that I realized the fatal flaw in my plan. Both of these products are part of the new breed of password managers, billing themselves as zero-knowledge password vaults. And the great selling point of these is the way the encryption works, which is apparently by encrypting your vault with a key derived from your personal password. With me yet? That means it’s fundamentally incompatible with LDAP authentication. The LDAP features provided (in a most difficult manner) by BitWarden and VaultWarden only provide user and group synchronization, not authentication. They provide this by syncing the directory at admin-defined intervals, deleting inactive users and adding new users on each sync, and then sending those users an email inviting them to use the app (and setting their password).
As far down the road as they took me, it was sad to learn I wouldn’t be able to leverage my existing LDAP authentication on this particular app. And i get it. In a zero knowledge world, it’s unacceptable for an admin to reset a user’s LDAP password and then inherit knowledge of all of their stored passwords. But I’m not in a zero-knowledge world. I’m in a shared knowledge world.
I’ll probably use it anyway, with the complication that my users will not have their BitWarden password updated when they are forced to change their LDAP password. Because the organizational features and data structures seem to outweigh that complication. For now, anyway.
By the way, there is an SSO feature included with the enterprise version of BitWarden ($) that solves(-ish) the problem by offloading the key encryption/decryption to stored key pairs in an external database using a complicated, rickety scaffolding of tubes and wires. VaultWarden doesn’t seem to be leaning toward replicating that functionality, and neither do I.
I saw a deal pop up for Pinecils, and took a gamble. There’s been a little bit of buzz about their next generation model, but they don’t seem to be making a big deal of it on their website. So when I bought them, I wasn’t 100% sure I’d be getting the V2 product.
But since the offer did mention “short tip,” I assumed it was probably the V2 product, because the increased power and short tip are what distinguishes V2.
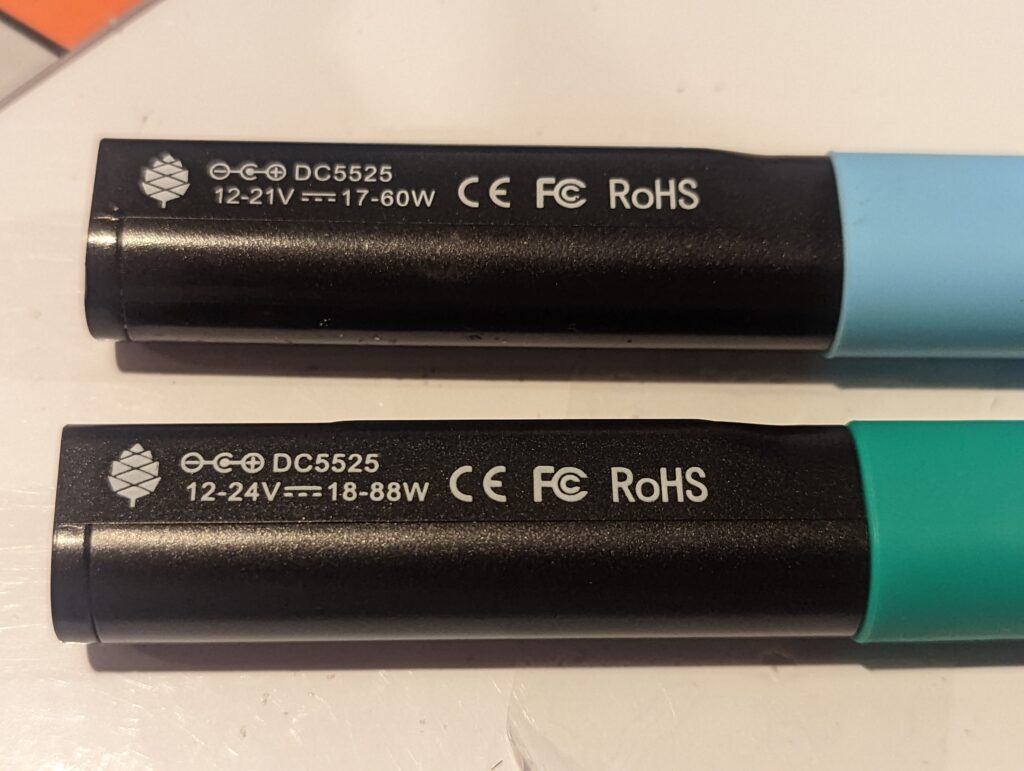
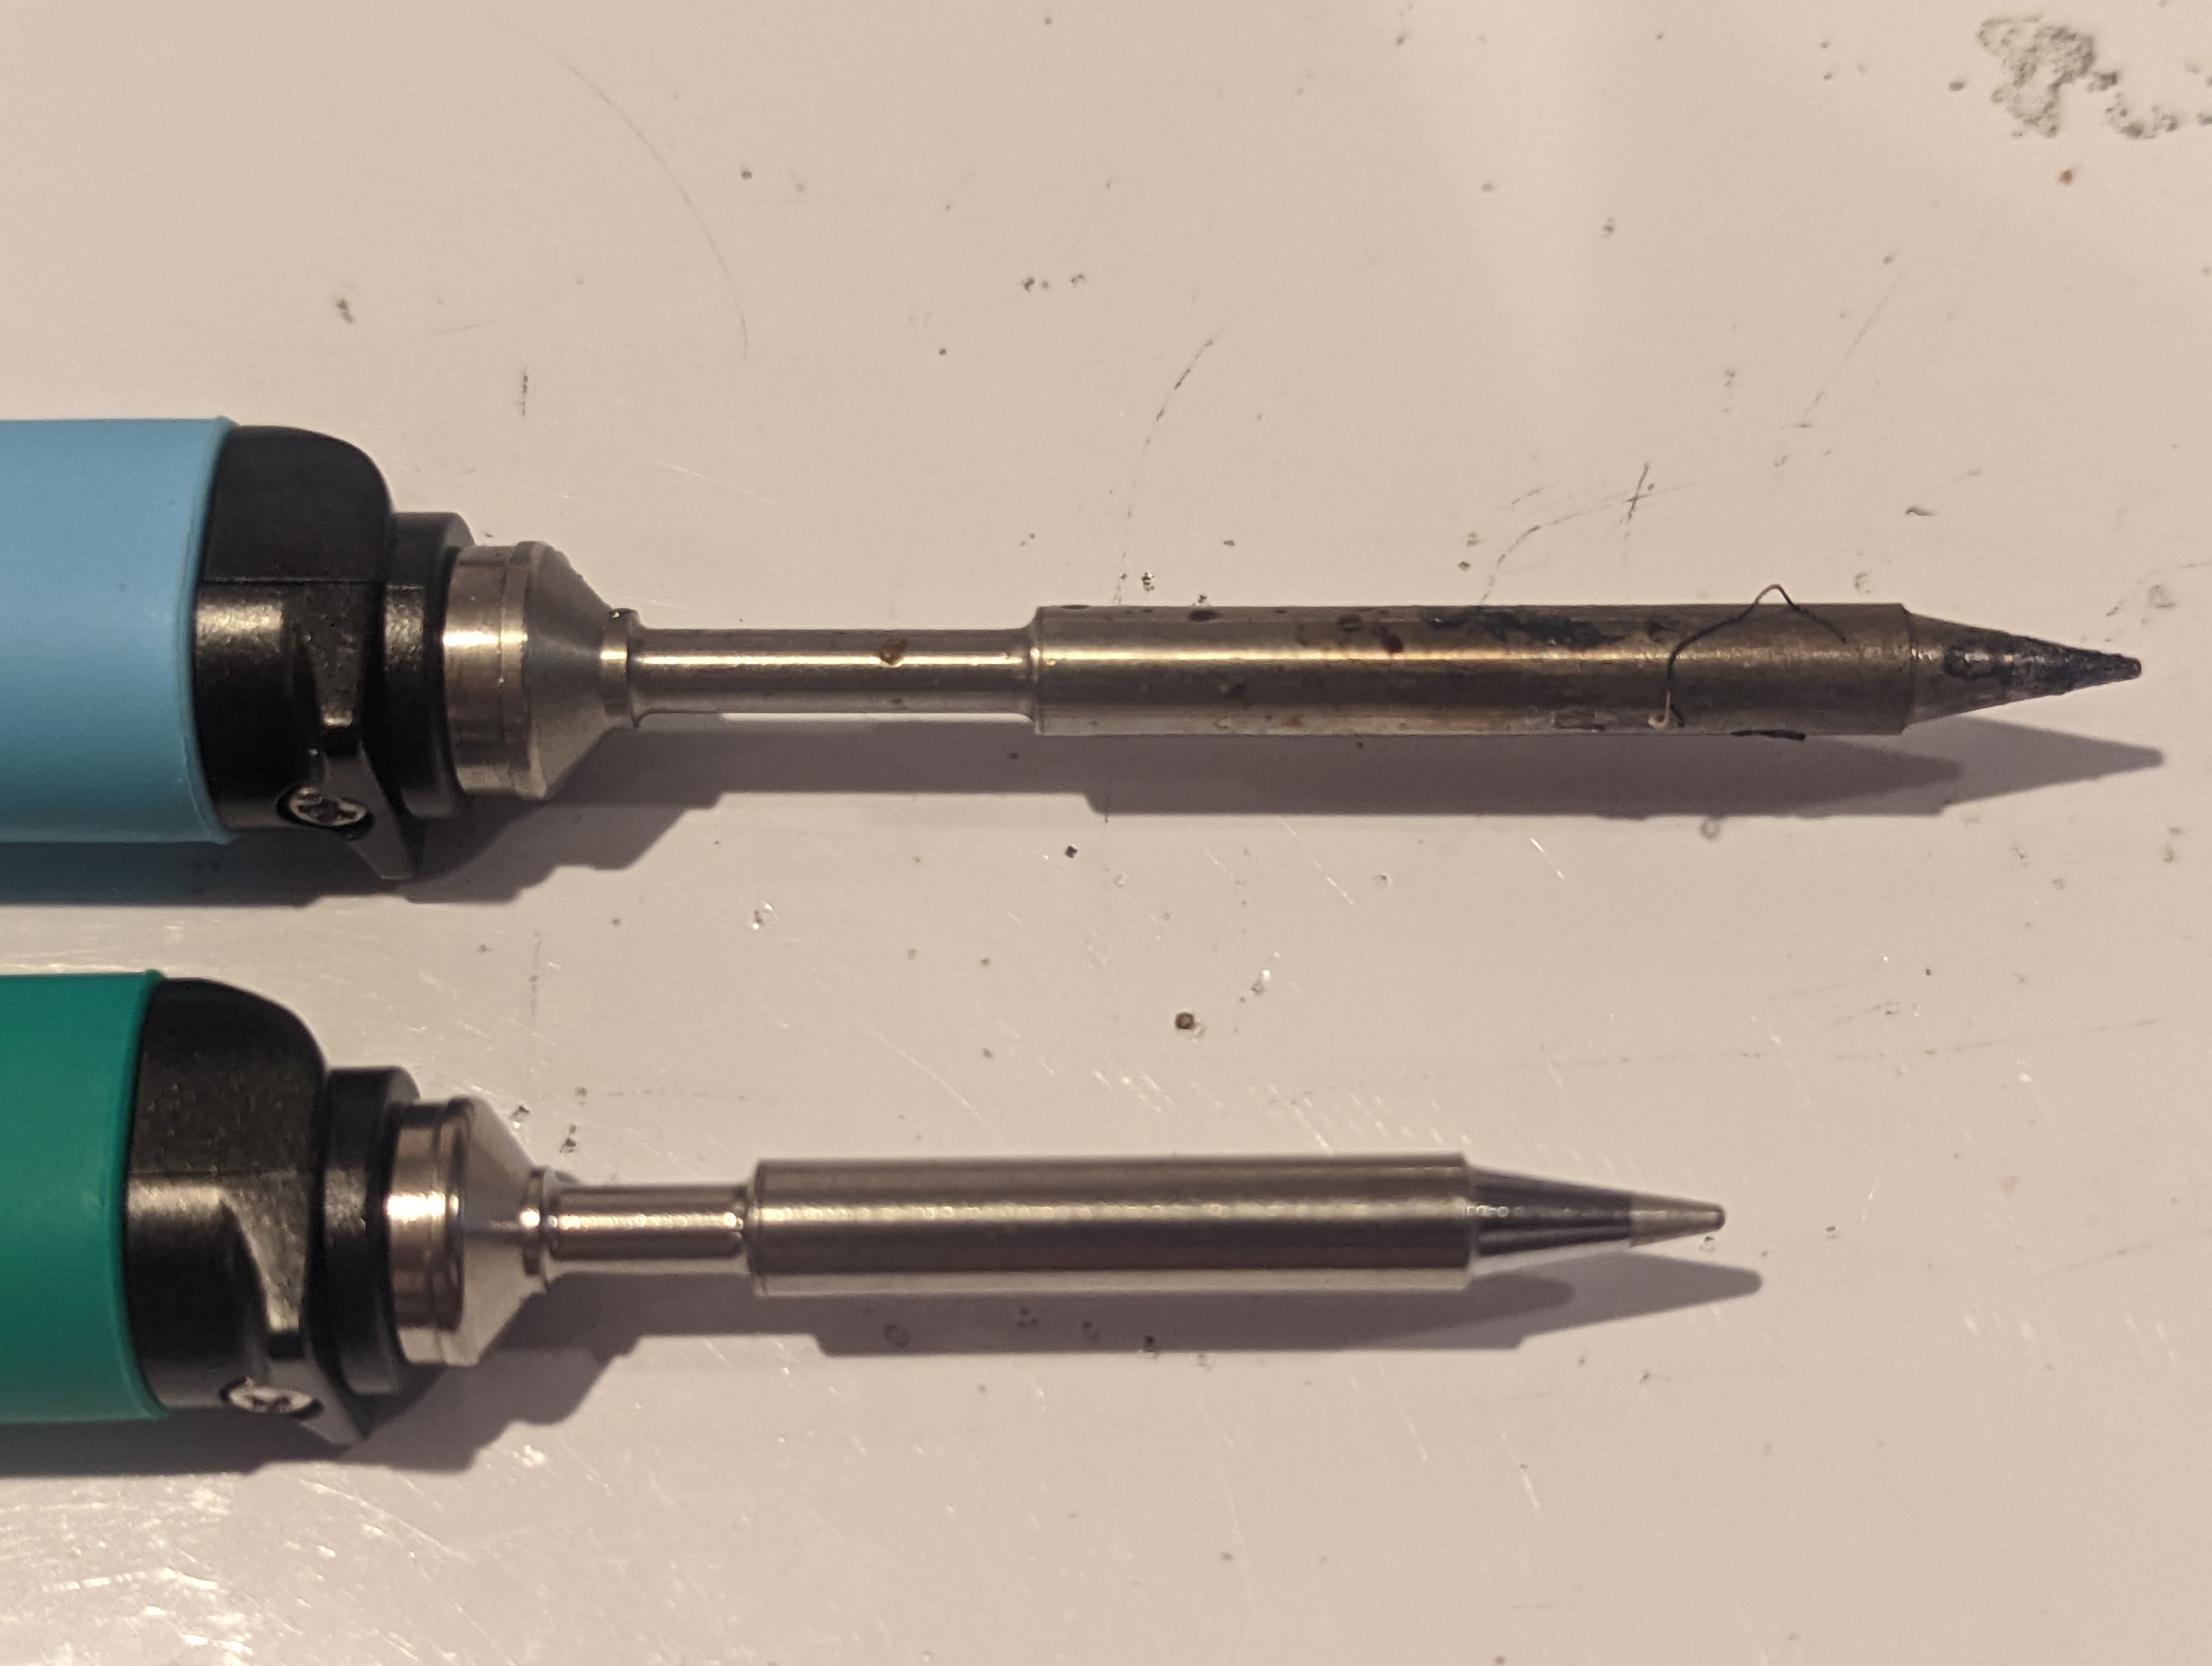
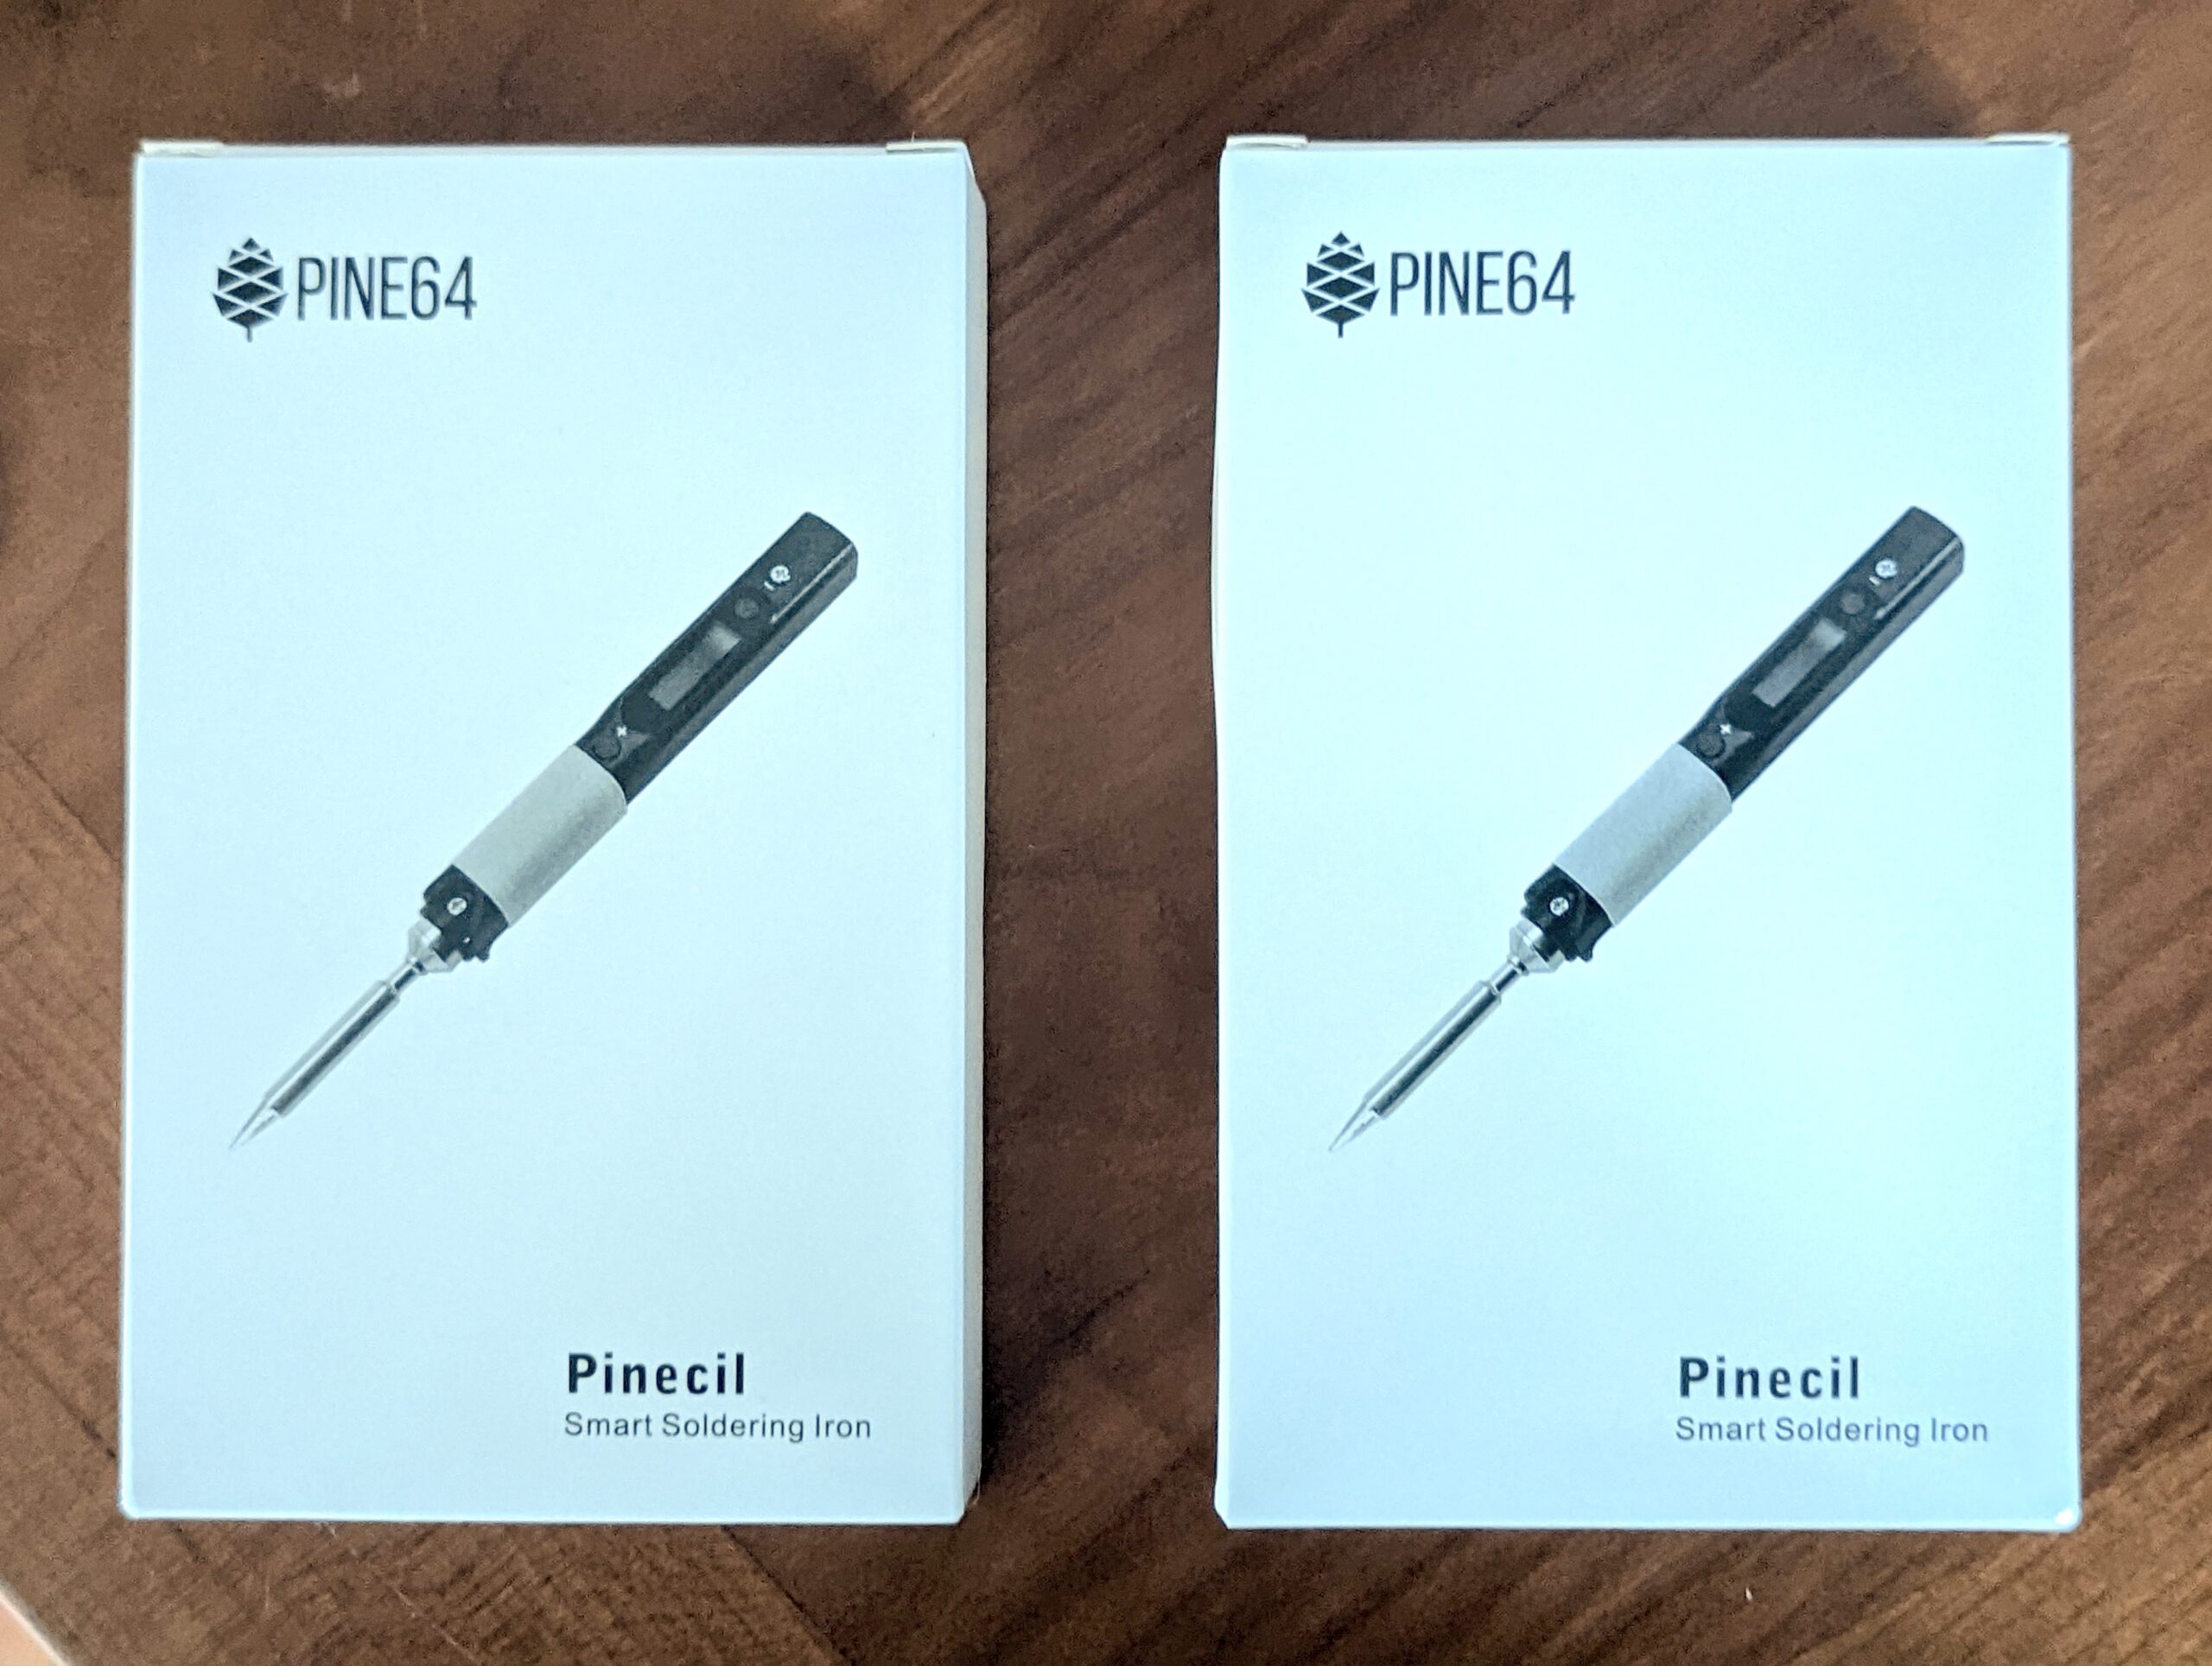
Here’s the V2 next to the previous version. You can see the difference in tip length and the difference in power spec.
From one write-up I found, the combination of increased power and short tip (less mass to heat up) results in ridiculously fast heat-up time. And yes, it has definitely improved. With my battery bank (EasyLonger 65W PD) heat-up time is down to about 6 seconds. As you can see, it will happily accept more PD power now. I have a 100W PD bank from a Kickstarter coming soon. Some reports indicate that with the right power, heat-up time is down to near-instant, which is amazing.
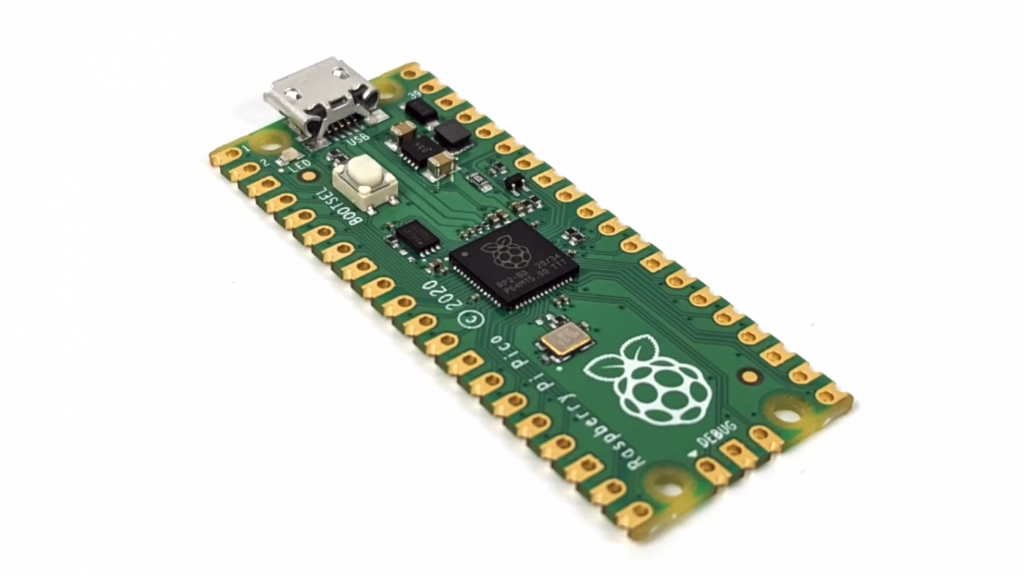
For our Tarot Badge this year, we chose a display with an onboard SD Card slot. The flash amount on the Pico was nowhere near sufficient for storing even one tarot deck at the display resolution, much less the three decks we included in the badge.
Early on, superdev Kevin had major success in coding our routines. Everything pretty much worked, loading cards wasn’t super fast due to limitations of the hardware, but splitting off the animations to their own core while card loading happened made things appear more seamless for the user.
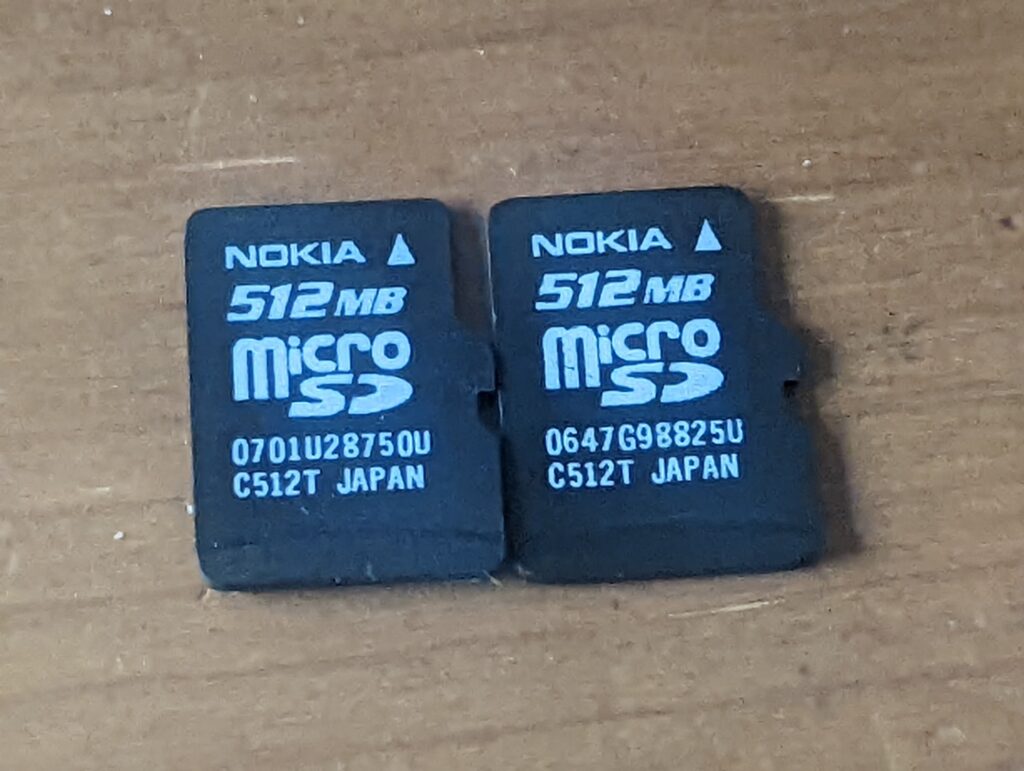
Of course in badgelife we count our pennies and look for deals, so I bought bulk microSD cards and adapters — in the quantities we were buying, even bulk retail was at least triple the cost of what we ended up with, which was a whole bunch of 512MB Nokia cards that appeared to be pulled from phones and surplussed.
Then we started noticing anomalies. Sometimes they would work, and sometimes they would simply fail to mount. We spent a lot of time troubleshooting this, and eventually bought a bunch of Gigastone MicroSD cards so that we’d have something to hand out at Defcon with the badges released there.
When we got back, however, we went into persistent mode. There was no way we were going to let this go without at least an explanation. SD cards are pretty low tech, and there aren’t that many variables in the mounting process — so why are they failing to mount when they read perfectly well on a PC.
The answer, it turned out, was baud rate. Kevin and I patiently sorted through numerous iterations of code with various cards, working with different variables until we found it. Turns out when you drop the baud rate down low enough, it mounts. And it doesn’t seem to really drastically affect the image load time. So it’s usable.
But we wanted to drill down even further. Because some Nokia cards worked and others didn’t. Eventually we came up with an iterative mount sequence, which is implemented in the current version of the release firmware. Basically, we try mounting at 4M. If that fails, we try at 1M. Then 500K. Then 100K. Then 50K. Then 4K. If it fails to mount at 4K, we call it a failure and toss that card.
So when you boot your badge, it tries that entire sequence described above behind the scenes, and reports the results once it settles on an acceptable baud rate.
I’d like to explore further and understand what determines the usable baud rate on a card, especially given that they are all, by all appearances, very similar models with the exact same capacity. If time permits, I may do a correlation of actual model numbers with detected baud rates.
If anyone knows, feel free to get in touch for further discussion. Meanwhile, I hope this helps anyone working with SD cards in the RPi Pico or RP2040 platform.
Seems like we’re all recovered from C19 now. Some of us went to BSidesNova yesterday. First batch of post-con Tarot badges about half sold & shipped, the rest will probably be ready later this week and stocked (some on Tindie for those still on the waitlist that haven’t found our site shop yet, and the rest on the site shop).
There seems to be momentum for an in-person meetup this week. The basement is in shambles right now with all surfaces taken up with badge parts, so I’m proposing a Social House meetup tomorrow evenings.
I will probably have both the LilyGo and PineTime watches with me to compare and contrast. The LilyGo is running the AND!XOR software under MicroPython. The PineTime is stock right now. Someone will likely have both of our badges if anyone needs to pair.
All are welcome. To quote Infinite Jest:
Obesity. Obesity with hypogonadism. Also morbid obesity. Nodular leprosy with leonine facies….
The acromegalic and hyperkeratosistic. The enuretic, this year of all years. The spasmodically torticollic….
Those with saddle-noses. Those with atrophic limbs. And yes chemists and pure-math majors also those with atrophic necks. Scleredema adultorum. Them that seep, the serodermatotic. Come one come all, this circular says. The hydrocephalic. The tabescent and chachetic and anorexic. The Brag’s-Diseased, in their heavy red rinds of flesh. The dermally wine-stained or carbuncular or steatocryptotic or God forbid all three. Marin-Amat Syndrome, you say? Come on down. The psoriatic. The exzematically shunned. And the scrofulodermic. Bell-shaped steatopygiacs, in your special slacks. Afflictees of Pityriasis Rosea. It says here Come all ye hateful. Blessed are the poor in body, for they….
The leukodermatic. The xanthodantic. The maxillofacially swollen. Those with distorted orbits of all kinds. Get out from under the sun’s cove-lighting is what this says. Come in from the spectral rain…. The basilisk-breathed and pyorrheic…. All ye peronic or teratoidal. The phrenologically malformed. The suppuratively lesioned. The endocrinologically malodorous of whatever ilk. Run don’t walk on down. The acervulus-nosed. The radically -ectomied. The morbidly diaphoretic with a hankie in every pocket. The chronically granulomatous. The ones it says here the ones the cruel call Two-Baggers—one bag for your head, one bag for the observer’s head in case your bag falls off. The hated and dateless and shunned, who keep to the shadows. Those who undress only in front of their pets. The quote aesthetically challenged. Leave your lazarettes and oubliettes, I’m reading this right here, your closets and cellars and TP Tableaux, find Nurturing and Support and the Inner Resources to face your own unblinking sight, is what this goes on to say, a bit overheatedly maybe. Is it our place to say. It says here Hugs Not Ughs. It says Come don the veil of the type and token. Come learn to love what’s hidden inside. To hold and cherish. The almost unbelievably thick-ankled. The kyphotic and lordotic. The irremediably cellulitic. It says Progress Not Perfection. It says Never Perfection. The fatally pulchritudinous: Welcome. The Actaeonizing, side by side with the Medusoid. The papuled, the macular, the albinic. Medusas and odalisques both: Come find common ground. All meeting rooms windowless. That’s in ital: all meeting rooms windowless….
Nor are excluded the utterly noseless, nor the hideously wall- and cross-eyed, nor either the ergotic of St Anthony, the leprous, the varicelliformally eruptive or even the sarcoma’d of Kaposi….
The multiple amputee. The prosthetically malmatched. The snaggle-toothed, wattled, weak-chinned, and walrus-cheeked. The palate-clefted. The really large pored. The excessively but not necessarily lycanthropically hirsute. The pin-headed. The convulsively Tourettic. The Parkinsonially tremulous. The stunted and gnarled. The teratoid of overall visage. The twisted and hunched and humped and halitotic. The in any way asymmetrical. The rodential- and saurian- and equine-looking….
The tri-nostrilled. The invaginate of mouth and eye. Those with those dark loose bags under their eyes that hang halfway down their faces. Those with Cushing’s disease. Those who look like they have Down Syndrome even though they don’t have Down Syndrome. You decide. You be the judge. It says You are welcome regardless of severity. Severity is in the eye of the sufferer, it says. Pain is pain. Crow’s feet. Birthmark. Rhinoplasty that didn’t take. Mole. Overbite. A bad-hair year.
So we got back, recovered from Covid, parts started arriving, and we started assembling and listing Tarot badges for after-con sales. The ones we listed were snapped up immediately.
There are a lot of folks still on the waitlist at Tindie. Well, Tindie flagged the sudden influx of orders as suspicious activity, and they held those orders up for a couple of days, suspended ordering and disbursements. Eventually they let the orders flow through, at which point they were packed into mailing boxes and prepared for shipment. But they still haven’t unlocked disbursements. Normally they release money for disbursement as soon as we provide tracking. Maybe they’re waiting for USPS to scan their arrival? (shrug).
In any case, we had been beta-testing our own e-commerce and shipping platform here at the website, and so far it’s much more pleasant to work with than Tindie — primarily because it supports shipping. Tindie has always been a hassle because of the manual process of getting the addresses from Tindie into the shipping software and the tracking numbers back into Tindie. The new shop here handles the whole process from start to finish. So if you haven’t gotten one yet, consider buying it here instead of Tindie. We will stock some on Tindie later this week for those on the waitlist that don’t get the memo.
Some notes on the badge:
Touch and hold the Sun symbol, for longer than you’d expect to have to, to interrupt the demo and reach the main menu. Scroll the menu options using up/down, then select the Sun symbol again to choose the option.
Yes, the front board has the outline for a SAO connector. No, don’t connect an SAO connector to it. The next batch will be fixed — the currently released batch has power and ground reversed and might fry your SAOs.
Best practice, hole the board by the bottom half. Those headers that connect the front and back boards, the six pins on the left near the top, those carry the signals for the capacitive touch sensors. If your hand touches one of those, or some of the pico pads on the bottom of the board, it could interpret those touches as menu navigation and cause confusing results. If you hold it by the bottom half, it should avoid those situations.
This is a new creation. If you notice anything that doesn’t seem to work right, let us know, and we’ll get our developer to look into it. We’ll probably release a couple more versions of the firmware.
Any questions? DM @dc540_nova on Twitter or join our Discord.
I got tired of Tindie’s lack of shipping integration, so I implemented an in-house shop. Then I put some of the new batch of Tarot badges in stock on both platforms. Tindie immediately suspended sales pending investigation of “suspicious activity,” which I guess, I don’t know, is the result of them announcing they’re back on social media, and then a sudden rush to purchase them. I mean, over 100 people on the waiting list, what did they think was going to happen? In any case, they’re also available here (click shop) — eventually the goal is to abandon Tindie as it’s far easier to fulfill shipping from this platform.
I took advantage of a spontaneous opportunity to get a NExT implant at summer camp. NExT = 125KHz T5577 RFID and 13.56MHz NFC NTAG combined into one bioglass cylinder.
I was able to put the DC540 website URL into the NFC tag and read and share it right away, but I had to wait until I got home to my RFID readers to test the T5577 in its natural habitat. I confirmed that the Proxmark 3 RDV4 was able to write to it as well as read it, but having a door reader read it is another thing.
I was a bit disappointed when my readers wouldn’t read it. I reached out on the forums and posited my theory, that inflammation from the implant might be blocking it, and that perhaps waiting would resolve it. A response immediately came back from another forum user agreeing that in some cases two weeks was a good amount of time to wait for internal swelling to go down and make it more readable.
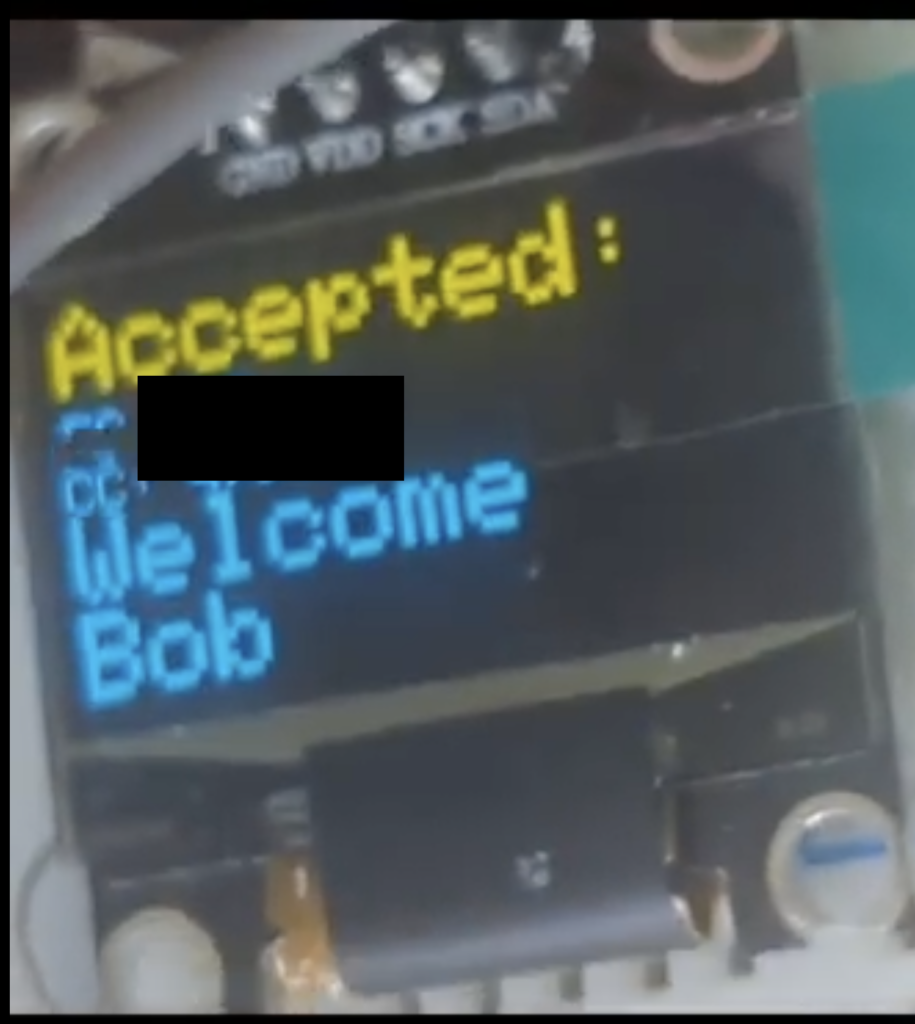
And here I am at two weeks and three days from implant day, confirming that the T5577 side of the implant is actually working with a standard HID door reader (mine is connected to an Arduino Uno and an SSD1306 for this demo).
As usual, we came back from DefCon inspired, energized, and diseased. Yes, some of us came home with Covid this year. But we’re recovering, and it hasn’t stolen our Big STEM Energy.
We decided to take what we’ve learned over two years of designing and manufacturing badges, and offer a course. This takes us a step closer toward fulfilling our mission as a non-profit, and teaching strengthens everyone all around. Students learn something, and teachers become better teachers.
This class will be in two phases. The first half will be an intro to MicroPython using the Raspberry Pi Pico microcontroller with breadboards and some basic electronic circuit elements (LEDs, a display, buttons, etc). culminating in cobbling together your own MicroPython game!
The second half will be taking what you’ve learned from the first half and turning it into a standalone PCB (printed circuit board) project, using all the elements and code you’ve mastered in phase 1, culminating in sending it off to a fab house to be manufactured. You’ll end up with a permanent keepsake of what you’ve learned, and hey — it might even WORK!
We’re looking to start this in October. The class will be virtual, so don’t worry if you’re not local. We’re trying to avoid requiring soldering skills until the very end, so don’t worry if you’re not skilled. The class fee will be nominal, and supports a nonprofit doing good things. If you’re interested, make sure to follow us on twitter @dc540_nova and Join our Discord — an invite link should be in the right column of this website somewhere. We’re going to cap the class at around 25 or so. The class will likely be held in a moderated Discord voice channel. There will be a parts list published in the coming days — actually two parts lists — one for those who have soldering capabilities already, and one for those who don’t. Once you’re in the Discord, request in the main welcome channel to be added to the MicroPython PCB class list — that will get you into the discussion channel, where we’re planning and staging the class. Once the class begins, those who sign up for it will be added to another group and will be able to join us one evening a week for live classes. We may record the lessons as well for those who miss a lesson or can’t meet the consensus-decided class evening.
If you get lost in the code and can’t keep up, don’t worry, we’ll provide some basics at each stage to make sure you have something that works. One of the great things about microcontrollers is that once you prove all your circuit elements work, you can go ahead and build it, and worry about the software later. It’s easy to apply new code to a device that has working access to all of its components.
We created a dilemma for ourselves last year. If you saw our badge from last year, the Tree of Life badge, you’ll notice that we took a simplistic approach when mounting our OLED display. We used the version of the display with a backing PCB, and just mounted the PCB to the top board. It’s not innovative, it’s not beautiful, but it’s fully functional.
In #badgelife tradition, we wanted to do a little bit better this year. My goal was for the display to be flush with the top board, for a clean, flat appearance. At the very least, this would likely mean mounting the display on the bottom board. This creates a dilemma:
If mounted via header pins and therefore removable/replaceable, the backing PCB of the display ends up at the same height of the top board. This is undesirable, because the backing PCB is larger than the display and inelegant. The goal is to have just the display itself rise into a cutout in the top board.
I could certainly have soldered the display directly to the bottom board, but since I made the design decision of mounting the display overtop and perpendicular to the Raspberry Pi Pico, , this would prevent access to the Pico in case a solder joint needed to be corrected. It would also prevent easy replacement of a broken or faulty screen.
So we looked at the problem and found several options available to us. I think the ideal solution would have been low profile female headers on the bottom board for the screens. In practice, however, we found these to be akin to Unobtainium. The only place sizes were properly defined was on Mouser and DigiKey, and no, I’m not paying a dollar each for freaking headers. I did find a writeup by someone who had done the research and found some reasonable low profile headers in China, but we were on a time crunch, so those remain on the to-be-explored list.
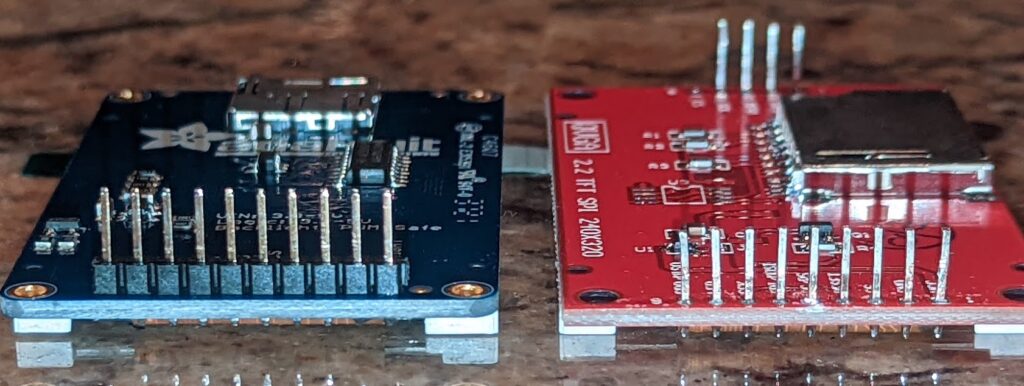
The solution that found us was to remove the “pin carrier” from the display after the pins had been soldered. The pin carrier is the extra bit of plastic that holds the row of pins together. This allows the pin to sink a bit lower into the receptacle header. Then we noticed it was bottoming out and not ending up completely flush at the top, so we ended up trimming about 1-1.5mm from the end of the pins on the display.
This solution allows the display’s backing PCB to sit just below the front board, and the display itself to sit flush, while still able to be removed for troubleshooting or inspection.
Here’s a before and after of the display modification, hopefully it helps to visualize. Note that the “before” model is actually a different model because I’m all out of unmodified stock.
So the group is home. Some of us are recovering from winning the C19 CTF this year, so obviously this coming Monday’s meeting will be virtual. Please join the discord.
We hashed out some changes before and during Con. The Executive Committee met in secret at the Jersey Eats food truck at 3AM and made the following decisions, which you all will just have to live with until someone creates consensus for better ones.
BadgeDev meetings for any potential badge to be released in conjunction with DC31 will be separate from the regular group meetings. Very limited in scope at this time, we will bring others in as needed.
We will be launching a class for members who wish to learn to do PCB design. If this is you, join the PCB class channel in the Discord. We’ll plan a schedule and dates. The syllabus will come soon, and the objective of the class is for each attendee to send something off to be fabbed and have something useful and/or blinky to cherish, lament or scoff at forever.
We will also hold separate meetings outside the normal group meetings to deal with the administrative tasks of keeping this group functional. Some things will trickle out of these meetings into the general membership meetings. There are soft, unspecified growth goals that will emerge and define themselves better as we move forward.
I have a funny little story to share. A few of us were hanging in the Forum outdoor area. Some were smoking, some were accompanying smokers. We were shooting the shit. Dude rolls up with one of those big badges with the speakers, we got to chatting about that, and Display recognizes him as the Strange Parts guy. He acknowledges, gives us cards & trinkets, and we’re still shooting the shit I guess. At some point DeadAddict rolls up and participates in the shit-shooting. Someone asks how the con is going, and I give my usual, “you get out of it what you put into it,” and DA responds, “oh no” and we all laugh. Some of the folks around are less attuned to DefCon history and don’t recognize DA. I think he’s got one of the most recognizable faces at the con. That’s fine, I didn’t recognize the Strange Parts guy. And nobody recognizes me unless they’ve interacted with us about badges and shit.
I wanted to provide some follow-up on that. My first instinct was that it was an unsalvageable error, which lead to adding the anti-metal NFC sticker to make it “work” while bypassing the onboard circuit. Not that it matters, nobody at Defcon in their right mind is going to scan your NFC badge. “Sure, I’ll take your malware!”
I’ll dive into an explanation with lots of pictures, to make it easier for folks maybe newer to Kicad to see the issue.
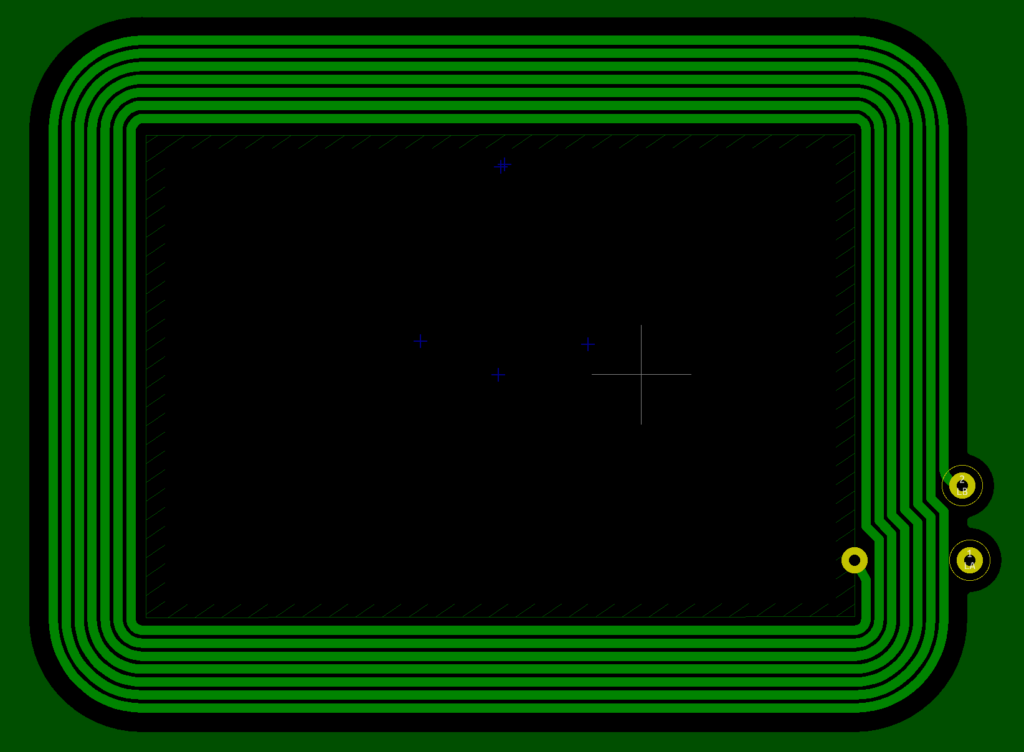
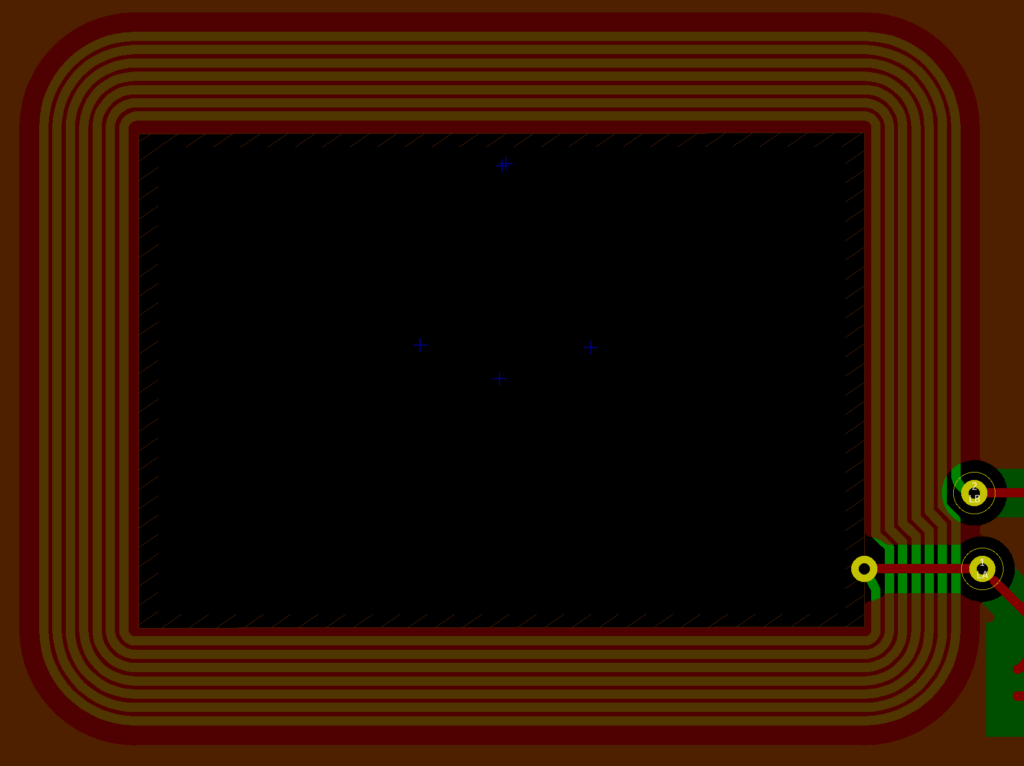
Here is the back copper layer. You can see that there is the antenna, which is the tight loops in a rounded rectangle, and that there is a copper keepout zone defined inside the antenna. This side, we believe to be correct.
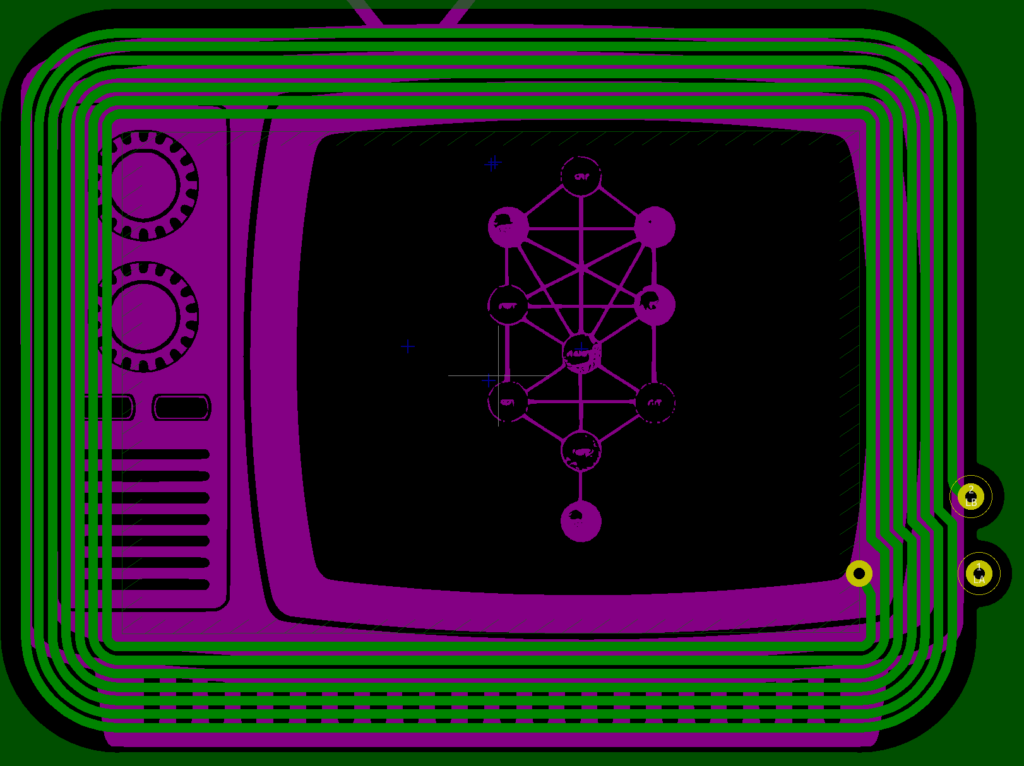
And for reference, here’s that same area with the silkscreen showing, so that you can see where the antenna lives on the backside.
With me so far?
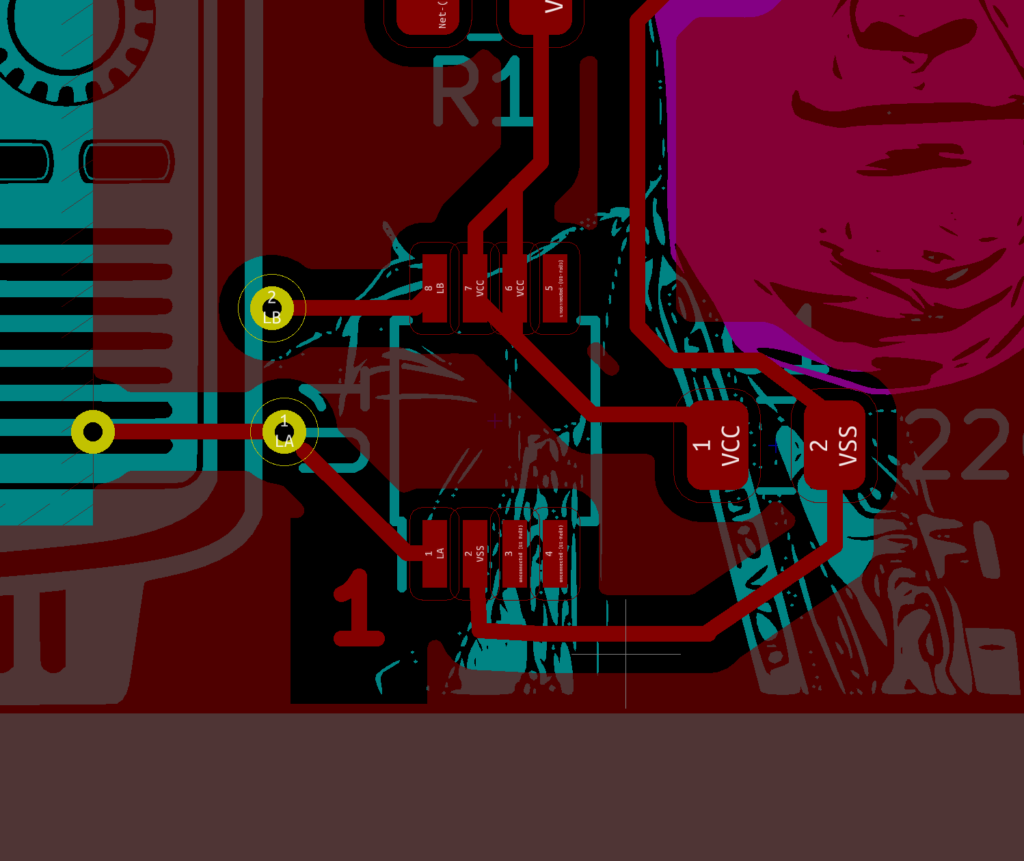
Ok, here’s where my attention to detail failed me. Here’s the front side copper layer in the same area. I’ve left the back copper layer visible but dimmed, so you can see how they interact/compare.
You see what I did there? I was in such a hurry to do this that I didn’t think it through. I just copied the keepout zone from the back to the front, thinking they needed to be the same. They absolutely don’t need to be the same. The purpose of the keepout zone is to allow radio waves to travel THROUGH the antenna, energizing it. The back is correct, because you don’t want a keepout zone where you actually want copper (the antenna). The front side, well, the keepout zone should have extended just outside the antenna on the back. I hope that’s clear. The front copper fill (which isn’t even tied to a net, not even ground — it only exists for the unmasked areas to be shiny!) actually overlaps the antenna itself, preventing the thing this circuit needs to the most — radio waves flowing through the antenna.
So here’s a shot with all of it showing, so you can see what part of the copper would need to be removed for the circuit to work (hint: All of the copper on the FRONT side that covers up the antenna).
So I assumed it was a lost cause. That copper is INSIDE the board, or at least under layers of mask and silk. Surely that can’t be repaired, or isn’t WORTH being repaired.
But this is DefCon, of course, and Syntax, who I met in either LineCon or MohawkCon or both at my first DefCon in 2017, speculated that perhaps if one wet-sanded the silk, mask and copper out of that area blocking the antenna (basically the red area highlighted above — while being careful not to destroy the trace between the inside and outside of the antenna across the two vias) it could still work. It would look a little janky, but I might try it when I get home just for the experience. And then BradanLane suggested removing it with a laser and acid etch, which might be a little cleaner.
Idunno. I’m going to try it, because dammit, I really want to see my eye light up when I scan it. If any of you lunatics goes home and tries it as well, I’ll mail you the TSSOP-8 NFC chip if you don’t already have one, and you can install it yourself. It goes here:
Sorry I didn’t bring the NFC chips with to Defcon, but you would have lost them in your sticker bags anyway. I naively thought it was a lost cause, and I mean, it’s not like hackers enjoy the recovery of a lost cause by any means necessary, LOL. It’s not like a point of pride or something to overcome by applying brute force, stimulants, ADHD and procrastination on actual money-making projects, simply for the glory of having WON.
Navigate to ‘Game Menu 1’ within the badge. You can choose to either practice or play. The practice option will allow you to refine your tarot card trivia information. When you are ready, select play and get 15 of 20 questions right in order to pass this challenge.
Game 2: Steganography
Steganography is a way to hide text in pictures. There are many ways to go about decoding steganography but I would suggest starting with a simple decoder found on Github https://stylesuxx.github.io/steganography/.
For this game, the steganography is hidden within our very own DC540 Shitty Deck (also featured in the badge but use the deck located at our GitHub Page. You’ll need to decode three pictures and then concatenate the answers to get a six-digit number. This six-digit number is what you will put into the badge.
Game 3: Tarot Card Reenactment
For this game, pick your favorite tarot card and reenact it. Take a picture and post it to our DC 540 Tarot Badge channel to receive your six-digit code. Be creative. Have fun.
Game 4: Scavenger Hunt
Find 10 of the items pictured on the Rider-Waite tarot deck to include: – a Fool – a Magician – a Hermit – a staff – a robe – Lovers – old school scales – a pair of knee-high peasant-looking boots – a throne – a white dog – an Angel – a chalice – six cups – eight stars – a chariot, – YOU MUST INCLUDE a picture with another person wearing the DC540 Tarot Badge
Post your photos to the DC540 Tarot Badge Discord channel. Once you post all 10 items and we’ll send you the six-digit answer to this game. Points for creativity (not like points really matter but you do get imaginary DC540 points).
Game 5: Tarot Flashcards
Navigate to ‘Game Menu 2’ within the badge. You can choose to either practice or play. The practice option will allow you to refine your tarot card flashcard knowledge. When you are ready, select play and get 15 of 20 questions right in order to pass this challenge.
Game 6: Personalized Tarot Card Deck
We at DC540 created our own terrible Tarot deck. To get credit for this quest, create your own deck. It must be original and posted to DC540.org/shittydecks to share with the world. Send us a message on our discord channel DC540 – Tarot Card Badge and make sure to include @DC540BAAB and @LYRATHEDAMMED in order to get credit for this game. We will send you a code and you can enter it on the badge.
Game 7: Morse Code
Have you ever wanted to learn morse code? This game will help. We have two modes – practice and play. The practice mode will display the letter, number, or word on the screen, and then the badge will “flash” in morse code. When you feel confident, you can select play. You will have three separate strings of words displayed on the screen. Use the left (dot) and right (dash) buttons to type out the morse code. If you get all three right. The badge will “flash” the morse code and let you pass the game.
Game 8: Decryption
There are three encrypted messages which can be found below or on the badge. Each of the three ciphers has a piece of the final answer. Your final answer should have six digits.
Malort is the alcohol beverage of choice among the DC540 members. Make your own drinkable recipe using Malort and share on the Discord page. Have fun and be create your own
Game 10: NFC
In a previous post, one of our members describes his NFC tag stickers. There are several of these distributed about DEFCON. We will drop hints on Twitter and our Discord website. This will provide a clue to the next sticker location. Find all the stickers and locate the code you need to enter into the badge.
Game 11: Tarot Badge Pair
Find another player wearing a DC540 Tarot Badge. Go to the Extras menu on the badge and select “pair”. Once paired, you’ll pass this game. While you are at it, say hello and get to know a fellow DC540 badge player.
Game 12: Boss Pair
There are at least two DC540 Boss Badges wandering around at DEFCON 30. They belong to several of our DC540 members. Introduce yourself and give us a unique sticker we can add to our collection to pass this challenge.
As a hint, we will be posting on Twitter occasionally or find us on the Discord site and ask us to meet up. Two of our handles are already included in this document but another Boss Badge holder was instrumental in programming this badge. His name is all over the documentation.
Important Tips and Hints
The DC540 Tarot Card channel can be found using the permalink located on the right side of the DC540 website’s home page. If you run into issues or questions, you can reach out to @DC540BAAB and @LYRATHEDAMMED on Discord.
Games do not need to be played consecutively.
If you reset the badge you lose the games you won.
Any answer that you have to input will be six digits long and consist of the numbers 1-4. For example, the answer for a game might look like 112114
Once a game is won, the badge will light up in a pattern and a red LED will stay lit in the corresponding number on the wheel.
Complete all twelve games to win. The first person who completes this game during August 11-14th and brings their badge to one of the DC540 founders wins a prize (To Be Announced).
So in the rush to get this done, apparently I mixed up power and ground between the top and bottom boards. So we’re going to disable them by removing those pins from the headers between the two boards. Power and ground on the front board ONLY provides power to the SAO header.
If you want to bodge it, you’re welcome to bodge it, just desolder the 4-pin header on the right and resolder a 6-pin header after cutting and rerouting the traces appropriately. If you want to add a SAO connector to mount an SAO without power, you’re welcome to do so. Just keep in mind it’s disabled for a reason. If you re-enable it without rerouting, it will burn out your SAOs and make your room smell funny.
This will be resolved in official batch #2 later this summer.
I could have retconned this as a “we deliberately disabled power on the SAO header for the Tarot badge so that it could connect to the Tree of Life Badge without concern for power in a future release of the firmware” but then we’d have to follow through on that promise.
First, a little bit of background. We had the idea for a Tarot badge last year, while walking around DefCon and getting so much love for our Kabbalah (Tree of Life) badge. That badge started so many interesting conversations and opened so many doors that we just felt it made sense to keep going down that path. When we started digging in to complete last year’s badge, I decided to commit to learning more about Kabbalah for a year and then to evaluate. I sorta mostly kinda did that, off and on. Once you start going deep on Kabbalah, you start to see it’s complete interconnectedness with Tarot. What happened was we started wishing last year that we had built last year’s badge bigger to include more about the tarot correspondences. The natural answer to badge insufficiency regret is “maybe next year.” So here we are.
The Badge: Technical
We did not stray too far from the technical features of last year’s badge. At the core level, this is still an RP2040-based Pico, some LEDs, an NRF radio and a display. But here’s why we were struggling until just this week to get it out. We lost a lot of time to decision paralysis – there are a lot of screens available. Which ones work with the Pico? Which ones will work with MicroPython? Which ones will work at our power level. A lot of research goes into these decisions. A lot of parts bought that end up never being used. I’m going to quote a prominent member of the badge-making community who recently said “Why do I do this to myself?” The answer has to be a feeling that you’re putting something useful, interesting and/or beautiful into the world. And we kind of hope we did.
We settled on the 2.2″ ILI9341 with integrated SD card. It seems to be the smallest profile screen available with 240×320 resolution, which is critical for displaying tarot cards. Any less resolution would have looked shitty. And it’s sad, but that’s one of the more expensive screens out there, which reflects in the final price of our badge.
Kevin, our developer, like to scoff at those who consider MicroPython as some sort of lesser language. Some still linger in the world of perceptions where led animations are slow, there are blockers everywhere, and too many Python libraries haven’t made it over yet. We’re here to tell you, MicroPython is thriving. Our LED animations are proof that there’s nothing slow about either the RP2040 or MicroPython. We make generous use of the dual core architecture. And Kevin managed to squeeze three SPI devices onto a two SPI bus system. And nobody knows why, but apparently we’ve implemented AES encryption into the badge.
Next year we’re thinking of bypassing the fully-built Pico and working with the RP2040 directly.
Please remember that none of us do this professionally. We’re all learning. This is a labor of learning, and a labor of love. Last year’s badge was the first “big thing” I ever designed in KiCad. After Defcon, this year we plan to develop some PCBs as a group in a group class series, so that more people can be part of the development effort, and we’ll teach each other some group workflow lessons.
The Badge: Features
It wouldn’t have taken much to make a badge that does a Tarot reading. We didn’t want to stop there. What I envisioned last year, and I told at least a few of you this in Vegas, was this. I wanted a badge that could do Tarot readings, but I wanted it to be OPEN. Meaning I wanted to provide at least one deck. In my naive early imaginations, I thought we’d actually find an artist to do a deck specifically for the badge. But Crowley and Harris we are not. They had time and money to pursue their project. We all have day jobs. Then we realized there are public-domain and open-licensed decks available. So we included (at time of writing) three decks on the badge to choose from. The Rider-Waite-Smith deck, a version of the Tarot de Marseille (unfortunately not the Jodorowsky version — I really want to turn more people on to Jodorowsky and the story of that deck), and what we call the Shitty Deck, one that we hand drew over DC540 meetups. Trust me when I tell you that this deck is absolutely shitty.
We’re including instructions on how to add your own decks to the SD card to make them available for display. It’s slightly convoluted, they have to be resized and converted to raw format, and a naming convention is enforced. But think about it — once you do this process once, you have that deck for use on the badge. We could populate the SD card with the hundreds of copyrighted decks out there that can be found on various file-sharing platforms, but that would be violating copyrights, and that would be wrong. So maybe scan the decks you have. Maybe make your own deck.
So you can choose a deck, you can do a reading. What else? We have badge pairing, of course. We have a challenge game, like last year, but unlike last year when all we had to give as a prize was Defcoin, this year we’re offering a badge as the prize. Either an additional Tarot badge, or last year’s Tree of Life badge. Because of quantity issues, there won’t be many badges to go around at the con itself, so that complicates the game a bit. We’ll see how that works out. Maybe we’ll separate out part of the game so that non-badgeholders can play.
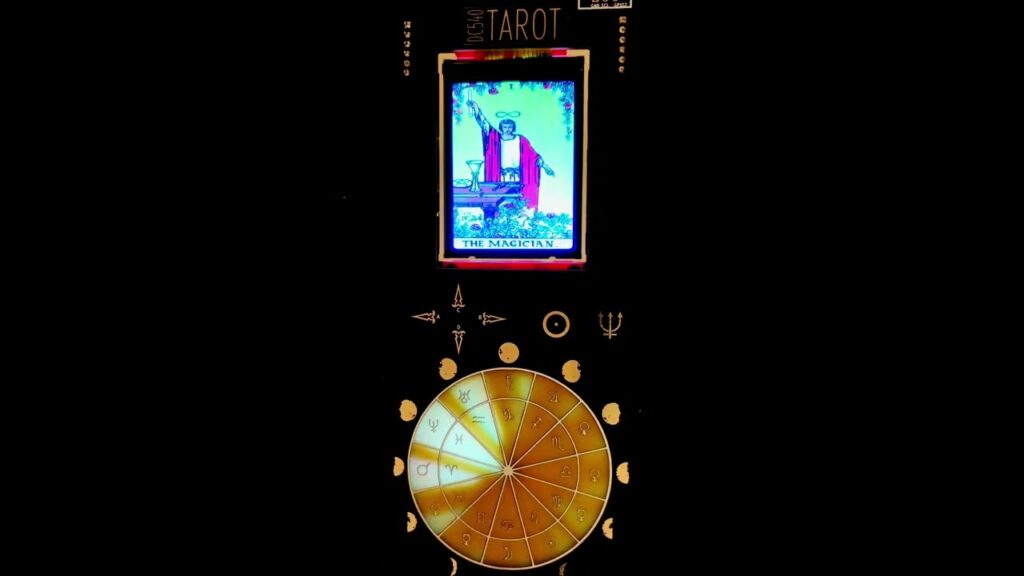
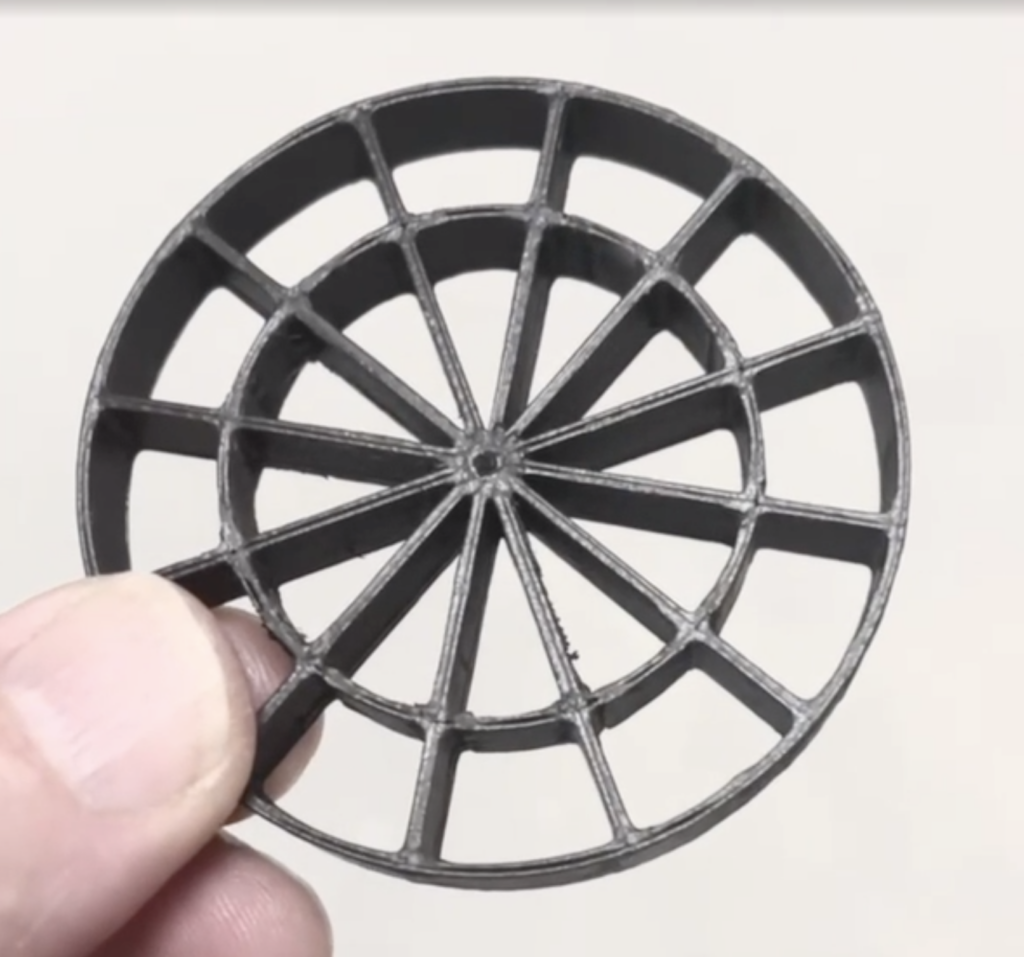
Everyone seemed to like the illumination scheme we went with last year. I’m not a fan of surface LEDs beaming photons into my faceholes, so I chose a more subdued look by strategically removing solder mask on both sides of the board and illuminating from a board below. I pushed to expand on that this year, but instead of just beaming through shapes and symbols, I put the shapes and symbols on the surface and opened up an entire wheel for shine-through. As you can see, the color of the FR4 itself tends to adulterate the LED colors a bit when illuminating large areas like that, but not excessively. I found it difficult to get a good blue to shine through, for example. As delivered, there is a lot of bleed between the different segments of the wheel, but in the demo Kevin posted last night, what you see is the result of gluing a light separation wheel to the underside of the top board. There are 24 LEDs on the bottom board this year, each illuminating half a wedge on the the top board. The separator wheel shown in the video only has 12 divisions, but still provides a nice sharp difference between the wedges. We will be providing an STL file for 3d-printing your own separator wheel, and the STL file has the inner ring defined as well, for full separation of all 24 segments. To be fair, I think beauty is in the eye of the beholder. The spinny animation in the first public demo, when run without a separator wheel, tends to lead to some interesting effects that evoke searchlight patterns at times, which is its own meaningful thing.
Searchlight casting for faults in the clouds of delusion
Anyhow, here’s what the beta version of the wheel separator looks like. It’s about 60mm in diameter. Thanks to BradánLaneStudio for creating the STL.
Not Many Copies at Defcon
We are so sorry, but because we got finished so late, we were too timid to drop coin on large quantities of the badge before knowing if it would work, so we won’t have many at Defcon at all. We should have enough to show everyone, and a VERY limited few to sell or trade, but literally don’t get your hopes up. We made 25 in the first batch. There are 10 of us going. We lost a few to testing. So we might have maybe 10 extras if we’re lucky. The good news is, boards and parts have been ordered, so we’ll be able to make more when we get back home.
We haven’t had the deep communications required to figure out how we’re going to distribute such a limited number of badges. We had such a good time distributing badges last year, we wish we could have done the same thing this year. We’ll try to have those discussions by the time the con starts. But seriously, temper your expectations of getting one onsite.
Some Thought About Tarot in General
A lot of people have a lot of thoughts about Tarot. On the ends of the spectrum, there are some pretty heavy expectations people lay on Tarot. As a lifelong rationalist, I see it, much like Kabbalah, as a framework in which to view the world and life events. A structure to be superimposed, for examination and rumination. Sometimes the results can be profound, but I like to believe the results are directly correlated to how much the reader and/or readee are able to open and stretch their minds. I will quote Lon Milo Duquette:
It's all in your head. You just have no idea how big your head is.
DC540’s Status and Mission
Last year, DC540 Nova cemented our status as a 501(c)(3) nonprofit. We have banking, we’re on AmazonSmile, and we have plans to to support people both in and out of the infosec community with our skills, talents, passions and green energy. So when you’re forking over your hard-earned pay to covet one or more of our badges, please keep in mind that it’s going to a good cause. If you’d like to contribute some of that green energy directly to DC540 to support our efforts, you can do so by sending money via Paypal to [email protected]. This will help recoup dev and prototype expenses, and support our mission. Now we’re not saying that making a healthy donation might lead you to receive a badge at Defcon, but we can absolutely be bought. And donations are tax-deductible.
Future Thoughts on this badge
We don’t know if it’s possible yet, but what if a new firmware could be developed for this year’s and last year’s badge that expanded the functionality a little bit, so that when a card is displayed on this year’s badge, the corresponding sphere(s) or path could be illuminated on last year’s badge? We exposed two GPIO pins on both badges via the SAO header, so maybe… Food for thought…
Engage with us. Join our Discord. Talk with us on Twitter.