

Look, I realize my lifestyle is a bit of an anachronism. I prefer keeping things working vs buying replacements when possible. I don’t mind getting my hands dirty and doing a deep-dive if it means my tech will last longer.
Here are two examples from recent weeks.
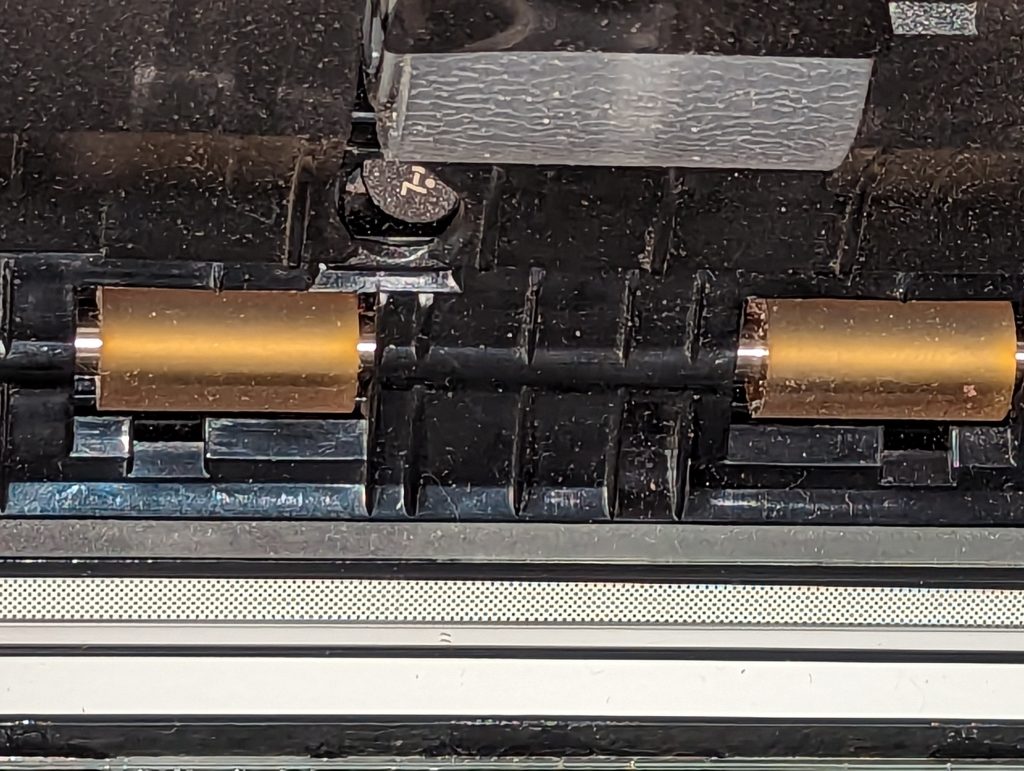
I scan all of my documents into a Mayan EDMS installation in my home network. Incoming mail, contracts, documentation, you name it. In the early days, I used an all-in-one scanner, but the feeder was less than optimal. I shopped for network scanners, but so, so pricy. So I picked up a USB scanner with a decent feeder, the Fujitsu ScanSnap S1500. I posted about this project. It scans in color, and scans both sides. It’s a relatively simple device, and until last week, I considered it super reliable. Last week I rearranged my office and moved it to a different table. Suddenly it would no longer feed. It emitted a horrific grinding sound. Research revealed that the rubber feed rollers had turned to goo, and would no longer spin. I was at a loss on how this happened, until I read the manual. You know, that pesky thing a lot of us tech folks don’t bother to read? Apparently the expectation is that we clean the rollers FREQUENTLY with F1 cleaner. I don’t know what freaking ink I’ve been scanning that eats rollers, but for reference, here is what rollers in good condition look like:
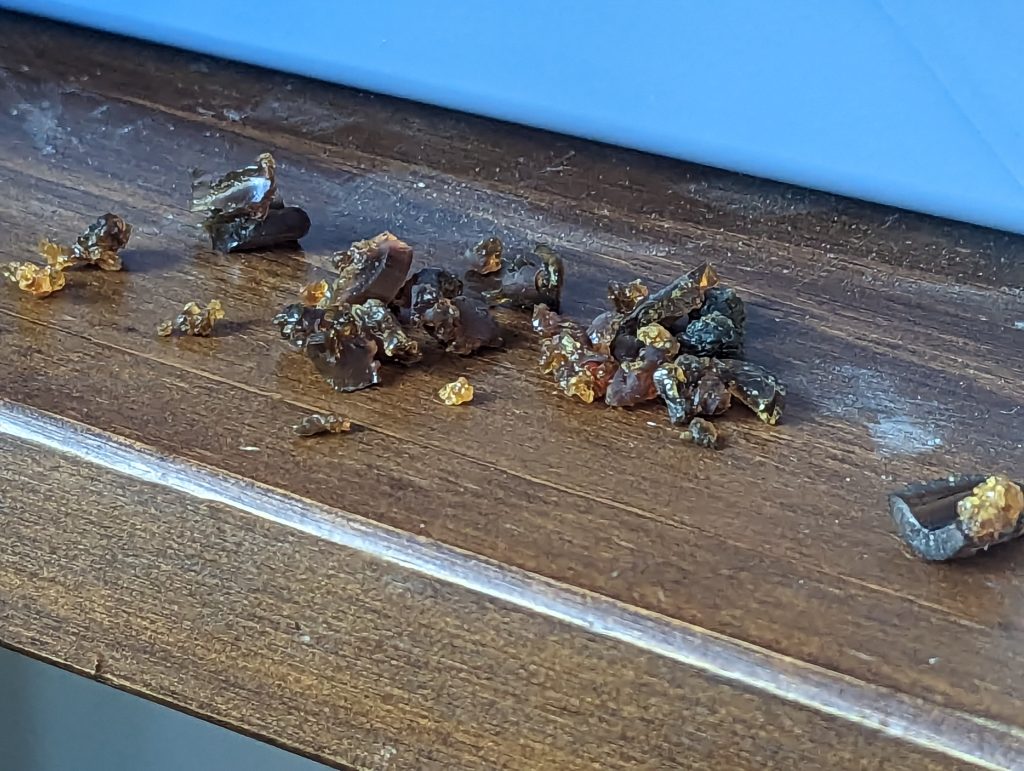
And here is what my rollers looked like after I used a razor and tweezers to peel them off of the shaft:
I have found feed roller shaft replacements on the ubiquitous web shopping site, but I have yet to find any document explaining how to disassemble and replace that particular part. It’s not obvious, anyway. The main parts Fujitsu consider consumable are the pick roller and pad assembly. I’ll dig down and figure it out at some point. For now, I just bought another scanner (super cheap) with rollers in good condition. There’s also mention somewhere of buying just the rollers, slicing one side of them and slipping them onto the existing shafts.
Considering the cost of network scanners, even buying two of them I got a deal (made them networked via Raspberry Pi, see prior post).
PART 2: THE QNAP
I have a QNAP with 8TB of disk space on it. This equates to 5.4TB of usable space in the RAID. I want to upgrade but I’m terrified of disrupting the gobs and gobs of media I’ve got stored on it. So I went shopping for a new one. They’re ridiculously expensive, some of them. But I found one “for parts or repair” for just $67. I did some research, and was convinced I could restore it to service. It’s a TS-453 Pro, which suffers from the famous J1900 LPC bug, which causes it to degrade and become unbootable. I got the sense from the listing that the “fix” (which may be temporary) was never attempted on this unit, and I was correct. The fix involves soldering a 100 ohm resistor from the clock pin to ground. The headers appeared unmolested on the board, so I grabbed a resistor from the basement and quickly soldered it into place. Sure enough, it booted right up. I slapped four 1TB hard drives from my surplus rack into it, and got the unit fully upgraded and functional. Then I ordered four 12TB drives to truly populate it. When they come, I’ll go through the recommended exercise of replacing each drive in the array one by one, and waiting for RAID to complete rebuilding itself, until all of the drives are replaced, and then expanding the storage pool and volume. I looked into a current equivalent of what I’m assembling — the Synology with 48TB of space is $1359 at B&H. I put this together for under $600. If it fails (nobody seems to know if the “fix” is permanent or just prolonging the inevitable — it’s a real scandal) I still have the other QNAP and should be able to just import the drives into that unit. Or maybe I’ll buy a brand-new 6-bay or 8-bay when that time comes. Who knows?