

Requirements:
Schlage KIK lock cylinders
Following tool (comes with Schlage keying kit, along with pins and springs for the inevitable losses)
Tweezers
Shim(s) (very helpful)
I picked up a bunch of cylinders on eBay to use for lockpicking practice, because it was a hell of a lot cheaper than buying an already-assembled progressive cylinder set. For example, one progressive set I found was $80 for five or six cylinders, and I picked up 20 cylinders for around $2 each.
I decided to document the process, because there aren’t enough detailed tutorials on the web for this particular task, and if you’re going to pick locks, you should know how to repin them, because that will help you understand how they work.
First, here’s how standard tumbler locks work. We won’t get into advanced topics like security pins here.
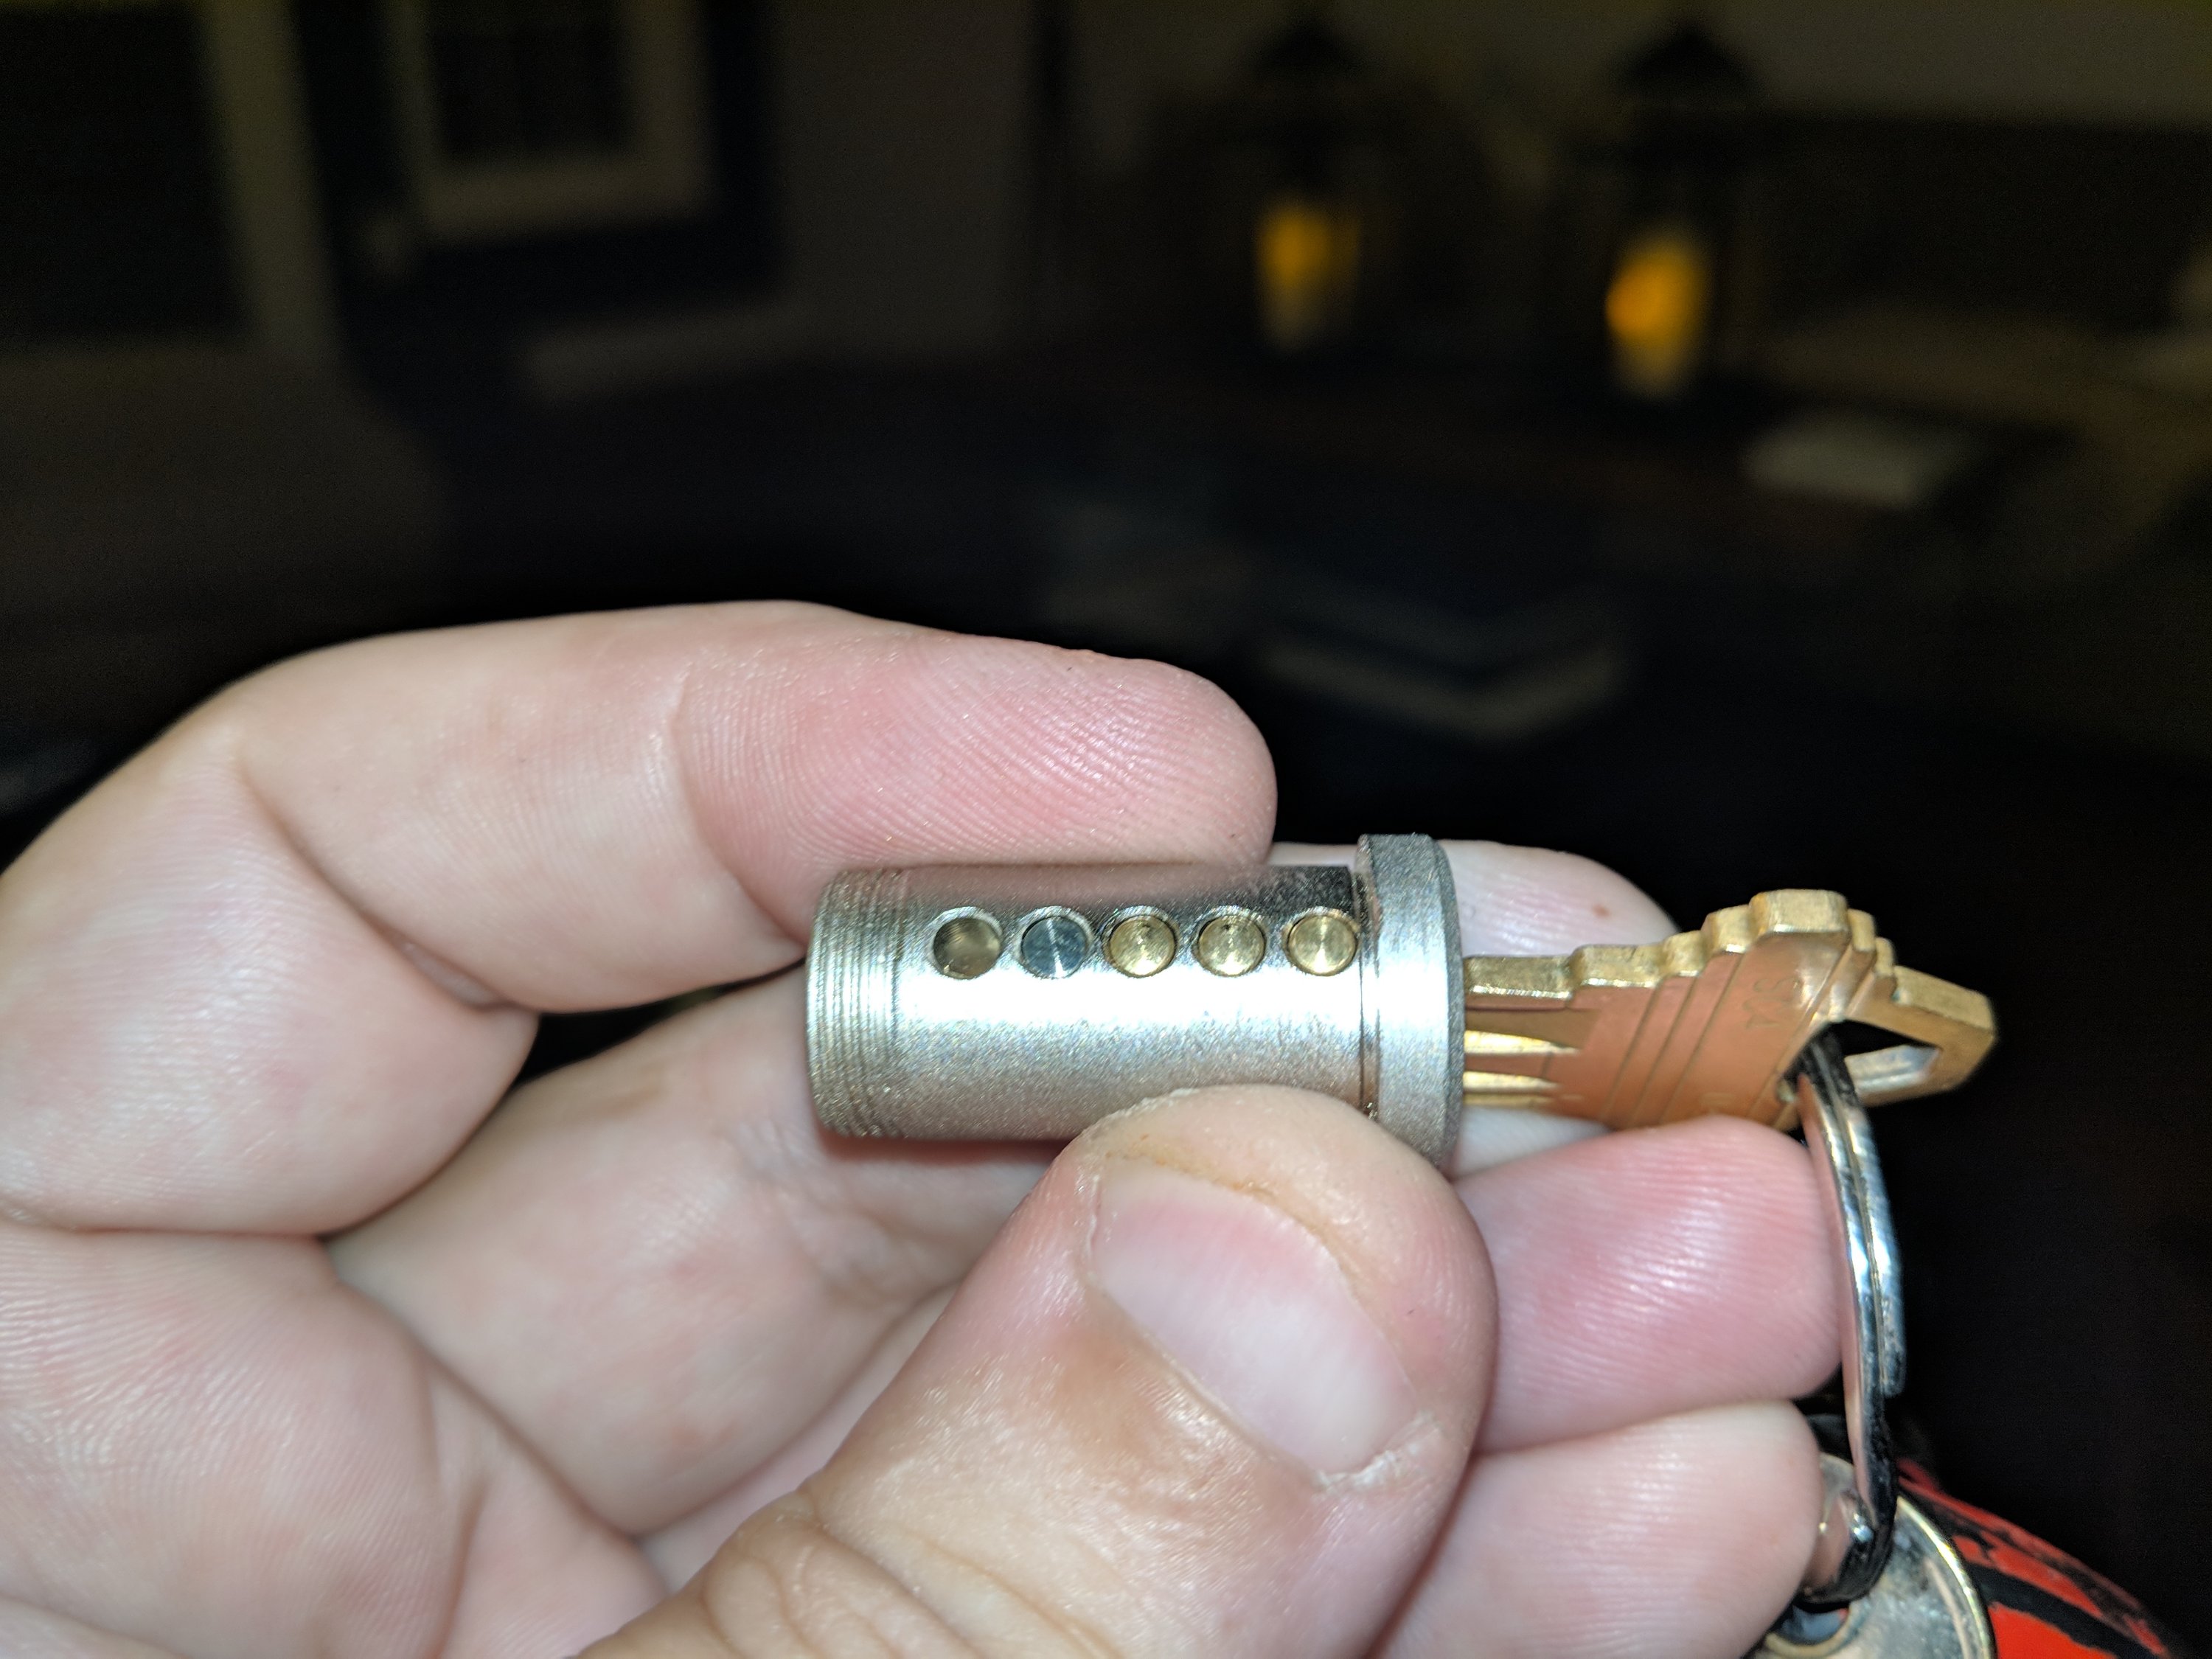
In a Schlage KIK (key-in-knob) lock cylinder, each “pin” in is actually two pins and a spring. The top pin is spring loaded, and when the key is engaged, resides in the upper part of the lock cylinder — the squared extension above the keyway known as the “bible.” The bottom pins are engaged by your key. The length of each bottom pin, along with the measurement of the “peaks” of your key, provide the combination that results in the bottom pins being flush with the keyway, forcing the top pins completely into the bible, providing a gap and allowing the lock cylinder to turn.
[drawing to come]
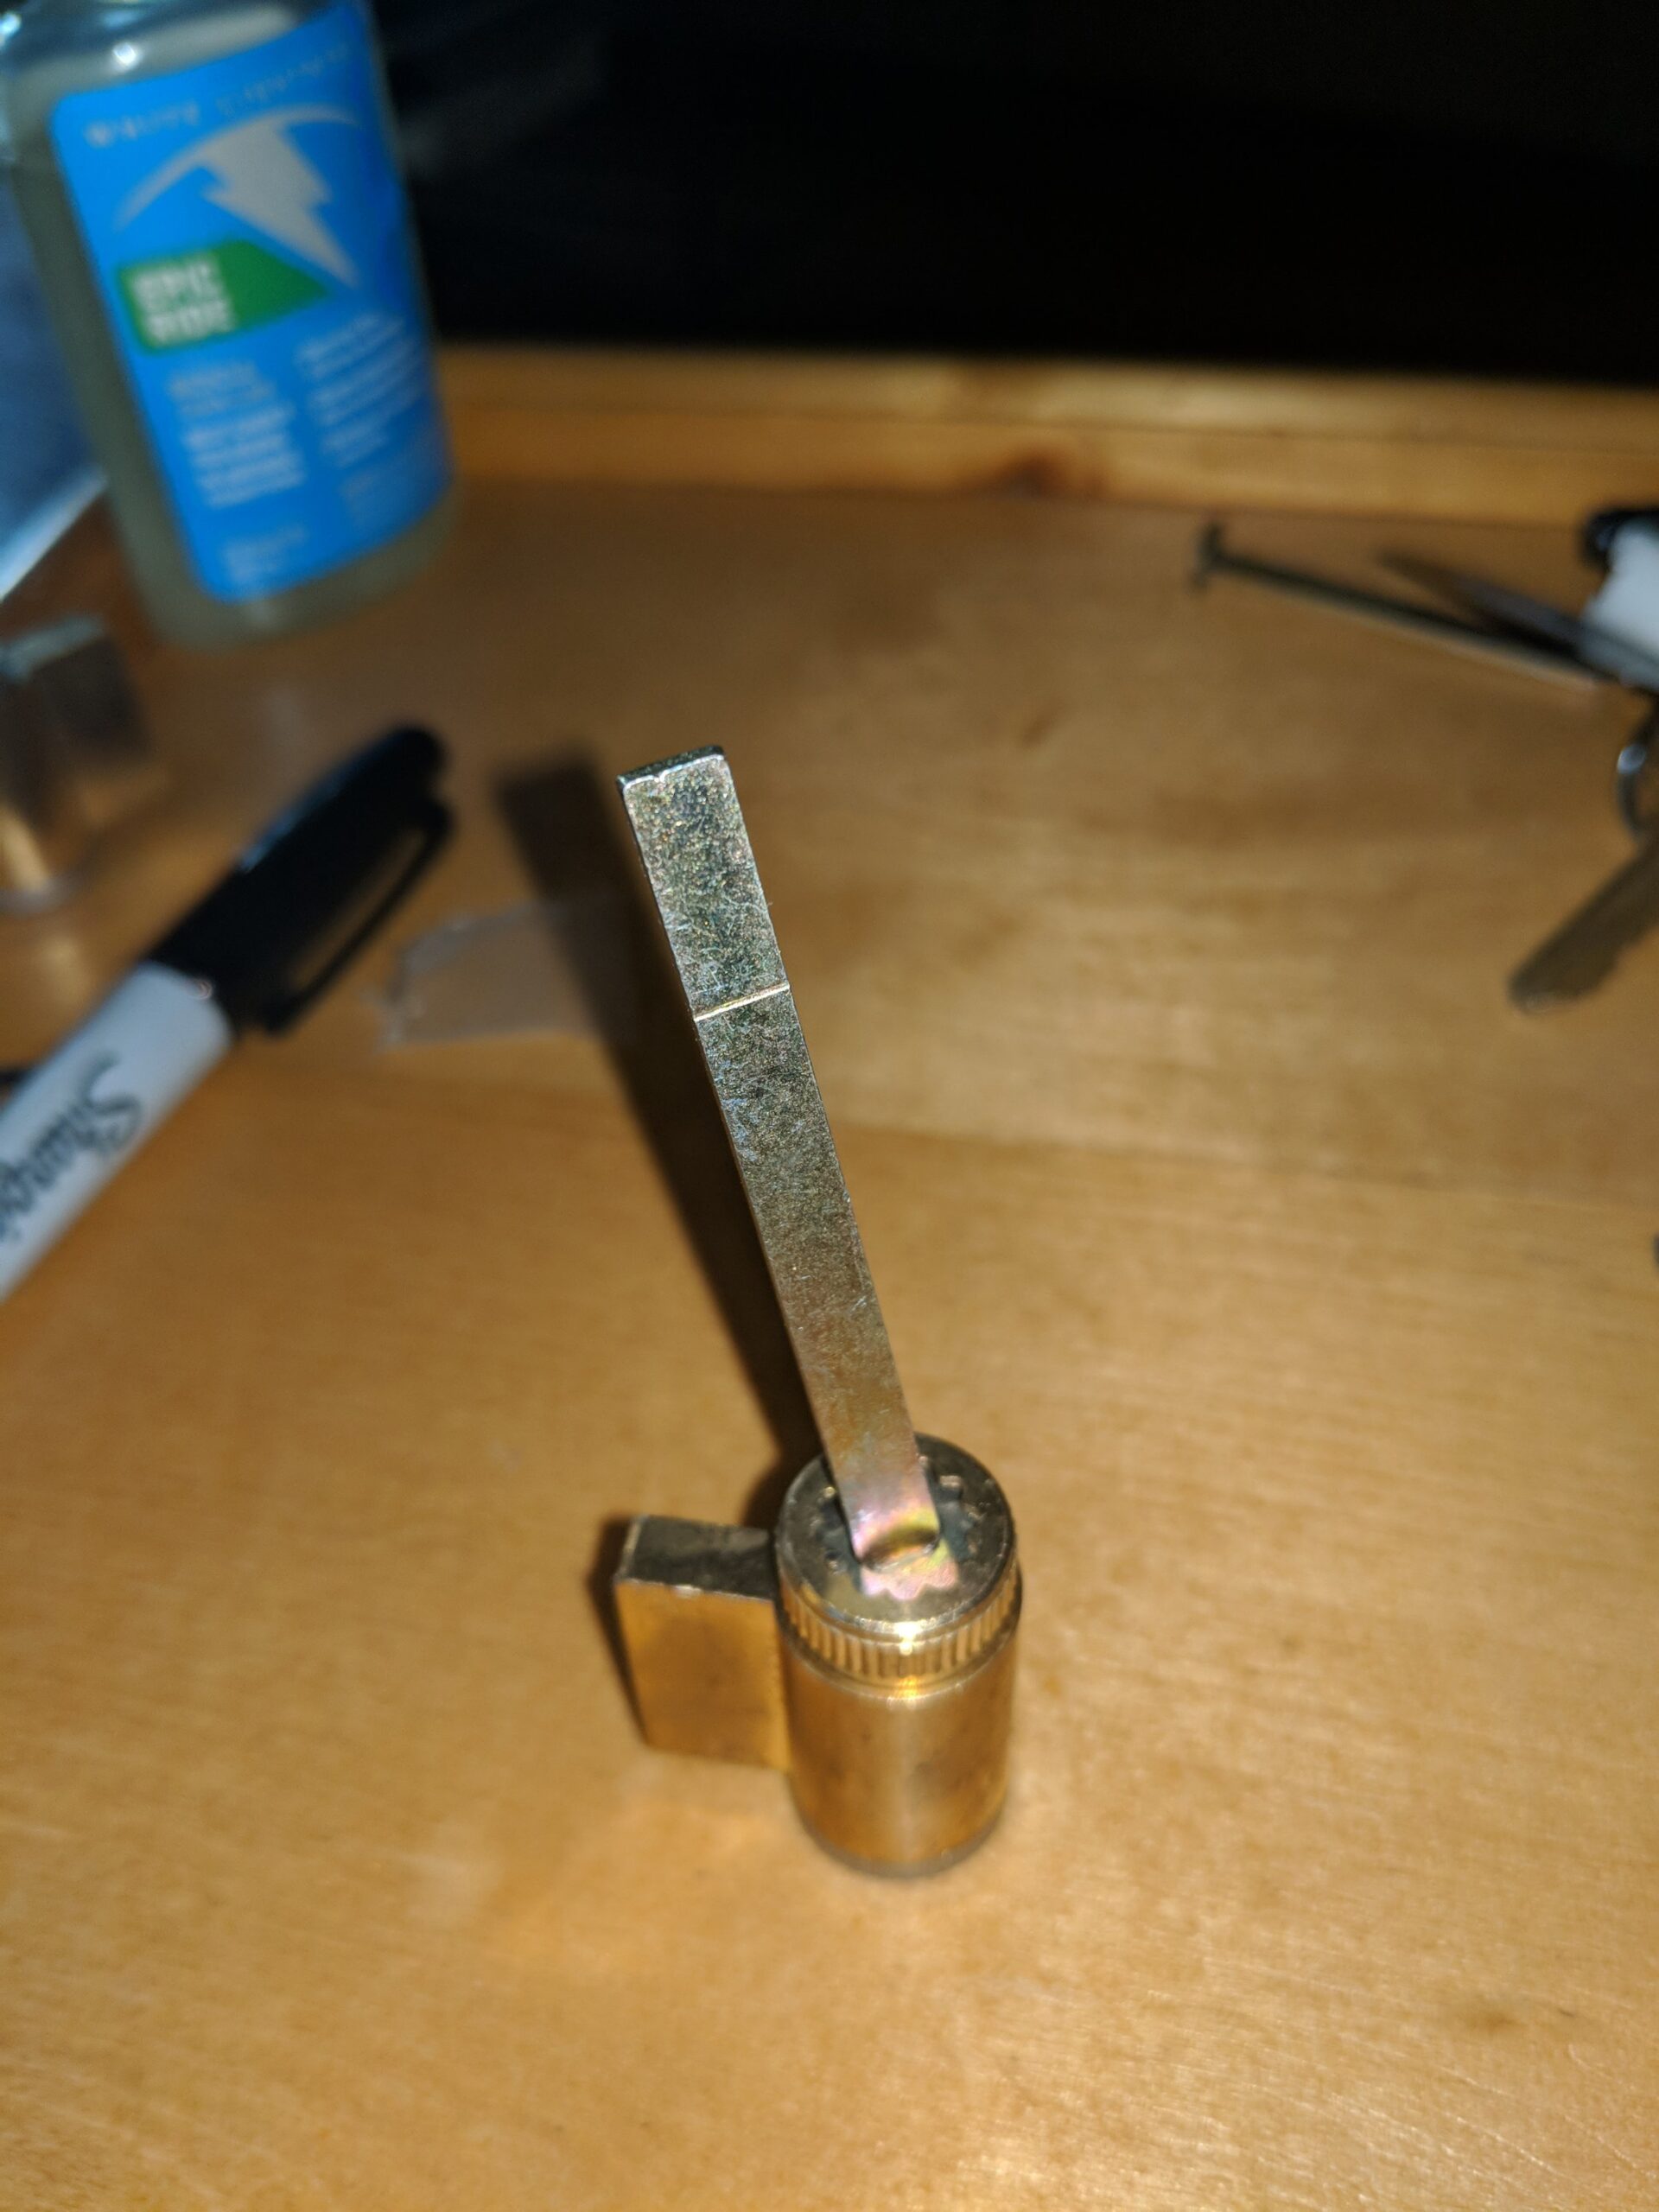
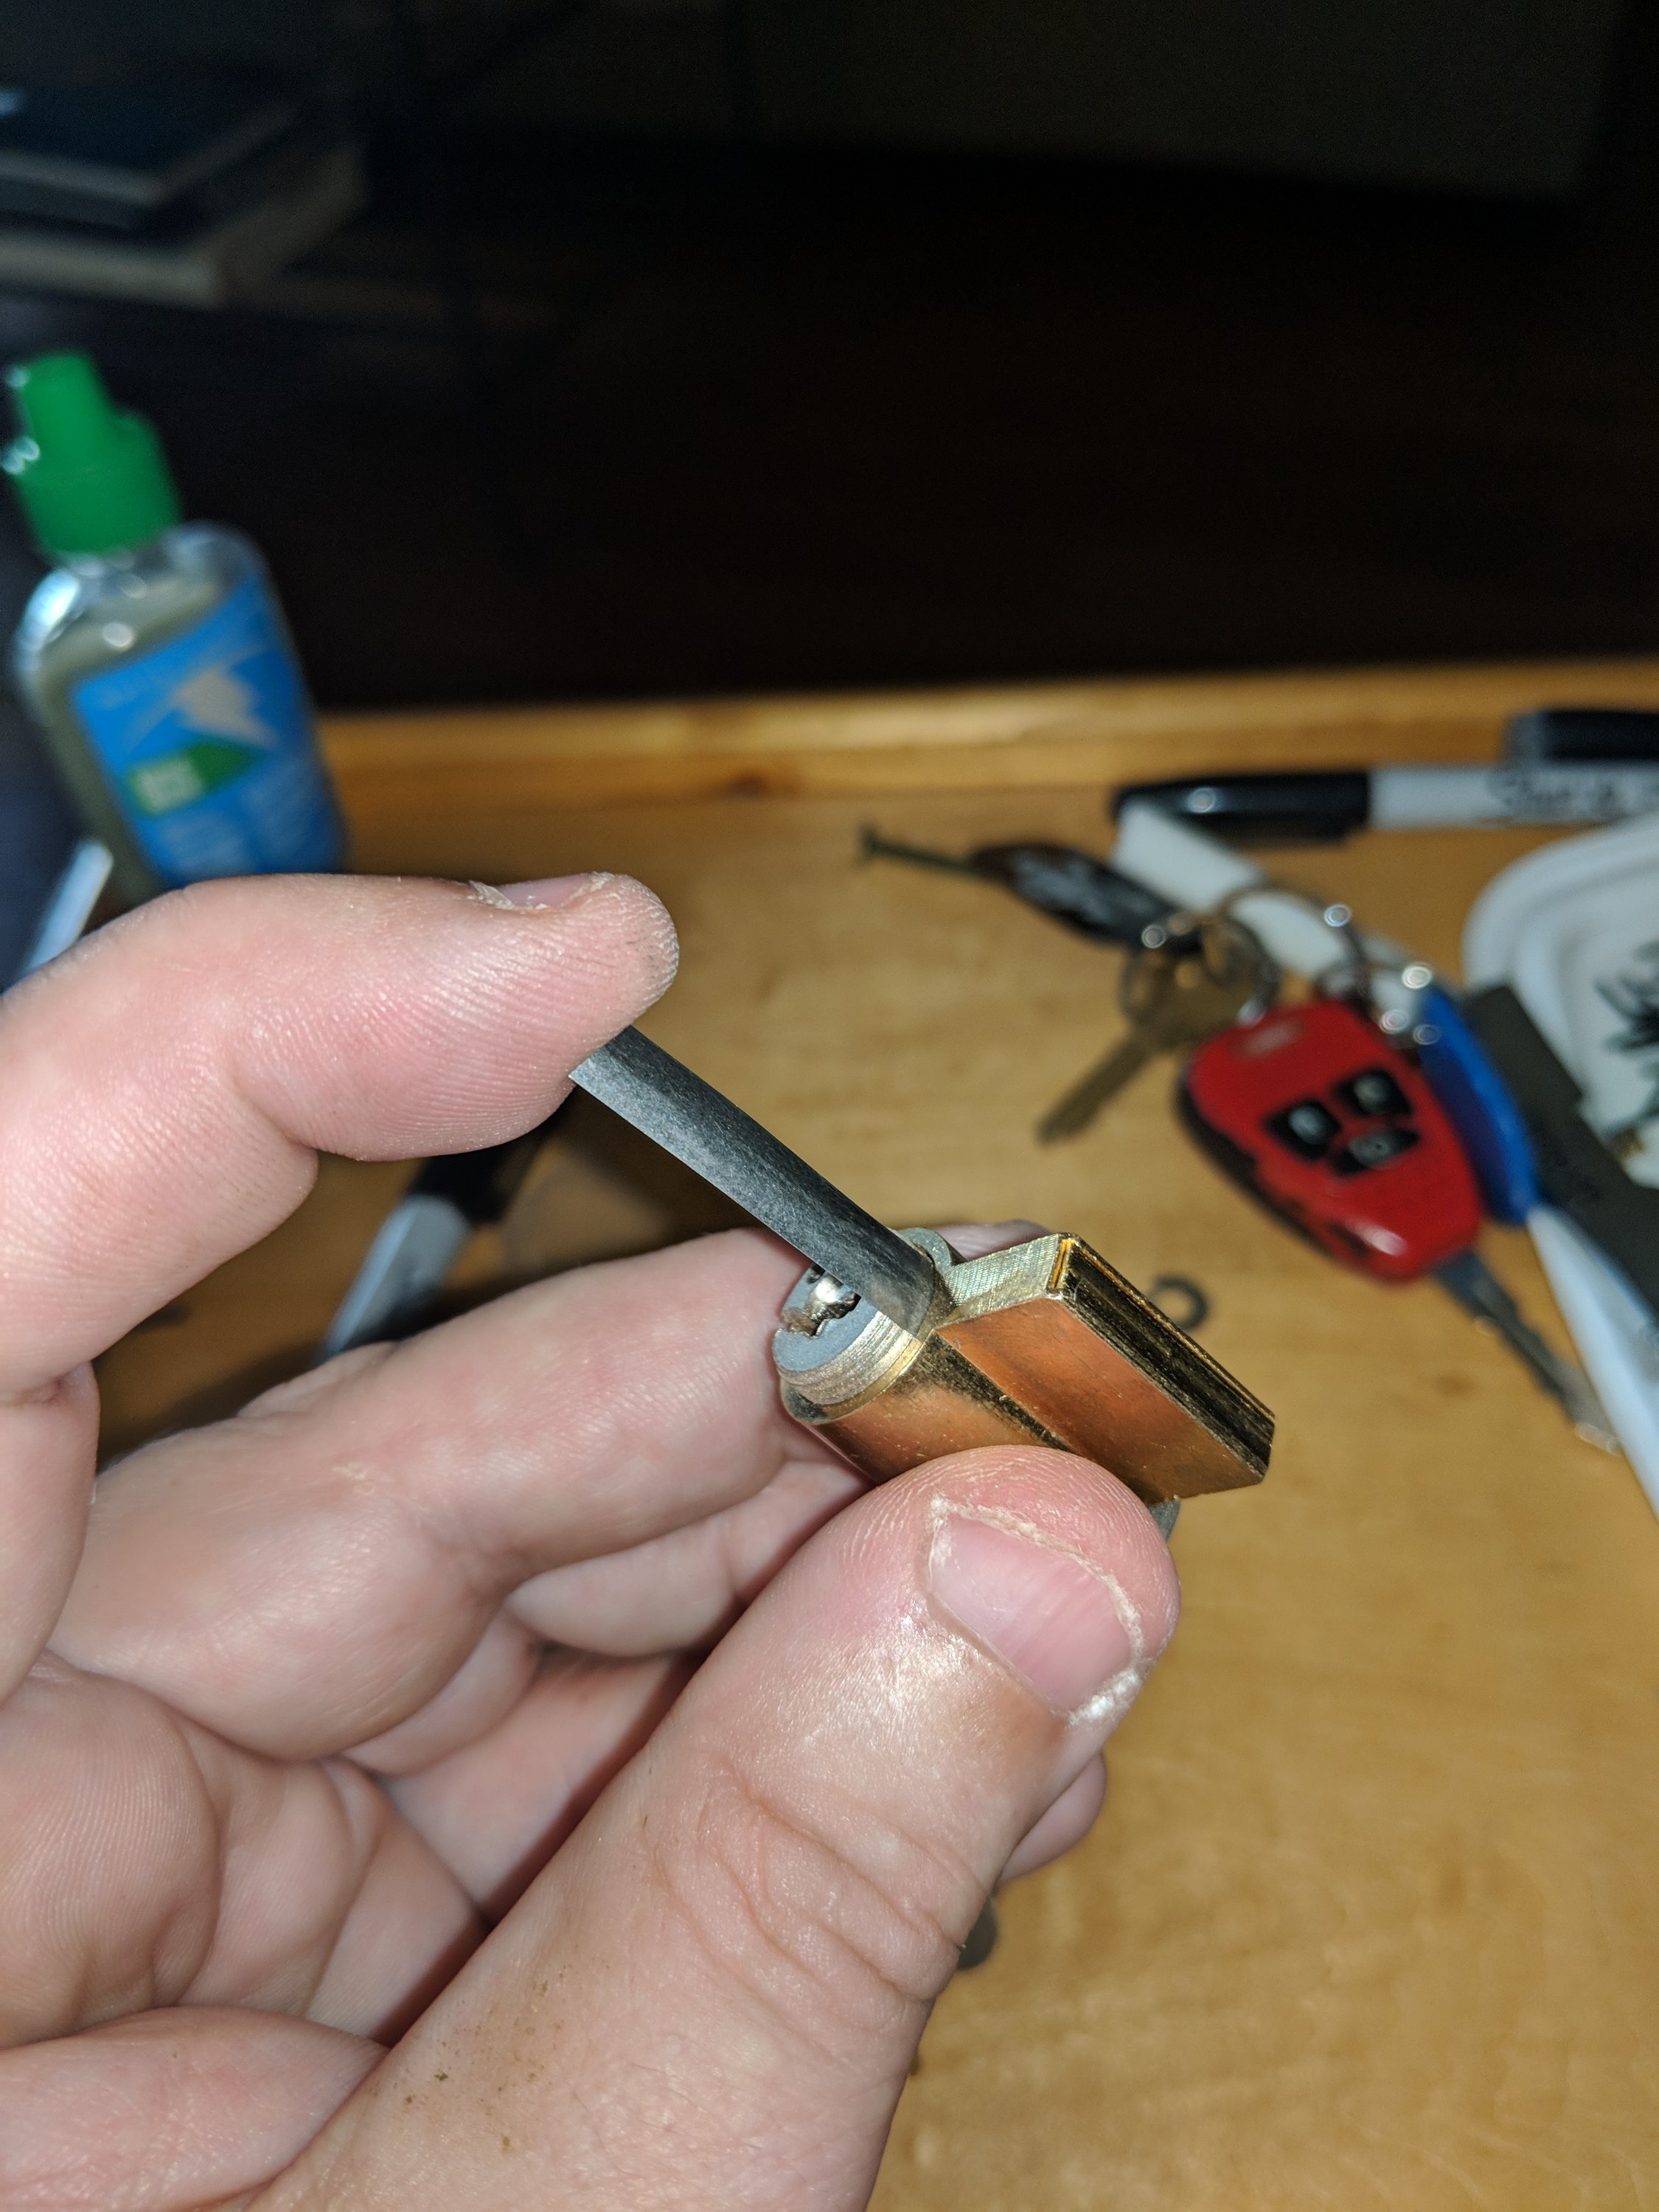
To begin, set the lock on its face on the table. Note the thumbscrew end cap.

This must be removed for repinning. It is held in place by a capture pin. This allows the end cap to be tightened to a specification and then held there, rather than tightened all the way to the point where the cylinder won’t turn.

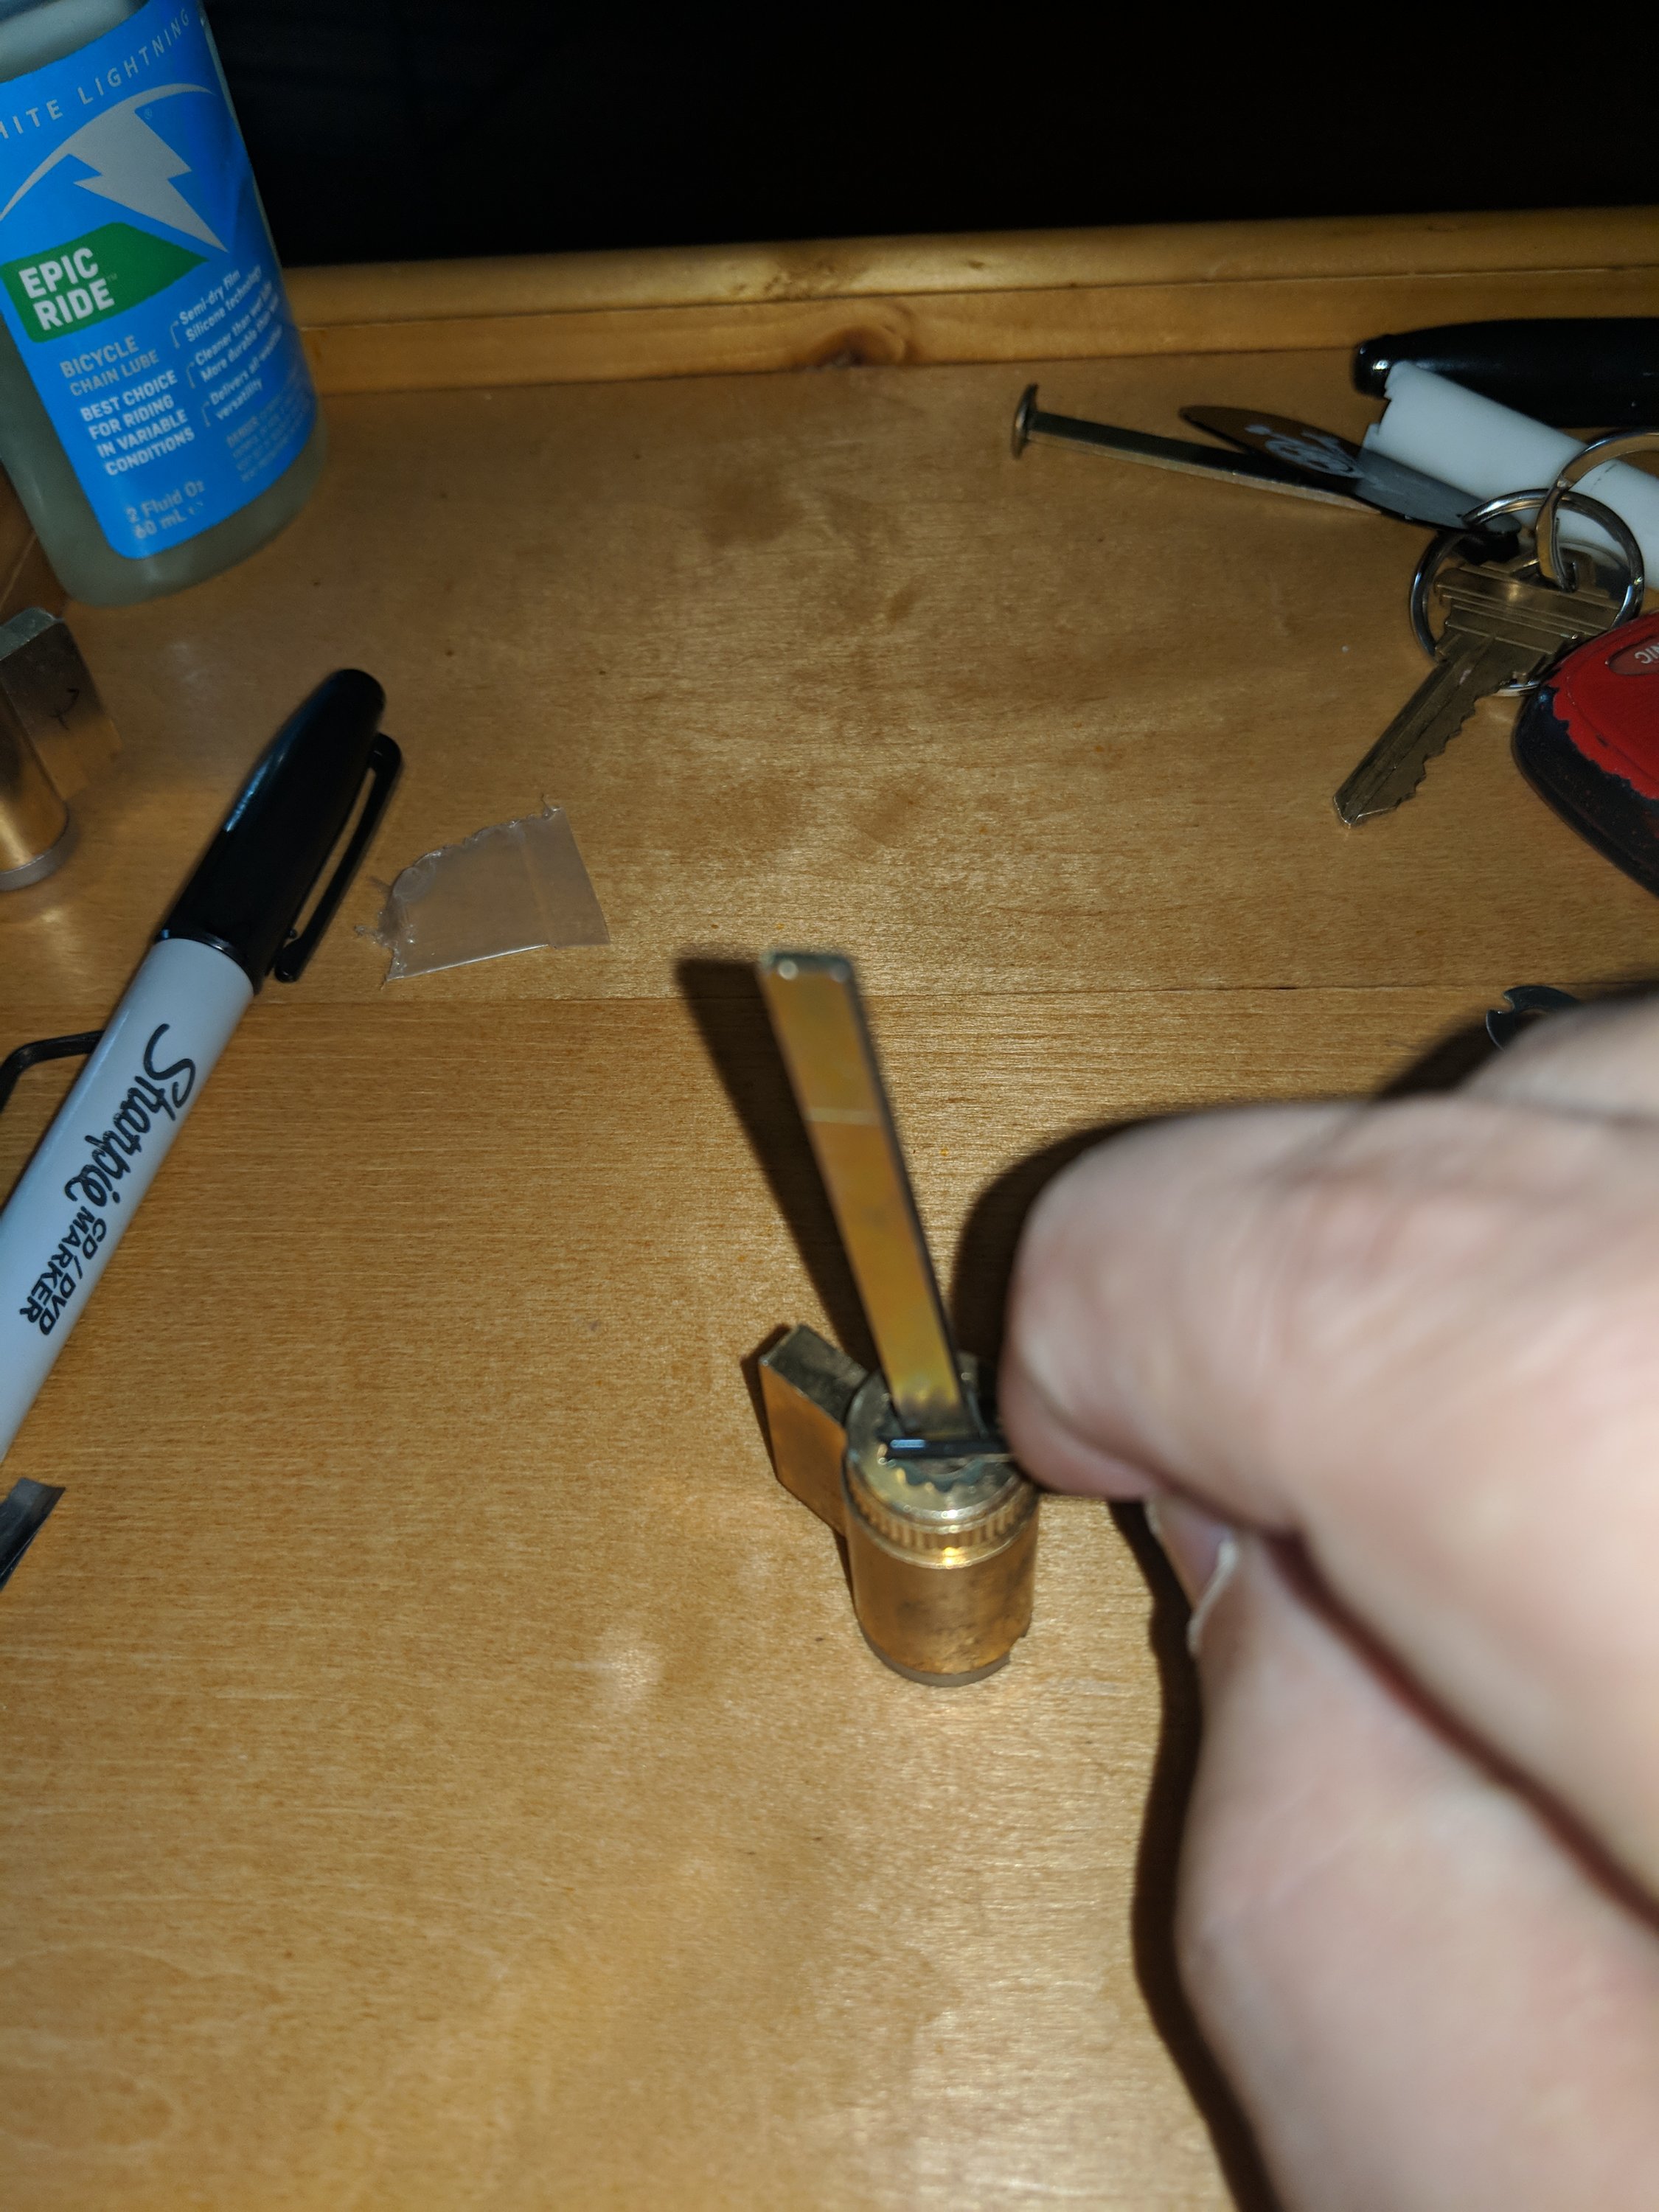
Step 1 is to remove that end cap. This is accomplished by pushing down on the capture pin with some sort of tool. This can be tricky, but once you get the hang of the motion, you can do it with just your two hands, one holding the cylinder steady and unscrewing the cap while the other holds pressure on the capture pin.
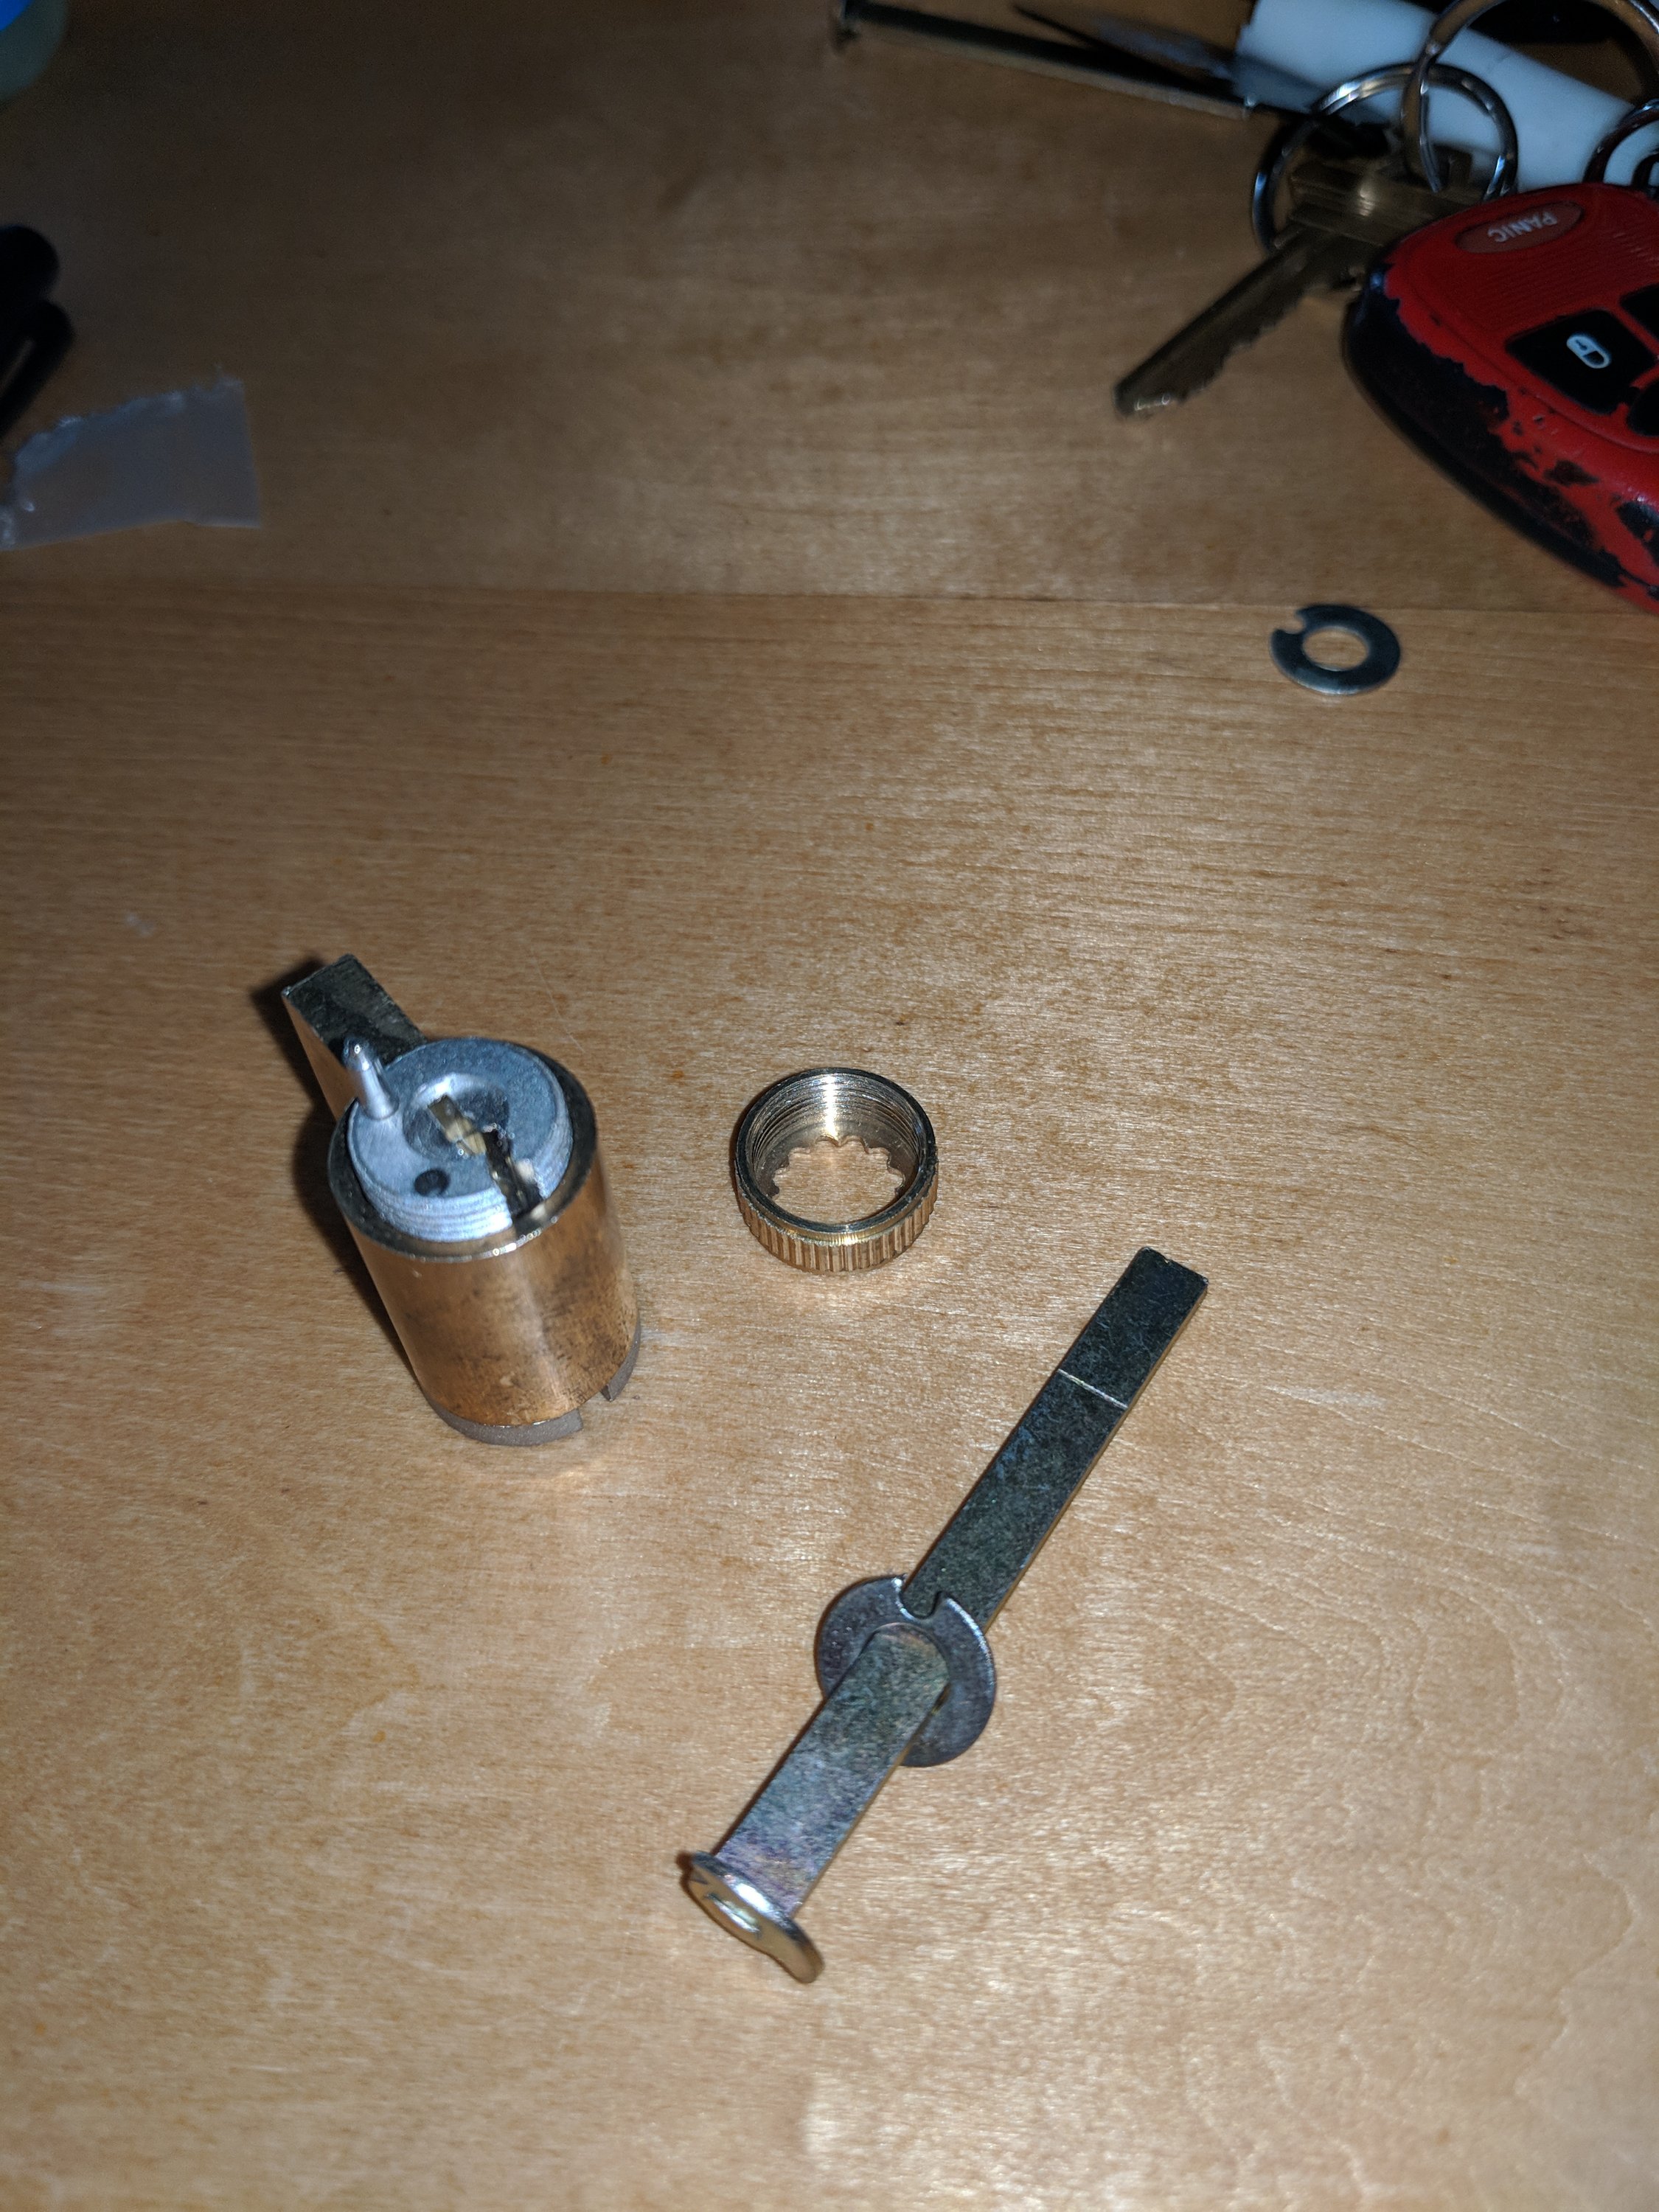
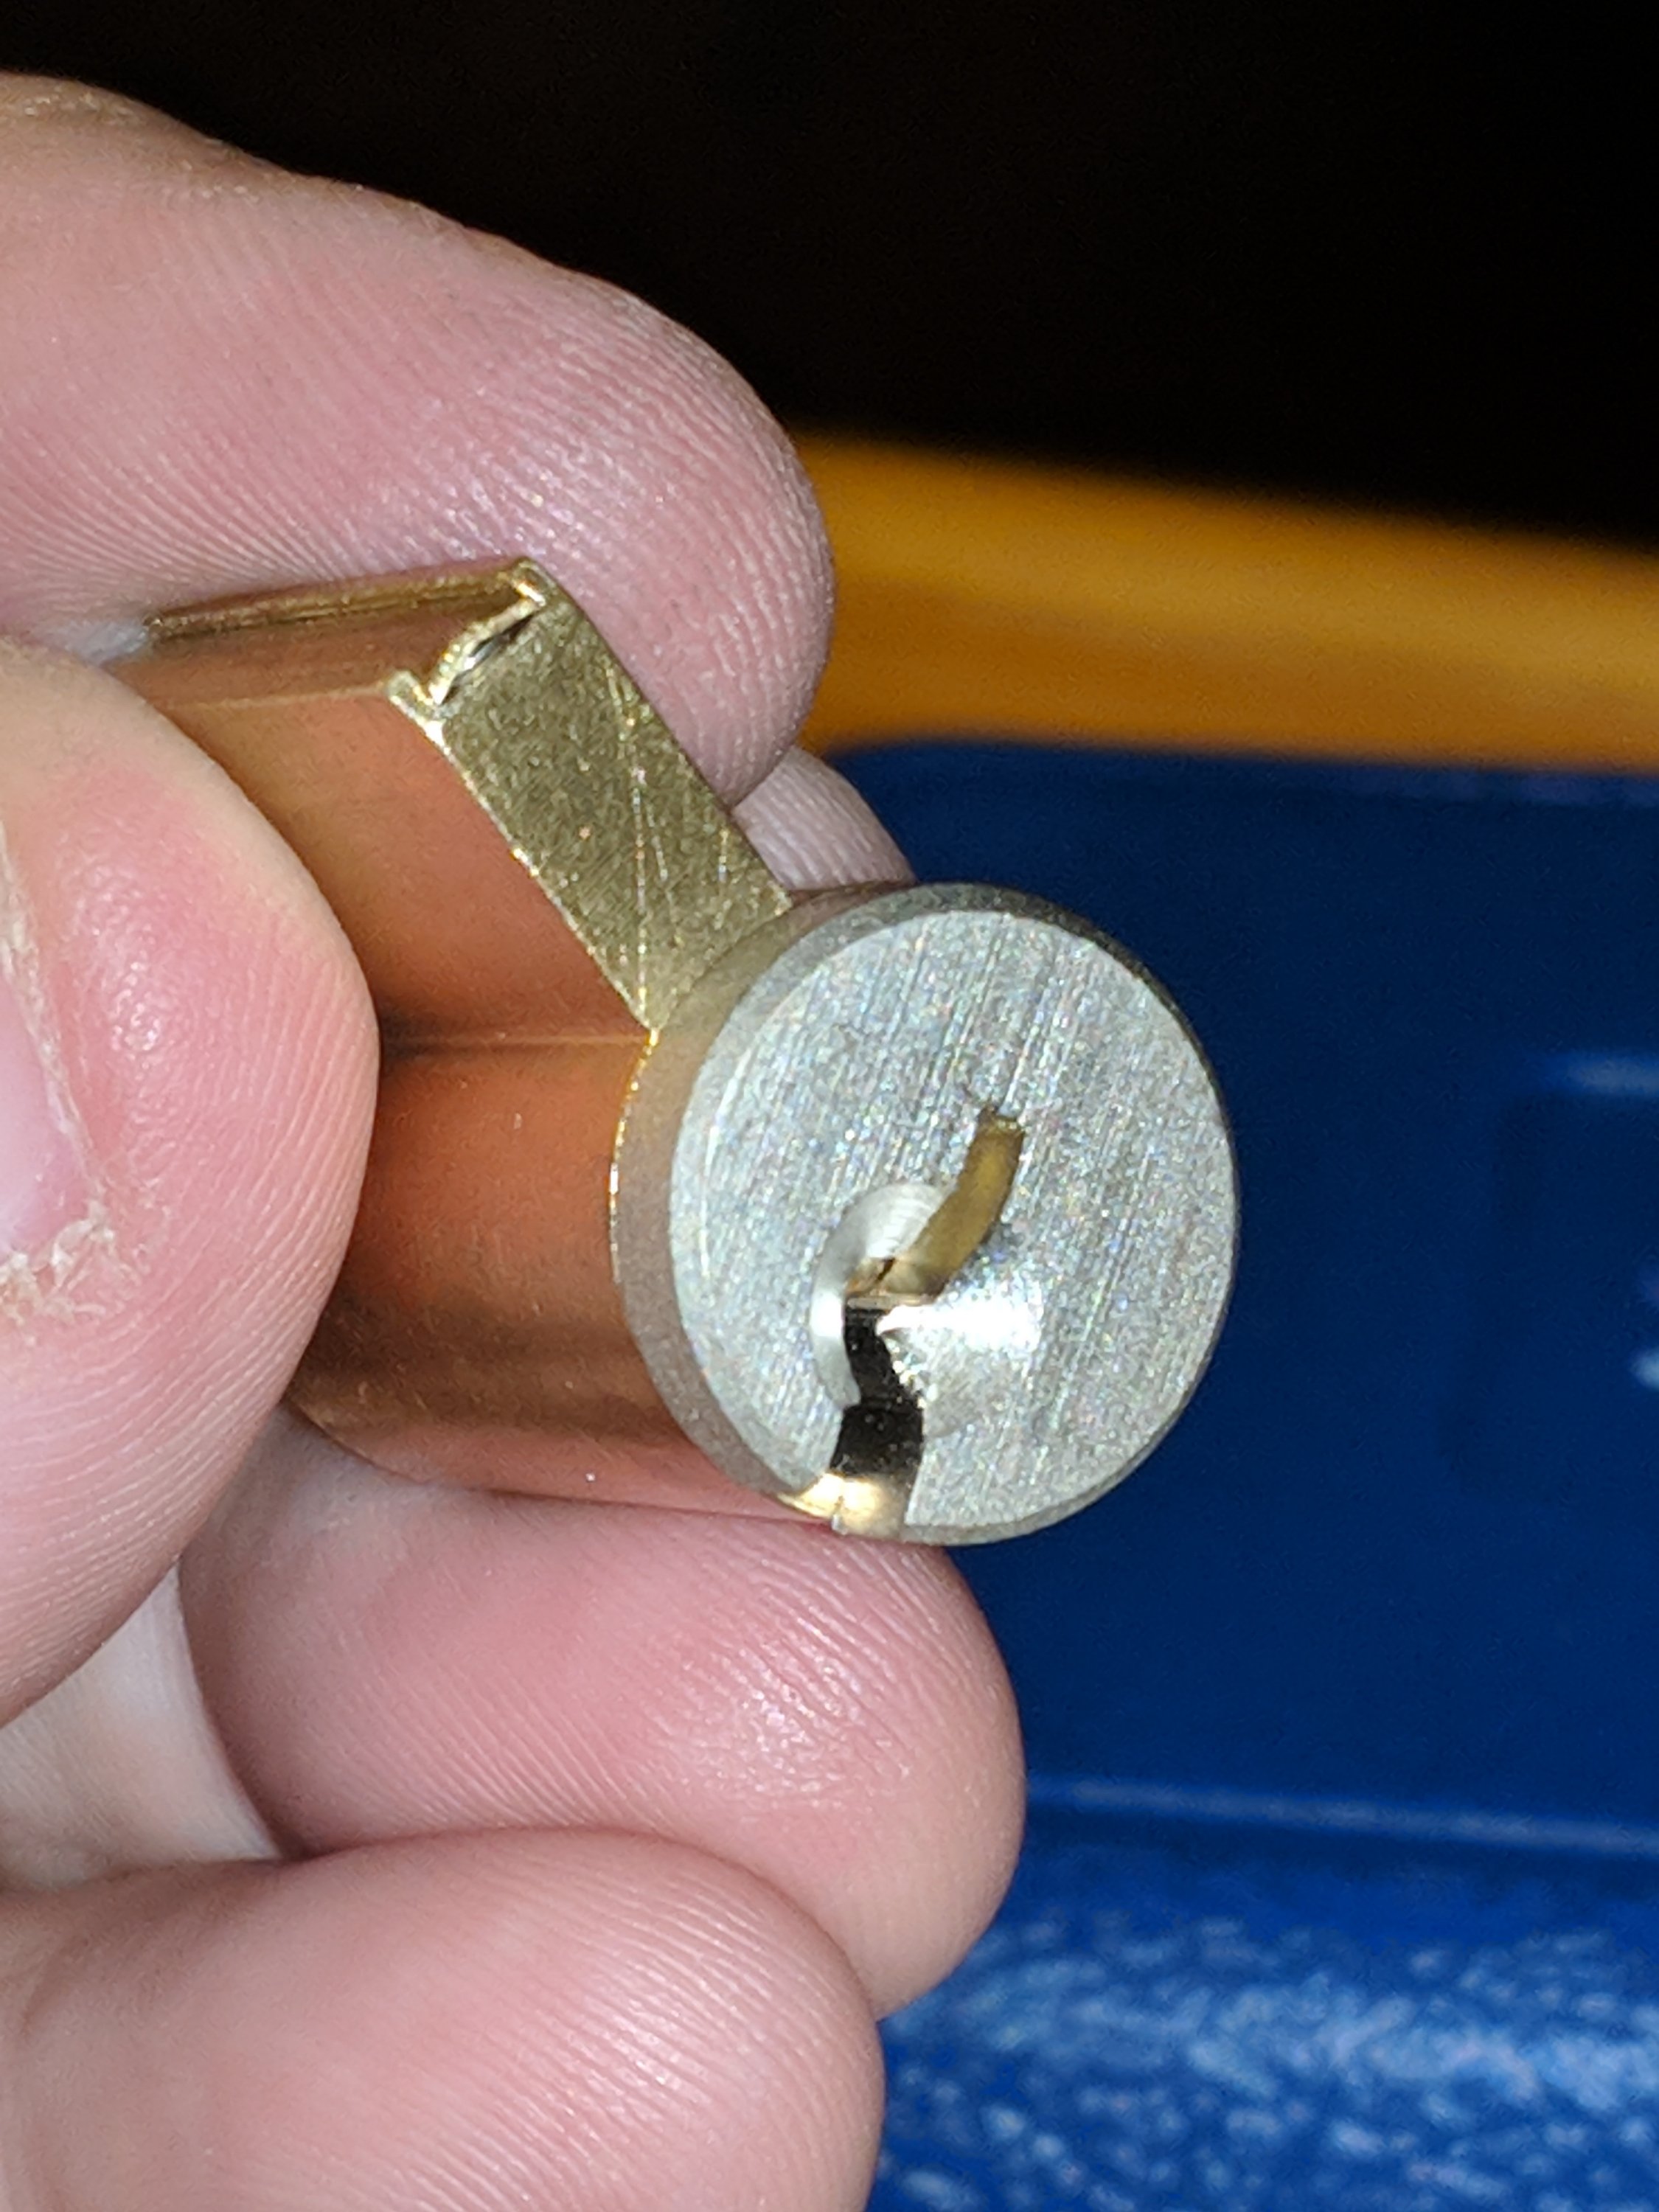
Once the end cap is removed, you’ll find a washer and a flat rod. The flat rod is used to open the actual door, and for our purposes should be removed.
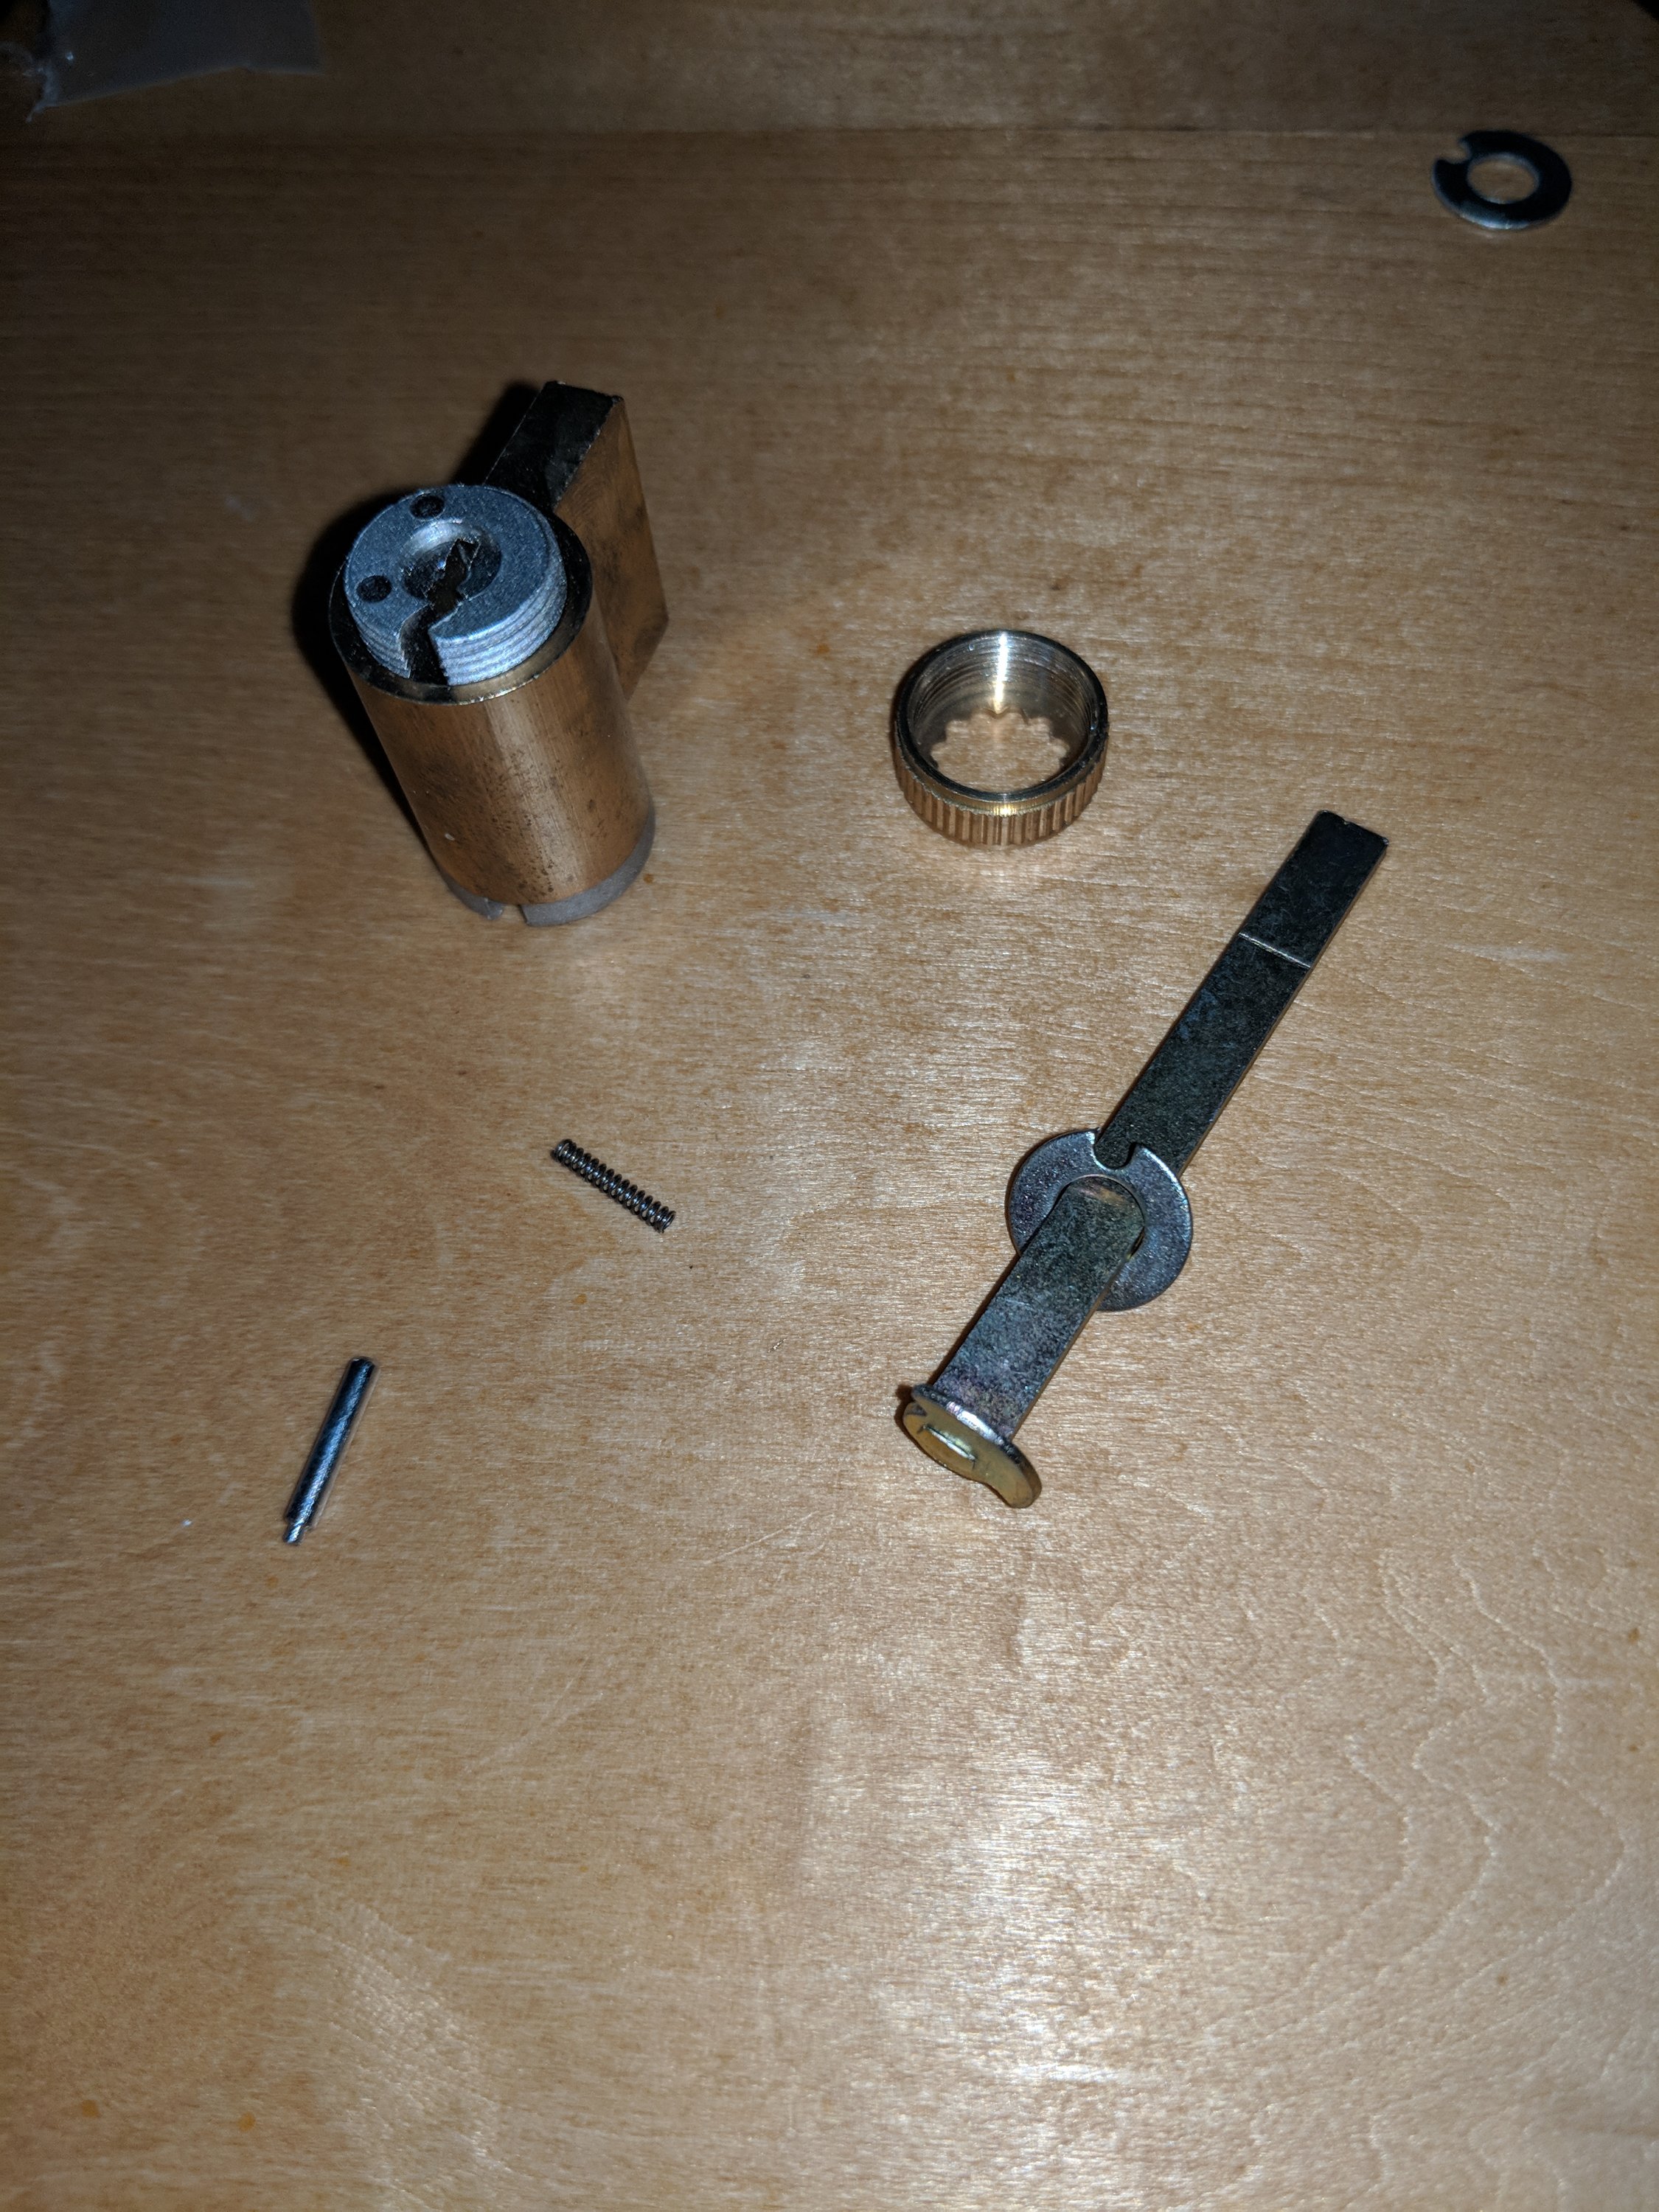
Carefully remove the capture pin and set it aside for safekeeping. Then carefully turn the cylinder upside down, and the capture pin spring will fall out. Set that aside as well. You will need all of these parts to reassemble the cylinder (minus the flat rod).
Now you need to unlock the cylinder to disengage the bottom pins from the top pins. If you have a key, use it, being careful not to pull the cylinder from its housing just yet.
In my case, I did not have a key. If this is your case as well, congratulations, you’re about to experience even more lockpicking fun. You can try and pick all five or six pins yourself the traditional way, but it’s far easier at this point to use a shim. Insert the shim into the rear of the lock (if still flat on the table, this is the top) where it meets the bible, and push until there is resistance.
Then, take the cylinder into your hand, holding light pressure on the shim, and pick the pins from rear to front. Each successful pin pick will result in the shim moving in a few more millimeters. Assuming the shim hasn’t slipped to the side, once you’ve got all five pins picked, the cylinder should turn freely inside the housing. DON’T PULL IT OUT YET.
You’re going to want to turn it maybe 45 degrees to the right, while holding the shim in place. Once you’ve accomplished this, you should be able to remove the shim.
Now you need a follower tool, a cylinder the same width as the opening in the cylinder housing. Press it flush against the rear of the cylinder, and slowly guide the cylinder out, taking care that no openings in the cylinder or the follower tool fall under the bible. Your goal here is to retain the top pins and springs inside the bible, because replacing them is really painful.
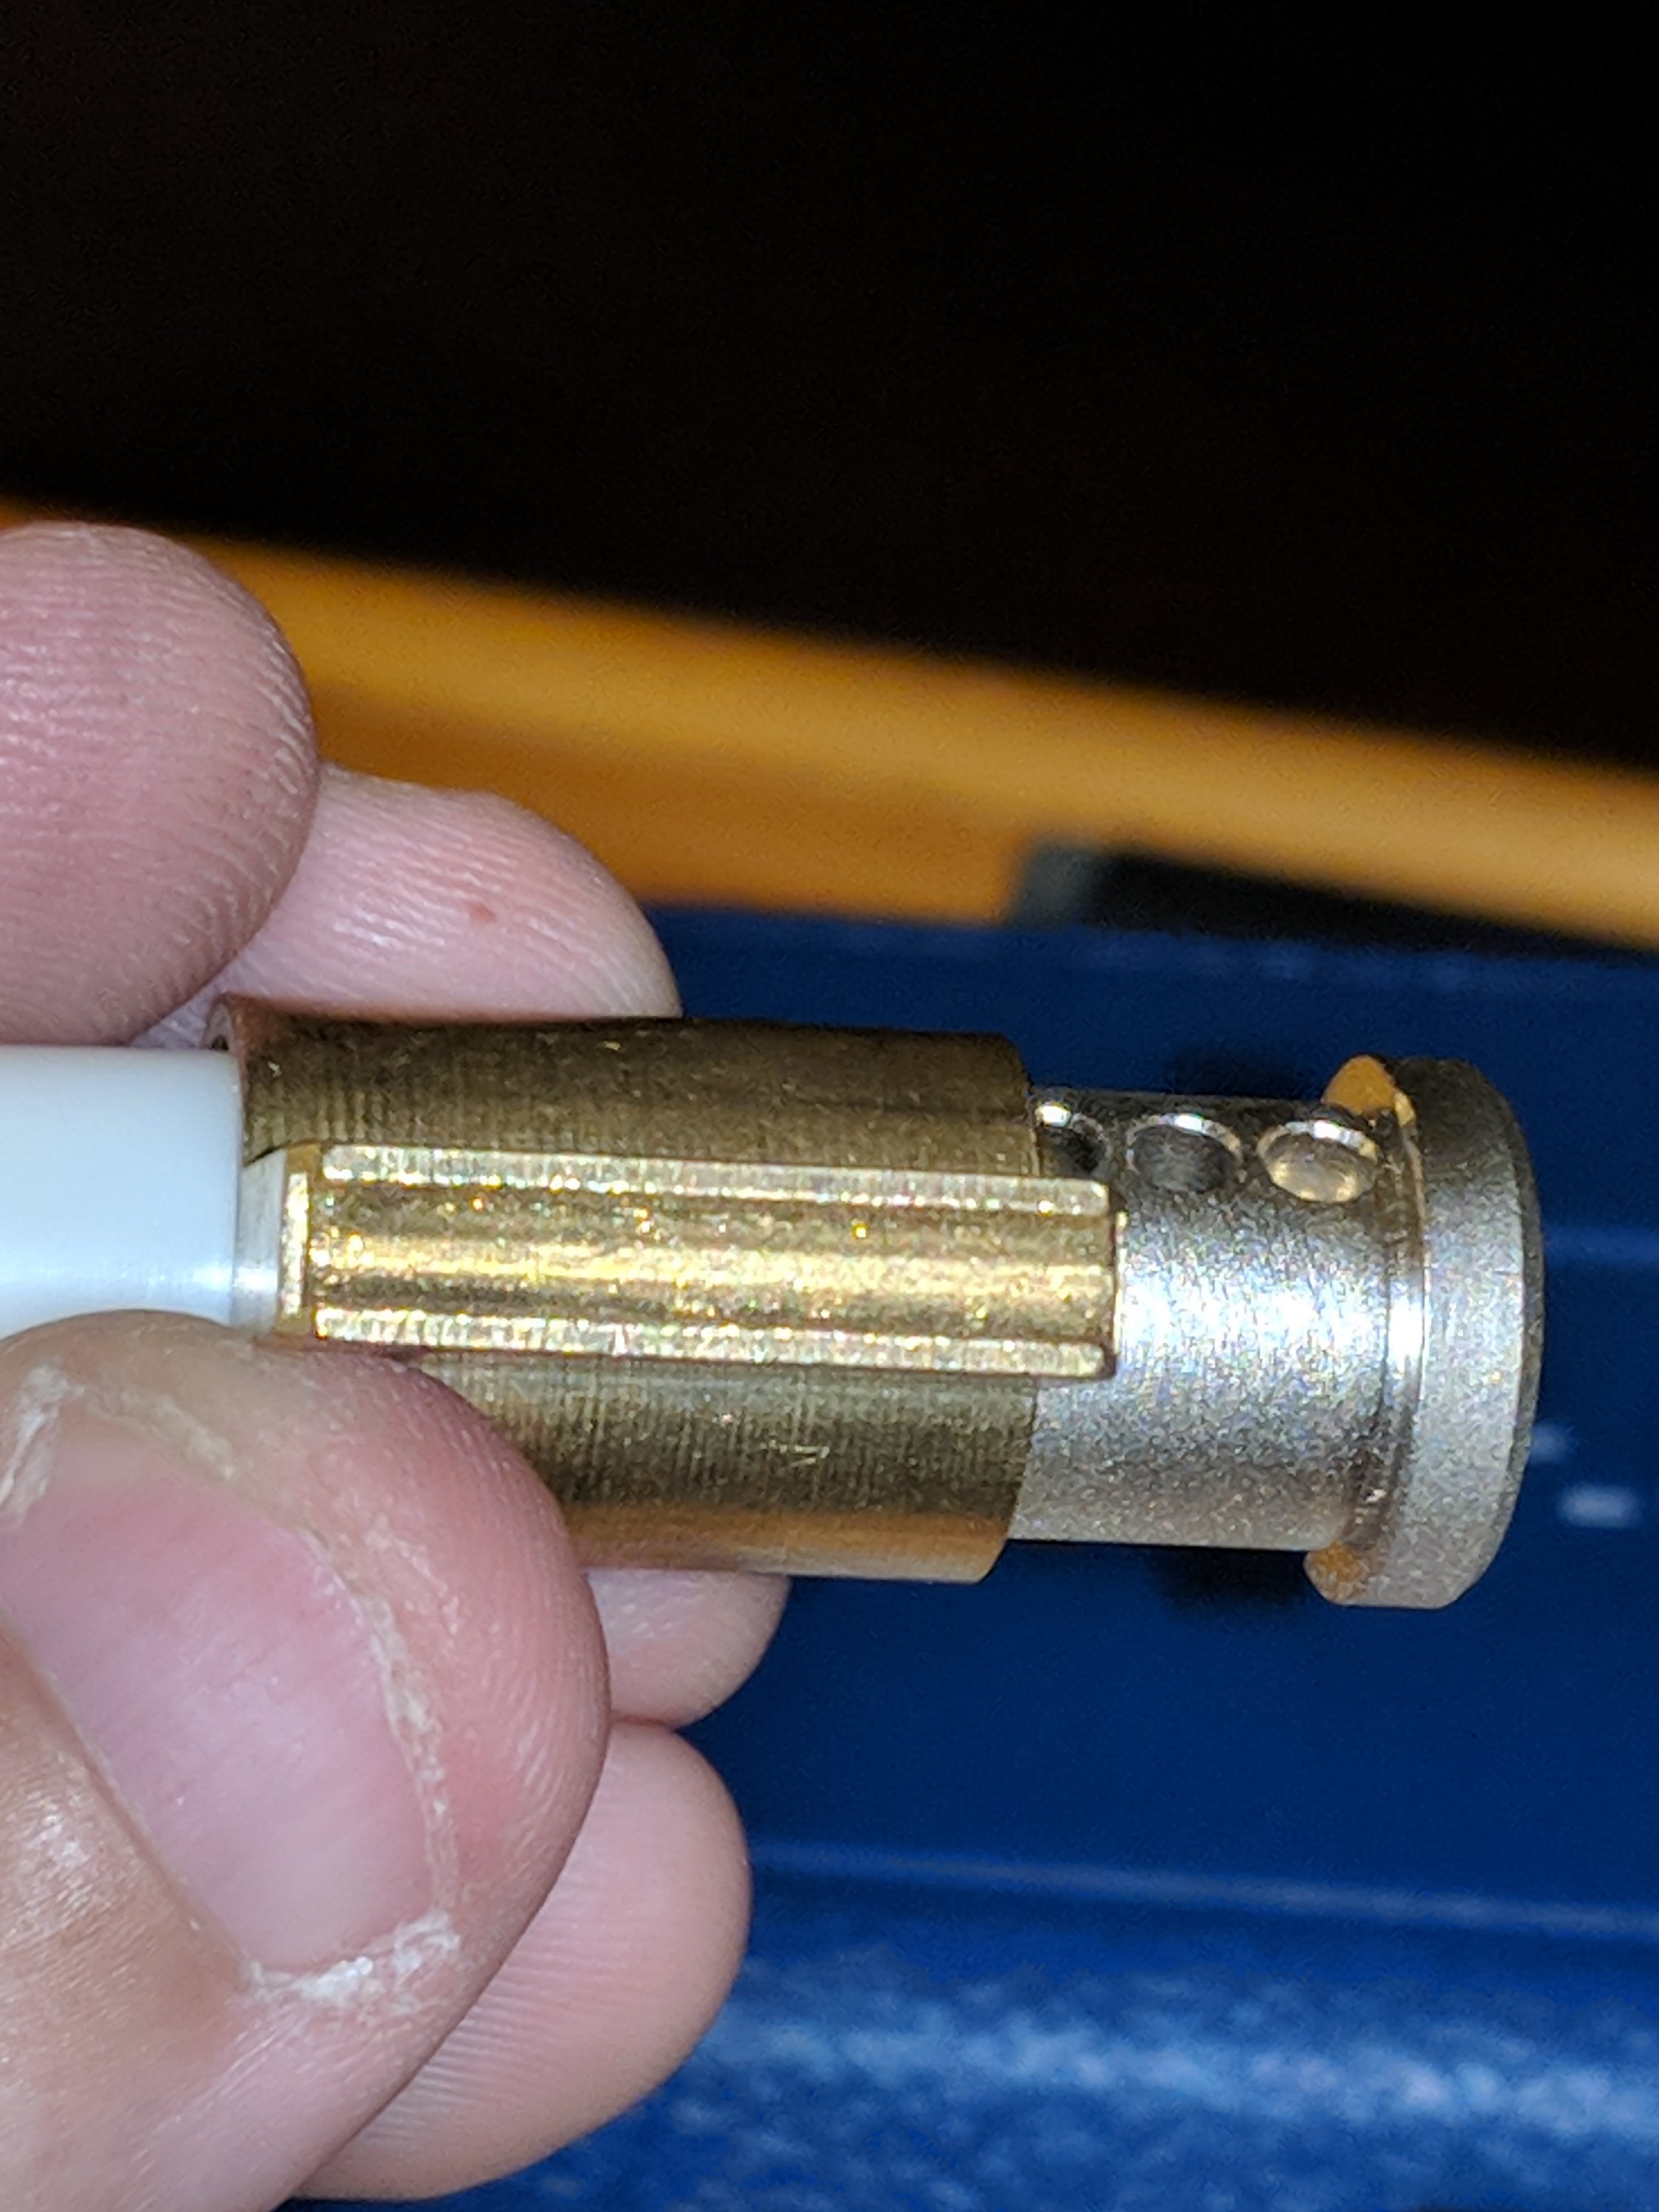
If you are successful thus far, set your cylinder down so that the pins are facing upward, because they will fall out as well.
The next step is assuming you are reducing the number pins for progressive lockpicking. You’re going to need to remove the top pins and springs from any holes toward the rear that won’t have bottom pins, or they will just fall into the bottom hole when you reconnect the cylinder, and fuck up your day. Ease it toward the front until the very last hole is just about uncovered, then catch the top pin and spring as they are ejected. Do this as many times as you need, but again, counting from the front, leave exactly as many top pins and springs as you will have bottom pins.
OPTIONAL: You can take this opportunity to switch out your bottom pins for a set that matches a specific key you’d like to be able to open some or all of your progressives with:
Now move your following tool back so your remaining top pins are no longer in danger, double check the number bottom pins in your cylinder, and get ready to reinsert the cylinder. To do this, bring the cylinder again flush with the following tool (from the front), be sure no gaps in the following tool line up with the bible, be sure your bottom pins don’t line up with the bible, but are 45 degress to the right to prevent them from catching or from falling out, and then insert. Once the cylinder is completely in, the following tool will be out and you can rotate the cylinder back to where the pins catch. At this point the cylinder should be locked in place.
Set the cylinder back down face down on the table, and reinsert the capture pin spring and then the capture spring (flat end first). Get the end cap washer and end cap in place, and hold down the capture pin while you quickly tighten the cap. This can be tricky.