Lock Bypass on a Zero Halliburton Centurion Elite Briefcase

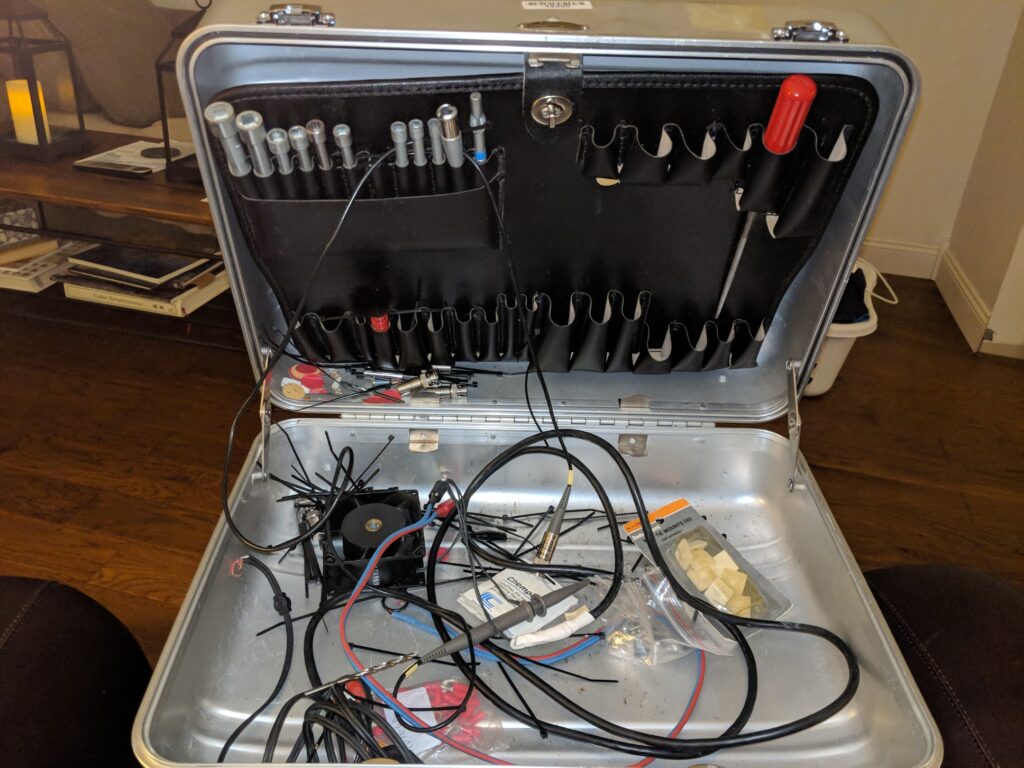
I picked up this older briefcase at auction in 2018. It was a good deal. Listed as locked, no knowledge of the contents at the time, and sold for way less than a used case of this variety would normally sell for. I like these cases. Each half of the shell has small bracket tabs which can be used to install aluminum panels, making them ideal for portable radio or other instrumentation installs. I was confident I’d be able to get into it one way or another.

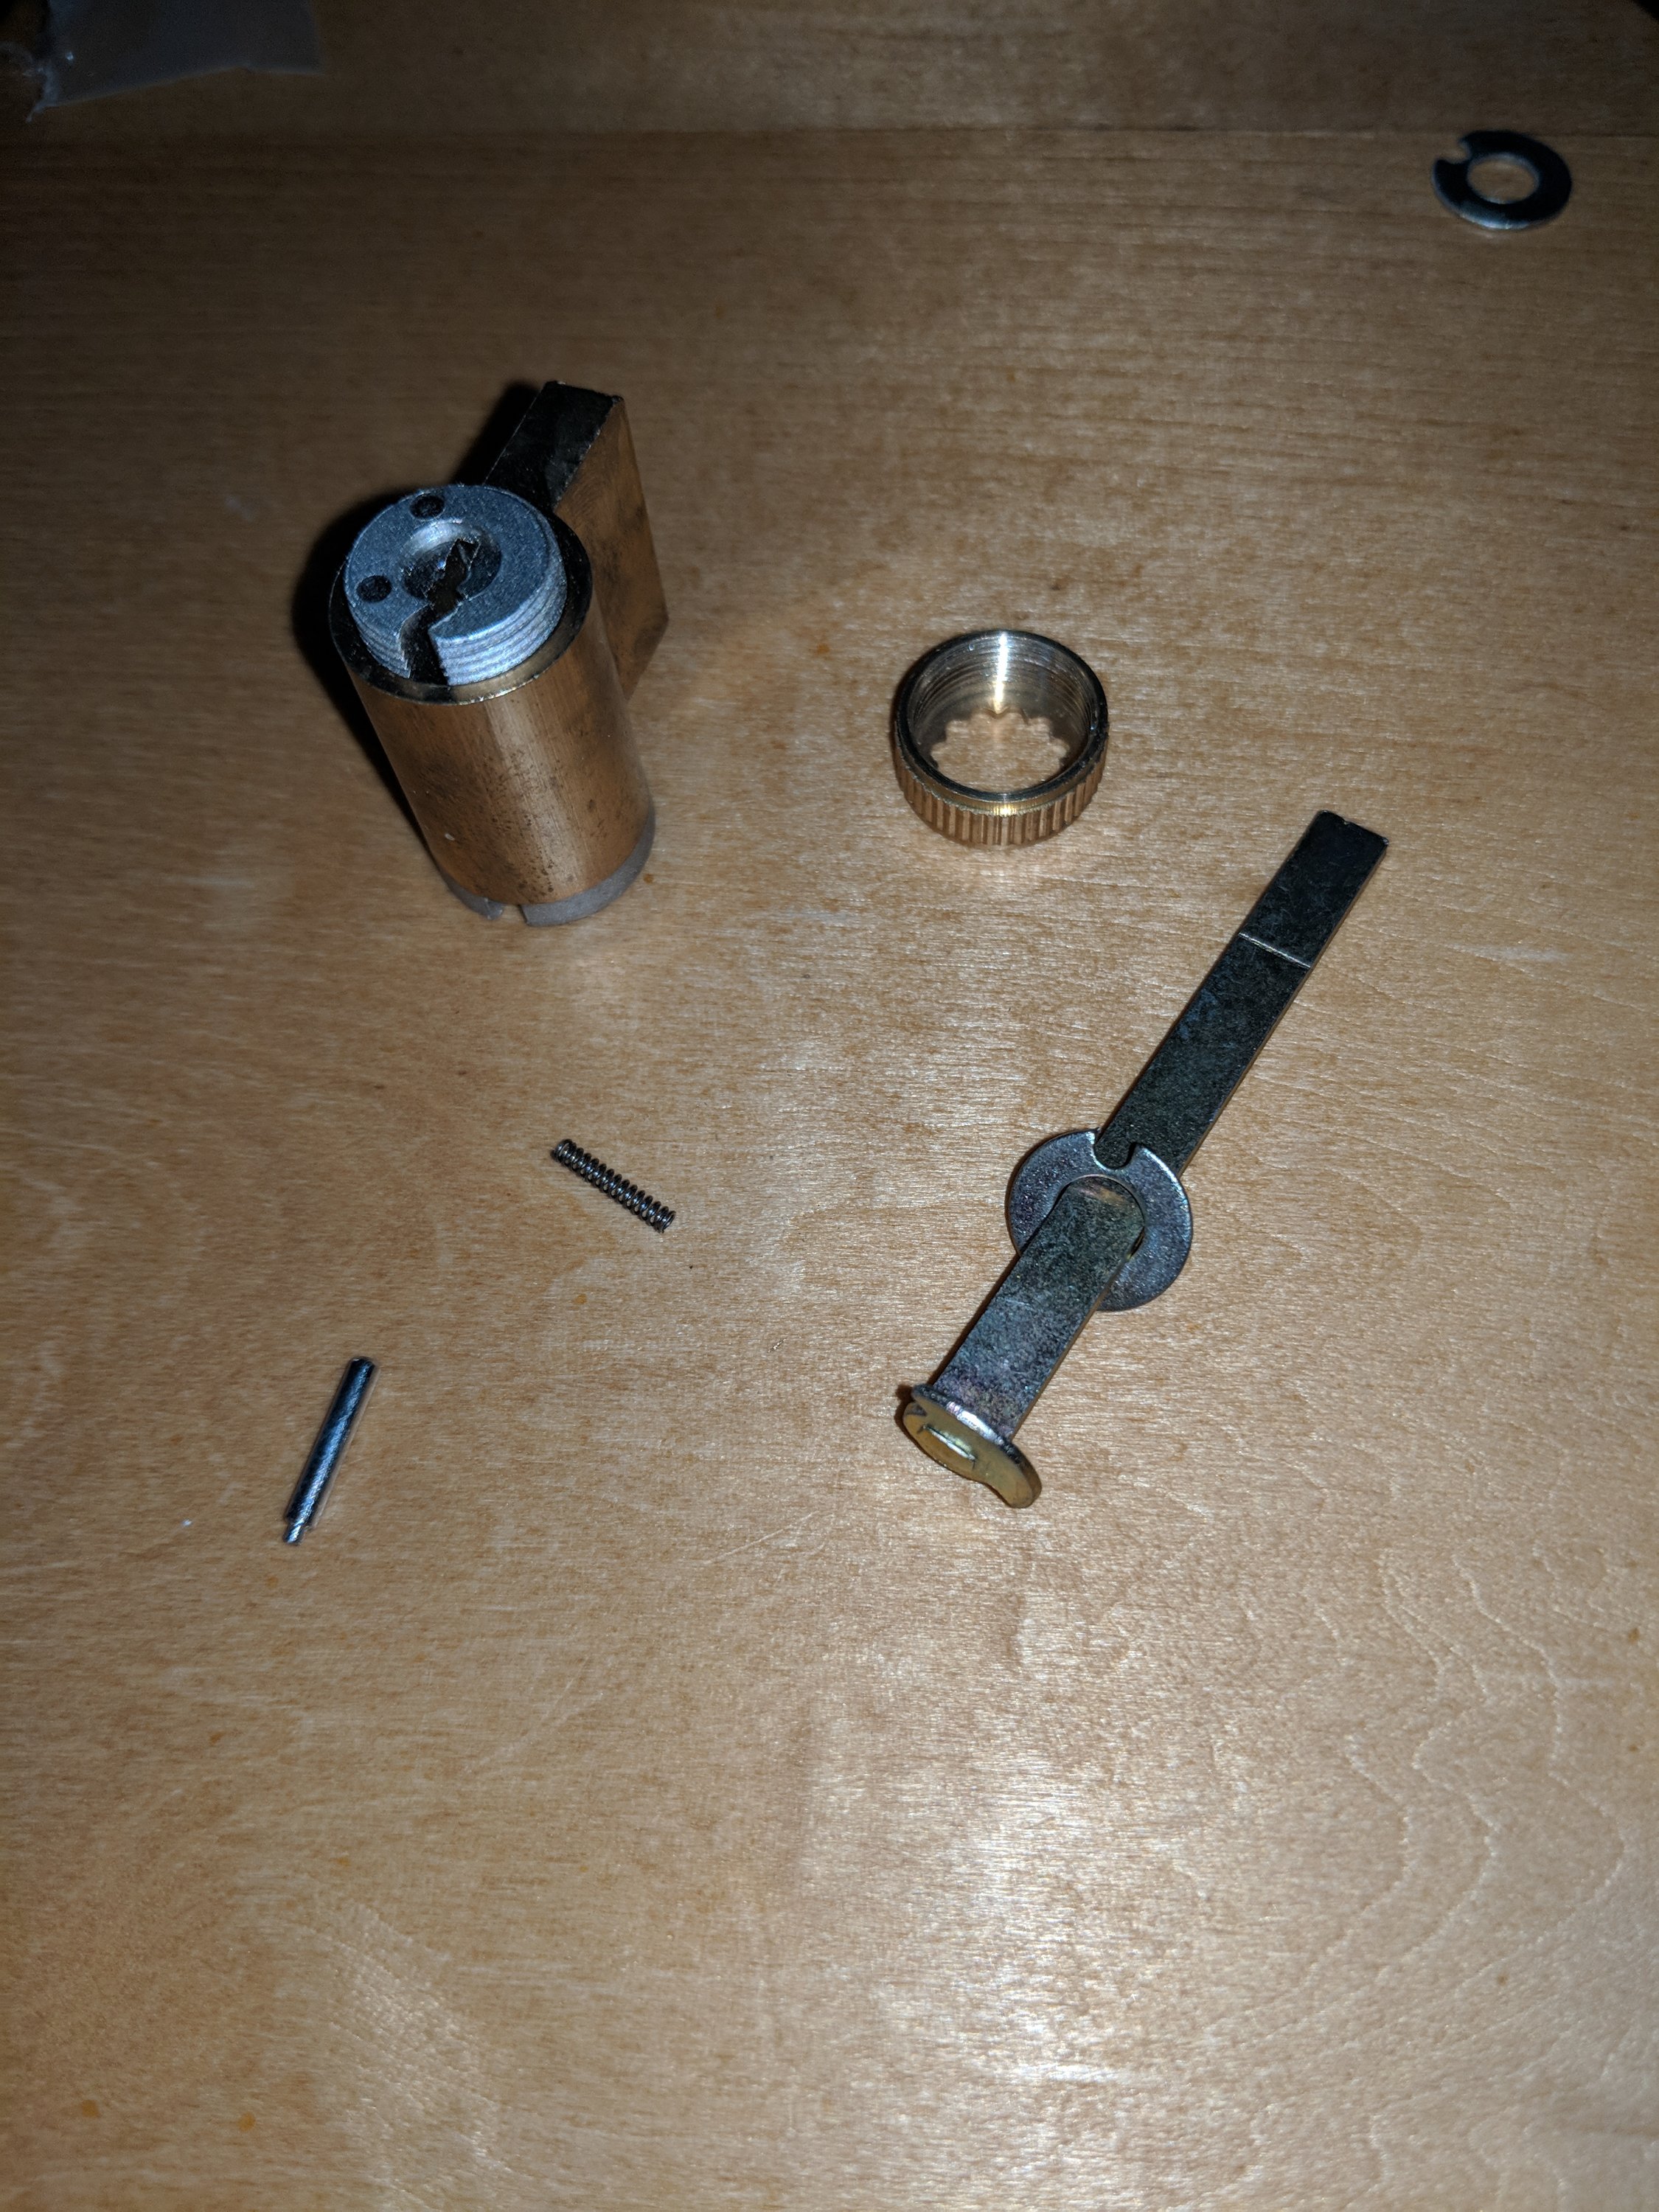
Indeed, I was able to get in by popping the hinge pin. From there I was able to remove the lock mechanism from the inside. It’s not a sophisticated protection mechanism, nor is it a particularly secure case. I’m going to venture to guess the new ones are even less secure, since they have TSA locks.

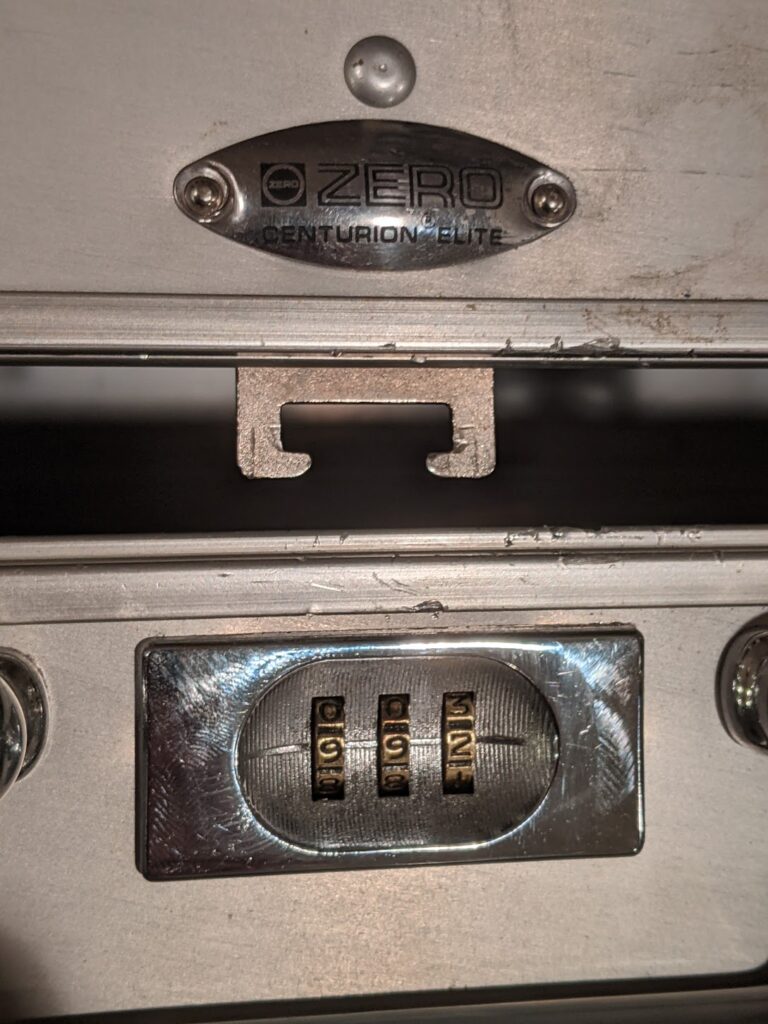
I spent quite a bit of time (before popping the hinge pin) brute-forcing the lock. You’d think that with only three 0-9 dials, just 1,000 possible combinations, that that would be sufficient, but I found that even with several tries, before and after removing the lock mechanism from the case, I was unable to make it happen. I think it’s a matter of imperfections in repetitive motions. After a certain amount of times, I guess your hands just “expect” the movement to continue to fail, and you fail to follow through with enough strength to clear the mechanism even when you get the right combo.

Last night I decided to give it another go.

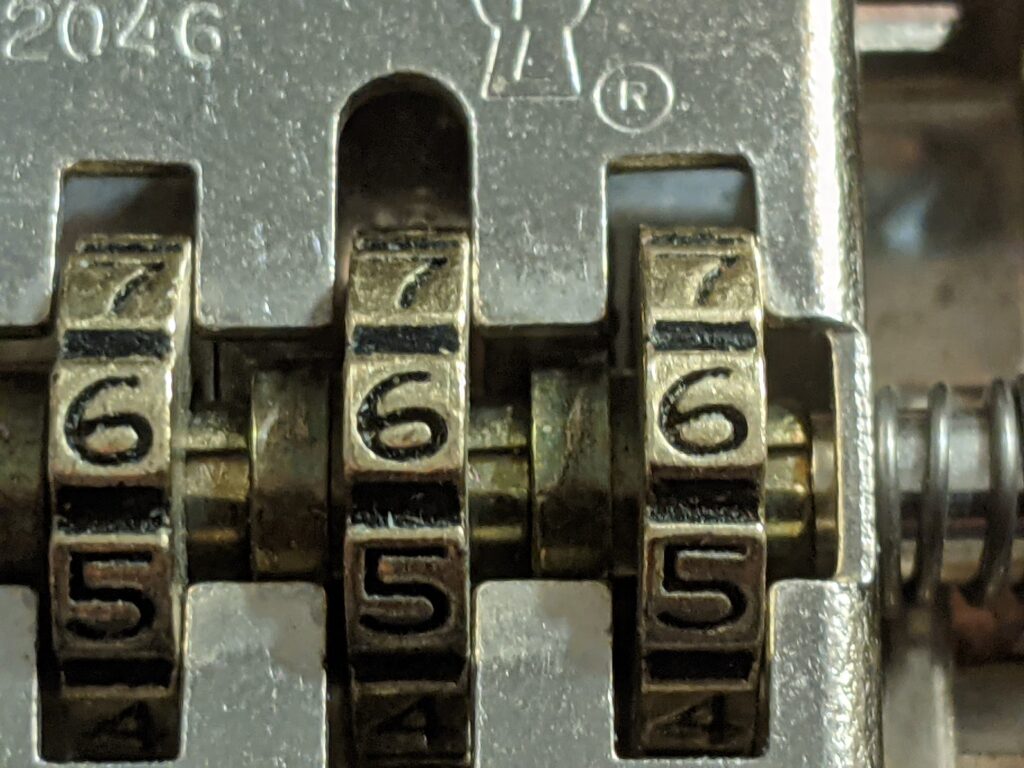
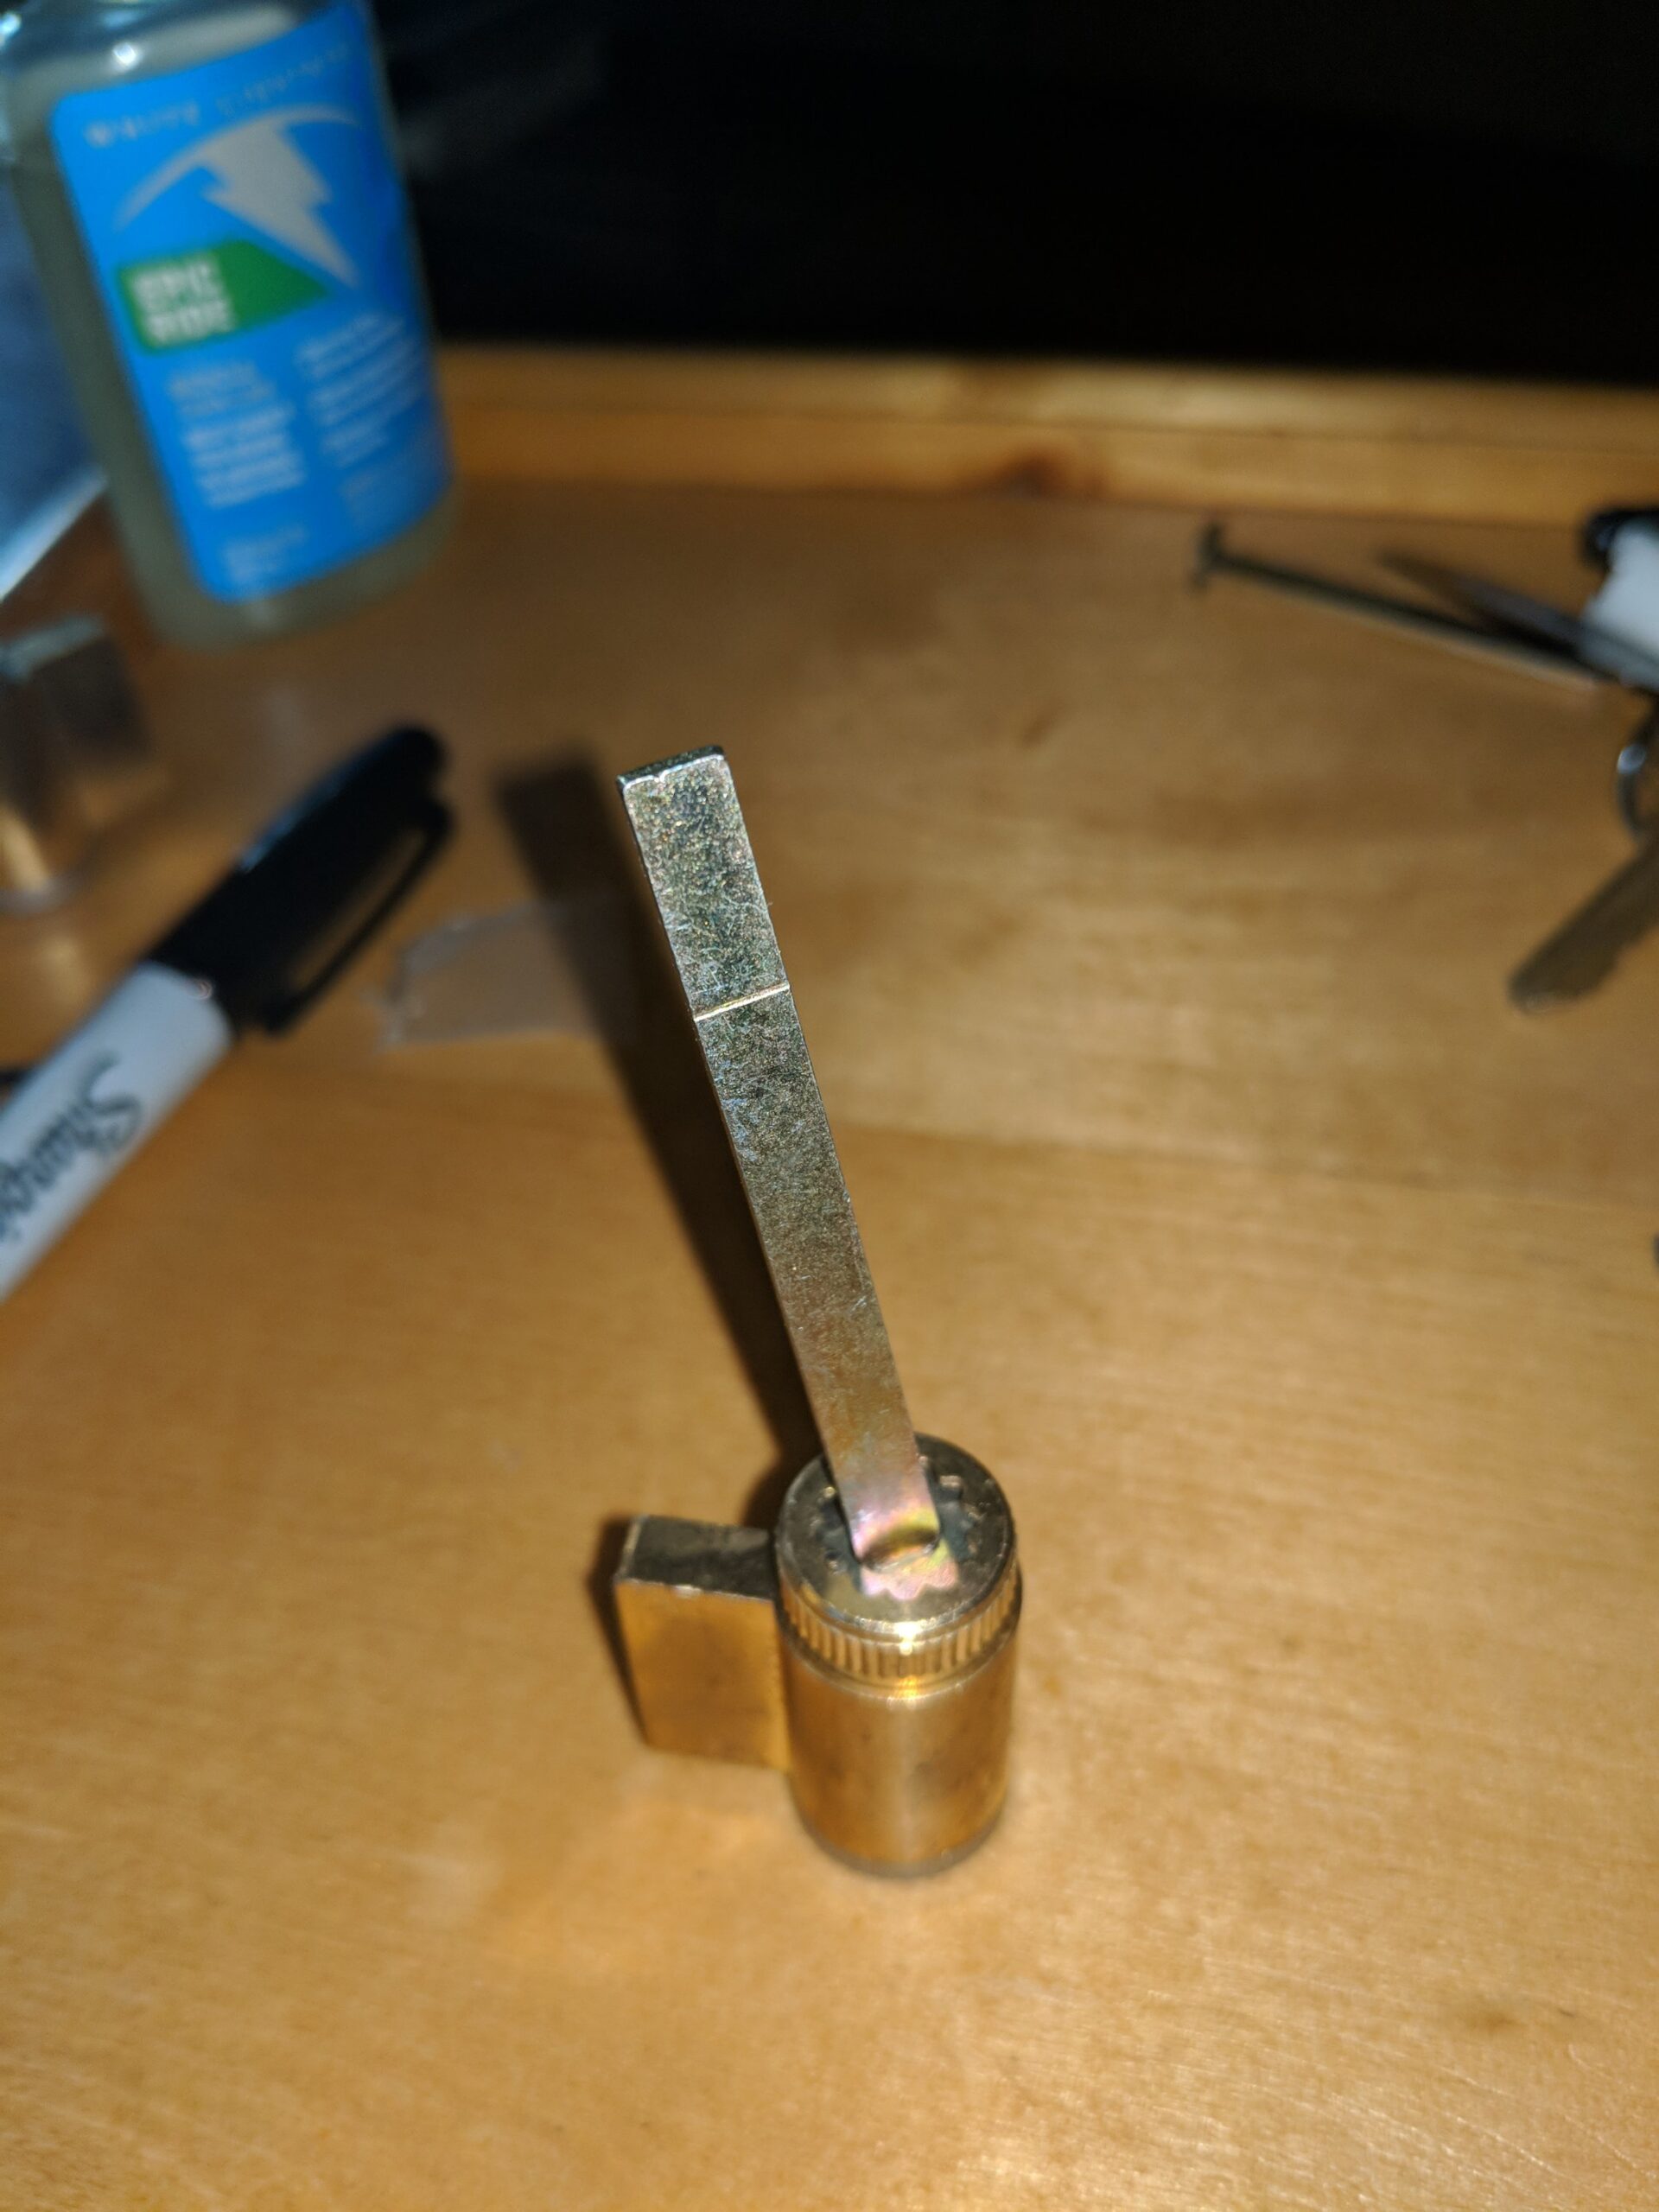
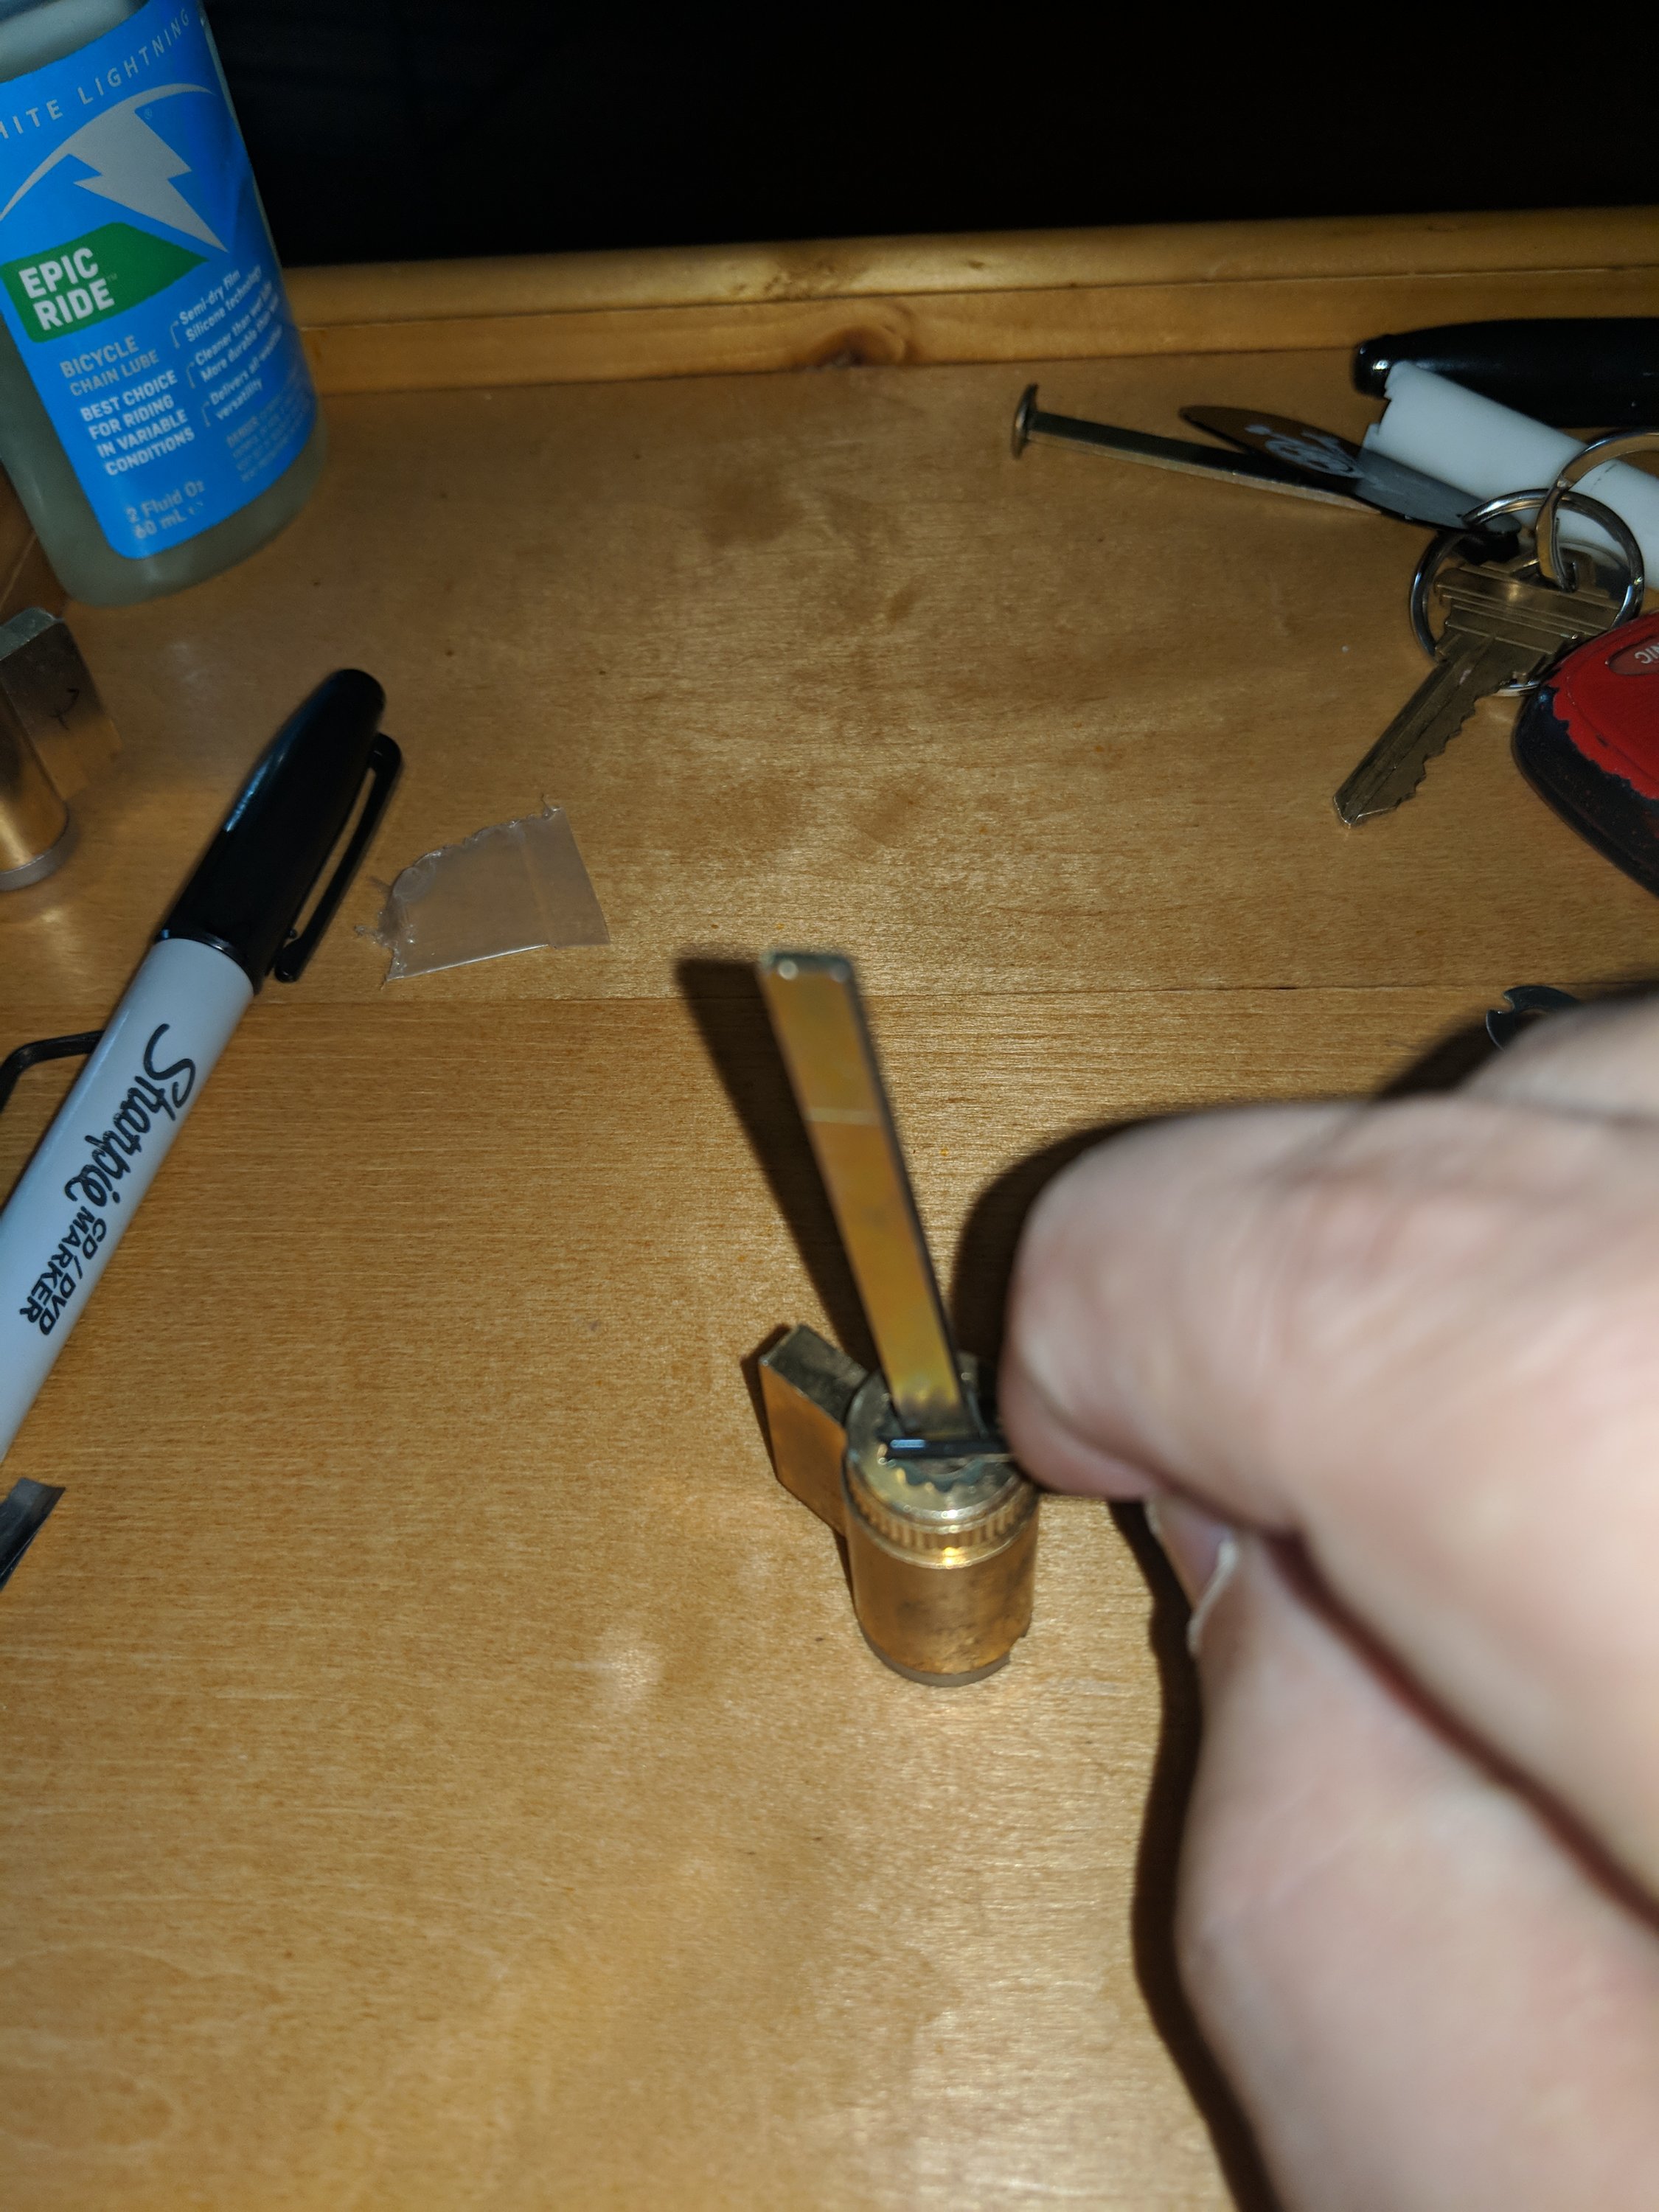
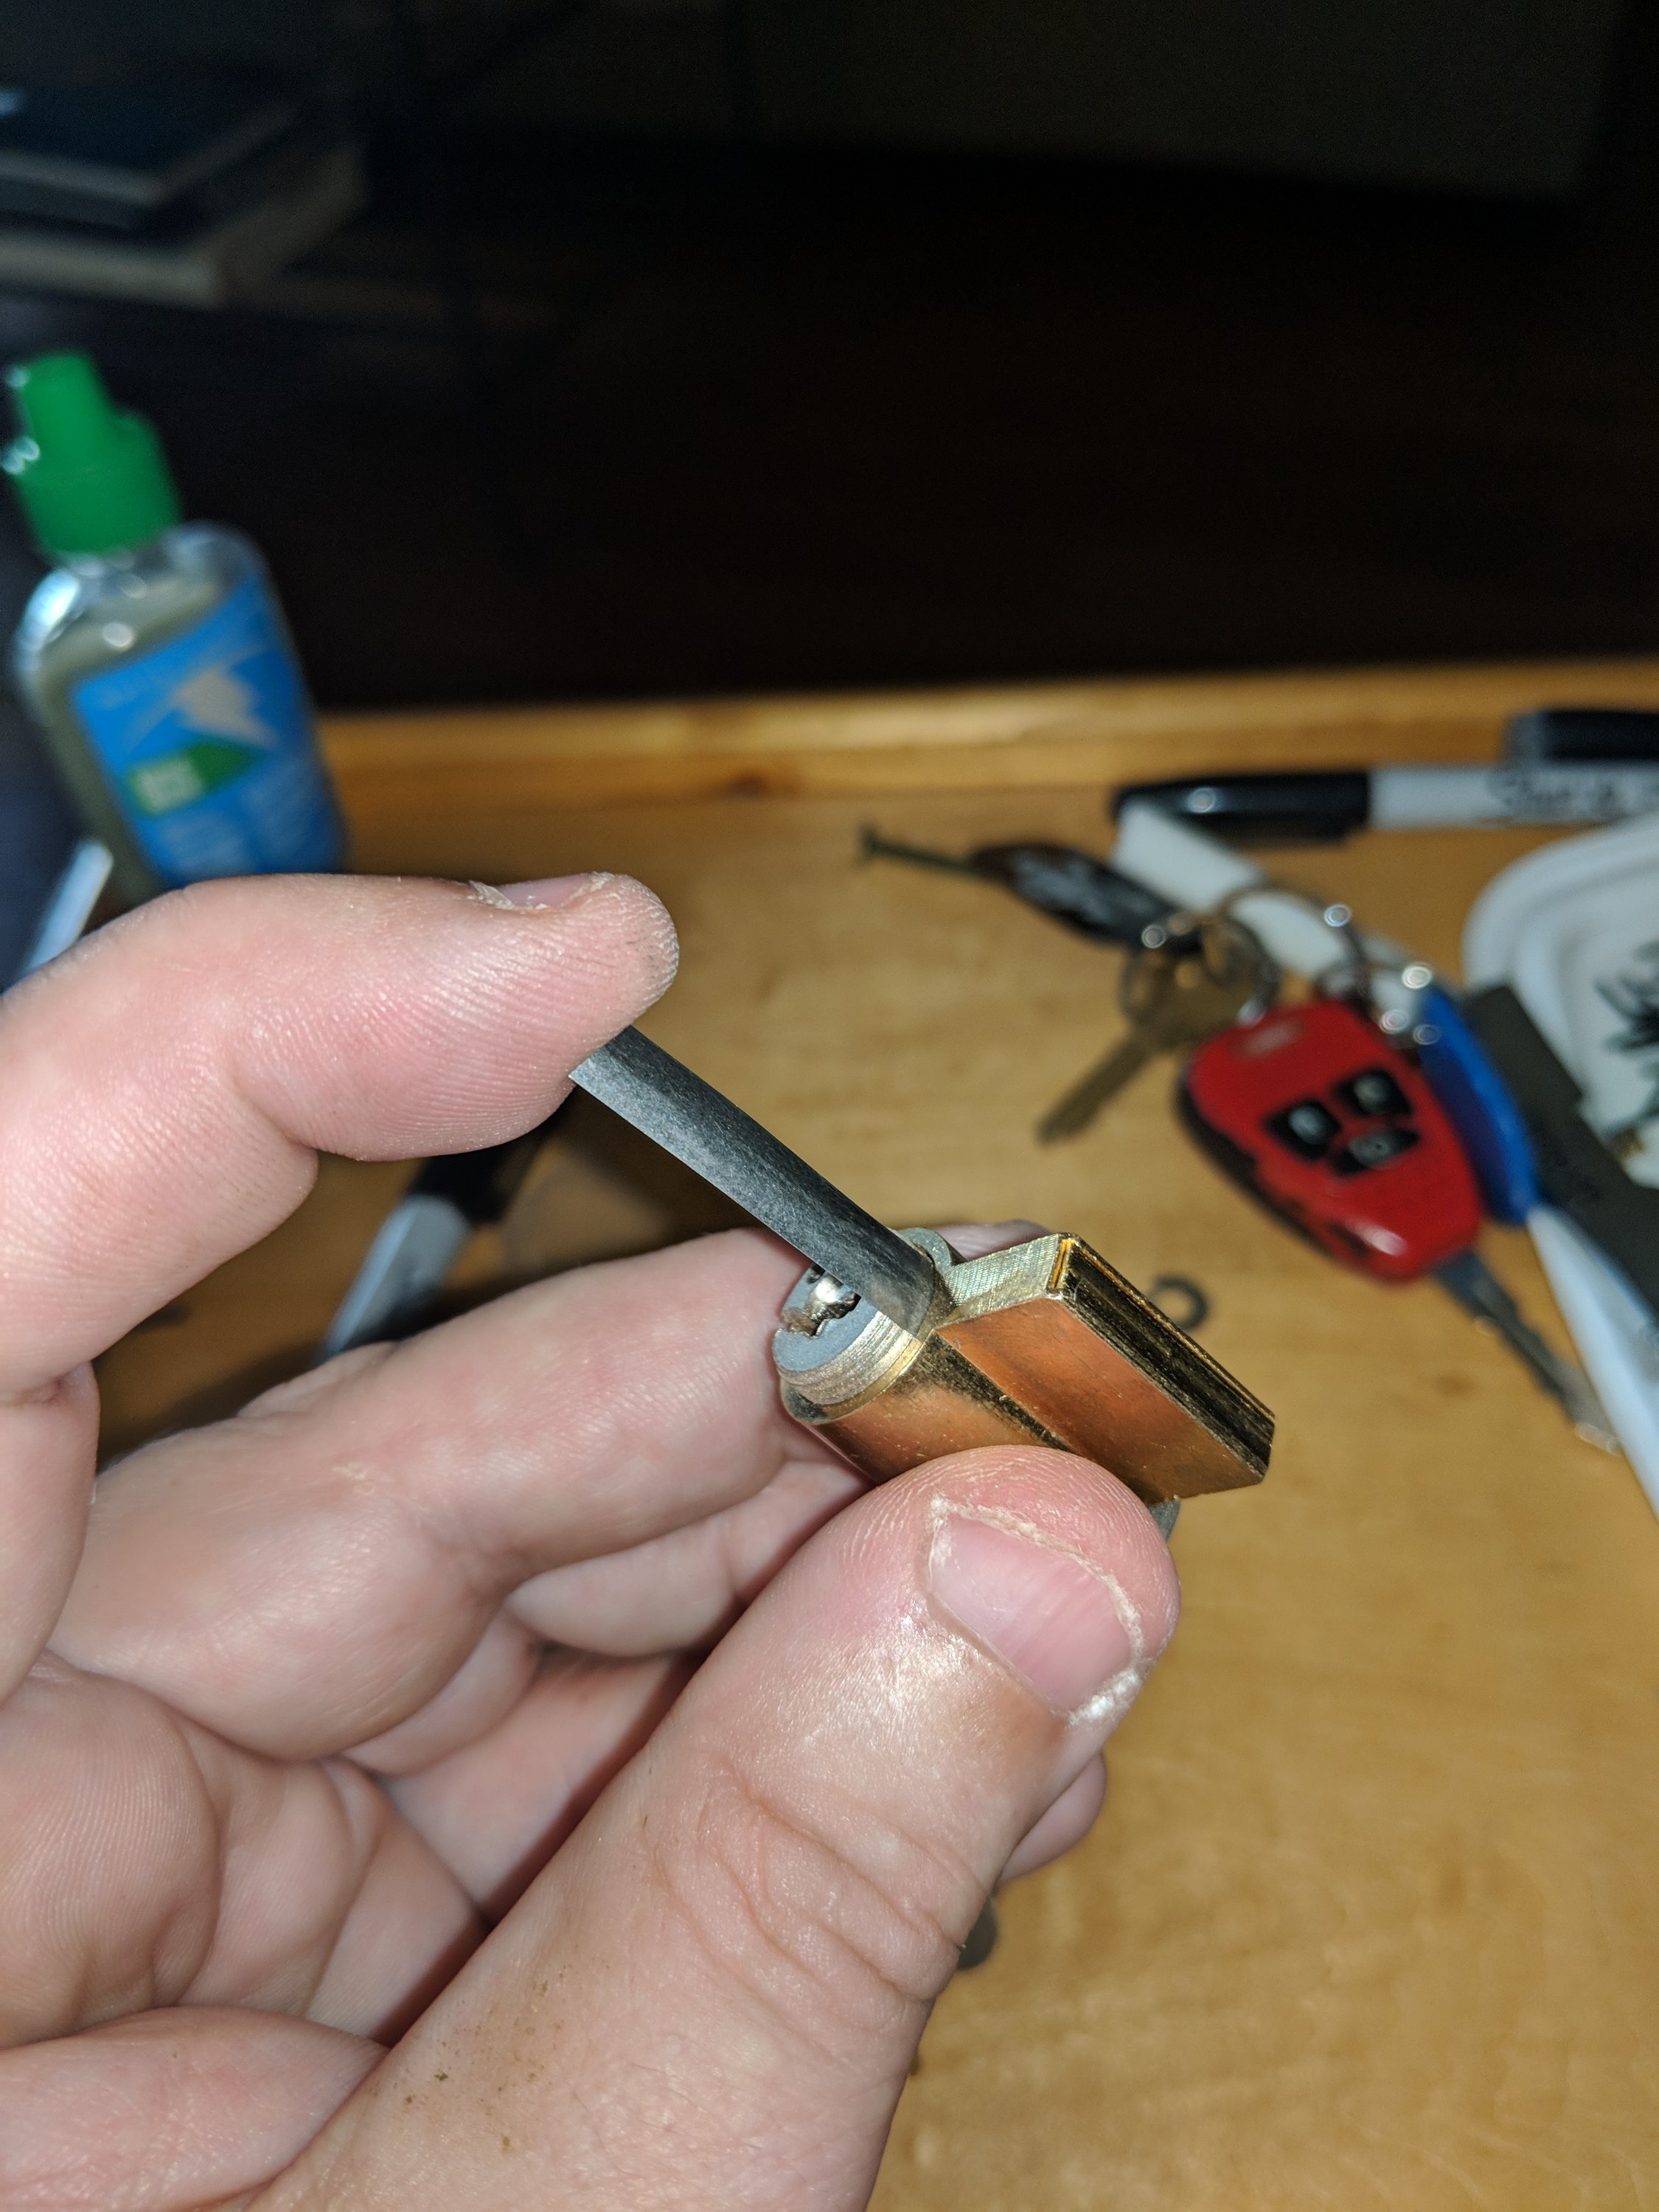
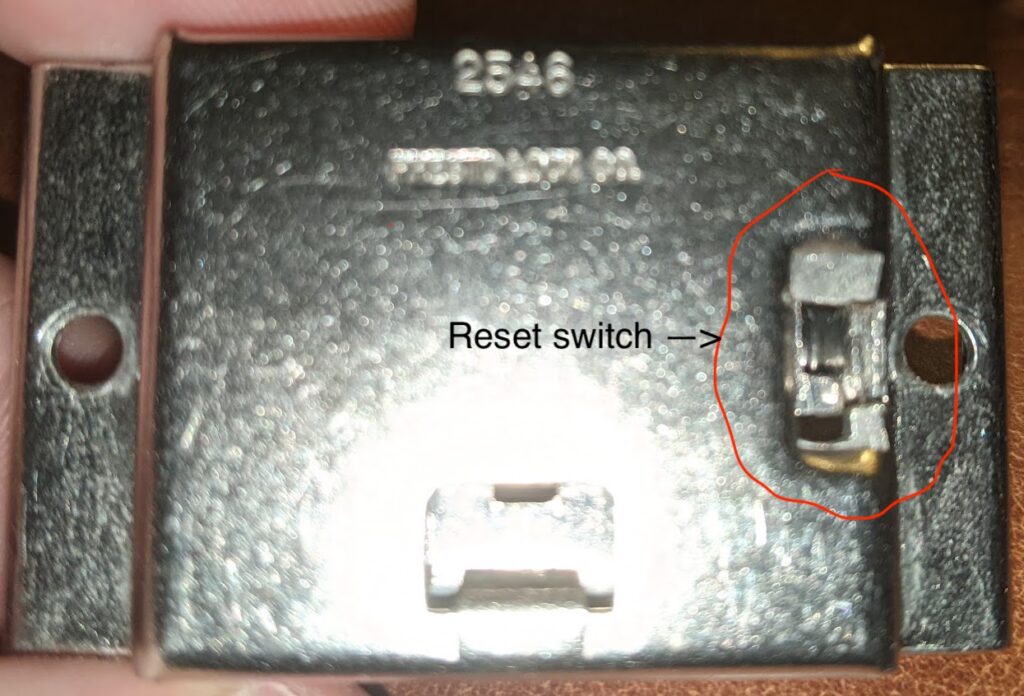
When brute-forcing with the lock attached, the test is to attempt to open the case. When brute-forcing with the lock removed, the test is to attempt to slide the combination-reset switch on the back of the mechanism, which won’t budge without the right combo. Again, repetitive motion attention failure likely prevented this from working properly, so I went back to the drawing board and researched bypass techniques with wheel-based combination locks such as this one. I found one technique involving proving to the right of the wheel with a narrow probe while turning the wheel and feeling for a “notch.” I tried that, and lo and behold, I found that each wheel had a notch point, in my case corresponding to “7-5-8.” I engaged the reset switch, and it worked!

The reset switch is engaged by sliding it inwards, then upwards. It can only be engaged while the correct combo is set, and while engaged, any changes to the dials result in a change of the combination. I reset the combo to 666, just so it’s easy to remember for now, and reinstalled it in the case. Tests showed that the new combo works, and the case is both lockable and unlockable.

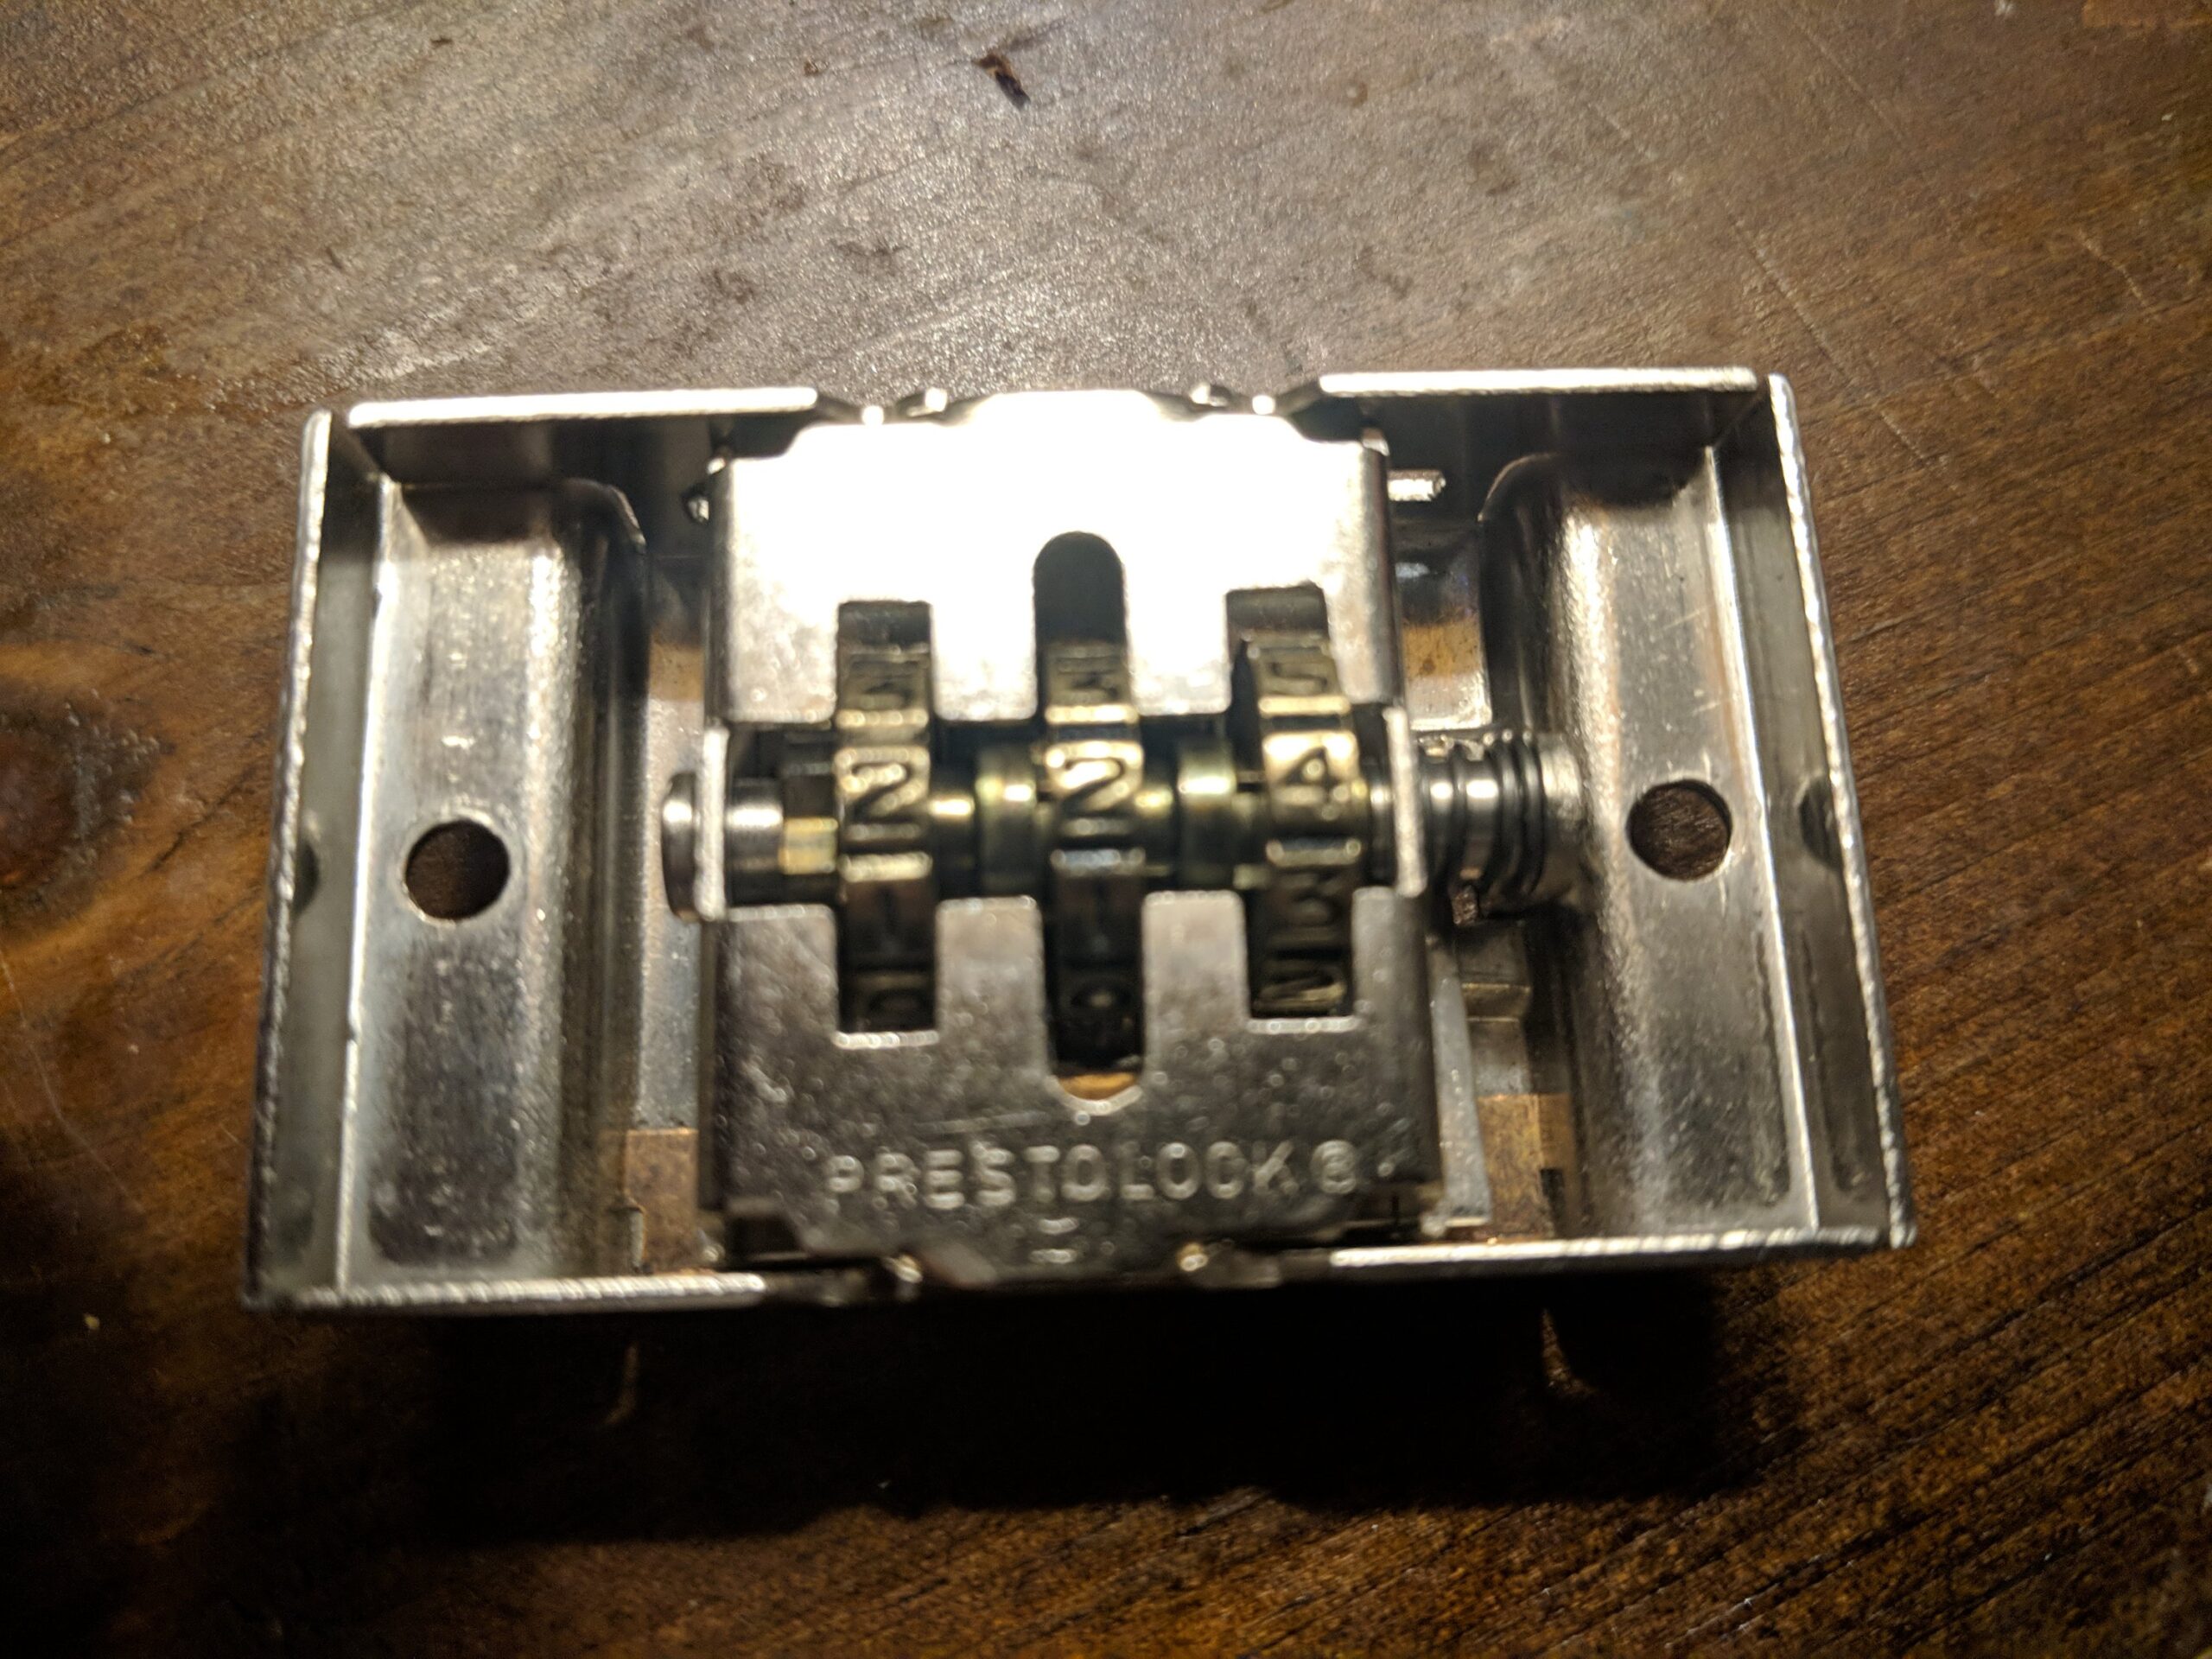
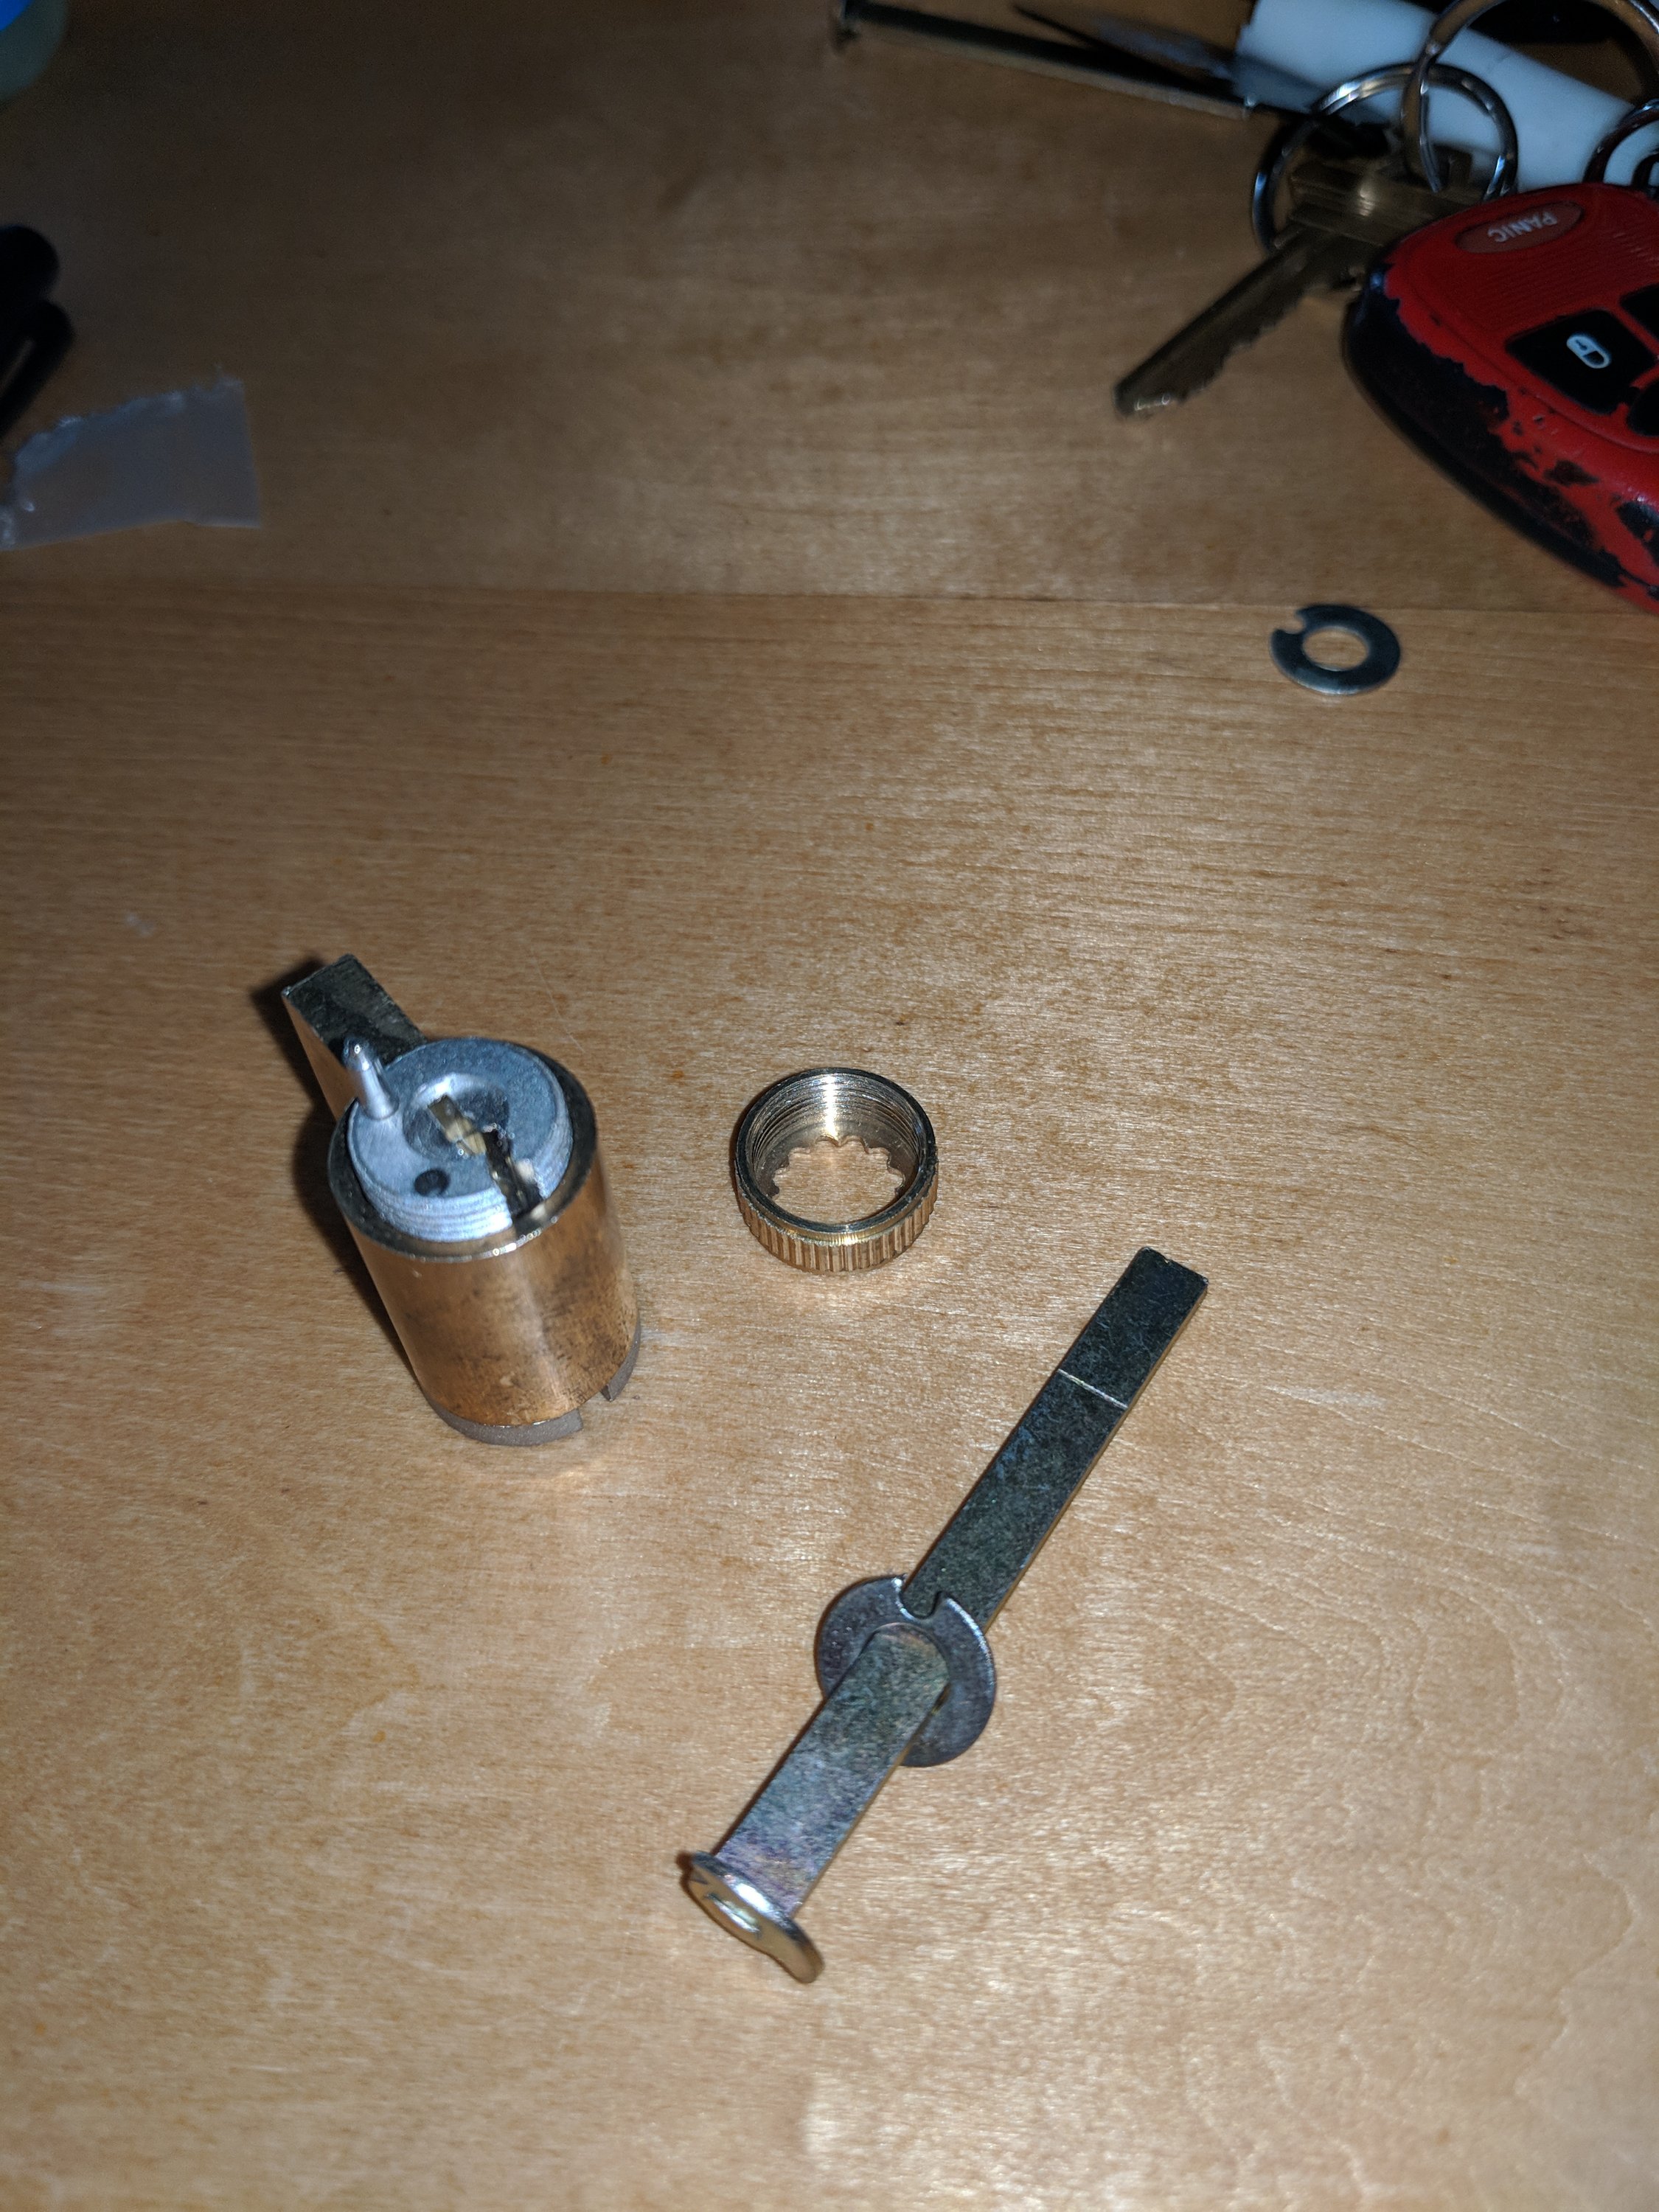
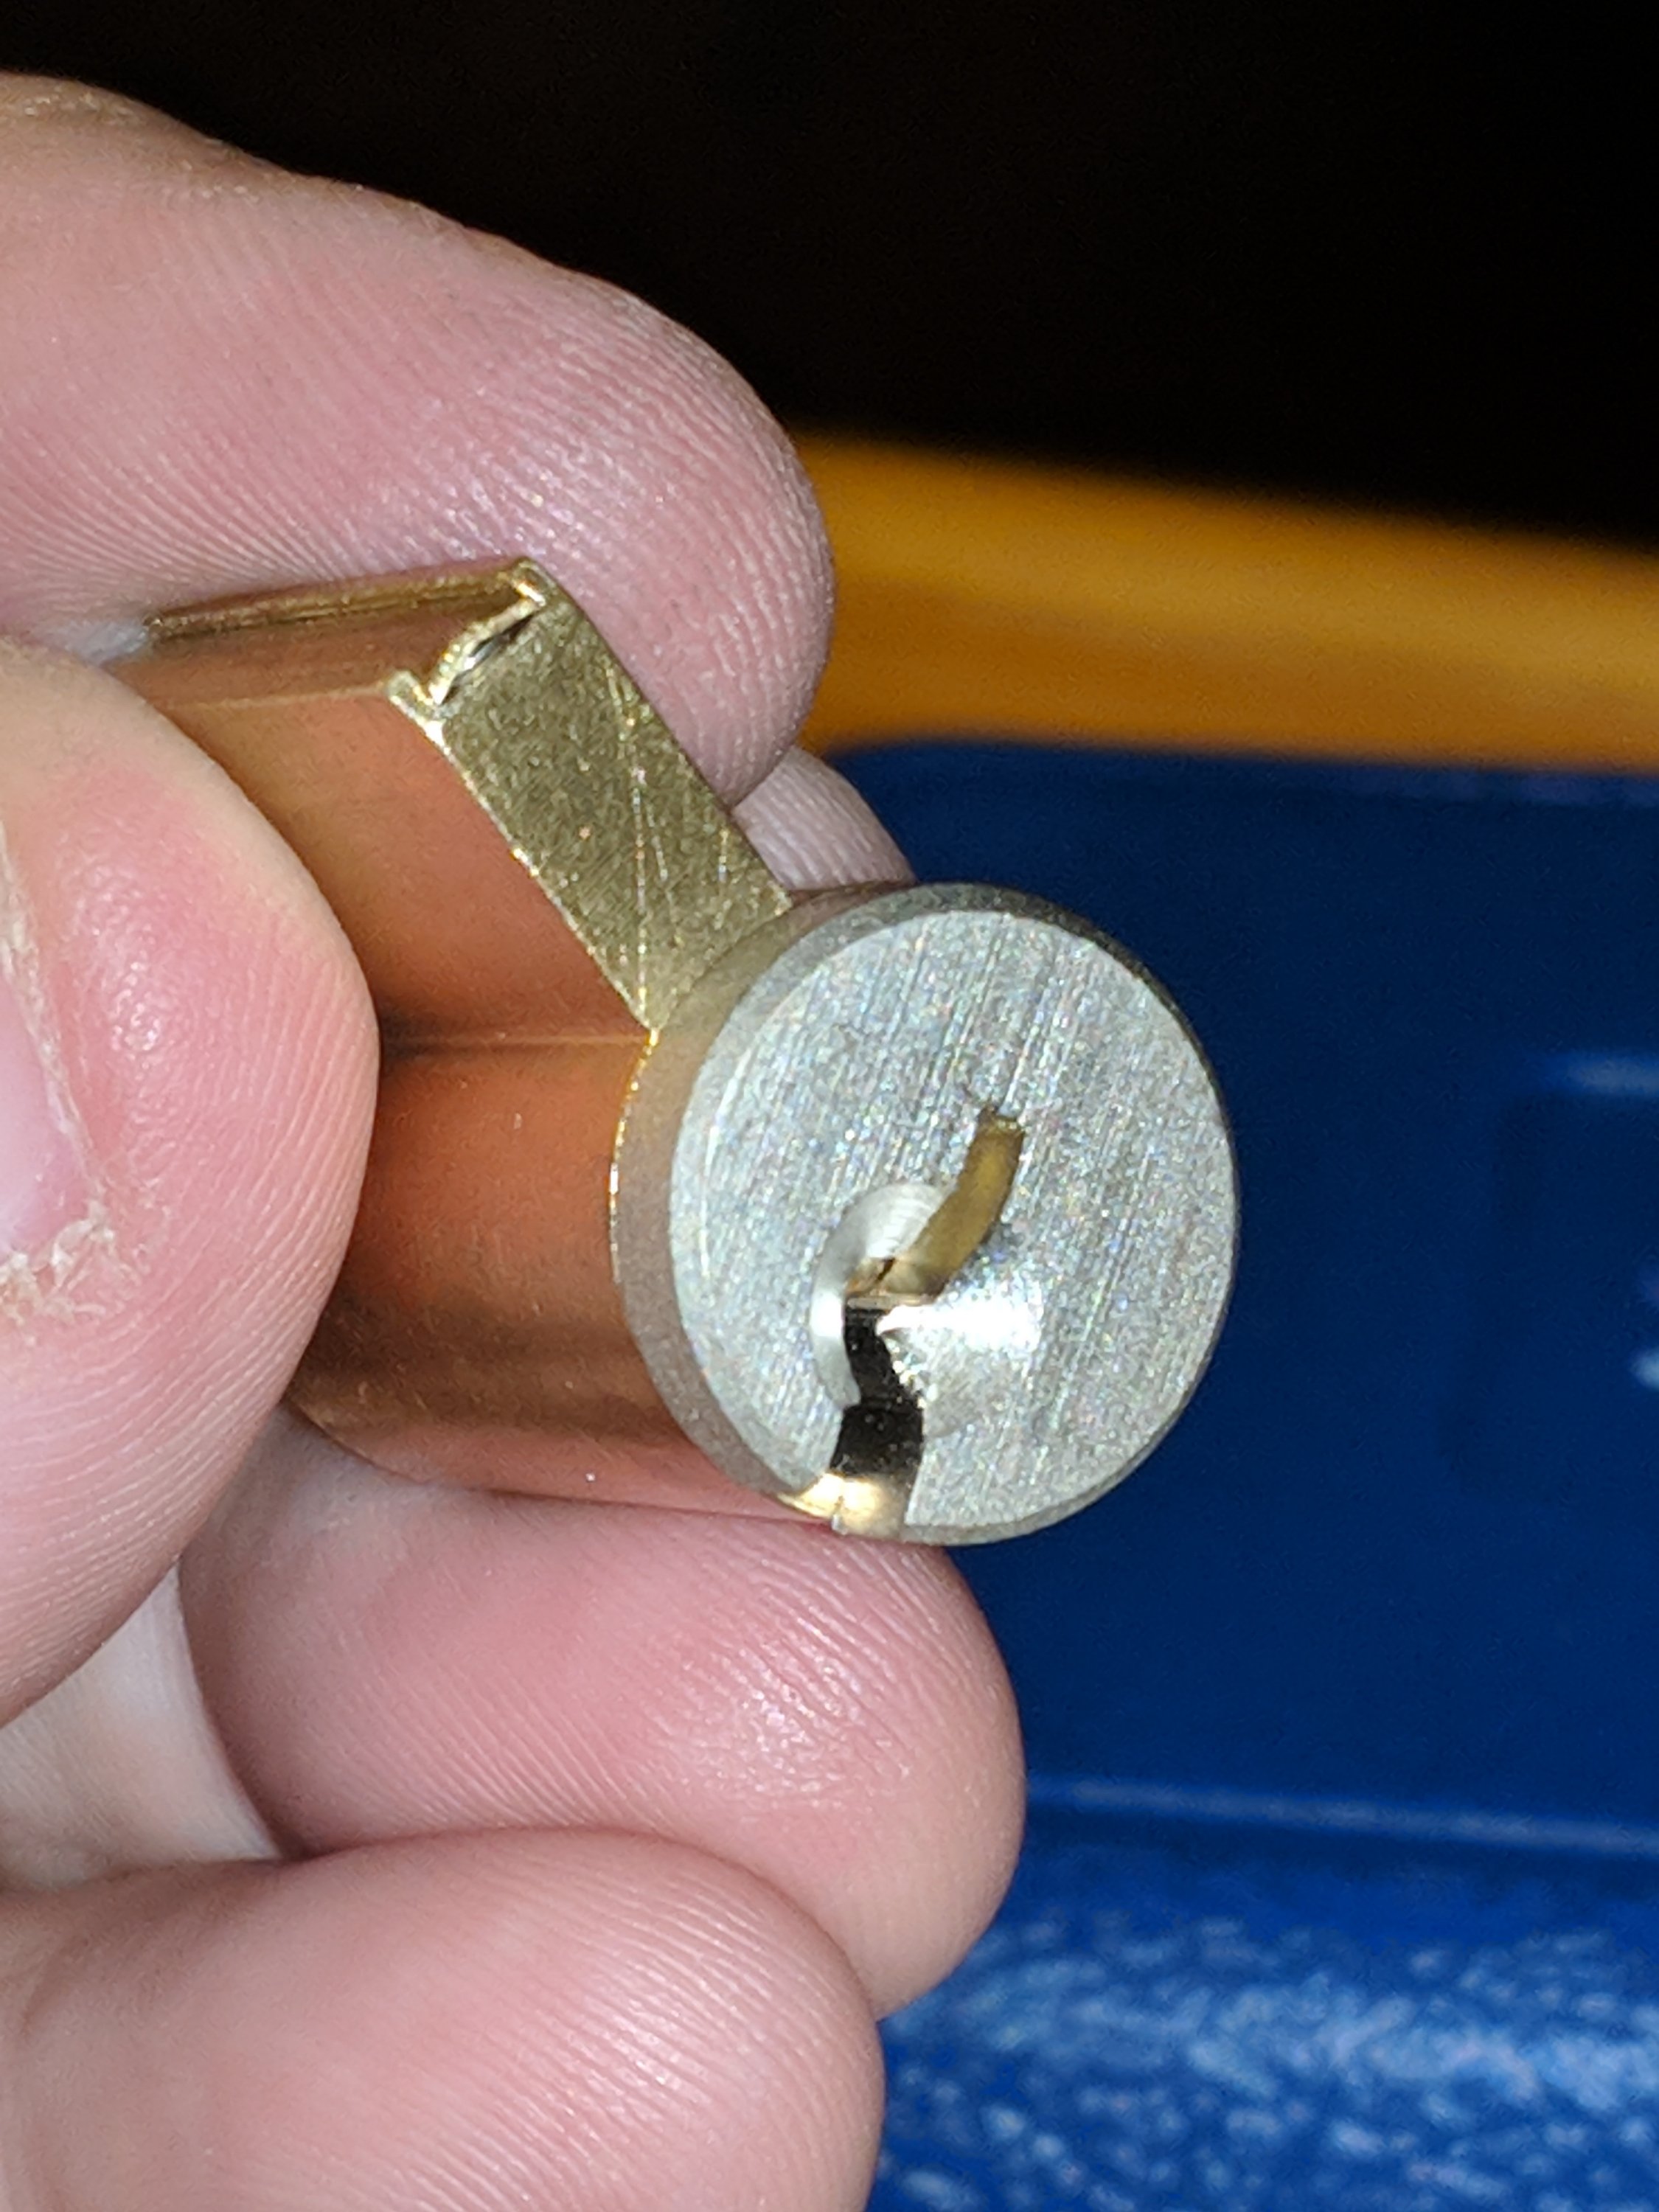
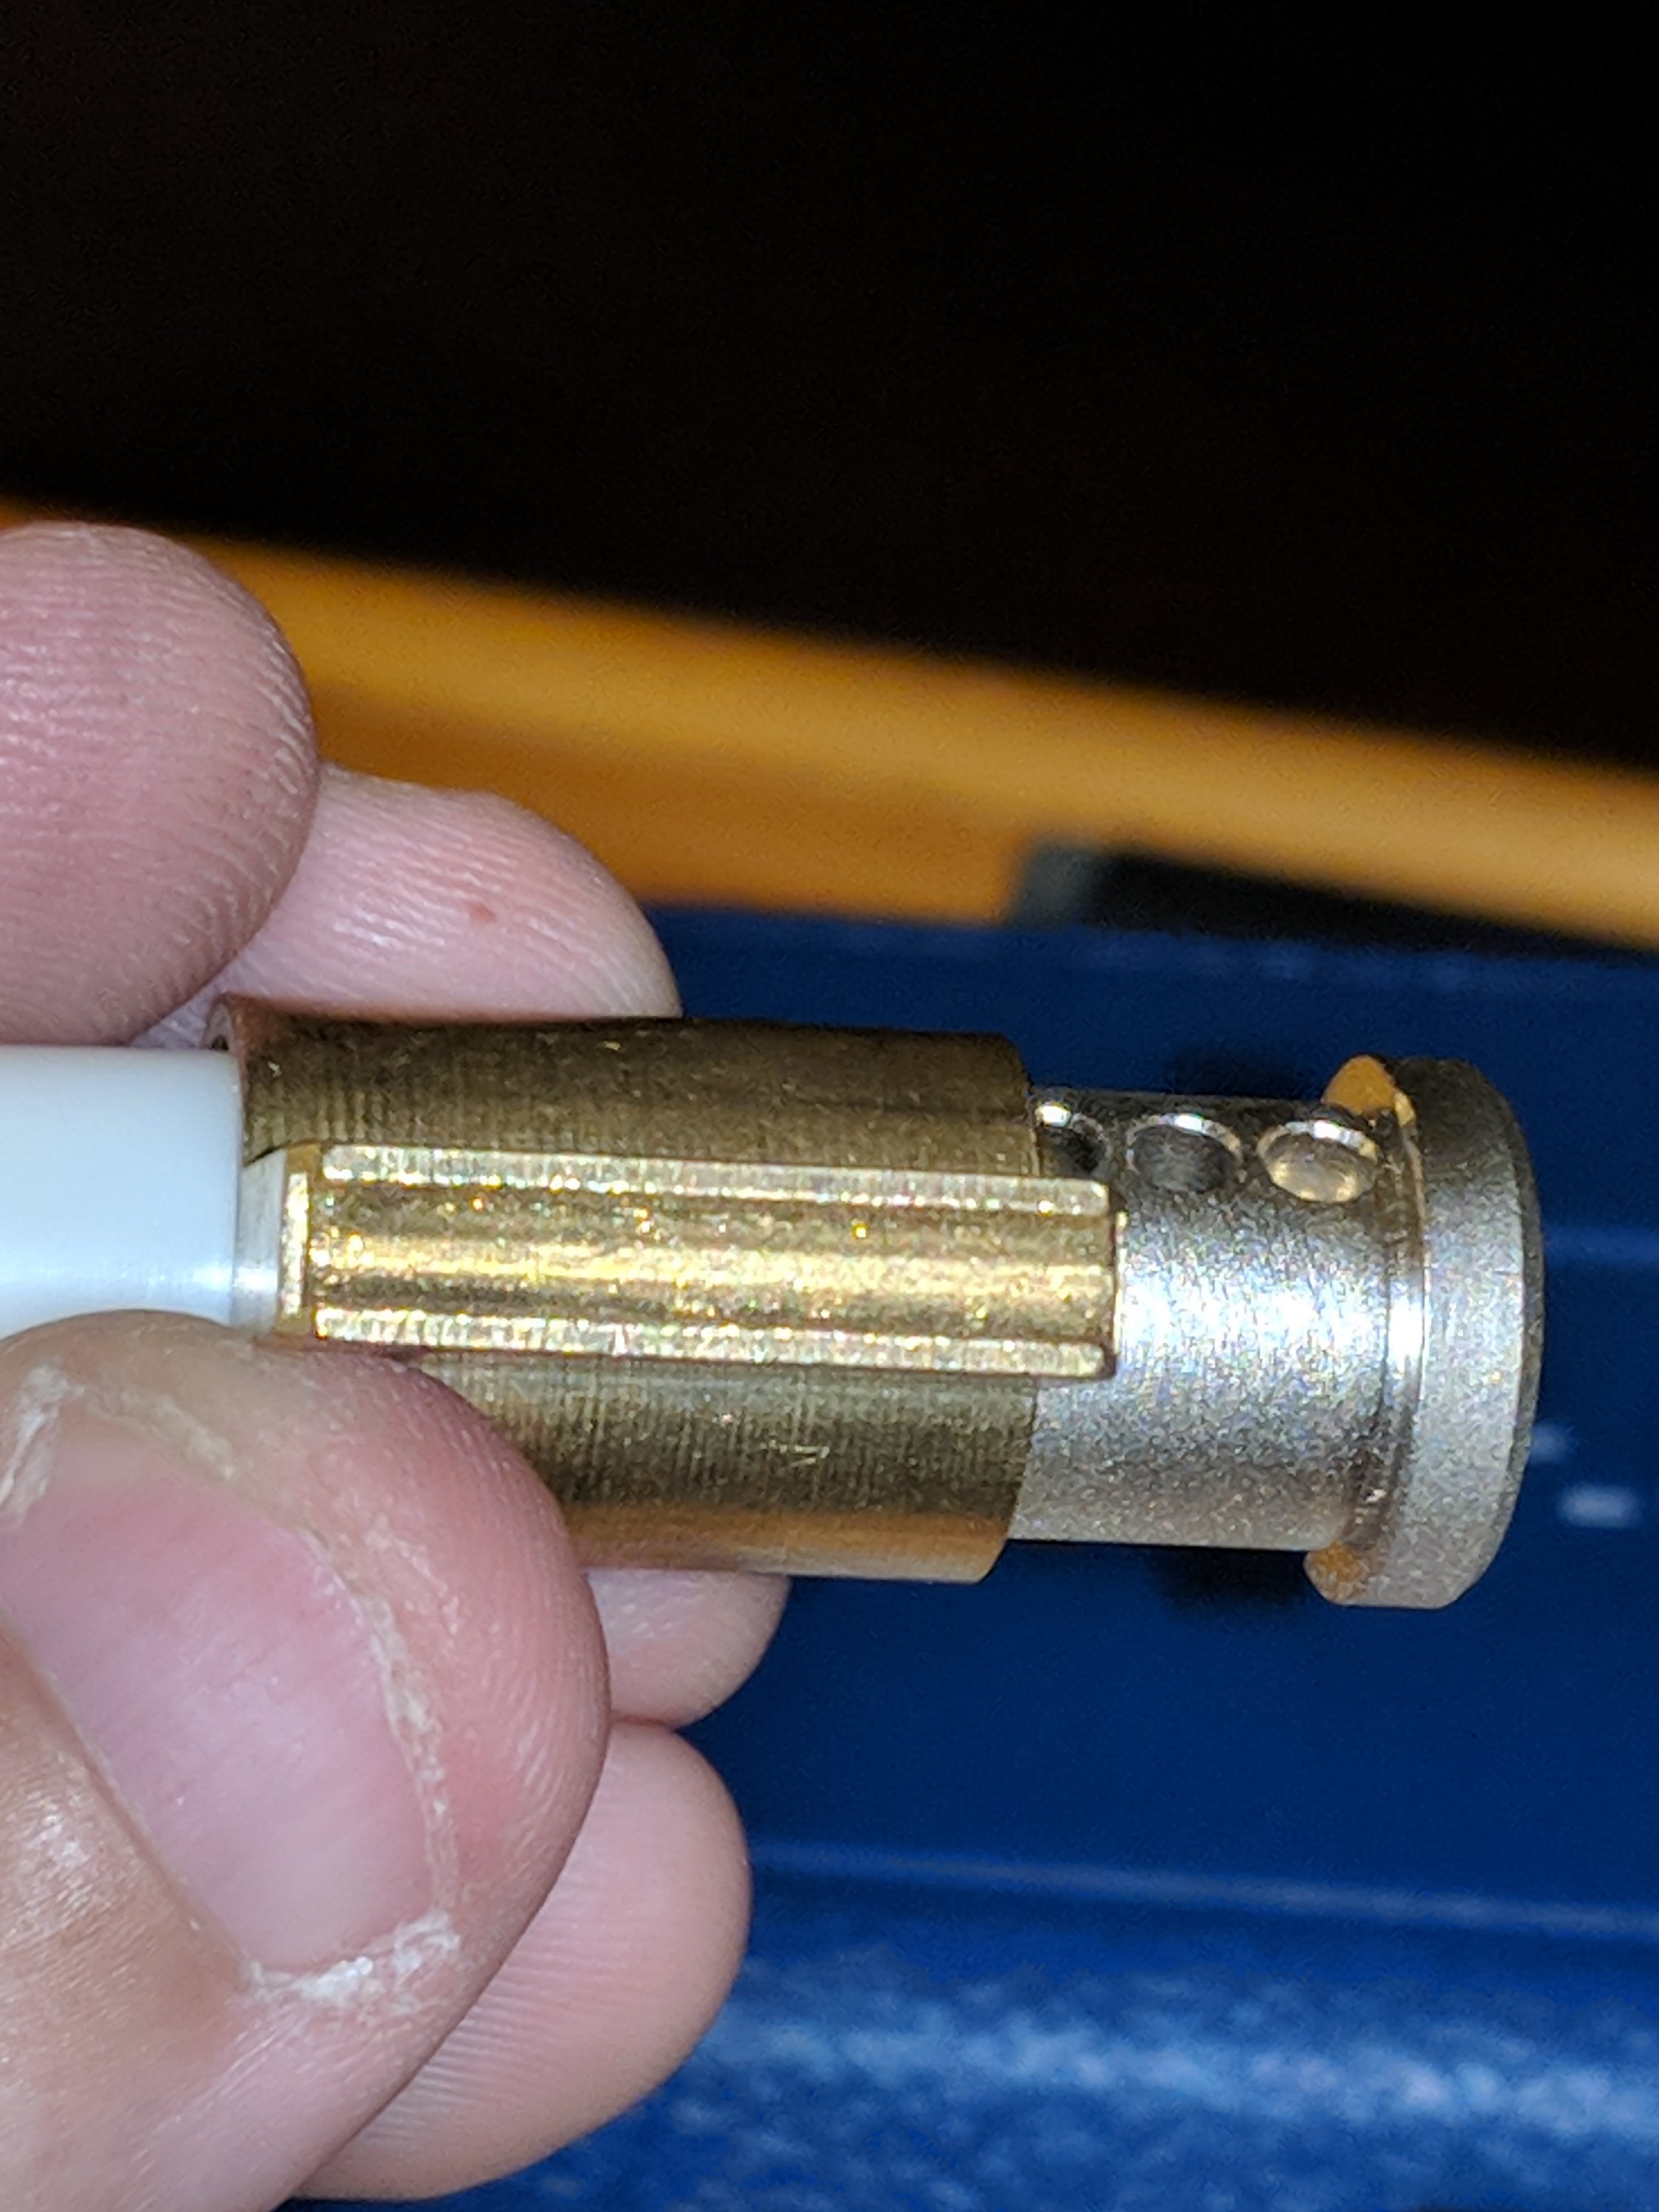
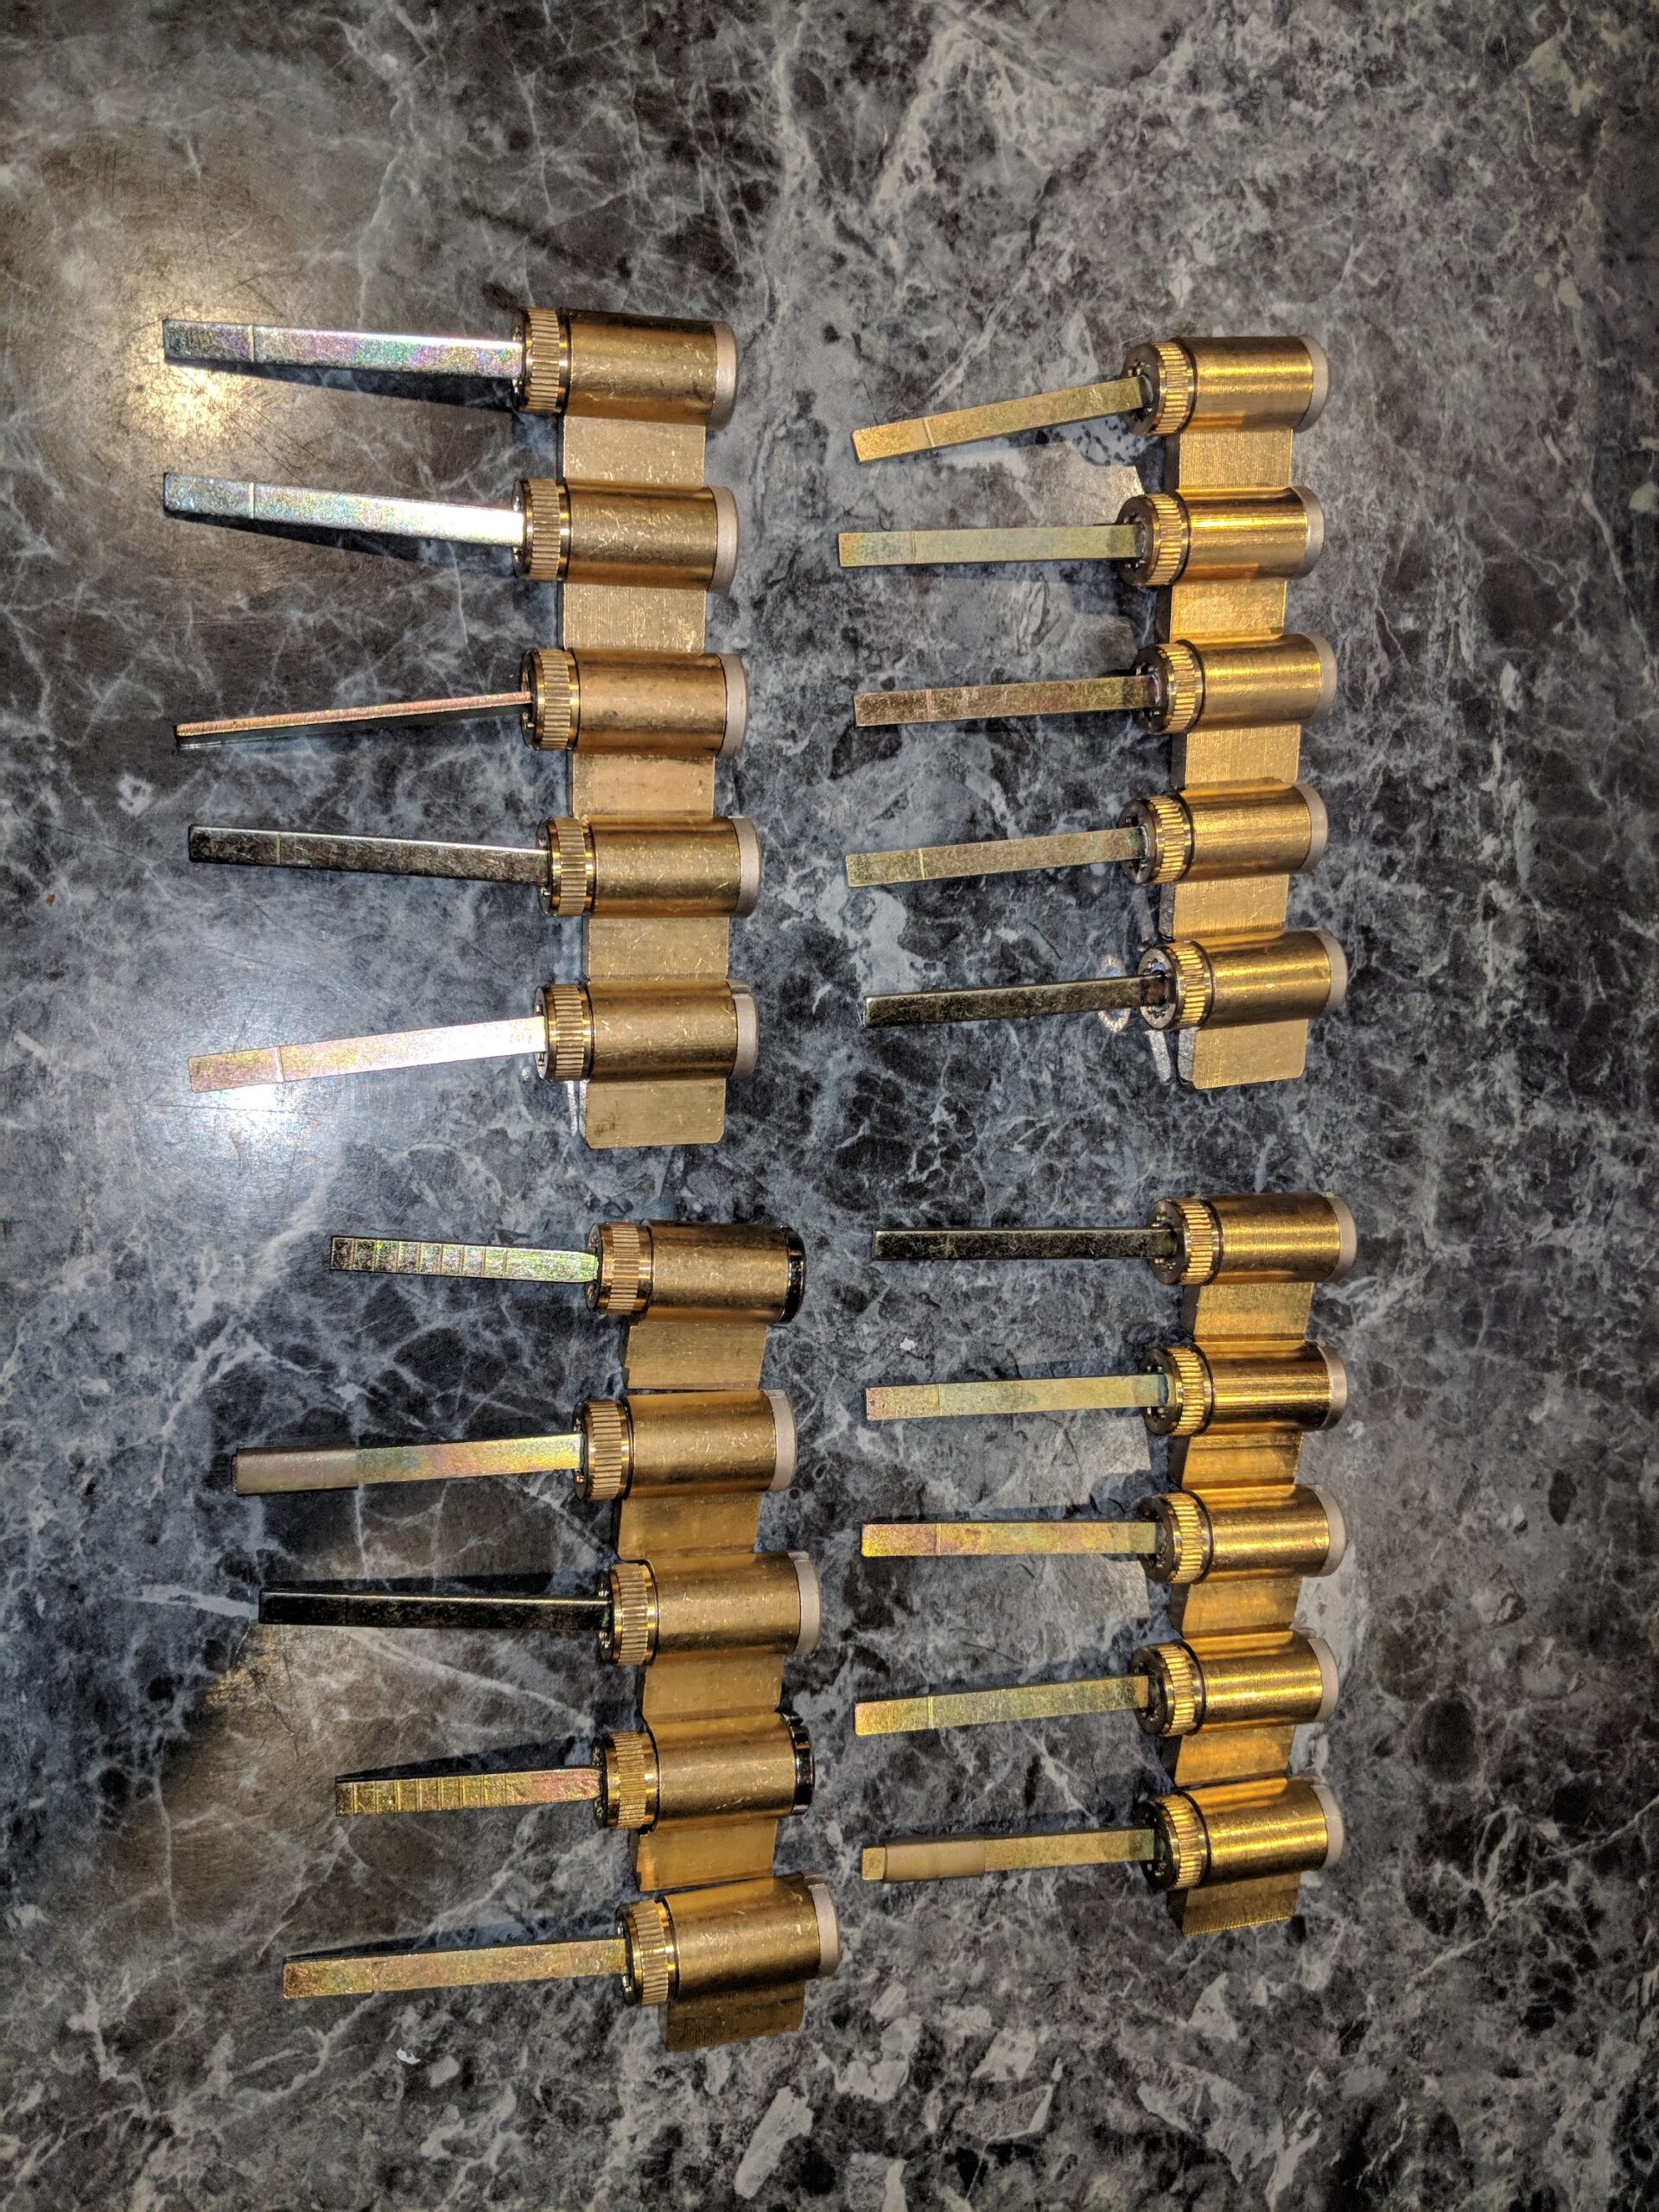
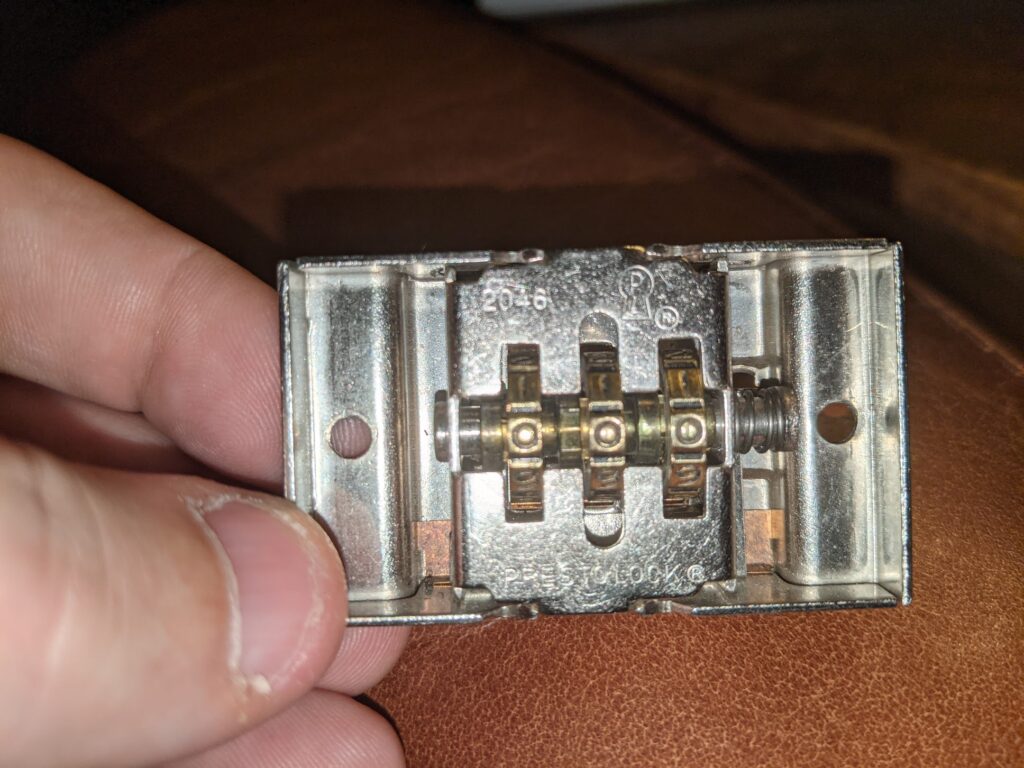
Here’s a photo of what the notches look like without the front cover. Interestingly, this mechanism, a Prestolock 2046 or 2546, is installed by screwing the lock mechanism directly to receiver tubes on the front cover from the inside. With the lock installed, you can’t see these notches. But knowing they’re there, on this and lots of other wheel-based combo locks, will help you to easily determine the current combination and disengage the lock. If your lockpicks are thin enough, they may work for feeling these notches even with the front cover engaged.

Tubular picking

No, this isn’t about radical bluegrass.  I acquired a set of tubular lockpicks some time ago, but never got around to trying them out.  After our first meeting, I was inspired, so I ordered a few locks to try them out on.  

I had NO IDEA how easy these things make it.  It’s amazing that these locks are marketed at all.  Flatten the tension bars.  Ease the pick in while gently twisting.  Eventually the pressure will balance out and the lock will open.  Ridonkulous.

A Different Kind of Lock

Picked up a locked Zero Halliburton Centurion Elite briefcase at an auction. There were contents, so I was dead set on getting in. It was the three-dial combo type. Tried brute-forcing it, but no luck. I suspect I would have had to go from closed and latched to open with every iteration, and that wasn’t about to happen. So I seduced my way into the case by another means, and removed the lock mechanism.  Hell, this case is considered the Rolex of briefcases, so I’d like to know the combo and be able to use it.


Repinning Schlage KIK cylinders for progressive picking

Requirements:
Schlage KIK lock cylinders
Following tool (comes with Schlage keying kit, along with pins and springs for the inevitable losses)
Tweezers
Shim(s) (very helpful)

I picked up a bunch of cylinders on eBay to use for lockpicking practice, because it was a hell of a lot cheaper than buying an already-assembled progressive cylinder set.  For example, one progressive set I found was $80 for five or six cylinders, and I picked up 20 cylinders for around $2 each.

I decided to document the process, because there aren’t enough detailed tutorials on the web for this particular task, and if you’re going to pick locks, you should know how to repin them, because that will help you understand how they work.

First, here’s how standard tumbler locks work.  We won’t get into advanced topics like security pins here.  

In a Schlage KIK (key-in-knob) lock cylinder, each “pin” in is actually two pins and a spring. The top pin is spring loaded, and when the key is engaged, resides in the upper part of the lock cylinder — the squared extension above the keyway known as the “bible.” The bottom pins are engaged by your key. The length of each bottom pin, along with the measurement of the “peaks” of your key, provide the combination that results in the bottom pins being flush with the keyway, forcing the top pins completely into the bible, providing a gap and allowing the lock cylinder to turn.

[drawing to come]

To begin, set the lock on its face on the table. Note the thumbscrew end cap.

This must be removed for repinning. It is held in place by a capture pin.  This allows the end cap to be tightened to a specification and then held there, rather than tightened all the way to the point where the cylinder won’t turn.

Step 1 is to remove that end cap.  This is accomplished by pushing down on the capture pin with some sort of tool. This can be tricky, but once you get the hang of the motion, you can do it with just your two hands, one holding the cylinder steady and unscrewing the cap while the other holds pressure on the capture pin.

Once the end cap is removed, you’ll find a washer and a flat rod. The flat rod is used to open the actual door, and for our purposes should be removed.

Carefully remove the capture pin and set it aside for safekeeping.  Then carefully turn the cylinder upside down, and the capture pin spring will fall out. Set that aside as well.  You will need all of these parts to reassemble the cylinder (minus the flat rod).

Now you need to unlock the cylinder to disengage the bottom pins from the top pins.  If you have a key, use it, being careful not to pull the cylinder from its housing just yet.

In my case, I did not have a key. If this is your case as well, congratulations, you’re about to experience even more lockpicking fun. You can try and pick all five or six pins yourself the traditional way, but it’s far easier at this point to use a shim.  Insert the shim into the rear of the lock (if still flat on the table, this is the top) where it meets the bible, and push until there is resistance.

Then, take the cylinder into your hand, holding light pressure on the shim, and pick the pins from rear to front. Each successful pin pick will result in the shim moving in a few more millimeters.  Assuming the shim hasn’t slipped to the side, once you’ve got all five pins picked, the cylinder should turn freely inside the housing. DON’T PULL IT OUT YET.

You’re going to want to turn it maybe 45 degrees to the right, while holding the shim in place. Once you’ve accomplished this, you should be able to remove the shim.

Now you need a follower tool, a cylinder the same width as the opening in the cylinder housing. Press it flush against the rear of the cylinder, and slowly guide the cylinder out, taking care that no openings in the cylinder or the follower tool fall under the bible. Your goal here is to retain the top pins and springs inside the bible, because replacing them is really painful.

If you are successful thus far, set your cylinder down so that the pins are facing upward, because they will fall out as well.

The next step is assuming you are reducing the number pins for progressive lockpicking. You’re going to need to remove the top pins and springs from any holes toward the rear that won’t have bottom pins, or they will just fall into the bottom hole when you reconnect the cylinder, and fuck up your day. Ease it toward the front until the very last hole is just about uncovered, then catch the top pin and spring as they are ejected.  Do this as many times as you need, but again, counting from the front, leave exactly as many top pins and springs as you will have bottom pins.

OPTIONAL: You can take this opportunity to switch out your bottom pins for a set that matches a specific key you’d like to be able to open some or all of your progressives with:

Now move your following tool back so your remaining top pins are no longer in danger, double check the number bottom pins in your cylinder, and get ready to reinsert the cylinder. To do this, bring the cylinder again flush with the following tool (from the front), be sure no gaps in the following tool line up with the bible, be sure your bottom pins don’t line up with the bible, but are 45 degress to the right to prevent them from catching or from falling out, and then insert. Once the cylinder is completely in, the following tool will be out and you can rotate the cylinder back to where the pins catch. At this point the cylinder should be locked in place.

Set the cylinder back down face down on the table, and reinsert the capture pin spring and then the capture spring (flat end first).  Get the end cap washer and end cap in place, and hold down the capture pin while you quickly tighten the cap. This can be tricky.

Lockpicking practice stands…

I’ve been tempted to buy a few of these, but I’m disappointed that it only holds three cylinders.  I’d love to have one of these (or FOUR of these, preferably) that would hold five cylinders.

I built a trainer last year for five cylinders, but I built it with full deadbolts with the KIK (key-in-knob) cylinders installed into them, so it’s a bit heavy and unwieldy for portable use, especially if I had to lug around four or five of them.  

If anyone has the capability to design a 3d model of something like this, please hit me up at [email protected].

Requirements: 
* Five evenly spaced openings to fit KIK cylinders
* Each opening should have a tension screw below it with a thumb tightener, to snug the cylinder and keep it from slipping
* A nice wide base with four holes near the corners, so that it can be screwed to a block of wood or other heavier object and prevent tipping.

Update: Found the TOOOL Practice Lock Case by MikeyMakesIt, which would suit my needs wonderfully AND be even more portable, but the big players want like $50-60+ just for the bottom piece.  Somehow I feel like this should be a lot cheaper than that.

And then there’s the Locksport 5×3, which I wish I had the STL for.


The rest of the Lockpick Village gear arrived today…

I was on the fence about making an investment in all this stuff, but now it will serve dual purposes.  Lockpicking practice at meetings, of course; and I’ve been asked to present a session at my day job as well.  So if you want to play, there will be four complete sets of picks and practice locks, and maybe a few extra locks for good measure, so if you have your own picks, by all means, bring them as well, then more people can play at once.

Lock cylinders arrived today

If only these had arrived a couple of days ago, I could have had them prepped and ready to bring with me to the DC202 Social this evening.  Corinthian had a good turnout at the rum distillery, and we had some interesting conversations.  

So yeah, we’re halfway to the lockpick village capability.  I’ll repin these to be four sets of progressive cylinders, label them in order of difficulty, and bag ’em up for our first DC540 meetup.

Meeting prep…

You’re doing a great job with your RSVPs so far.  I’ve got 8 members coming to the first meeting last time I looked.  If you haven’t RSVPd, and you plan to come, you should probably RSVP via Meetup (or directly if you don’t use Meetup), because the room doesn’t have unlimited capacity. Also helps for planning.  Also, we’re still not listed on the official Defcon groups page. When that happens, a few more slots may fill up.

I should mention that there will be swag.

I expect there will also be a lockpicking station. Maybe a Proxmark to play with.  

If anyone is interested in helping behind the scenes, let’s meet up before the meeting, I’d love to hear your ideas.

Also, please take the poll I posted a few days ago if you haven’t already.  It will help guide meeting content.