We worship at the cult of efficiency

Quite a while back, I posted an article about networking a scanner with a Raspberry Pi. At some point I added an inkjet printer to that configuration using cups, because the color laser in the house has a roller-induced wrinkle that I can’t seem to get rid of.

Yesterday, I received a Rollo 4×6 shipping label printer. The truth is, it’s about damn time. For years, I’ve just been printing labels on regular (sometimes with a wrinkle) printer paper, and painstakingly taping that folded piece of paper on outgoing packages. This would be fine if I was a normal citizen and my outgoing packages were limited to the occasional friends and family care package. But they’re not. My home is the nerve center of a group that creates electronics for distribution. In addition, I have a number of ever-morphing hobbies that have me buying and selling on ebay monthly at a minimum. So there are always packages coming and going, sometimes 20-30 at a time.

So a member heard that I’d been doing that and suggested the thermal label printer. Just print, peel and stick. Saves a lot of time, and a lot of tape, because with this, the tape is only used to seal the package.

I started with one of the Chinese knockoffs. The price was certainly right, and I picked the one with the lowest percentage of negative reviews. But either the reviews are stacked or I got a dud, because it makes spotty, unusable labels. It would be fine if it was just for print, but these labels have to have their barcodes scanned. I can’t be printing labels with spotty barcodes. So I ordered the Rollo, which is twice the price of the knockoff, but came well recommended.

Unsolicited recommendation: Rollo commercial-grade thermal 4×6 label printer

I don’t have a dedicated PC for shipping. My daily driver is a Macbook. The printer is not wireless. I had to figure out the best strategy for accessing it from the Macbook, while leaving open the possibility of accessing it by other means. I started down the path of sharing the printer from a gaming PC, but man, Windows printer sharing is ugly and painful without a domain.

Then I remembered the raspberry pi with the scanner and DeskJet attached. I determined that it still had a USB port free, and that Raspberry Pi drivers were available (WOW!) for the Rollo. I installed the drivers and plugged in the printer. I remembered that cupsd was already running to support the DeskJet, so I browsed to the cups interface and quickly added the printer and made it shareable. The MacBook immediately saw it via Bonjour and I printed my first label. I’m sitting here in awe thinking about how much time this is going to save in my upcoming shipping adventures, in which I’ll be shipping dozens of badges over the next couple of months.

Self-hosted Password Manager Round-up

Haven’t you ever set up a network for a specific project and wanted a simple way to manage passwords within the project network while sharing them between the project participants?

Don’t you hate/mistrust the cloud?

For this project, I did a quick rundown on a few available self-hosted password managers that can live inside a network enclave without involving the cloud.

  1. PASSBOLT

I wanted Passbolt to work. Even after I found out the installer* isn’t available beyond CentOS 7 and won’t run under Rocky. Seriously, who uses a closed installer anymore?

So i built a C7 VM and let her rip. Flawless install, got all the way to the point of logging in, and then?

Fucking hell. It REQUIRES a BROWSER EXTENSION to browse the site. That’s a lot of trust you’re asking me to extend. It also requires an email address to validate users. This seems more like a cloud offering hastily made into a self-hosted offering. These are not features I want or need in a closed, self-hosted password manager.

2. BITWARDEN

I wanted to disqualify this one simply for deploying it in Docker. If you know me at all, you know I f’n HATE Docker. And the first set of instructions I found completely validated my hate.

But then I found this. Specifically happens to be for the exact platform I’m working with. https://computingforgeeks.com/running-bitwarden-password-manager-using-docker-container/

Other than dealing with SELinux (either by disabling it or by poking holes in it) and using a different cert mechanism than those described, it was flawless, and I had a Bitwarden instance complete in about an hour.

3. Anything file-based

Immediate automatic disqualification for being file-based. No matter how you share them, sharing them never works out.

4. Integrations

I noticed that NextCloud has a password manager app available for it. So that’s another valid option if it turns out we don’t like Bitwarden.

P.S. I still hate Docker.

Two Gitlab books briefly reviewed

If you’re following along like a good little do-bee, you’re already aware that i’ve been evaluating Gitlab as a functional equivalent to (much of) my Atlassian infrastructure, due to unforeseen events I will no longer vent about.

This required me to actually LEARN gitlab in the process.

In my usual fashion, the very first thing I did to start learning it was to install it. In my infrastructure. No planning, no strategy, just follow the install doc and get it up and running so that I can start playing with it.

That alone was so easy that I got cocky. Again, with no planning and just the barest hint of strategy, I integrated it with my FreeIPA ecosystem. No problem.

Then, following the simplest of breadcrumbs, I was able to migrate both my existing Bitbucket infrastructure AND my existing Jira dataset. Some of those subsets of data referenced the same internal projects, so it was fun and informative to sort through that.

So here I am with 92 projects, many with open and closed issues, some with git repositories. Seems good. I’ve already started working through issues and generating new ones.

But now here I am with a mostly unfamiliar new interface. I’ve been around, I’ve used many interfaces and I’m reasonably competent with git, but I have yet to figure out what else Gitlab can do for me to improve my life.

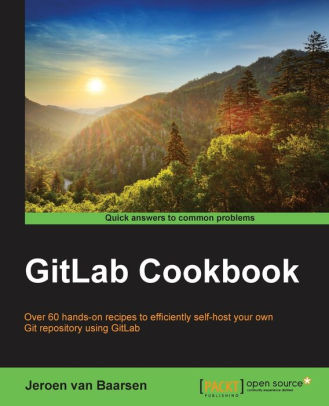
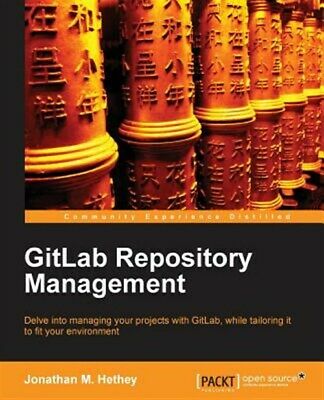
So I picked up The Gitlab Cookbook and Gitlab Repository Management to see if they would expand my knowledge.

They did, to an extent. But neither of them were perfectly suited to my needs. This is my gripe with most of the computer books out there. The widest audience for a book is going to be people who are new to the product, the technology or the paradigm. There are very few books out there that are capable of taking you into the stratosphere — the deep tracks of a product, where hearts and minds are conquered, lives are changed forever, destinies altered…

So yeah. These books covered installation, user management, creating projects and issues, etc. I was able to skim through most of that. The CI/CD sections will probably prove useful at some point, but that’s not exactly where I’m going right now. I guess what I want is all the cool little timesavers that improve our lives and the quality of the data retained and created by these products. Neither of these books really got into that.

As an example, I wonder why neither of these books chose to explore “Quick actions.” This is the kind of deep knowledge I need. When I can open an issue, and type “/spend 1h” in the description box to document the fact that I spent an hour on something, that means a lot to me. When I can type “/shrug” to append ¯\_(ツ)_/¯ to a comment, these are the important things I need to know.

So now I know. I don’t need a Gitlab book. I need a Gitlab Quick Actions Cheat Sheet.

And so do you.

And here it is. https://docs.gitlab.com/ee/user/project/quick_actions.html. You’re welcome.

The rest of Gitlab is mostly pretty intuitive, or else completely dependent on your knowledge and understanding of git itself.

Is Gitlab a viable Atlassian alternative? Spoiler: maybe?

Maybe you’re one of those stubborn people like me who insists on self-hosting everything. Maybe it’s a requirement due to sensitivity of data, or maybe it’s just pride. In any case, that’s what I was doing. I was proud of my Atlassian setup. I happily paid my $10 each for 10-user licenses of various Atlassian products. Jira, Confluence, Bitbucket.

Everything was fine, and everyone was living happily ever after.

UNTIL.

And this is where I sacrifice my personality for professionalism. In my humble opinion, Atlassian made a huge error in judgement. They decided to end support for their “Server” line of products in favor of “Cloud” and “Data Center.” No more $10 10-user licenses for self-hosted apps. 10-user licenses are FREE now — in the cloud. You want to host it yourself? Fuck you, go get the Data Center version. How much is it? Well, if you have to ask…

And yes, I was holding back. I’m a little bitter.

So here I am, exploring ways I can take my business elsewhere. I’m a simple man with simple needs. I don’t need all the workflow bells and whistles that Jira offers. Hell, we don’t even use most of that at my job. At the core, I need projects and issues. Gitlab has that. And of course Gitlab can do everything that Bitbucket does. What’s left? Hmm, Confluence. Well, I’ll explore that part later. I do know that there’s a “Markdown Exporter” plugin for Confluence that will export “markdown” documents in a way that can be imported into Gitlab, Github and other apps. I just don’t know what the paradigm equivalent is for it just yet.

So let’s start with eradicating Bitbucket.

OK, I built a VM. CentOS 8. Gitlab’s installation instructions are crystal clear. A few prerequisites, an update, and a repo install, then a package installer. Nice, that’s how I like it. OK, they include a LetsEncrypt cert deployment by default. We’ll have to get rid of that, I have my own CA internally, and I issue certs from that. Done, not so hard. Next, SSO. I have FreeIPA in my infrastructure and had integrated the Atlassian products with that. Can I do that with Gitlab? Shit yeah. Easy as chocolate pie. A little bit of finagling with the .rb file and I’m in.

So now on to Bitbucket. Well, they just went and built in the integration/import functionality, just like that. I can give it my bitbucket login and password and import ALL of my bitbucket projects in one session. Lovely. I’m in tears over here. Literally ten minutes after getting Gitlab up and running in my environment, I’ve got all my git repos imported.

How about Jira? Well, it used to be a pain in the ass, when I first looked into it it sounded intimidating. “Well, you’ll need to do REST API queries to both services to translate everything blah blah blah”. Nope. Not anymore. The latest Gitlab has an importer built-in. It’s a little weird and roundabout, but it farging works. Go to, or create, a project. Go to the Issues page within that project. Click the “Import from Jira” button. Here’s where it gets weird. You have to re-enter the Jira integration details for each project before you can import that project’s issues. It would be nice if you could do it once, map the Jira projects to existing projects and choose to ignore or create the rest, and click it. But no problem. It brings them in, correctly lists some of them as closed. etc. It’s just going to take some time, thought and planning.

Confluence integration is going to require its own post, because getting all the confluence data over, including attached files, is going to be important to me. I use it as a home for a whole lot of documentation that I refer to frequently, and I can’t afford to lose it. So stay tuned for more on that.

I’d love to hear what other people are doing. I can’t be the only one dealing with the loss of the nearly-free Server products.

Hey, upgrading CentOS 7 to CentOS 8 in place still works!

So I had a remote VPS in the wild giving me issues, and while addressing the issues, I decided I should update the OS. No updates available, up to date… on CentOS 7. Well, I thought it was a good time to move up to CentOS 8. Yeah, I know the whole 7 vs 8 vs stream thing is a thing, I’m not too worried about that for the moment.

Because I didn’t want to rebuild it, I searched to see if there were upgrade instructions out there for 7->8. Found some, with the usual disclaimer. “This is unsupported,” “There is no upgrade path, you must reinstall,” blah blah blah.

So I backed up what needed to be backed up in case I had to rebuild. and went for it.

I used this as the base:

https://www.howtoforge.com/how-to-upgrade-centos-7-core-to-8/

The first problem I ran into is that the version of the Centos-Release package was no longer being served. And the current release actually changed names, from CentOS-Release to CentOS-Linux-Release. “Interesting,” I thought, “I wonder if that’s going to bite me in the ass later.”

Then I ran into some issues with dependencies. gcc and annobin was the top line. A quick google revealed another user had encountered this and resolved by simply “uninstalling Perl and Python3, then reinstalling after the upgrade.”

So I tried that, and got past that little obstacle. A couple other minor dependency issues, I had to uninstall python-six and one or two obvious little interfering little noids. But it rolled through. The really scary part was the reboot, because part of the process is uninstalling ALL kernels and then reinstalling the new kernel, then making sure that grub is correct.

So I opened a serial console to it, so I could watch the boot process in case something went twisty. Double-checked that backups were thorough, and let her rip! Booted off my serial console, but opened it right back up again, and boom, everything came up. Not just the CentOS 8.3 base OS, but all my exotic internet apps. I was right back to being usable again. Why was Redis on this server again? Strange.

So that’s my story, and I’m sticking to it. Score one for the documented unsupported upgrade-in-place instruction set.

Baab out.

Network Scanner on a budget

I was about to pull the trigger on a network-enabled Fujitsu ScanSnap scanner, because I’ve been scanning on my Ricoh all-in-one that doesn’t do duplex, and I have a number of two-sided documents to scan. I was annoyed at the price tag on what seems to me to be not much more innovation than the older machines, which lack only networking.

Then I found this post by Chris Schuld:

https://chrisschuld.com/2020/01/network-scanner-with-scansnap-and-raspberry-pi/

Makes perfect sense. Set up a Pi to do the networking, then just get a SANE-enabled scanner and off to the races.

So I checked the SANE supported scanner list, and found that the ScanSnap S1500 or S1500M (pro-tip: they’re the same) was a good choice — a snappy duplex scanner with ADF, USB-connected, for a good price point, about $100. Picked one up in great condition on ebay, and it was absolutely up to the task. For testing, I used the Raspberry Pi 4 (4GB model) that had been commissioned for OctoPi for the 3D printer, and figured if it worked well I’d order another.

Well, following Chris’ blog post, I got all the scan functionality working, but even with other resources I haven’t yet figured out how to get the ADF button to trigger the scan. I’ve got the udev rules in place, everything should be running, but I still had to trigger the scan manually from the pi. Then I noticed that when I triggered the scan and nothing was in the scanner, it was a simple failure, no document detected or something like that. So I had a simple thought. I’ll just set up a cron job to run every minute and make an attempt to scan. If nothing’s in the feeder, no harm no foul, move right along. If so, scan that shit and send it to the Mayan EDMS share. Happy happy joy joy.

So now I just drop a doc into the feeder, and within a minute it’s on its way to the EDMS. Exactly what I was looking for. New RPi 4 is on the way.

UPDATE: It was migrated to an RPi 4, and I changed the single cron job to do the scans to a collection of cron jobs that run every five seconds.

Since triggering a scan does nothing if there’s nothing in the feeder, I added a simple lockfile test to the scan job: If the lockfile exists, bail. If not, create the lockfile, attempt to scan, then drop the lockfile. That way if a new scan is triggered during an existing scan run, it will abort.

* * * * * ( /usr/local/bin/scan.sh )
* * * * * ( sleep 5; /usr/local/bin/scan.sh )
* * * * * ( sleep 10; /usr/local/bin/scan.sh )
* * * * * ( sleep 15; /usr/local/bin/scan.sh )
* * * * * ( sleep 20; /usr/local/bin/scan.sh )
* * * * * ( sleep 25; /usr/local/bin/scan.sh )
* * * * * ( sleep 30; /usr/local/bin/scan.sh )
* * * * * ( sleep 35; /usr/local/bin/scan.sh )
* * * * * ( sleep 40; /usr/local/bin/scan.sh )
* * * * * ( sleep 45; /usr/local/bin/scan.sh )
* * * * * ( sleep 50; /usr/local/bin/scan.sh )
* * * * * ( sleep 55; /usr/local/bin/scan.sh )

Harrowing Tales of Networking FAILS.

With all the scary stuff you’re hearing about in the news this week, I thought I’d inject a little bit of light-hearted storytelling.

Long ago and far away, I inherited a network. Then I was tasked with relocating it to a new room. This was successful, and everyone lived happily ever after.

Until I checked in on it later and discovered that the backups were failing. Not only were they taking days to complete (or fail), but the restore points were becoming corrupted, which takes more time to repair, on top of an already excruciatingly slow (6mpbs) backup.

I looked at networking, I looked at server bottlenecks, I manually deleted restore points to eliminate that extra delay of rebuilding corrupted points. I was truly confused. So I looked deeper. Fearing a drive media failure, I looked at the device from which the backup drive was shared.

That’s when it hit me. The “backup” VM on which I was looking to determine the location of the network share — was NOT the same server as the backup server from which I was administering the backups via the web.

Looking closer, I discovered that the backups were running on TWO separate backup server. And yes, you guessed it. To the SAME Nakivo backup repository. Or even worse, to two identical configurations of “the same” repository. Disastrous. Backups were stepping on each other, corrupting each other, and slowing each other down. It seems the engineer who built the network was unhappy with performance on one server and just descheduled the jobs and built a newer, faster server to run the backups. After the move, I guess I came across this one instead of the correct one, and re-enabled the jobs, thinking they had been disabled for the move.

The moral of the story is this. When you migrate backups from one server to another because of speed, don’t just unschedule the jobs, because someone may reschedule them in the future. Take the extra step of deleting or disabling the jobs on the outgoing server, or do what I did after resolving this debacle — Since I couldn’t disable the old backup web interface (for reasons), I added a fake job with no targets, called “DONT-RUN-JOBS-HERE” to remind someone who happens upon it in the future, and updated the “where is everything” document to point to the newer location.

TIL about john the ripper and trigraph frequencies.

I have an assignment to crack an Office password for a document. I have tried using john and hashcat with several large wordlists, and had no luck, so I decided to go all-in and just leave a Kali instance running john in incremental (brute force) mode for “as long as it takes.” It’s been two days so far.

I have it running within ‘screen’ so that I can occasionally login to the system remotely to check progress without risk of losing it. I was excited at one point yesterday seeing that it was in the middle of checking seven-character passwords, but then I checked back later and it was checking six-character passwords. This morning, five. I wanted to understand — I assumed (without doing a deep dive on the mechanics) that it would just go literally incrementally. aaaaa, aaaab, aaaac, etc. That was an incorrect assumption.

John’s incremental mode actually operates on “trigraph frequencies.” While I understand the concept of trigraph frequencies (certain sets of three characters occur more frequently than others, and this can help with decryption efforts, I have my doubts as to whether this helps in cracking passwords. Passwords aren’t always natural speech, after all.

Anyhow, it’s been running for two days now, and I’ll post about it again when it’s done just to give an idea of whether it’s successful, and if so, how long it took vs the complexity of the password.

If anyone else wants to try using similar or other methods, let me know, and I’ll send you the hash (generated by office2john). No, I can’t send you the actual document. That would be unethical.

Certs and continuing education

Just a reminder that attending conferences, security group meetings, and similar activities can count toward continuing education credits for maintaining certifications.

I picked up CEH last April, and thanks in a large part to attending DEFCON twice and BSidesLV once, I’ve already got 89 credits toward the 120 required for maintaining my certification..

Over the winter, I intend to take on OSCP.  What certs to you folks have?

Here are the activities that qualify as continuing education credits for CEH:

  • Volunteering – 1 credit for each hour you will spend
  • Association/Organization Chapter Meeting (per Meeting) – 1 credit per hour
  • Author Article/Book Chapter/White Paper – You can contribute to authoring an IT security related book, chapter or paper and earn 20 ECE credits. Note that, if you write the whole book, you will earn 100 ECE credits.
  • Education Course – You can earn one ECE credit per hour for any IT security related course you will attend. 
  • Seminar/Conference/Event – You will earn one ECE credit for every hour of a seminar, conference or similar event you will attend.
  • Higher Education – If you are continuing to higher education in IT security (e.g. Masters or PhD) you can earn 15 credits per semester hour
  • Identify New Vulnerability – If you identify an IT security related vulnerability, you can earn up to 10 ECE credits
  • Presentation – You can share your IT security knowledge with your colleagues, in a chapter meeting or in a conference. You will earn three ECE credits per every hour you will present.
  • Reading an Information Security Resource – You can earn up to five credits by reading an IT security related book, article, review or case study.
  • Teach New – You can prepare a course or organize a workshop and teach people about IT security. You will earn 21 credits per day for teaching IT security. This is generally an eight hours per day course.