Tonight’s meetup will happen as usual, 6:30 on the Discord. I will be ducking out early to attend another meeting, but y’all are welcome to hang around after if you want.
Network Scanner on a budget
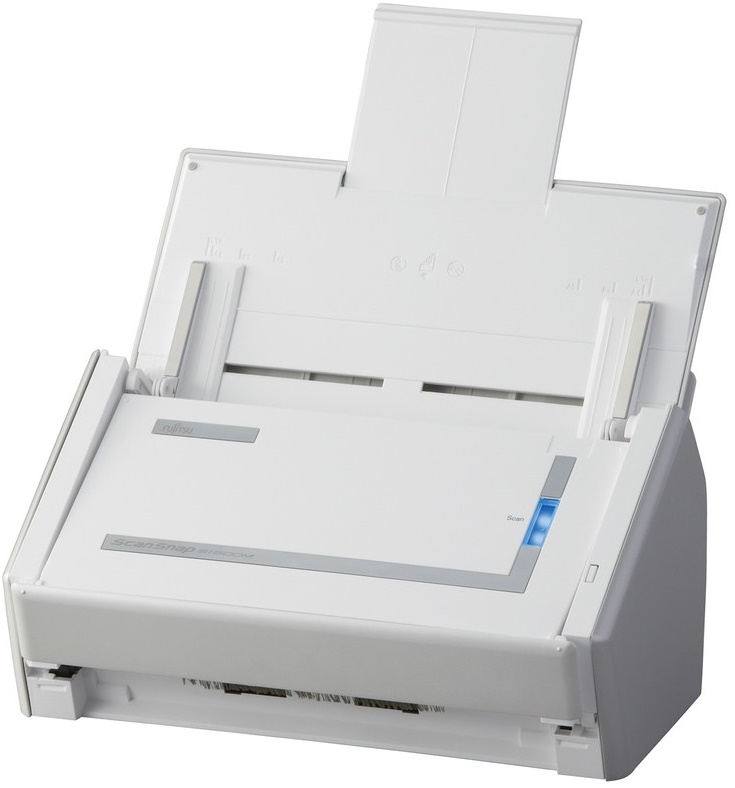
I was about to pull the trigger on a network-enabled Fujitsu ScanSnap scanner, because I’ve been scanning on my Ricoh all-in-one that doesn’t do duplex, and I have a number of two-sided documents to scan. I was annoyed at the price tag on what seems to me to be not much more innovation than the older machines, which lack only networking.
Then I found this post by Chris Schuld:
https://chrisschuld.com/2020/01/network-scanner-with-scansnap-and-raspberry-pi/
Makes perfect sense. Set up a Pi to do the networking, then just get a SANE-enabled scanner and off to the races.
So I checked the SANE supported scanner list, and found that the ScanSnap S1500 or S1500M (pro-tip: they’re the same) was a good choice — a snappy duplex scanner with ADF, USB-connected, for a good price point, about $100. Picked one up in great condition on ebay, and it was absolutely up to the task. For testing, I used the Raspberry Pi 4 (4GB model) that had been commissioned for OctoPi for the 3D printer, and figured if it worked well I’d order another.
Well, following Chris’ blog post, I got all the scan functionality working, but even with other resources I haven’t yet figured out how to get the ADF button to trigger the scan. I’ve got the udev rules in place, everything should be running, but I still had to trigger the scan manually from the pi. Then I noticed that when I triggered the scan and nothing was in the scanner, it was a simple failure, no document detected or something like that. So I had a simple thought. I’ll just set up a cron job to run every minute and make an attempt to scan. If nothing’s in the feeder, no harm no foul, move right along. If so, scan that shit and send it to the Mayan EDMS share. Happy happy joy joy.
So now I just drop a doc into the feeder, and within a minute it’s on its way to the EDMS. Exactly what I was looking for. New RPi 4 is on the way.
UPDATE: It was migrated to an RPi 4, and I changed the single cron job to do the scans to a collection of cron jobs that run every five seconds.
Since triggering a scan does nothing if there’s nothing in the feeder, I added a simple lockfile test to the scan job: If the lockfile exists, bail. If not, create the lockfile, attempt to scan, then drop the lockfile. That way if a new scan is triggered during an existing scan run, it will abort.
* * * * * ( /usr/local/bin/scan.sh )
* * * * * ( sleep 5; /usr/local/bin/scan.sh )
* * * * * ( sleep 10; /usr/local/bin/scan.sh )
* * * * * ( sleep 15; /usr/local/bin/scan.sh )
* * * * * ( sleep 20; /usr/local/bin/scan.sh )
* * * * * ( sleep 25; /usr/local/bin/scan.sh )
* * * * * ( sleep 30; /usr/local/bin/scan.sh )
* * * * * ( sleep 35; /usr/local/bin/scan.sh )
* * * * * ( sleep 40; /usr/local/bin/scan.sh )
* * * * * ( sleep 45; /usr/local/bin/scan.sh )
* * * * * ( sleep 50; /usr/local/bin/scan.sh )
* * * * * ( sleep 55; /usr/local/bin/scan.sh )Migrating YUUUGE photo galleries: exiftool FTW

Years back, I hosted several large photo galleries on a public website. Password-protected, but my family was the only consumer of the data anyway.
I decided to migrate that to my growing internal network, because I have disk space, backups, and faster networking. Plus that old gallery software was getting long in the tooth and I didn’t feel like continuing to maintain it.
Dilemma: The old gallery was one of those, like most of them, that import the files, give them a long filename and remove the uploaded copy. So there was no rhyme or reason to the 11G of photos on that server, just a single flat gigantic directory of JPG files, over 1500 of them in total.
It only took a few minutes to realize that there seemed to be three paths — (1) a fully manual path of uploading all of the files in a batch into the new photo management app (I’m using Lychee, by the way) and then sorting through them; (2) a less manual, but still involved, path of logging into the old gallery and exporting/downloading each set; or (3) finding a smarter way.
I chose (3) finding a smarter way. I realized that my photo sets were all event-based, and the date of those events are stored in the EXIF data of each individual photo file. So I wondered if there was an easy way to extract that in a useful way, and then possibly script it to segregated it by date. I quickly found something even better — the exiftool itself (installed on my macbook with Homebrew) will easily do exactly that:
exiftool '-Directory<DateTimeOriginal' -d %Y-%m-%d "$dir"
Will siphon through an entire directory, lickety-split, pull out the capture date from the EXIF data, and then file them in a directory named for the YYYY-MM-DD of the date. It will even create the directories if they don’t exist. I went in seconds from a flat directory of over 1500 files to, let’s see…. 12 individual date directories, each filled with a day of photos.
Lychee lets me import directories and will name them “[IMPORT] (directory name)” so all I have to do once they’re all imported is to log into Lychee, look into each newly-imported directory to figure out what the event was, and rename the album. Fun stuff.
Harrowing Tales of Networking FAILS.

With all the scary stuff you’re hearing about in the news this week, I thought I’d inject a little bit of light-hearted storytelling.
Long ago and far away, I inherited a network. Then I was tasked with relocating it to a new room. This was successful, and everyone lived happily ever after.
Until I checked in on it later and discovered that the backups were failing. Not only were they taking days to complete (or fail), but the restore points were becoming corrupted, which takes more time to repair, on top of an already excruciatingly slow (6mpbs) backup.
I looked at networking, I looked at server bottlenecks, I manually deleted restore points to eliminate that extra delay of rebuilding corrupted points. I was truly confused. So I looked deeper. Fearing a drive media failure, I looked at the device from which the backup drive was shared.
That’s when it hit me. The “backup” VM on which I was looking to determine the location of the network share — was NOT the same server as the backup server from which I was administering the backups via the web.
Looking closer, I discovered that the backups were running on TWO separate backup server. And yes, you guessed it. To the SAME Nakivo backup repository. Or even worse, to two identical configurations of “the same” repository. Disastrous. Backups were stepping on each other, corrupting each other, and slowing each other down. It seems the engineer who built the network was unhappy with performance on one server and just descheduled the jobs and built a newer, faster server to run the backups. After the move, I guess I came across this one instead of the correct one, and re-enabled the jobs, thinking they had been disabled for the move.
The moral of the story is this. When you migrate backups from one server to another because of speed, don’t just unschedule the jobs, because someone may reschedule them in the future. Take the extra step of deleting or disabling the jobs on the outgoing server, or do what I did after resolving this debacle — Since I couldn’t disable the old backup web interface (for reasons), I added a fake job with no targets, called “DONT-RUN-JOBS-HERE” to remind someone who happens upon it in the future, and updated the “where is everything” document to point to the newer location.
Google DMCA rabbit holes

Just a little curious exploration. I googled something, happened to notice that there was a takedown listed for that search result, so I clicked on it to see what it was. Did you know you can get the list of URLs on the takedown request by just supplying an email address?
None of this is what I was looking for, by the way. [file attached]
From Radare2 N00b to successful RE walkthrough
So a couple of us were working on a reverse engineering challenge in a CTF.
We were provided with an ELF binary and an encrypted file. The goal was apparently to decrypt the file into a .PNG, the MD5SUM of which would be the flag to solve the challenge.
A cursory look at the code, either in IDA or in radare2, clearly showed that the primary purpose of the code was to XOR the entire file with the letter A.
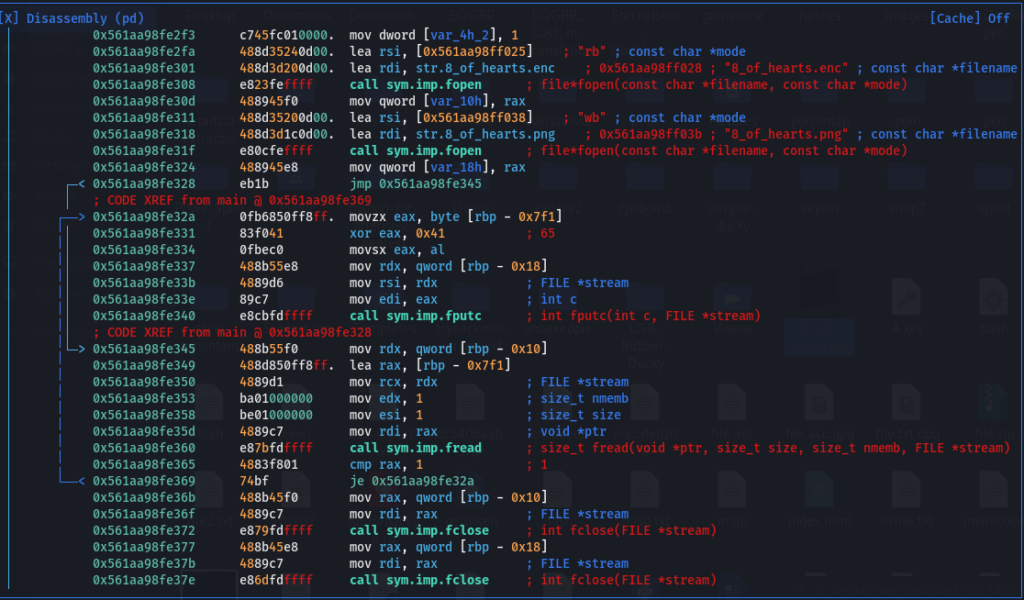
AHA, we thought, all we have to do is an XOR. We don’t need to RE to do that. Enter xortools, a pip-installable python module. Installed, ran xor against the file, with the output as a .PNG file. Success, it looked like. The linux “file” command recognized the new file as a PNG, and we could even browse and view the image, which is exactly what we expected to see. Excitedly, we entered the MD5 of the PNG into the flag field. NOPE. Not accepted.
So it quickly became clear that the binary was doing something hinky to the file in addition to the obvious XOR, because the XOR worked and decrypted the file in a working PNG.
So Kevin and I rolled up our sleeves and got down to some RE work in radare2. I prefer IDA because it’s so much prettier, and easier to navigate and see everything, but connecting an ELF debugger to IDA is no trivial matter, and Kevin is a whiz at radare2, so off to the races we went.
First, we identified the code segment that opens, translates (via XOR) and closes the file. I’m no genius at radare2, and time constraints prevented me from fully learning assembly, but it was clear to me that the goal was to get the binary to execute that segment, and experience had showed us that earlier tricks were proving just to dance around that section of the code with evil trickery.

So we followed the desired code segment backwards, and found two decision points that would normally have an opportunity to redirect program flow. We decided to change them both in a way that would guarantee program flow in our desired direction, whether that’s changing a je/jne (jump if equal, jump if not equal) to a jmp (unconditional jump), or a NOP (no operation).

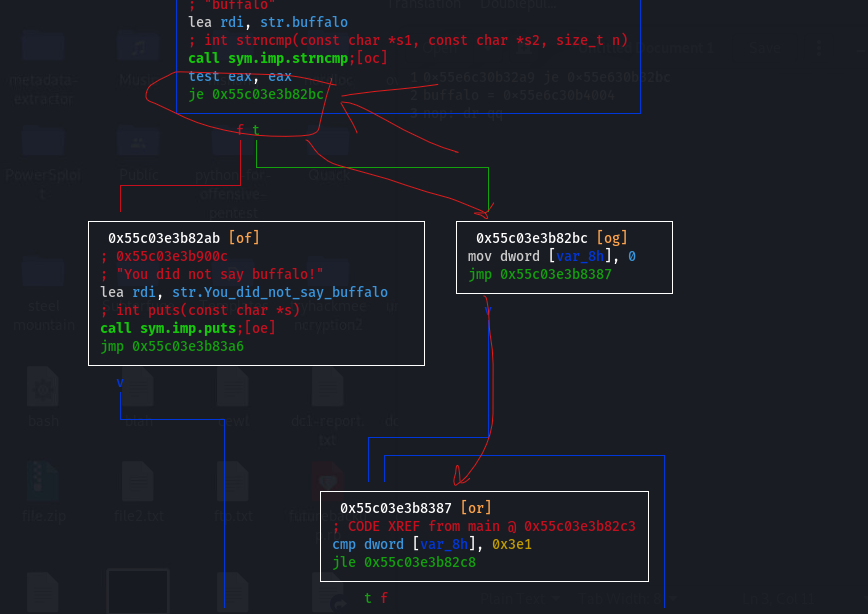
After we did that, and entered the password, program flow moved as expected, and the encrypted file was successfully decrypted to a .png. Sure enough, the md5sum of the new .png was different from the one we xor’ed manually. I put the new md5sum into the flag field, and it was ACCEPTED! Yay, we won.
But I wasn’t satisfied, I wanted to know what was different from our manually-xor’ed decryption and the one that the binary did.
So I used xxd to dump the hex output of both versions of the .png to files, then ran a diff between them.
The only difference? The very last line of the new file contained the following:
0000f380: 0a .
Meaning a single character, hex 0x0A, was appended to the file, which of course changes the checksum of the entire file without distorting the image in any way.
Let’s go back to the code and see if we can figure out why it does that.
…
Nope. No idea. Guess I’m still a noob. But we solved the challenge, and I learned some things about navigating radare2 and focusing and recognizing what’s going on in the program flow, and that’s what counts, right?
Review: Mayan EDMS

I was feeling like I would literally drown in paperwork. Stacks and stacks of unfiled documents. Statements, legal documents, mortgage paperwork, car loans, instructions, you name it.
I had been looking casually for years for a solution to paper clutter. I always felt like just a shared drive was somehow insufficient. Sure you can store things in folders and name them properly, but that’s not enough — for me, anyway.
I wanted something that I could scan directly into (over the network — it has to live on a server, not on my desktop), something that I could replicate file cabinet functionality without storing the paper.
I finally got around to putting focus on it. I looked at PaperMerge. I like the layout and responsiveness of PaperMerge, but when I got to messing with the import and API upload functionality, neither one of them worked despite following the somewhat convoluted instructions to a T. Then I looked at their support page, and it really feels like it’s just one person doing the development, and that one person might be a little bit overwhelmed. There were comments about completely rewriting a portion of it, and I didn’t want any part of that. However, in PaperMerge’s own materials, a comparison is made between PM and two other products, one of which is Mayan EDMS.
I gave it a shot. I built an Ubuntu server VM, followed the detailed yet streamlined installation instructions, and it worked on the first try. I messed with the API, and it responded as expected. And then I found the import feature, and it was everything I wanted and more. I set up a Samba share on the server for the scanner (a Ricoh all-in-one) to drop files into, and started scanning. Documents started flowing into the EDMS. I created cabinets and assigned documents to cabinets. I renamed documents. Then I realized that all of those documents weren’t just being imported, they were also being OCR’d. With no additional effort on my part, I can now text search documents I scanned.
It’s not perfect. The interface gets a little bit clunky and less responsive once you have a page full of documents to display. I hope to dig in and find out of there’s a way to make that more snappy, maybe disable the previews, or reduce the number of documents per screen or something. I went to the website to see if there was a support forum — I guess I won’t be contacting THEM for support, holy crap. They want $699 per MONTH for support. It feels like a great product, but I’ll keep my eyes peeled for community support or just dig into the internals myself. Or maybe I’ll buy the book and see if I learn anything from that.
One thing I’m really curious about is whether it’s possible to have it automatically categorize/”cabinet” new documents for me during the OCR stage, based on keywords. That’d be amazing.
Oh, and it supports LDAP. That’s cool. I don’t think Papermerge does.
TryHackMe Advent of Cyber 2

So someone on my feed mentioned the TryHackMe Advent of Cyber 2 event that’s coming up, and I figured, f it, I’ve been all in on the last few events, what’s one more, right? So I looked into it…
I kinda like the idea. It’s a new challenge every day from 12/1 to xmas. Billed as “beginner-friendly” challenges, which is fine, because any practice is good practice, keep your skills fresh and all that.
I especially like TryHackMe’s platform. If you haven’t explored it yet, it works like this. When there’s a machine to attack for a challenge, they offer it as a deployable machine, on their network. The way you attack them can be either through a VPN (they will give you a personalized .ovpn file that you can drop onto your Kali box or whatever your chosen attack platform is) –OR– they will give you a fully-configured attack platform in the browser. Best of both worlds. If you’re just getting your feet wet and don’t have an attack platform set up yet, they’ve got you covered. And if you’ve got a fully-refined set of tools you’d prefer to use (and continue to refine and beef up while you’re at it), they’ve got you covered there too.
I signed up nine days ago, and I’ve already leveled up to level 5 and earned 10 badges. None of this was part of the Advent of Cyber event, this was just part of their regular offerings. I’m comfortable with the platform and ready to hit the ground running.
The other thing I like about this event is that the prizes, of which there are quite a few, are not awarded in order of performance. Instead, you get a raffle ticket for every task you complete. That means n00b hacker just getting his or her feet wet stands a reasonable chance of winning something, and it’s not all going to be locked in by the best of the best.
Hope to see some of you on the leaderboard. It starts Tuesday. Get signed in now at https://tryhackme.com and get comfortable now so you can plow through. I expect the time commitments will be light, even if you try to hit every challenge.
Is relaxing even an option anymore?

Today I installed SigintOS into a VM and captured it with FOG for lab deployment, got the Wifi Pineapple upgraded, and installed “Damn Vulnerable Windows” into my lab for sploit practice. ‘Twas a good day, and now I’m going fishing in VR.
Modular Followup #1
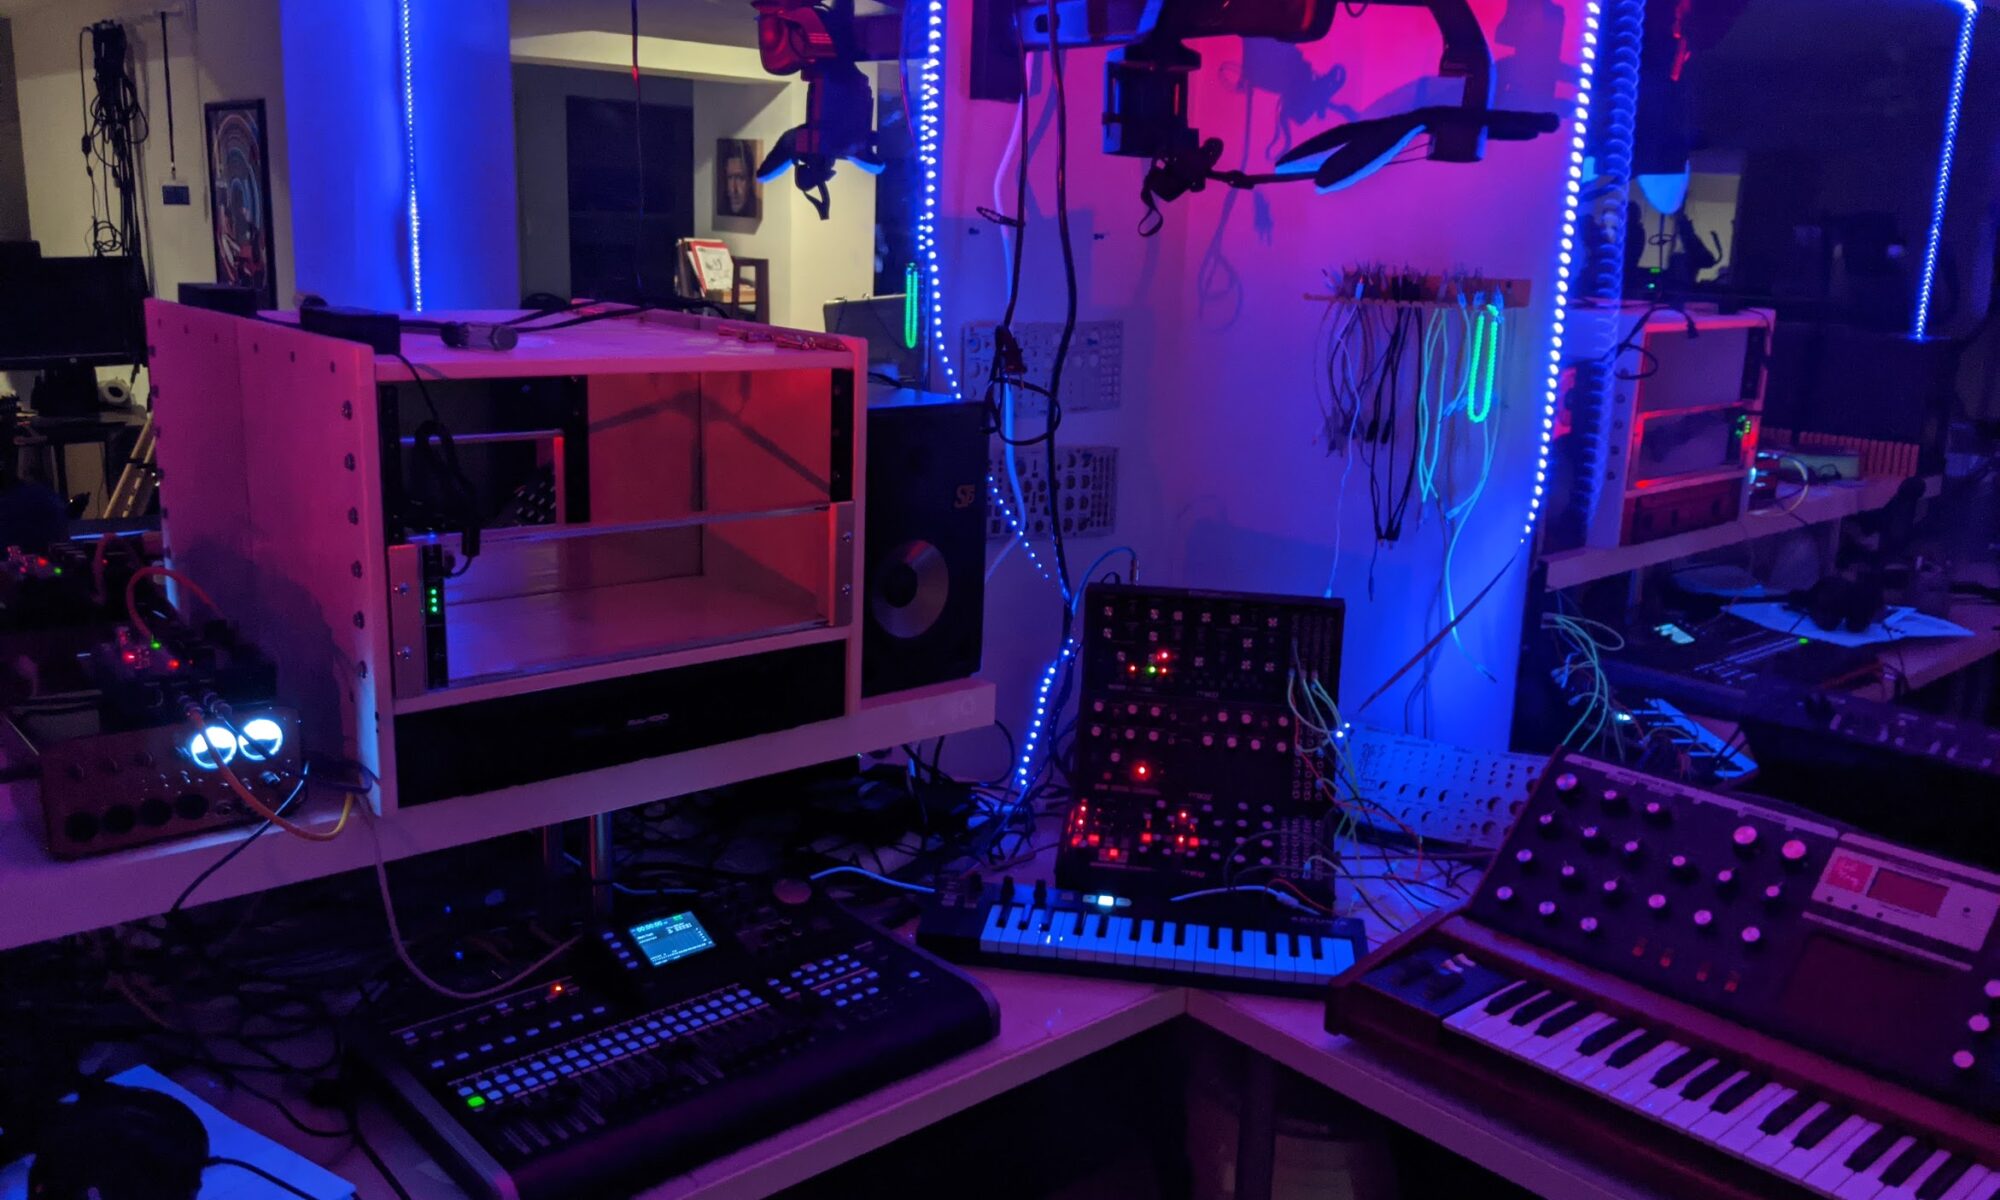
Well, I can’t complain. That was a super quick delivery.
I ordered both of these things three days ago at 2:30AM.
Let’s start with the Eurorack frame from Synthrotek. For just over $30, you get top and bottom rails with channels for the included M3 Eurorack square nuts (50ish I think?), and a pair of rack ears that screw into the ends of the rails with self-tapping 10-24 machine screws. Considering that the cheapest comparable size unpowered Eurorack skiff is probably the Moog 60HP for $90, and I already have a place to rack it, I think I got a good deal.
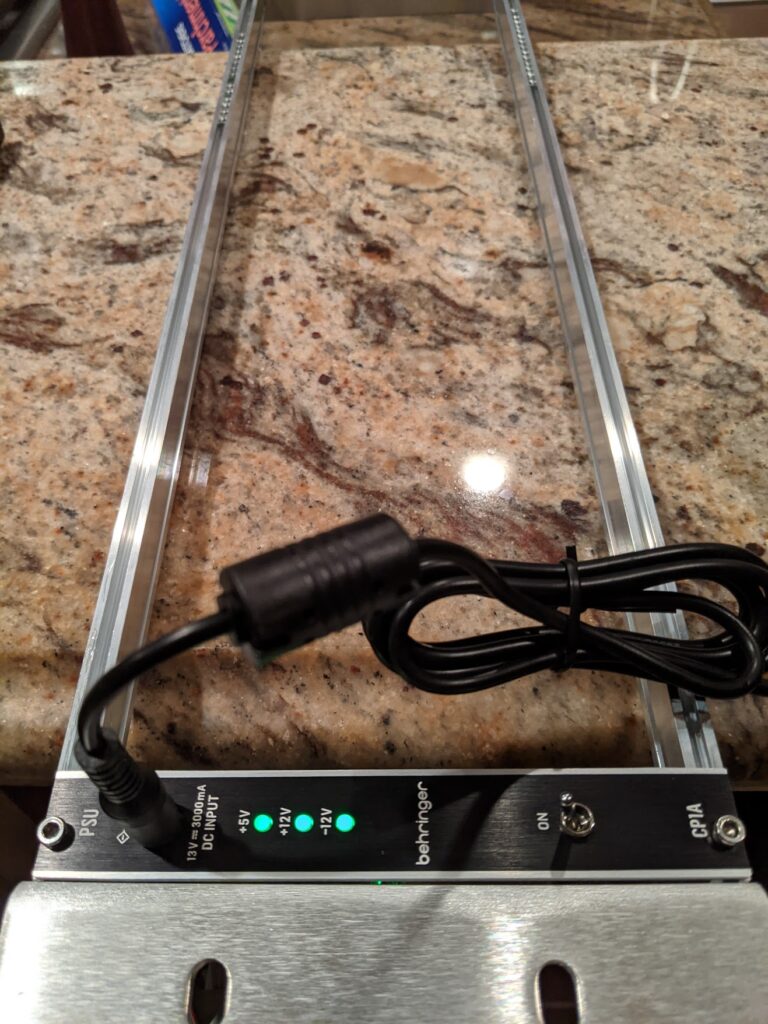
Now, onto the Behringer CP1A Eurorack power supply. Most everywhere I looked in the US, this unit sells for over $100. However, gear4music in the UK sold it to me for $58 + like $12 shipping, and unlike China, it arrived on my doorstep in three days via DHL.
I’ve held a so-so opinion of Behringer for years due to shitty audio gear I’ve owned. Feature-poor and muddy sound. But I talked to a synth addict colleague of mine, and he says they’re making a lot of serious moves into synth territory, and becoming a respected name. And I thought, “Well, I can’t go wrong with a simple power supply, right?”
I was pleasantly surprised with the packaging, first of all. Some thought went into the internal packaging and foam design. That’s always a good sign.


Then I noticed the power supply. It came with a brick-style transformer which takes in 100-240V AC and outputs 13V DC in a standard barrel connector, but the power connector from the wall to the brick was UK AC to relatively ubiquitous C8. If I wasn’t an electronics hoarder who recently rearranged all of my power cables, I’d be in a bit of a quandary there. But of course I have a standard ungrounded US AC power to C8 cable. Not a problem at all.
The unit has two sockets for bus connectors in the rear, and they were kind enough to include two flying bus ribbon cables in the box. There’s a good chance this unit will power two racks rather than just the one I intended it for. Time will tell. Looks nice, takes up very little space, and has an on-off switch. I’m pleased. Now we wait for the modules to start arriving.
And I’m excited for how it fits into the overall plan, too…. Muahahahahahaha.
Making the jump to modular synthesis on a budget…

So within the last year, I saw the Moog Subharmonicon demos, and decided that this is something I really really wanted to experience for myself. Then, per my standard response, I went all in, obtaining the Subharmonicon, then the DFAM, then the Mother32. “But wait,” you’re thinking, “that’s not modular, that’s semimodular!” Yeah. I know. Believe me, I know. But it’s close enough to have given me the bug.
I started looking at modular setups. Going fully modular can be really, really expensive. Anything beyond a minimal setup starts at maybe $1000 and goes way, way, way up from there. It’s difficult to imagine how people afford some of the rigs they’ve put together.
But recently, Winterbloom opened up preorders for a module I’ve been watching the progress on — the Castor & Pollux module. I like it because (a) it’s unique — I don’t think there’s another module like it; (b) it has functionality I think I’ll truly enjoy, rather than just utilitarian modules that you simply have to buy if you go fully modular; and (c) it’s open — I can decide to use the ins, outs and knobs for different functionality than originally intended, and it’s DESIGNED to be that way. So I’m excited about it, and placed a preorder. Oh, and (d) it’s fucking beautiful, visually.
Here’s the difficulty. I don’t have ANY Eurorack modular gear yet, and at the very least I will need a housing and power. So I weighed my options. I could go with a Moog 60HP case that will aesthetically match the three Moog semimodulars I have now — about $90 for the case, plus the cost of a power distribution module for it. I could shell out hundreds for a powered or unpowered Eurorack skiff. I think most of them are drastically overpriced for what they are.
What I settled on was a DIY solution, which isn’t TRUE DIY, but also happens to be the best budget solution out there for getting started in Eurorack.
Years ago, I built a DIY Ikea 19″ rack. I probably posted about it here. It’s 6U of rack connected to an Ikea side table. I recently retired it and offered it to my friends, and nobody took me up on it. Good thing. When I started looking for 19″-rack compatible Eurorack housings, I found that Synthrotek offers one for just over $30. An 84HP 3U rack with ears, compatible with 19″ racks, for just $35. And then I found that Behringer offers a decent power module for Eurorack (the CP1A) which can be found for well under $100, including flying bus board and a wall wart to power it. So I get to recycle my DIY Ikea rack and start filling it with Eurorack modules as the whim hits me.
I also decided that I can’t have a Eurorack with only power and Castor & Pollux. I needed something else to round it out. So I went with another module kit that I’ve had my eye on for a while. I need a source of “randomness” that I can use with any of my semi-modular gear, because it suits my style of synthesis. So I ordered a “Sauce of Unce,” inspired by Buchla’s Source of Uncertainty. I’ll have to assemble it myself, including soldering components, but it’s worth it.
I may ditch my most recent effects pedal as well, the Source Audio Collider, in favor of a Eurorack reverb unit. Pedals take up unnecessary surface space if they’re on the desk, and you can’t see them or work them easily if they’re on the floor. I like the Collider a lot, but the available Eurorack reverbs almost had me make the jump to modular when I was making that decision. Fortunately, when you buy the good shit, it holds its value.
It’s a slippery slope, but for better or worse, I’m on it.
Message decryption using SAINTCON ENIGMA badge – VIDEO
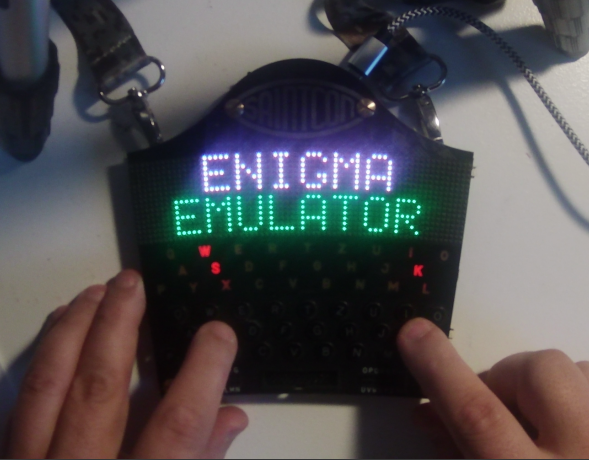
For those who don’t have access to one of these, you can live vicariously through this video.
No Hello Kitty fobs for daughter… for now.
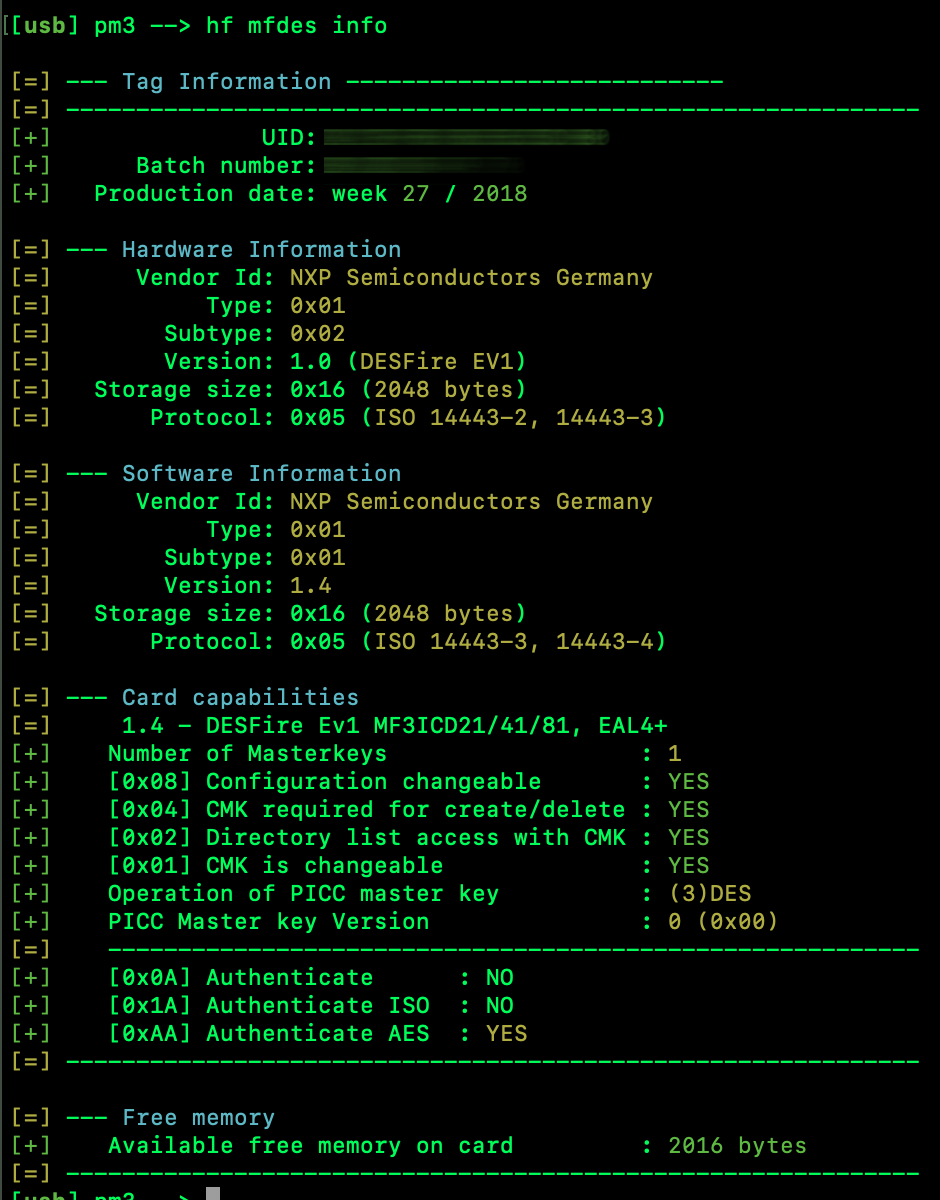
I recently blogged about obtaining Chinese UID-writable magic backdoor Hello Kitty MIFARE fobs to test cloning HF RFID cards. My hope was that I’d be able to clone my kid’s college card, so she wouldn’t have to dig out a card every time she enters a space, just use a fob on her keyring, just like I cloned my LF HID card to a fob for work.
At the time I ordered them, she was away at school, so I had no way of knowing what format her card was. If her student card was MIFARE, I’d probably have a fighting chance. I believe I have successfully cloned MIFARE cards. I say I believe, because I don’t have access to a testing platform until my next hotel stay.
Alas, it seems like schools (at least her school) are a bit ahead of the RFID game compared to hotels. Rather than simple MIFARE, it’s DESFire EV1 2K, and from the searching I’ve been conducting tonight, it doesn’t seem like DESFire has been cracked as far as retrieving the master key. DESFire EV1 is not bleeding edge, though. According to MIFARE, it’s not recommended for new designs. Instead, MIFARE recommends DESFire EV3.
In any case, it’s a hell of a lot of fun to learn the ins and outs of the various formats, protocols, etc., and how these cards and readers work.
I’ll keep on it on the sideburner. I suspect if I do nothing and someone cracks it, it will make its way into the PM3 firmware rather quickly.
I did read something on the forums indicating that the master key might be derived through side-channel attacks involving response speed.
DC540 Workspace Tour
I’ve been wanting to slap this together for a while. Since we have so many members who have never seen the space (thanks Covid!), I thought I’d give you a taste.
Mucking around with the 2019 SAINTCON Enigma Badge
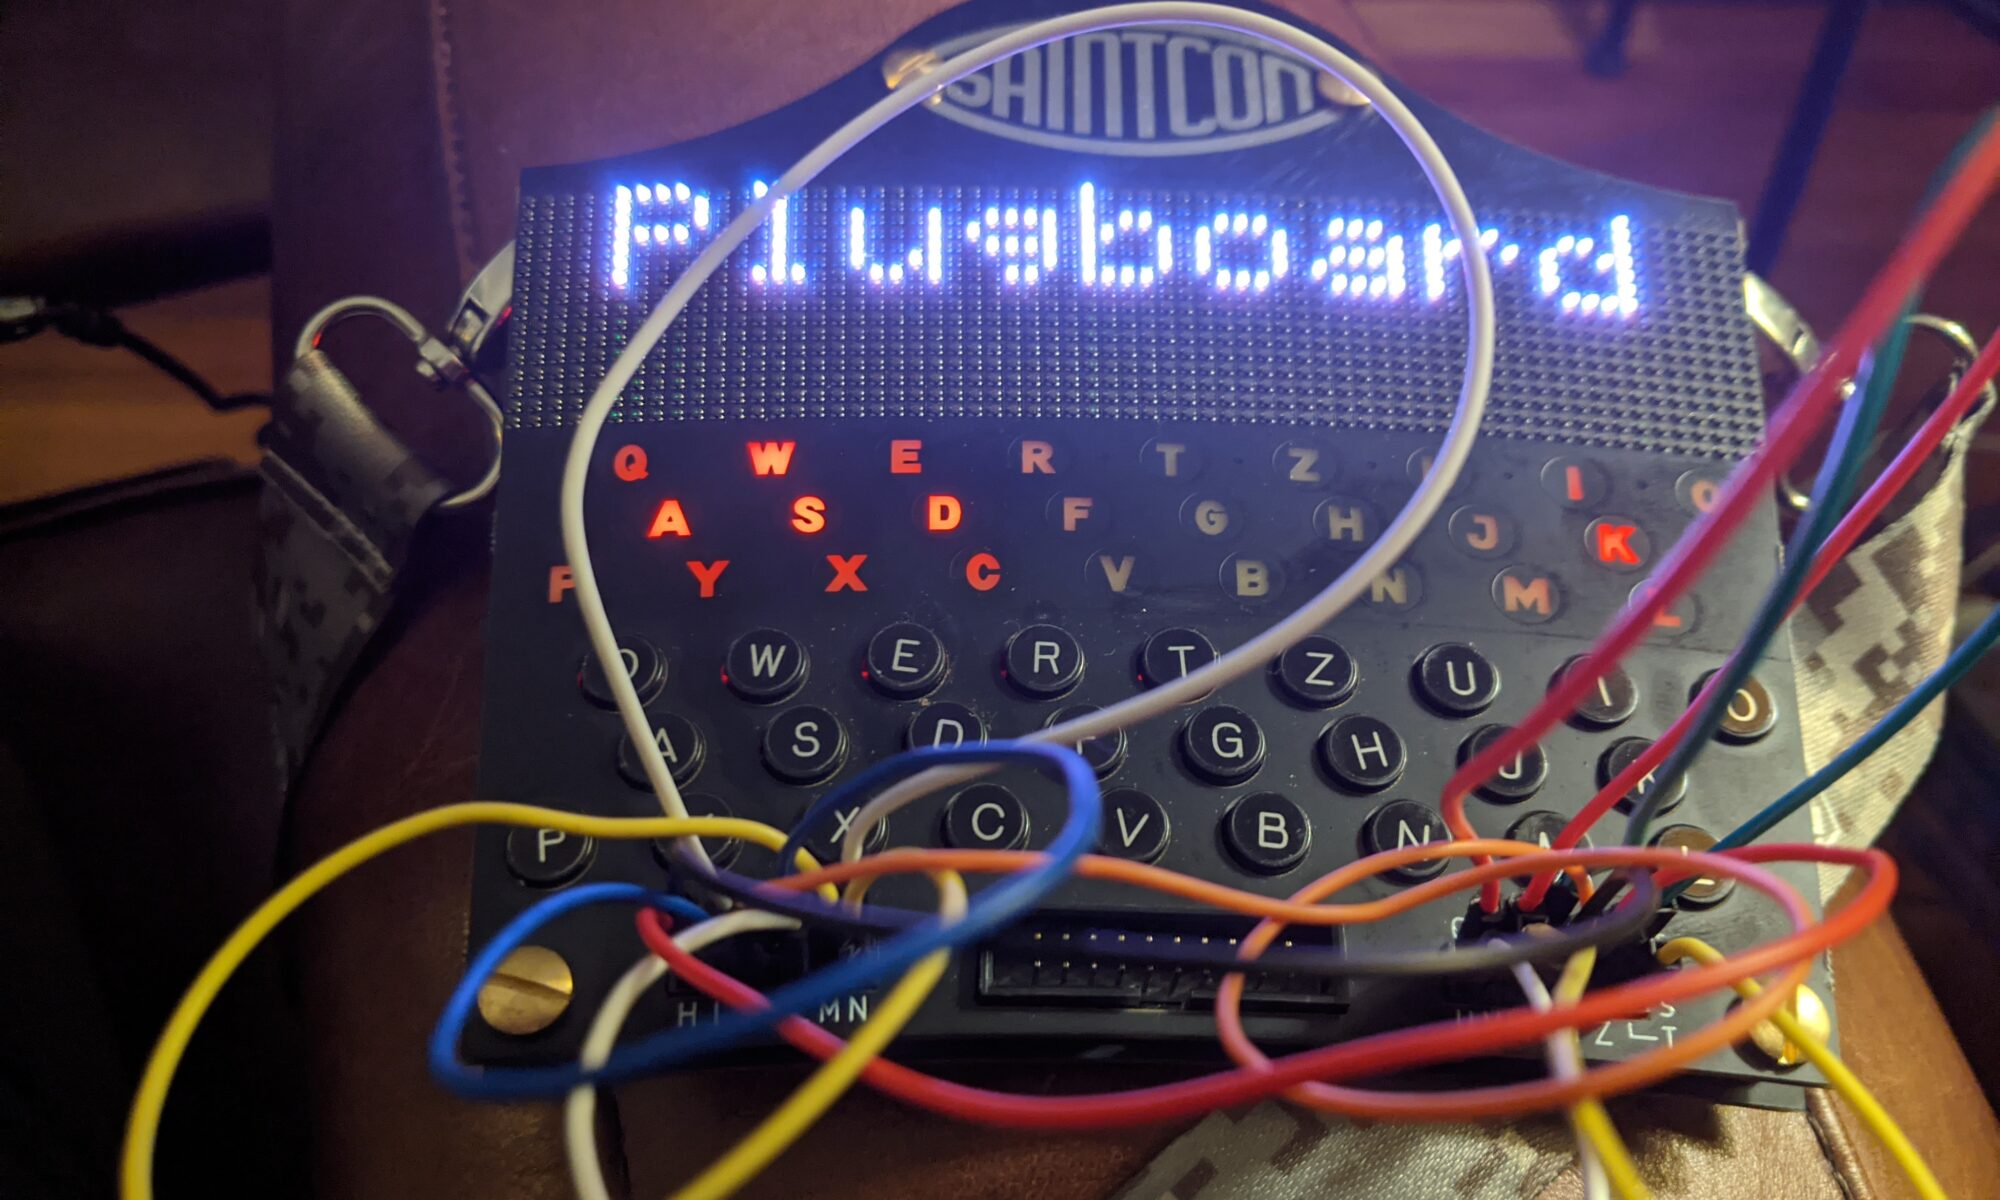
So thanks to Kyle, I’ve got a 2019 SAINTCON Enigma Badge to play with for a while.
I’ve been mildly frustrated by the fact that I haven’t gotten anything to decrypt on it yet using the 2019 instructions, sample messages and code sheet. I had just gotten comfortable with that fact when the Hackers Challenge CTF came up during this year’s SAINTCON. I lost quite a bit of time to trying to solve an ENIGMA challenge, because I HAVE the badge right here in front of me but still had a knowledge block that was preventing decryption. Had I learned before the CTF, I would have gotten another 300 to 400 points.
So now, even though the challenge is over, I was even more determined to see this through.
Here are the 2019 instructions, with my commentary following:
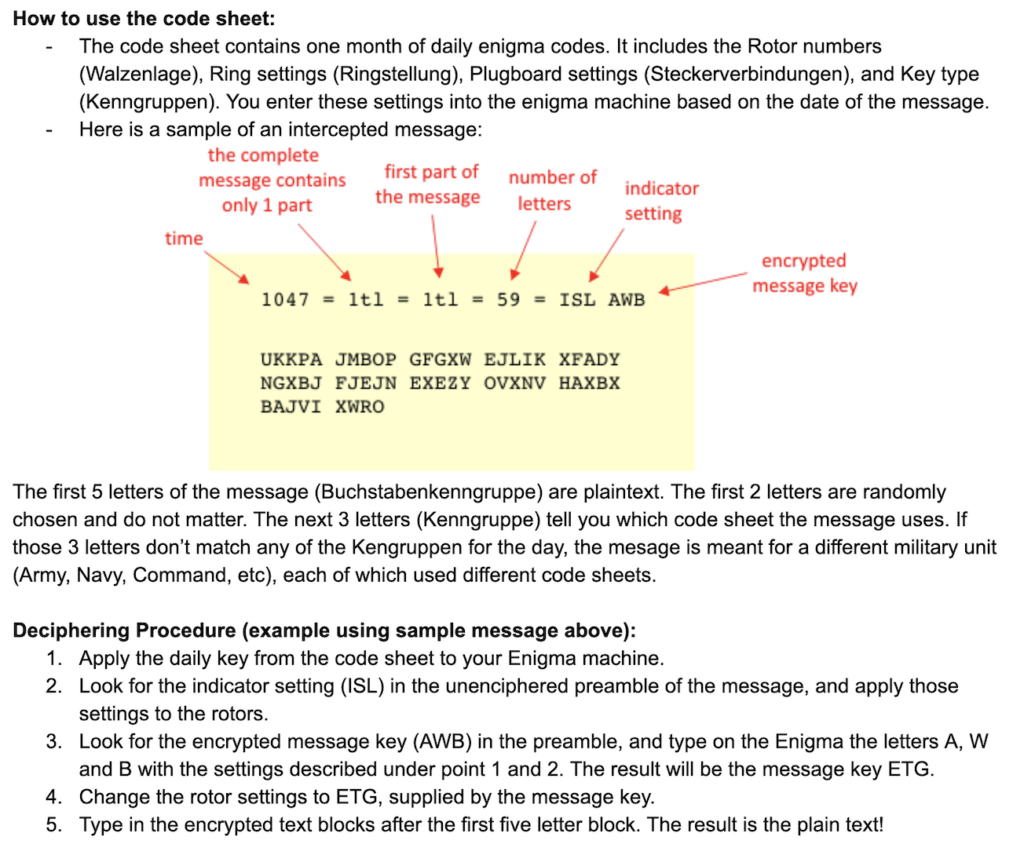
Okay. Instruction 1 says “Apply the daily key from the code sheet to your Enigma machine.” This is a sample of what the Code Sheet looks like. While it is unclear from the instructions AND the Code Sheet, I assumed that “daily key” refers to the “ring settings” or Ringstelling.

What threw me was the plugboard. When I entered settings, there was a PLUGBOARD section on the badge that wouldn’t accept any input. Naively, I assumed that was an unimplemented feature. Boy was I wrong. I wasn’t at SAINTCON last year, so I missed a critical piece — the critical piece is that the plugboard is a PHYSICAL plugboard on the badge, just as it is on the real thing.
Once that Eureka moment came (thanks to atru5 and kfeuz for clueing me in), it was smooth sailing all the way to the finish line. God I want one of these of my own.
Here’s the sample message and the code sheet for that day, followed by the images of the message decoding after setting all the rotors, ringsettings and encrypted message key, and connecting the plugboard up properly with jumper wires:
October 27 1942
0801 = 1tle = 1tl = 107 = SYN VAB

SCZOT GULGK VHBJQ WILJA CBSZG YUUYC VYLFV YPEFZ SMLNR DFPEO HYHNB JFSYV JFJJP QGKRV MUJLS TLESD IISMW POMJT JBYNL LLOIC YFNWK VU



If you want to play with the Enigma yourself, you can use the simulator on Cyberchef. For the SAINTCON simulations, you will need a custom rotor. When the code calls for rotor IX, use the following: BASHCOMPUKIDZERGYJWLQTFXVN
YAPA: Yet Another Proxmark Accessory
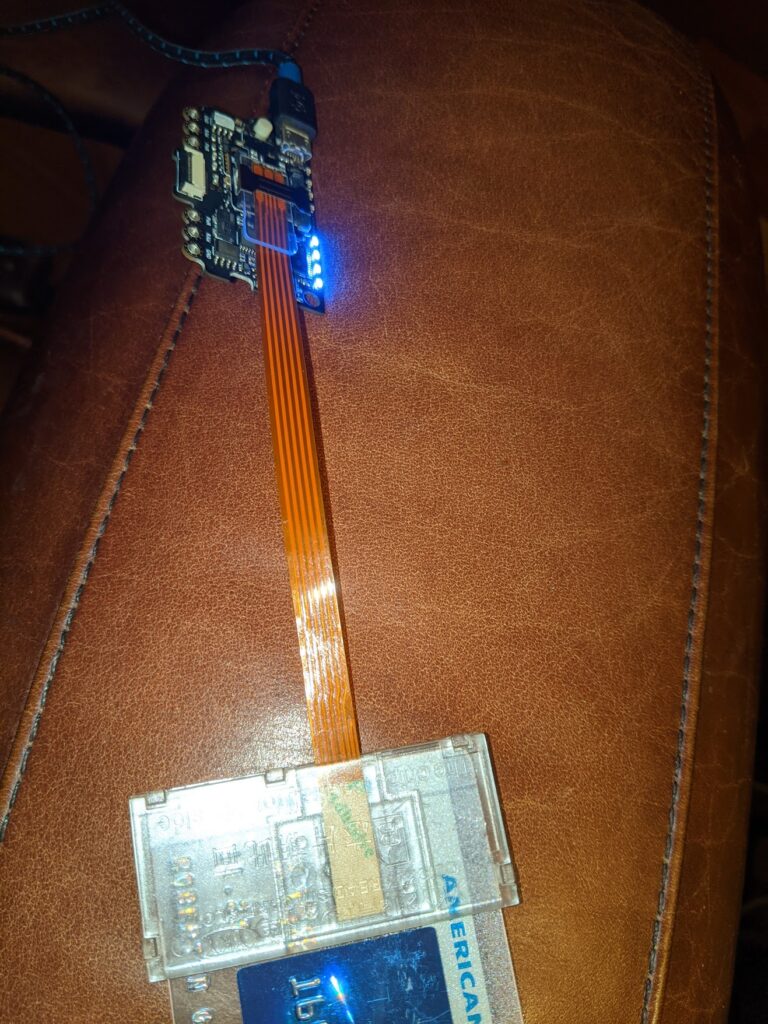
Today, one of the important accessories I was waiting for arrived. The SIM card reader extension. This extends a SIM card slot out via ribbon cable to a clear housing which fits, wait for it… a smart card. Inside the Proxmark3 RDV4 housing, in addition to all that delicious RFID goodness, is a SIM card slot. (If you didn’t already know this, SIM cards are basically the same technology in a different card profile.
So if you crack open the housing (and remove the BlueShark battery/BT module if you have one), you’ll see the SIM card slot. These adapters are less than $2 on aliexpress. Once you slide it in and slip a card into the housing (chip end first, of course, and chip facing the contacts), you have access to the sc commands in the Proxmark firmware (I’m running iceman’s fork, I don’t know how much of this is supported in the stock firmware).

Custom Flight Tags FTW
I remember when I got my Hak5 kit, one of the things I thought was a nice touch was the custom flight tags — “REMOVE BEFORE FLIGHT” on one side and “TRUST YOUR TECHNOLUST” on the other.
Anyone who knows me knows I have a fetish for storage solutions, both permanent and portable/mobile. I really like the idea of everything in its place. When done right, finding things in the heat of the moment becomes a breeze. I wasn’t always like this.
So when I started enhancing my Proxmark3 RDV4 with accessories, most of which aren’t used at the same time, I realized I would have to assemble a kit and contain it somehow, because when going out and about for RFID research purposes, I might need any of the accessories. I happened to have a zipper bag similar to the Hak5 kit, so the thought came to me, “Hey, I wonder if custom flight tags are affordable in low quantities.” Turns out they are!
I found this on Amazon — two tags, two sides of messaging, choose your colors, under $10.
https://www.amazon.com/gp/product/B085772MFD/ref=ppx_yo_dt_b_asin_title_o02_s00?ie=UTF8&psc=1
I figured at $10 it was worth a shot. For a moment I struggled with what the second tag would be for, then I realized I could use it with my locksport Pelican.
I think they came out fabulous. 10/10 will purchase again.


My SAINTCON badge came today.
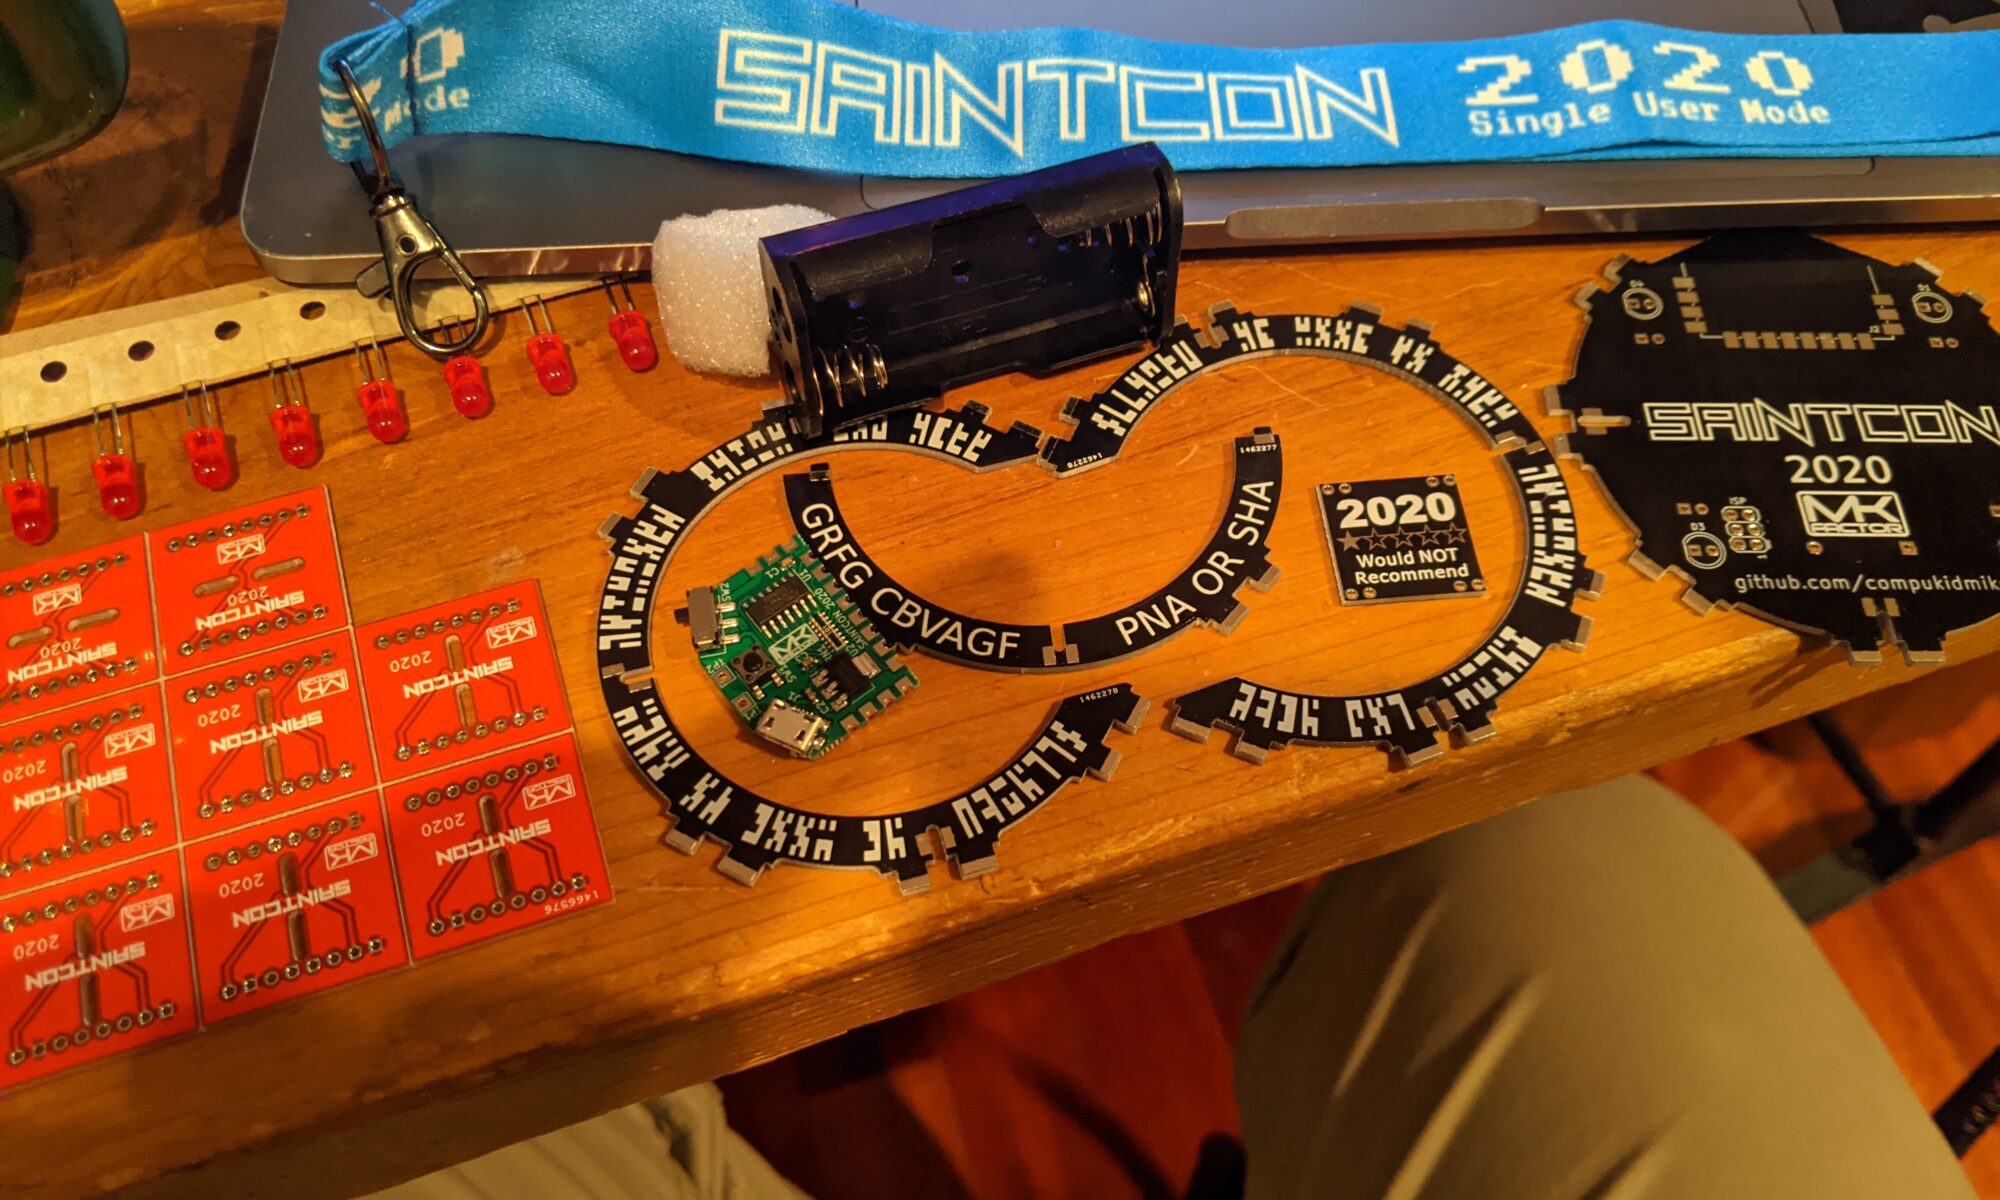
What an exciting time to be alive. The badge itself will be a really fun platform for collecting minibadges. A minibadge came with it, as well as a coupon for three copies of my own minibadge, which I designed today as part of the Hackers Challenge CTF that’s going on during the con. Strongly recommend y’all get one before they run out. Very affordable for the level of fun and creativity involved.
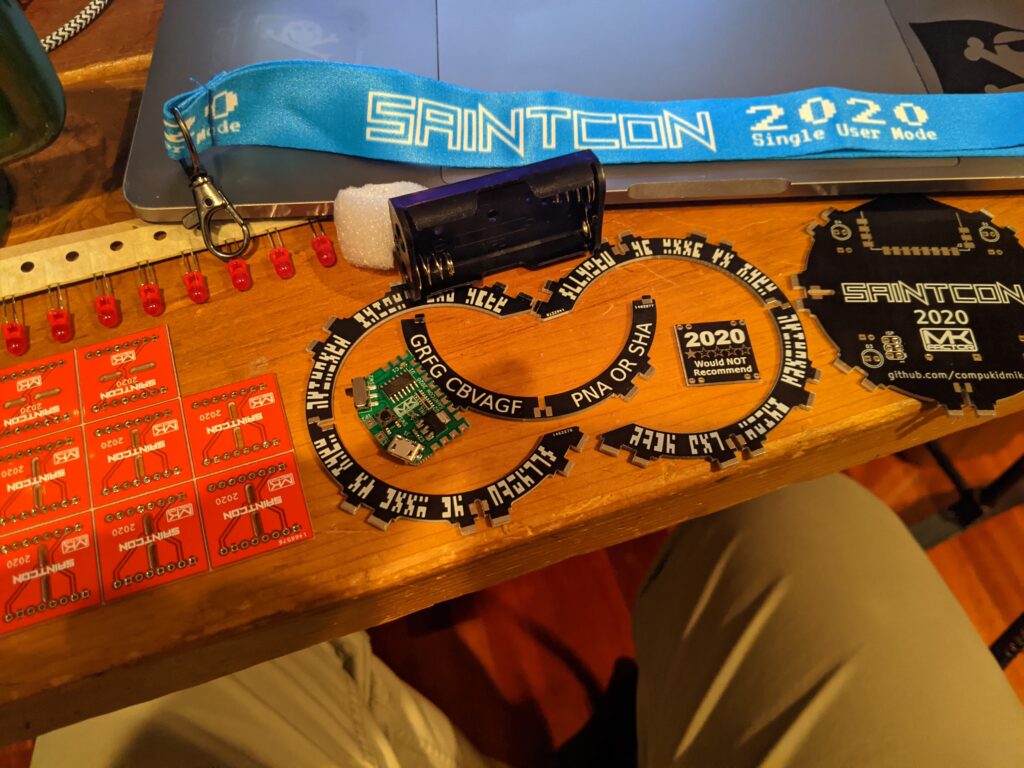
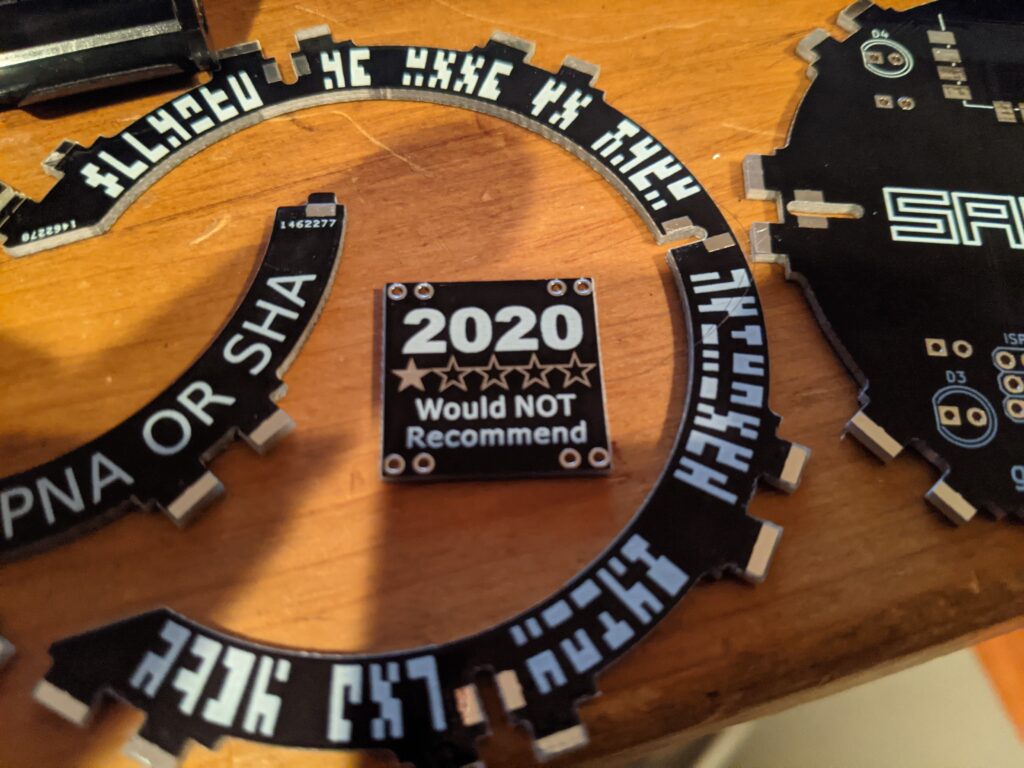
Hey Kyle, look, I took it apart!
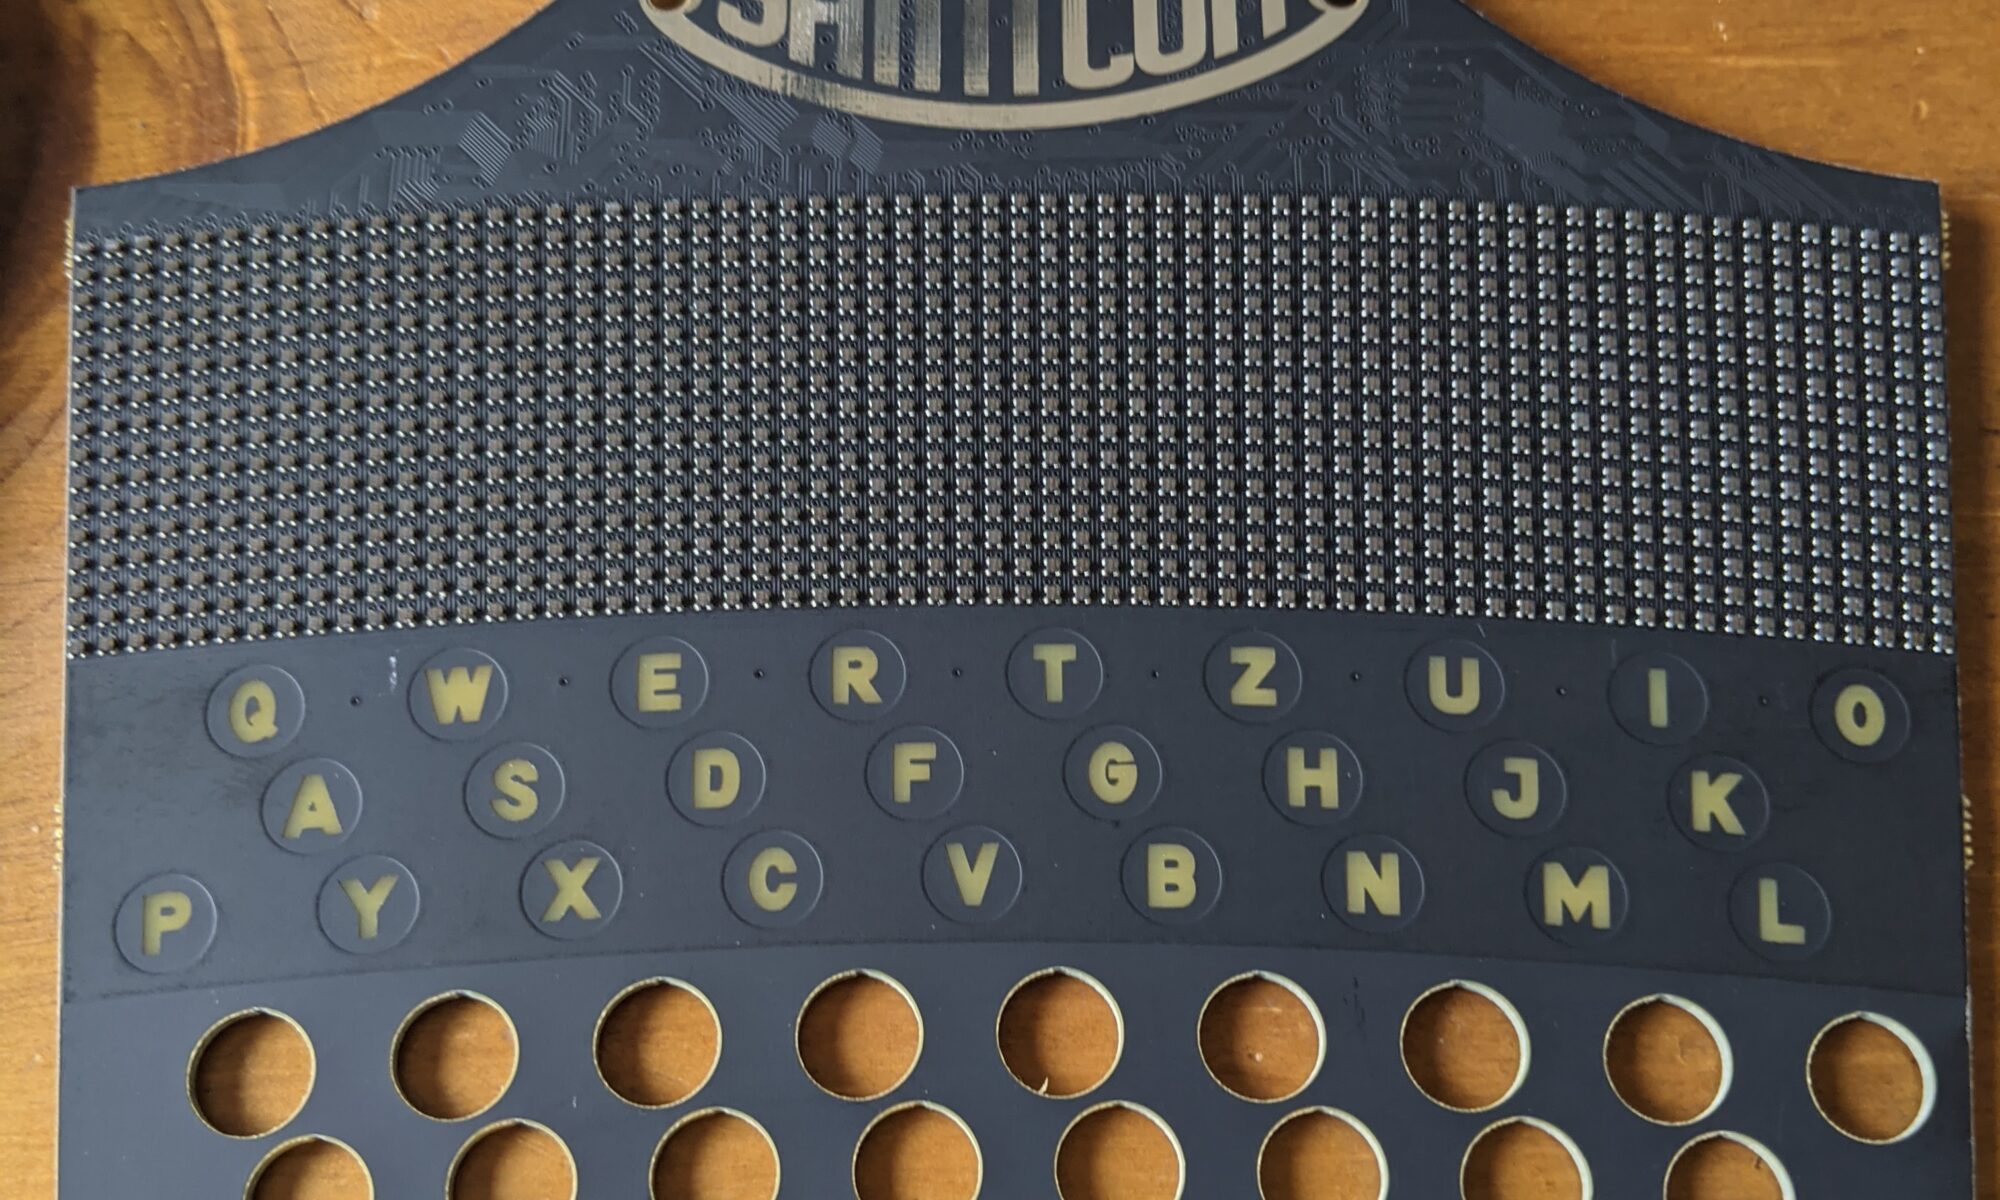
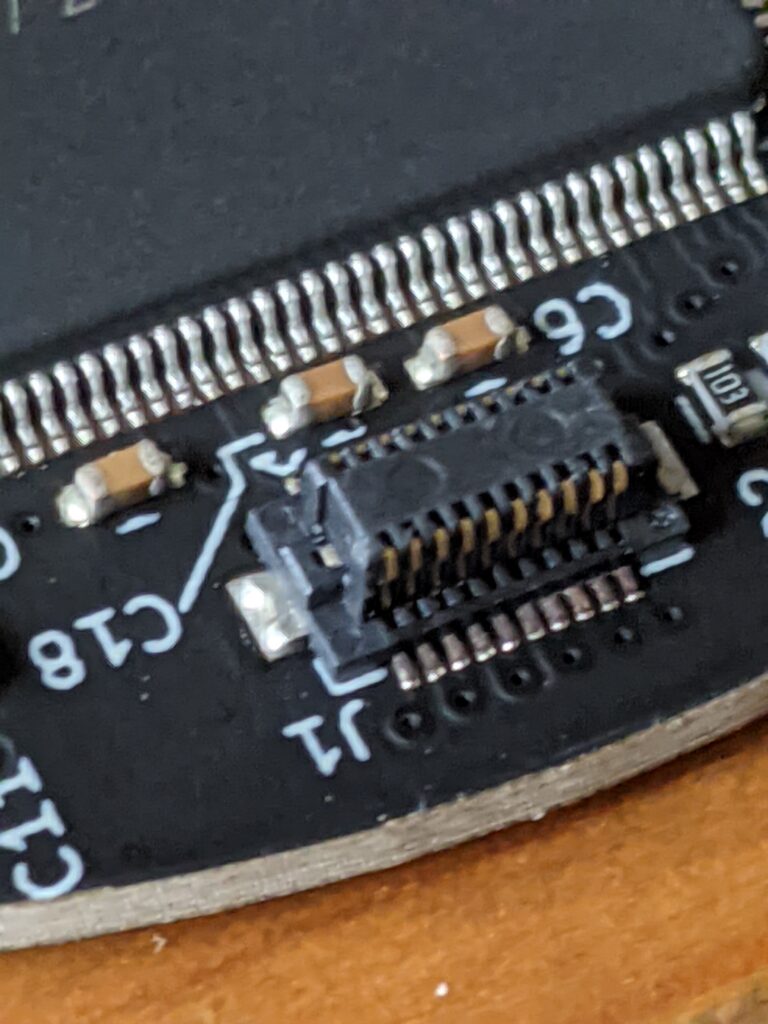
Just kidding. When I was lining up to buy this year’s SAINTCON badge, I saw they had the board/LED display available super cheap, so I bought one. If I can’t have the full ENIGMA badge, at least I can have a fun replica. Never mind that I have no earthly idea how to connect to it to light it up. All in good time, my friends.
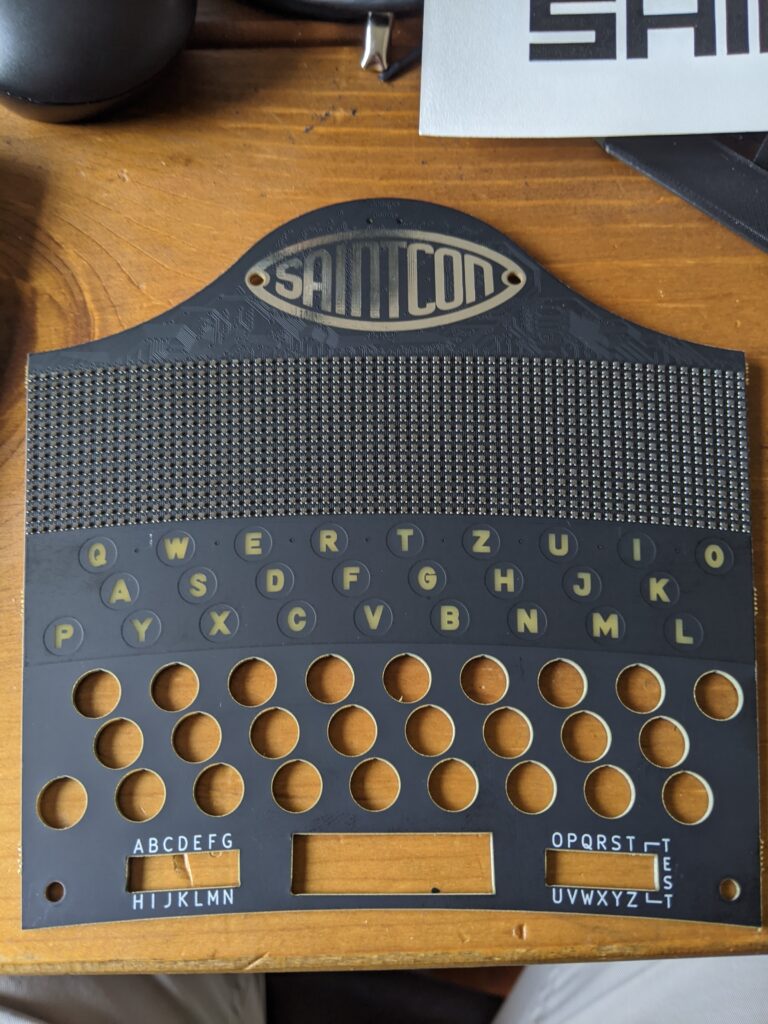
[Update] — OK, I figured out where it connects. That was easy. Just almost too tiny for my poor old man eyes.
New RFID tags arrived

A while back I ordered some stylish (by my standards) Chinese magic writable MiFare RFID fobs. They were clear acrylic with a visible embedded chip. I was excited, even though they were a month away in China.
Well about a week after I ordered them, I got an email from the vendor saying they were out of that model, and gave me three other models to choose from. I didn’t like any of them, but I also didn’t want to start the shopping and ordering process all over again, so I just said, “give me whatever you have.”
They arrived today, and I have to say, I kind of like them. Especially since one of my first clone tests on these fobs will be my daughter’s access card at school. Wish me luck.