There’s a lot of debate about creepy devices these days.
Part One: Meta Glasses
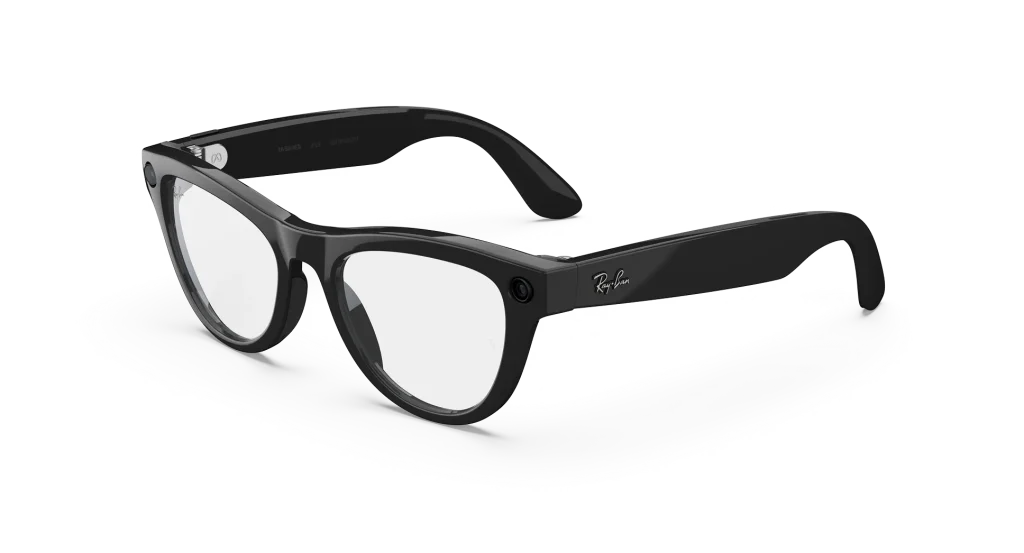
There is a sort of kneejerk reaction to Meta Glasses that anyone wearing them is automatically creepy, sketchy or at the very least suspect.
Maybe it depends. I went to Italy last year. Spent a lot of time in galleries, museums and historic buildings. Took a fuckton of photos. Didn’t have to distract myself or others by taking my phone out of my pocket every time. Just looked at it, leaned in, and clicked the button on the arm of my glasses. It was an experiment. Would I feel comfortable? Self-conscious? Would the photos turn out ok?
I ended up not feeling self-conscious or uncomfortable, and the photos turned out fine for my personal collection.
I was wearing them inside the Sistine Chapel. None of the guards or attendants noticed. I could have taken photos inside the Sistine Chapel, despite the disappointing photography prohibition in that particular location, a result of a deal made years back to fund restoration in exchange for exclusive photography rights.
I didn’t violate anyone’s privacy with them. Just took photos of what I was seeing. But I wasn’t in private places. Didn’t take any photos where I wasn’t supposed to. Didn’t use any technology to obscure the indicator light, which is where one of the debate points resides — a valid question, I suppose — If you’re not intending to do something illegal, prohibited, sketchy or sus, or (gasp) perverted, why would you need to obscure the indicator light, and hide the fact that you’re taking photos? Ask any photographer who takes candid photos among friends and family. A lot of people react when they know they’re being photographed, even when they approve of it. It takes the candid out of candid, and turns something that might have been candid into something posed and unnatural. So there’s one valid reason.
I’ve seen discussions around someone who intends to wear Meta glasses inside Def Con, where photography is strictly prohibited. To me that’s risky and confrontational, and maybe it’s time to get the popcorn out and wait and see how that works out for him.
I bring my Meta glasses to Vegas, but I don’t wear them inside the Con space, for two reasons: (1) Con policy, and (2) They are sunglasses. Sunglasses in the con, which is frequently dark in many places, would stand out.
There are other debatable aspects of Meta glasses, such as the data Meta collects from you when you use them, the fact that their app may be able to do facial identification and more. I’m not going to get into those aspects here, other than my threat model is not your threat model, and there is certainly a lot to discuss.
Part Two: Audio Recording Devices
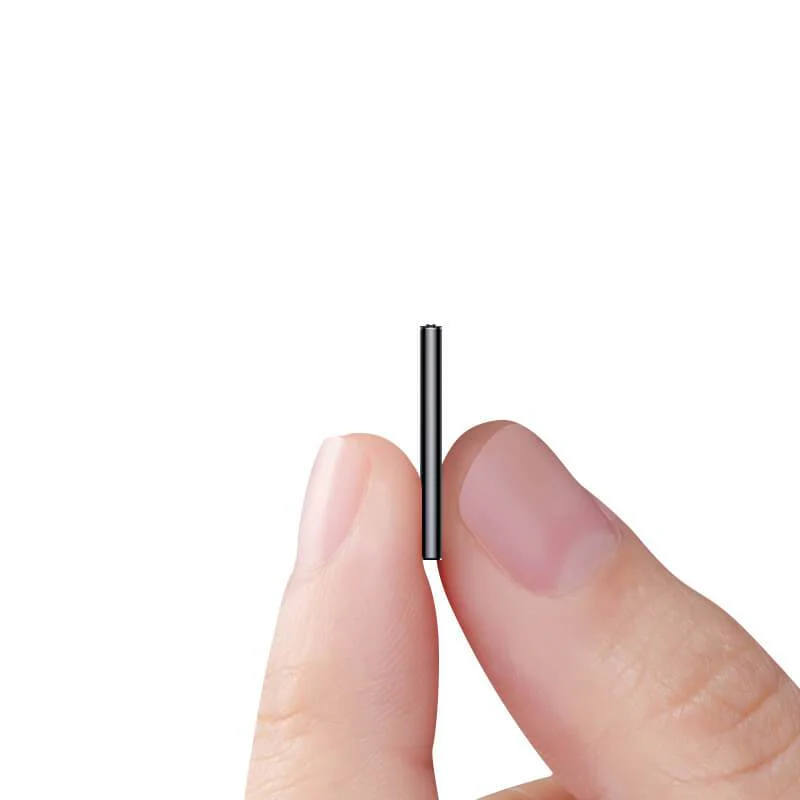
Less talked about is the low-cost proliferation of discreet, long battery-life audio recording devices. Some of them in a credit card-sized format, some of them more like a quarter. Easy to leave somewhere discreetly and return later to retrieve, transfer, transcribe, etc.
What if, as a provocative experiment, someone planted a number of these strategically during a security conference, and collected whichever units weren’t discovered later for research purposes? You can argue one-party vs two-party recording laws, but from cursory research, generally, public locations where no expectation of privacy exists are exempt. I’d love to hear other people’s takes on how this would butt heads with state and federal audio recording laws.
At the very least, an experiment like this, aside from getting someone banned from Def Con, might get people thinking on how the average researcher with a far lower threat model than nation-states or public figures might mitigate the threat posed by such devices. I wonder how much corporate and social espionage is going on as we speak, now that these devices are so freely available and affordable….
…food for thought.